Punchcard machine users have limitations in terms of repeat width, depending on the brand and age of the machine. Those numbers might vary from 8 to 12, 18, 30, and 40, with a 24-stitch width eventually becoming the most frequent.
When electronic machines were first released decades ago, multiple built-in functions allowed one to manipulate programmed repeats. The latter were drawn with electronic pencils (Studio) or far more often with permanent jet-black ink on mylar sheets or “cards”. Passap at one point developed the initial Wincrea version with a very short dongle for downloading designs to the console away from the knitting bed.
Brother was the first manufacturer to allow programming multiple repeats on a single mylar sheet. It took Studio some time to play catch up to eliminate all the potentially wasted space on them.
Both brands used mylars with 60 rectangular cells in width by 150 in height.
Variation buttons for the Brother 910, for those not familiar with its options. 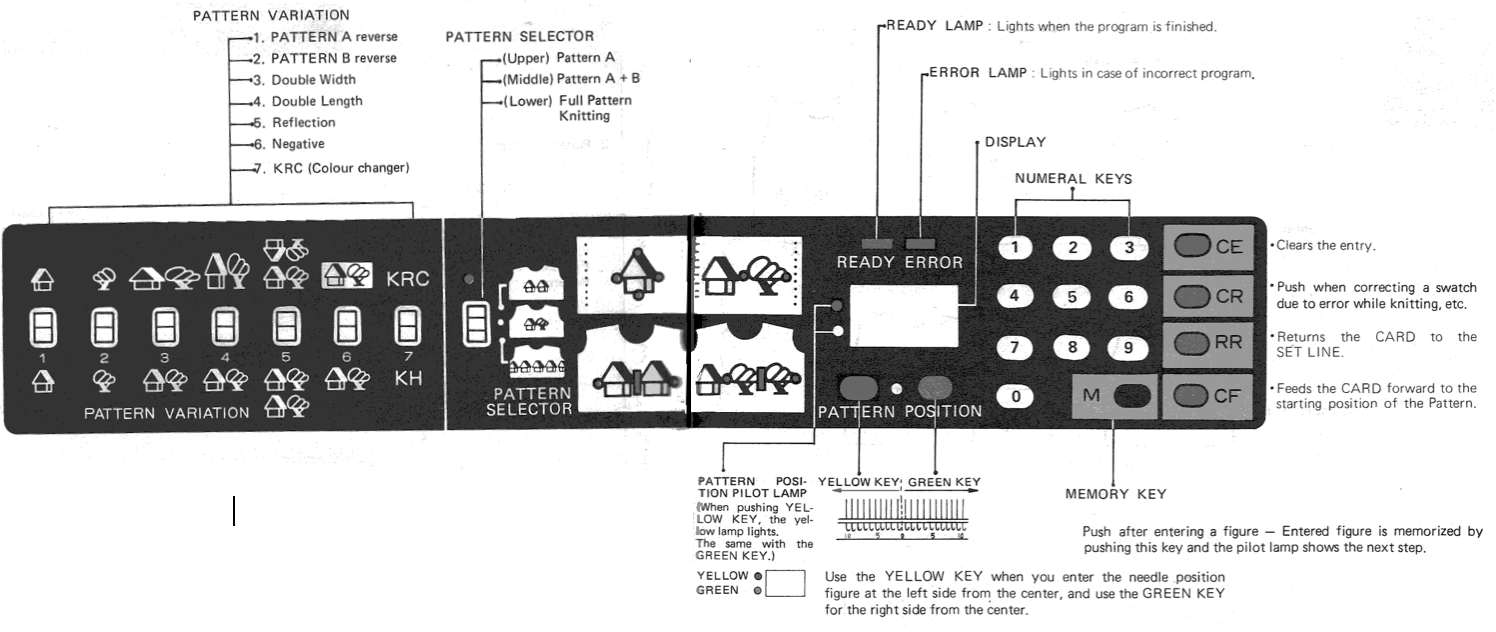 Building up a simple angular repeat can easily be done freehand filling in pixels, or with the use of the straight line tool in ArahPaint.
 ![]()
 The 12-stitch design may be mirrored and rotated in a variety of directions. For use in a punchcard, this may be done once in width, and three times in height to meet the minimum length requirement.
It is not necessary when drawing to use only black and white to start with, though if the goal is ultimately to produce a programmable bmp or png, the final images need to be in those 2 colors.
It is easier to produce a design filling in fewer squares in lesser density and then to color reverse the results if that is required for the specific stitch type.
A: using horizontal and vertical mirroring yields the start of a diamond shape. Punchcard users may find it easier to mark the dark squares and punch everything else if the goal is to use the tuck stitch setting or to have a card “safe for everything”
B: checking alignment by tiling the file
C: if the intended goal is tuck stitch, and the minimum information is drawn in the design, then the repeat must be color reversed, whether in the program used to create the file or by selecting the built-in function in an electronic after download.
D: the color reverse image tiled, may be suitable for some interesting fair isle striping or exchanges of positive/negative spaces at the intersection of any of those rows where the double-height or double-width markings occur.
Red cells indicate two side-by-side unpunched holes or unmarked pixels. In theory, this breaks the tuck rule requiring a knit stitch/ unpunched hole or black pixel on either side of an unpunched area/white pixel, but it likely will be fine, producing something that looks more like a slipped stitch than a tuck.
The double-height areas marked in green would be a problem if one were to test the repeat by doubling its length, with a compounded issue in those areas where tuck stitches would then happen on side-by-side needles for 4 consecutive rows.
Usable with some care for knit weaving, slip stitch, and other stitch types. Results are not discovered unless actually tested.
Keep good notes.  Breaking the design into segments to knit as a striped fair isle ie in these 4 places
 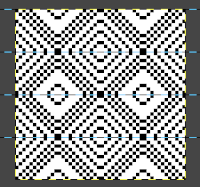 Variations are easier to imagine if one begins with colored repeat segments that can, in addition, be varied using color exchanges to resemble approximate yarn colors. Instructions on color banding using ArahPaint follow at post bottom.
 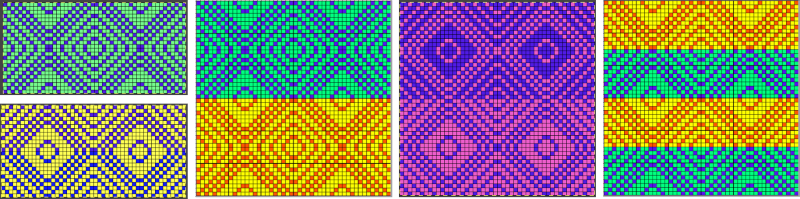 In the last post, the same image was mirrored using ArahPaint
 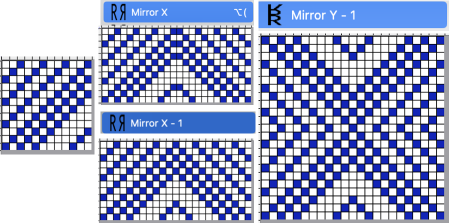 The result is a 23X23 pixel design.
Any incrementally larger repeats would require the same operations, using the mirror X-1 and Y-1 options to avoid any side-by-side equal cells, but the process is easier with some understanding of isolating repeats. When the 23-stitch file has been formed, manually trim one pixel along the bottom or top row, and one along either the left or right side, down to 22X22 pixels ![]() tested in B/W repeat
tested in B/W repeat 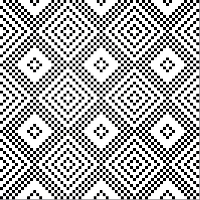 and here color inverted
 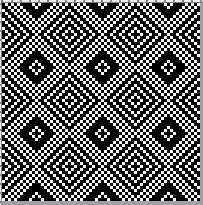 it is executable in double length
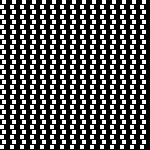
 ![]() thus offering the opportunity for color changing every 2 rows, testing the possibility of its morphing into a mosaic/maze design, remembering first to color reverse the repeat as given here,
thus offering the opportunity for color changing every 2 rows, testing the possibility of its morphing into a mosaic/maze design, remembering first to color reverse the repeat as given here, ![]() which in turn yields a file that may be knit with color changes every 2 rows, a technique that can produce maze/mosaic designs with an appearance very different from the same pattern knit as fair isle.
which in turn yields a file that may be knit with color changes every 2 rows, a technique that can produce maze/mosaic designs with an appearance very different from the same pattern knit as fair isle.
In this swatch, 2/20 wool yarns were used. This results in a knit that can be steamed to stay flat.
The variations in the amount of tucked stitches and their placement expand in some areas more than others yielding wavy vertical side edges.
The striping occurred to enhance the visibility of stitch formations on the machine, but can be a deliberate way to add even more colors to such pieces. 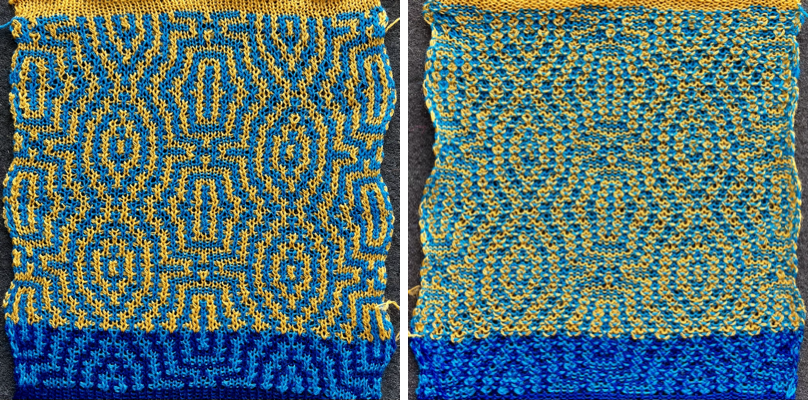 The same design, knit in 2/8 wool, begins to show that a pattern may produce very different effects with a simple change in materials or color choice
 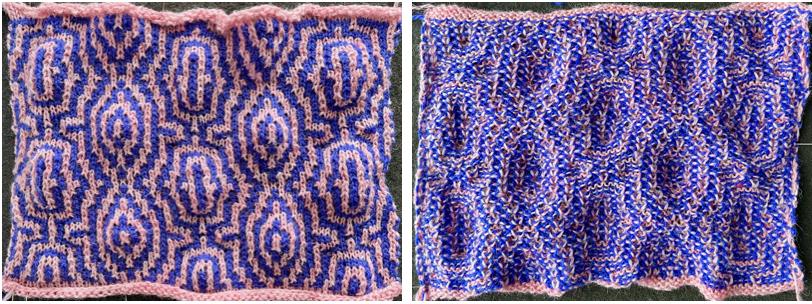 Working outside straight lines and exploring random starts: the post Working with diagonal patterning in machine knitting introduced several larger initial repeats also suitable for tuck patterning when reversed, including this 12X24 pixel design,
 ![]() and the companion larger file, 144X144 pixels
and the companion larger file, 144X144 pixels 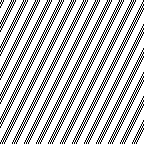 The larger file can serve as the start for exploring knit pattern variations through the use of filters.
A description of filters and their use may be found on pp 88-101 of the user manual (thumbnails # 96-108).
A “fast pattern” user guide shared by the ArahPaint 6 developer October 2023 which demonstrates how to use filters with associated designs https://www.arahne.eu/pdf/fastpattern-EN.pdf
The associated tool options: 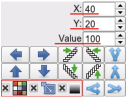 This first series uses only the Contour filter
 ![]() and random selection of arrows from this tool
and random selection of arrows from this tool

beginning with a 12X12 pixel design ![]() developing it into a 31X31 one, not all doubled pixels eliminated doubled pixels eliminated
developing it into a 31X31 one, not all doubled pixels eliminated doubled pixels eliminated ![]()
![]()
![]()
![]()
![]()
 The Zigzag filter creates a zigzag from the image. The number of zigzags depends on the setting of the filter option (X, Y, and Value) and the direction (Horizontal, Vertical, or a combination of both).
X: determines the number of zigzags up and down, the number should be an even number ie. 144 divided by 12 would create 12 peaks
Y: creates the vertical direction of peaks
Value: set to 0 the whole image height is taken as amplitude
The variations can be endless, and exploring changes in settings will help develop a sense of what happens. The larger scale results may at times be reduced to a significantly smaller working repeat. Tools/Find Repeat often but not always will do that seamlessly.
The manual offers instructions for manipulating vertical bands of color. Such variants could be knit as intarsia or multiple colors per row, with limitations and considerations.
This 4X4, vertical repeat, tiled to 12X12 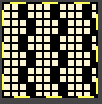 color reversed for tuck knitting
 ![]() drawn in repeat and filtered is knittable, but not interesting to me. The result, shown tiled for clarity
drawn in repeat and filtered is knittable, but not interesting to me. The result, shown tiled for clarity 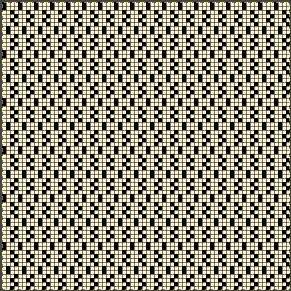 Moving away from straight lines, these initial experiments employed limited variations. The red X mark marks the repeat suitable only for fair isle knitting
 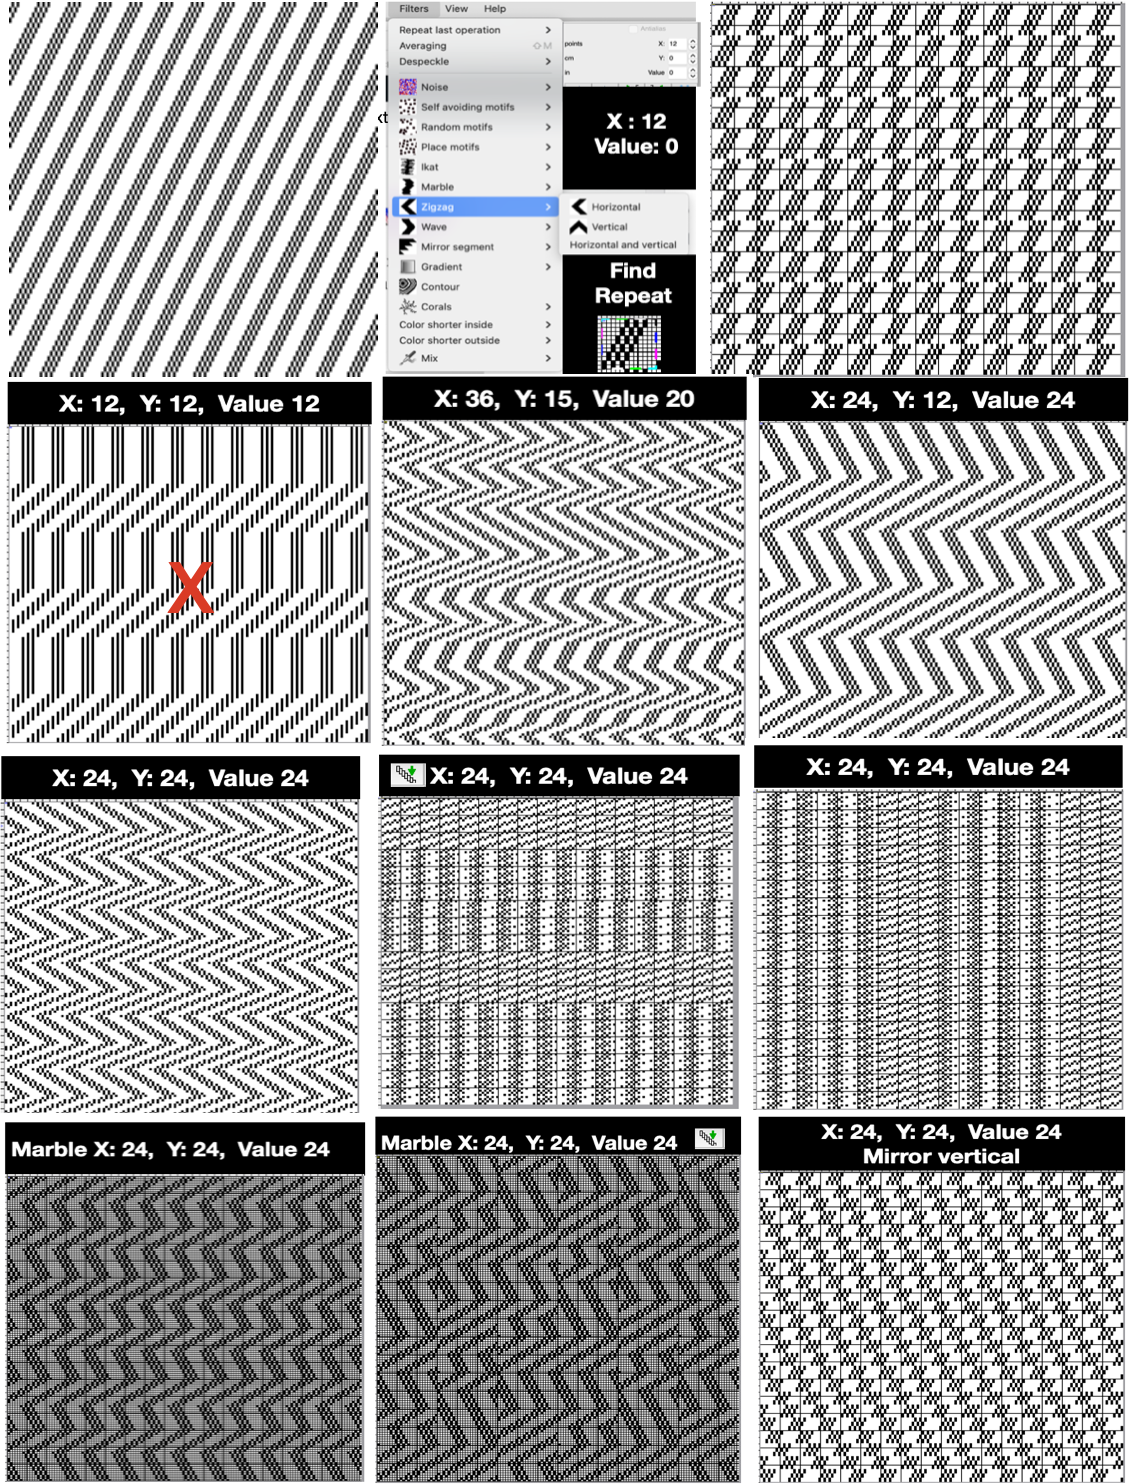 Choosing individual results to knit in tuck stitch, in review: the smallest repeats may be isolated and pixels cleaned up if preferred, remembering to color reverse when needed. This 24X24 repeat is suitable for punchcard models with the black pixels areas punched. Testing is far easier and quicker using electronic machines, do not use double length
 ![]()
 The design is asymmetric, subject to personal preference, and as usual, with results dependent on yarn and color choice.
The yarn used at the top of the photo is a wool-rayon, knit single bed. It was hard to identify stitch formations, hence the swatch was short in height for a visual texture check. Because of the rayon content, all edges steam and press fairly flat.
The other yarn is all wool, knit in every needle rib with the knit carriage set to tuck in both directions, and the ribber carriage set to knit in both.
This type of knit is often referred to as pick rib. Depending on the tuck stitch distribution, the stitches are forced apart vertically and can produce an eyelet effect in a fabric that lies quite flat. 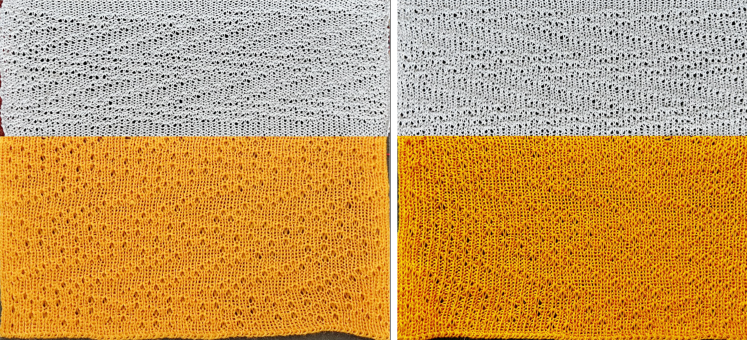 A closer look at approximately the same part of the ribbed fabric.
 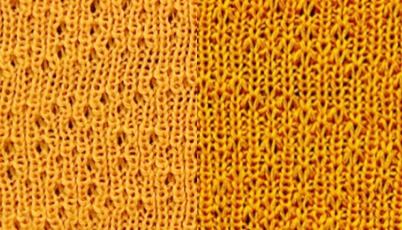 A 58X16 file after some cleanup and cropping of one of the other variations is to be color-reversed for use with the tuck setting. Depending on the thickness of the yarn, double length may be used safely for added texture.
 ![]()
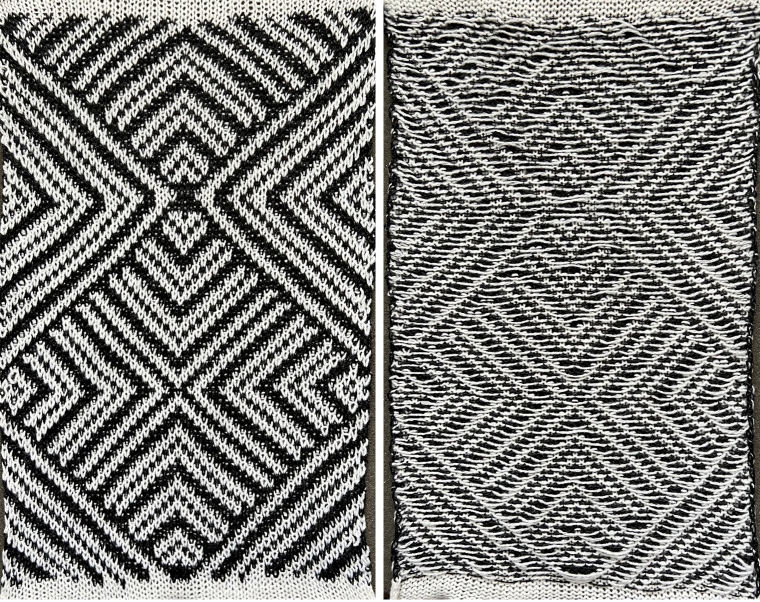
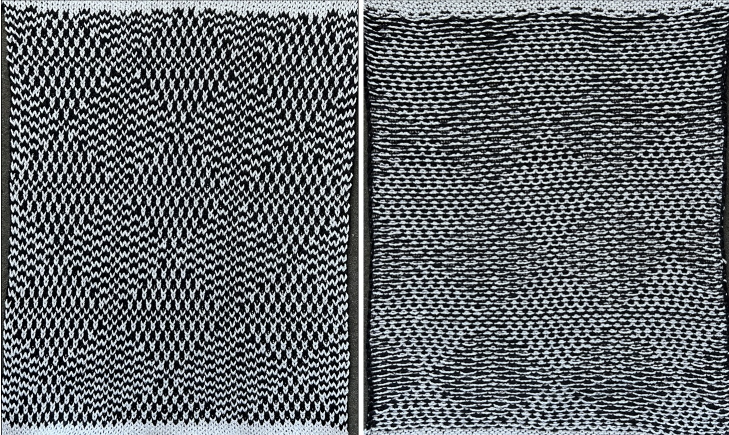
![]() The swatch illustrates the difference between fair isle knitting and tuck stitch, even when the tension used in the knit carriage remains fixed. Fair isle is in the slip stitch family, so it is short and narrow, while tuck stitch tends to be short and wide. It is usually recommended that fair isle floats be no wider than 5 pixels. Many here break that rule and would need to be managed if the design were to be used in a finished garment.
The swatch illustrates the difference between fair isle knitting and tuck stitch, even when the tension used in the knit carriage remains fixed. Fair isle is in the slip stitch family, so it is short and narrow, while tuck stitch tends to be short and wide. It is usually recommended that fair isle floats be no wider than 5 pixels. Many here break that rule and would need to be managed if the design were to be used in a finished garment. 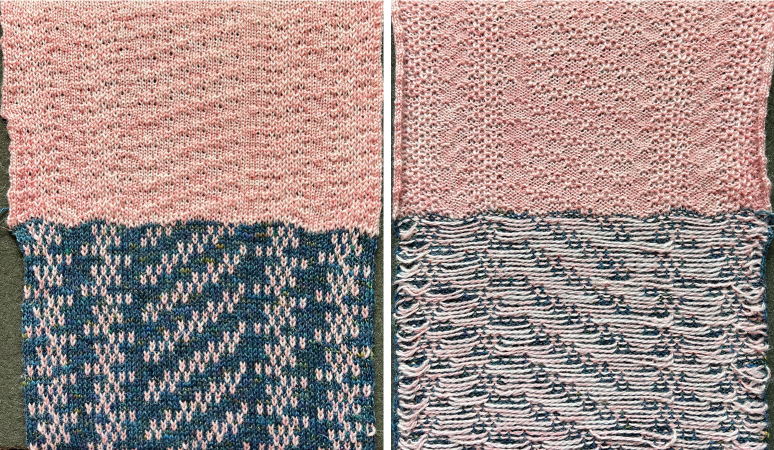 This
This ![]() segmented
segmented 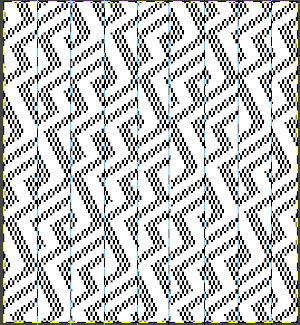 and cropped to 17X144 pixels
![]() Mirrored X-1, 33X144 pixels
Mirrored X-1, 33X144 pixels ![]() I like to plan repeats for any intended piece when possible in a width matching the number of needles in use, which allows programming as single-motif in the 930 with img2track and eliminates the need to turn on other built-in functions or assign needle positions. Doing so also offers the opportunity to add borders if desired.
I like to plan repeats for any intended piece when possible in a width matching the number of needles in use, which allows programming as single-motif in the 930 with img2track and eliminates the need to turn on other built-in functions or assign needle positions. Doing so also offers the opportunity to add borders if desired.
A 99X144 version 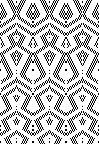 was programmed, and the central 71 stitch width was tested, likely suitable for an accessory ie a scarf
 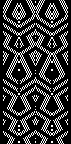 Those side-by-side white pixels are “OK” since they are in turn sided by black pixels and do not repeat for more than 2 rows.
At some point, one needs to commit to actual knitting. The first proof of concept swatch was knit in a softly spun, shiny rayon that had a slight tendency to split during knitting and steams and sets nearly completely flat. 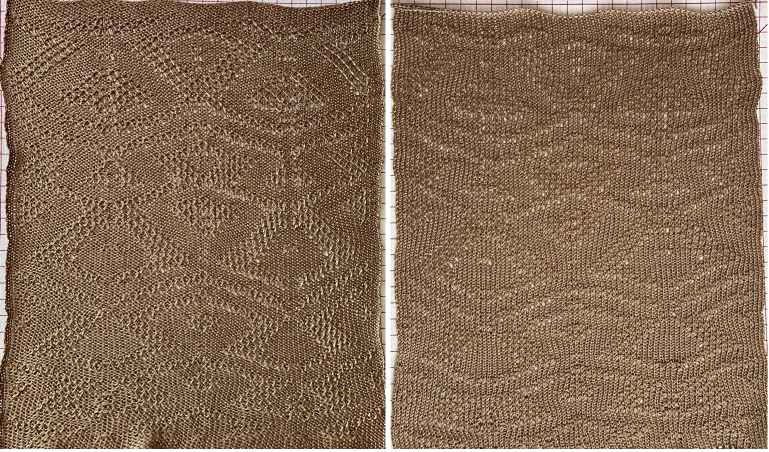 This swatch is knit using a 2/8 wool, retains its texture after steaming and pressing, and exhibits the usual roll to the knit side at the top and bottom of the piece, and to the purl side along the vertical side edges. The variations in the 3D surface that can happen with some tuck patterns appear here and are retained.
 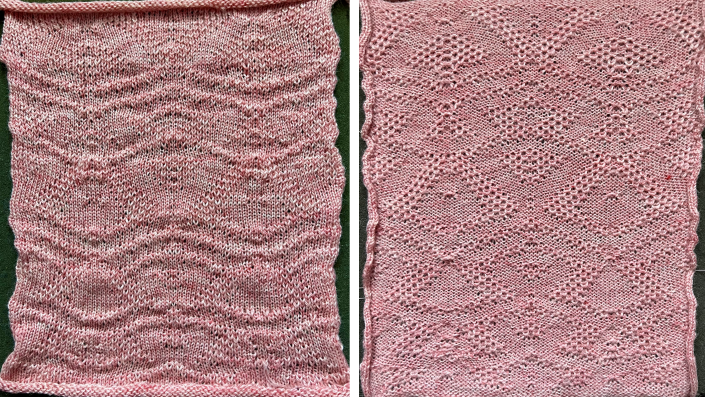 A brief look at Gradient filter included in post on Truchet inspired tiles.
Restricted use images may also be built from scratch.
Large published illusion-style designs even if beginning as black and white when scaled down in size can lose definition as a result rendering them speckled, needing a lot of pixel cleanup, or completely unusable.
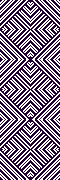
This first attempted DIY version begins with a 31X31 repeat. The odd number allows for a corner-to-corner start. The lines are drawn using the straight line tool, with pencil size alternating between one and 2 pixels 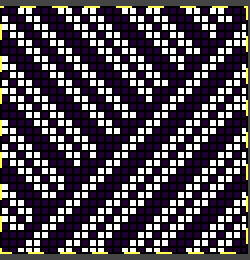
![]() Using mirror X-1, Y -1 to 61X61
Using mirror X-1, Y -1 to 61X61  trimming by a single pixel and width and height for routine tiling avoids lots of doubled pixels. The final repeat, with small single pixels placement edits, is now 60X60
  repeated in height only it could be used for perhaps a scarf, with or without solid borders at the bottom, top, and sides.
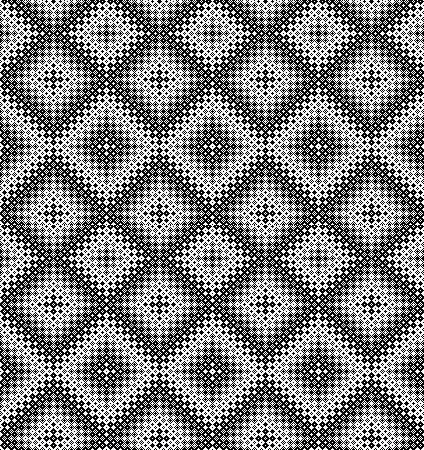
 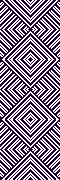 Drawn in repeat X3 in both X and Y directions it produces a 180X180 file large enough for a blanket, with a bit of wiggle room to add a narrow solid color frame if desired.
  The design may be knit as fair isle for a quick initial test or for a final piece since the floats are all very short or knit as DBJ to produce a no-roll final fabric without floats.
In this test, softly spun rayon and heathery wool were used, resulting in a surprising color mix when compared to their original colors. There were a few spots where the rayon fiber split and knit with the contrast. The end needle selection was off, so there are tiny eyelets in some places where the contrast was not knit on the side edge, and the fabric separates a bit. 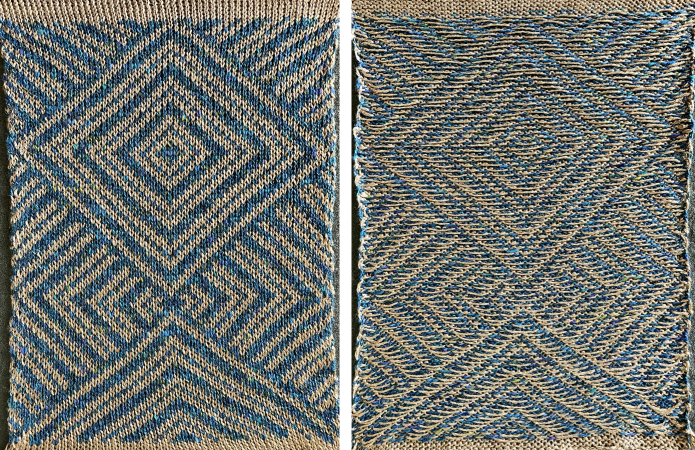 A variation for a different vertical repeat can easily be isolated from tiled drawings. This additional sample was also knit as a fair isle, with end needle selection on.
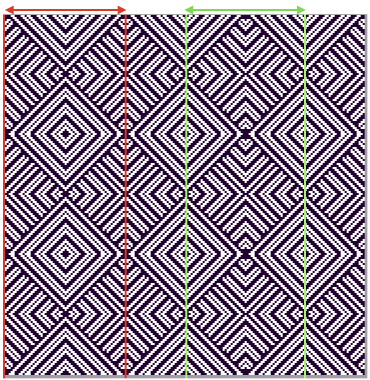

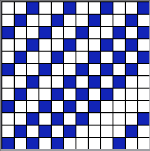
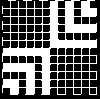
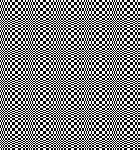
 Suitable for punchcard knitting: a 12-stitch simple geometric repeat
![]()
 visualized X12
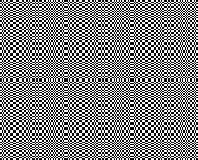
 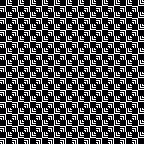 modified using drawing X12 in random repeat for electronic machines.
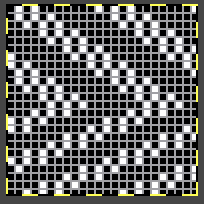
 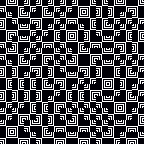 20X16
20X16 ![]()
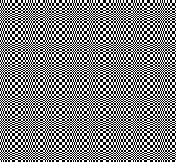
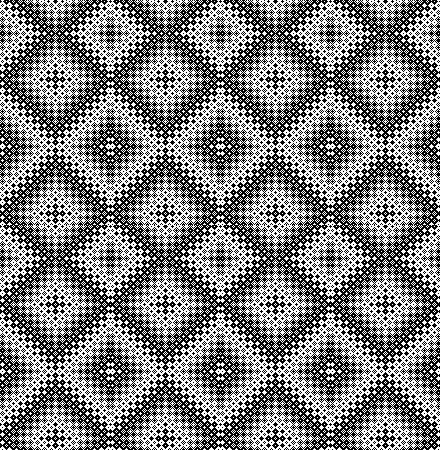
 30X30
30X30 ![]()
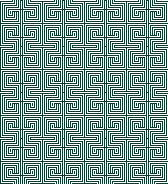
 When the planned illusion is simple line distortion
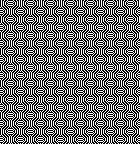
18X18 “Café Wall” distortion ![]()
 tested on a 60 stitch width, the bottom is double stranded birdseye DBJ with a shift to single strands at the top. The single plies produce a wider, softer knit
 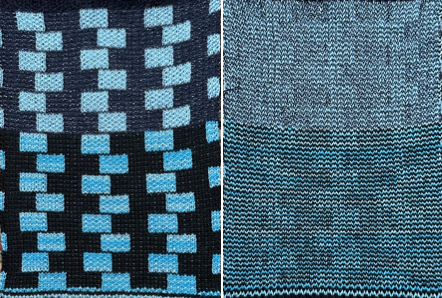 imagining a wider piece
 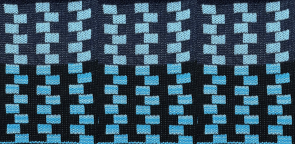 10X10 repeat
![]()
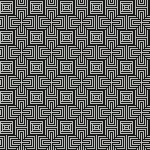
 Knit as DBJ, in 2/20 wool single strand, at as tight a tension as possible to allow for proper stitch formation, the bleed through is quite visible, the swatch is also 60 stitches wide
 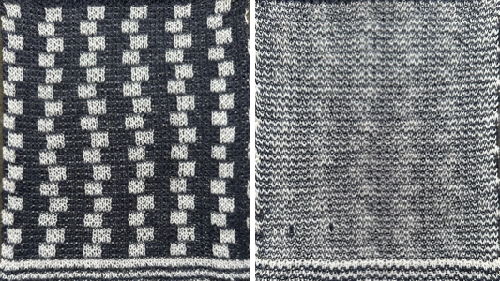 There is discussion online whether adding a single row of a contrasting color heightens the illusion, a 9X10 repeat adding a third color
 ![]()
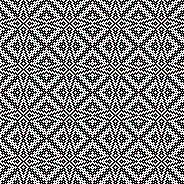
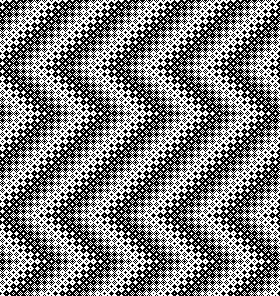
Shifting gears, a different 18X18 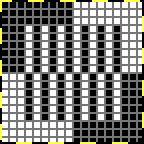
![]() visualized X 9
visualized X 9  modified using random
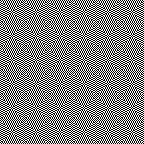
 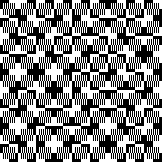 nearly the width of the full needle bed, 172X169
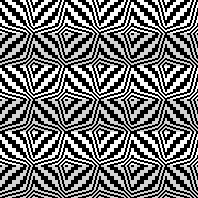
 ![]() A 24-stitch repeat
A 24-stitch repeat 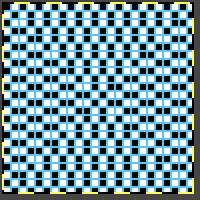
![]()
 accomplishes an optical illusion of sorts. If only it would work for creating origami-style pleats!
A former Ravelry query prompted these designs,
22×22
![]()
 22X30
22X30![]()
 66X60
66X60

44X54![]()
 42X46
42X46
![]()
 from a weaving draft, 46X46
 ![]()
 66X66
66X66 
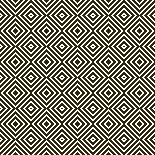
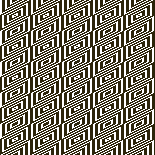
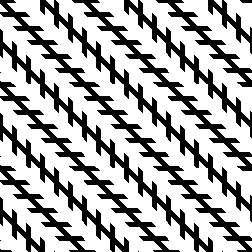
 Johann Karl Friedrich Zöllner (1834 – 1882), a German astrophysicist with a keen interest in optical illusions was inspired by a cloth pattern that he observed in his father’s factory and first published the illusion that bears his name in the journal Annalen der Physik in 1860. The acute angles formed by the intersections of the short and long lines make the spaces between the diagonals appear to expand.
My knittable adaptation: the 84X84 repeat 
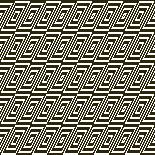
 Building tiny shapes into secondary ones inspired by weaving drafts
56X148 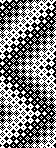
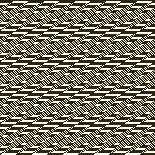
 110X225
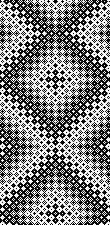
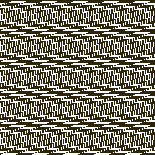
 Removing doubled vertical segments, 106X225
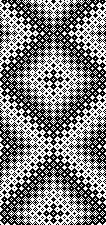
 Adding colors to black and white pngs following the tip by the developer in the post comments:
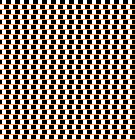
Choose a black-and-white repeat, in this case, a 36X9 pixel repeat ![]() Double-click on one of the two colors to protect/lock it
Double-click on one of the two colors to protect/lock it  Double-click on it again, and the lock disappears, the color is no longer protected.
In the palette, use + to add a new color, this may be repeated more than once to add more colors or go to colors, set the number of colors to a number, ie. 6, for a random palette group that may, in turn, be edited to other values. 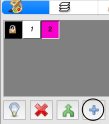 Double-click on the rectangle tool to draw filled rectangles
 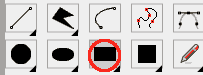 In rectangle options, above the palette icon, there are toggle buttons for Horizontal and Vertical, remember to protect a color
 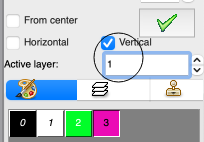 Once your selection is made, draw the filled rectangle across a selected width and height while keeping the protected color intact. Draw the result in repeat to check for alignment
  the protected color may be toggled to white
  If the designs are to be programmed for multiple color slip stitch or DBJ there are rules to be observed, and there may be restrictions on whether each palette color will be recognized as a third or fourth color by the download program ie. when using Ayab, where no two colors may occur in the same range of 8-bit values. For 4 colors, the ranges would be 0-63, 64-127, 128-195, and 196-255.
The img2track partial window with the associated color assignments for the first vertical variation. 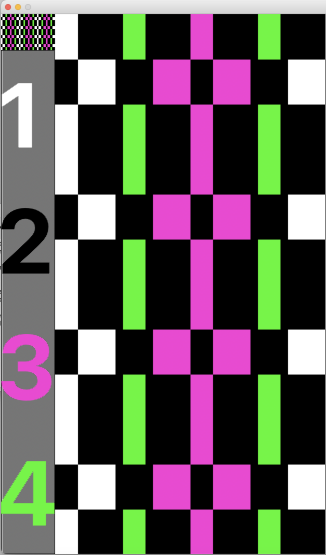 The horizontal choice allows one to play with selections possibly matching yarn colors in fair isle knitting,
 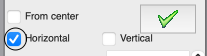 only 2 colors per row may be used, here the A feeder yarn remains fixed
 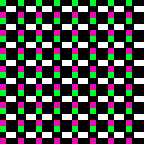 Remember to unlock the previous color choice if protecting new segment selections.
Visualizing possible FI striping results in progress 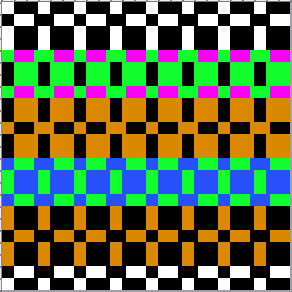
As always, thank you for your tips and feedback
One tip for recoloring in textile way with ArahPaint6:
Repeat the pattern with two colors to the size you want.
Double click on one of the colors to protect it (you see a lock on it).
In palette, use “+” to get a new color.
Double click on rectangle to draw filled rectangles.
In rectangle options, above the color palette, you will have toggle buttons “Horizontal” and “Vertical”.
Click the one you want, and draw the “rectangle” in the main window, it will draw with selected color across the whole image width or height, while keeping the protected color intact.