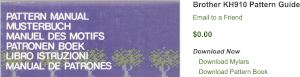
A recent FB post led the discussion to this repeat from a 910 mylar, which does not have the immediately recognizable format of the Brother lace patterns if viewed in a small screengrab such as this. 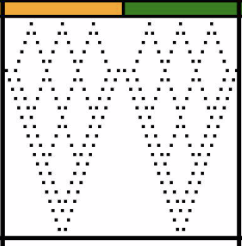 The repeat is included in Ayab test patterns. The full mylar collection and user manual may be found here http://machineknittingetc.com/brother-kh910-pattern-guide.html.
 The segment including the lace pattern
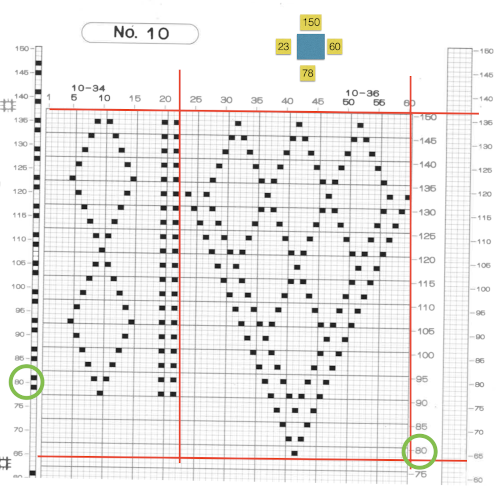
![]() Brother was the first to allow programming from multiple areas on a single mylar sheet. Starting and ending stitches and rows needed to be entered, I got used to drawing boxes for each pattern as seen on the upper right, reducing errors in future knitting. The red lines on the copy highlight the repeat’s border. Mylars were read 13 rows down, punchcard machines7. The equivalent of arrow markings on lace punchcards are provided in the column on the left, which extends over the top of the drawing space by the same number of rows, allowing it to remain visible above the card reader even as the top of the mylar patterning area is reached.
Brother was the first to allow programming from multiple areas on a single mylar sheet. Starting and ending stitches and rows needed to be entered, I got used to drawing boxes for each pattern as seen on the upper right, reducing errors in future knitting. The red lines on the copy highlight the repeat’s border. Mylars were read 13 rows down, punchcard machines7. The equivalent of arrow markings on lace punchcards are provided in the column on the left, which extends over the top of the drawing space by the same number of rows, allowing it to remain visible above the card reader even as the top of the mylar patterning area is reached.
The design is actually created from isolated areas of a mesh repeat discussed in a previous post. The lace carriage is used for 2 passes and then for 4 alternately, as indicated on the left side of the punchcard. The 2 passes will result in transfers to the left, the 4 make in transfers to the right. This repeat, usable in nonelectronic models, appears in my pre-punched factory basic packs as both #17 and #20. 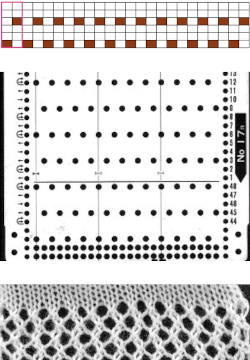 Depending on the electronic model or the software used to download patterns designed for lace, the final image may need to be flipped horizontally. This is true for use on my 930. Creating a template for mesh using numbers: begin with a table with square cells in numbers larger than you might need, ie 24 by 54. The method for doing so has been explained in previous posts. I happen to prefer cell units that measure 20 points by 20. The smallest repeat unit for use on any machine is isolated, shown bordered in red, is 4 stitches wide by 6 rows high, and drawn onto the template. The group of cells in the repeat are selected. If one hovers over any side or top and bottom borders of it, a yellow dot appears. Clicking and dragging on the yellow dot will repeat the full selection to the right, left, up, or down. Here the move is to the right
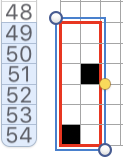
 The whole group is selected,
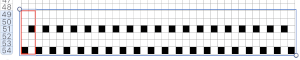
 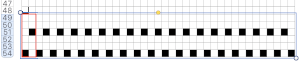 and dragging on the yellow dot once more, the whole template can be filled
 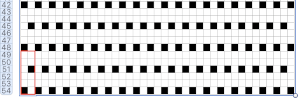 Beginning at the top or bottom of the table, hide all blank rows. Using the command key during the selection process will allow this to be done on the whole table at once or in groups of rows at one time; 36 of the 54 rows are hidden.
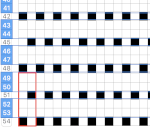
 At this point, there are a couple of choices. One is superimposing a solid shape. Using a contrasting color makes it easier to sort out its placement
 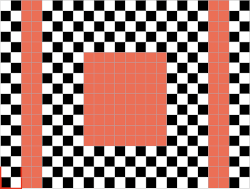 the color may be replaced with white in the spreadsheet,
 unhide all rows, and the lace pattern is ready for the final steps before using Gimp
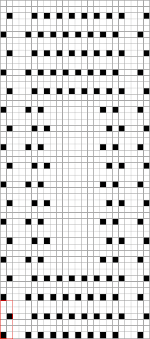
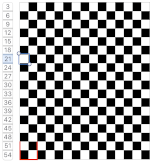
![]() The other option is to unhide rows on the colored table, screengrab as usual after removing cell borders. Open in Gimp, crop to content, eliminate the cyan row by filling it with white. It was intended as a placeholder for the last row in the pattern, is not part of the final repeat.
The other option is to unhide rows on the colored table, screengrab as usual after removing cell borders. Open in Gimp, crop to content, eliminate the cyan row by filling it with white. It was intended as a placeholder for the last row in the pattern, is not part of the final repeat.
In this instance, I used mode, indexed, to the maximum of 3 colors.
Choose the color to alpha option from the colors menu.
Using the dropper tool select the color you wish to be made clear, and click OK. Create a new image of the same size.
Copy and paste the color-reduced image onto the new one. Dotted lines will appear in areas that had the color removed previously. Clicking anywhere in the window outside the image anchors the paste and makes those dotted lines disappear. If that does not work, select the rectangle tool before doing so. The file is then ready for final scaling. 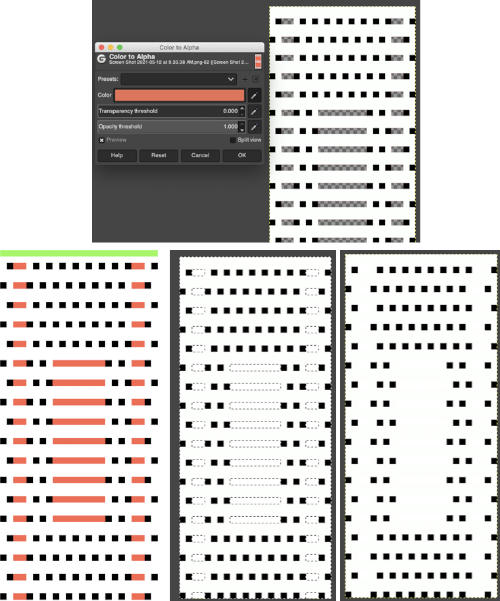 The last image is in RGB mode once more, converted to BW indexed, scaled to 24 by 54, and exported as BMP or choose any other format ie png, etc. to suit your needs.
Responses to alpha selection can vary depending on the original color palette used when filling cells.
Creating a template for drawing simple shapes using transfer lace, it is easier to start with the transfer grid in a color, rows are hidden as above, and eyelet shapes are drawn in black. The rows are unhidden. 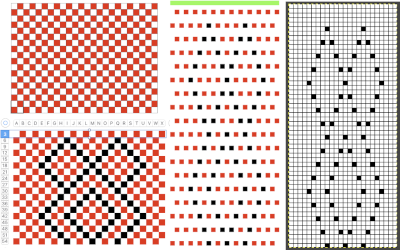 In this instance, the red was selected for converting to alpha with the image still in RGB mode, copied and pasted.
 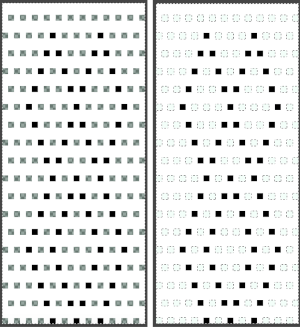 The pasted image may be anchored in several ways. Using the image menu: select merge visible layers, or flatten image; layer menu: select anchor layer, or simply click on rectangle select tool and click again anywhere in the window. Changing the mode to black and white indexed will yield the repeat for final scaling.
 ![]() Each transfer design segment of the repeat is 6 rows in height and completed with 10 combined carriage passes. The lace carriage, LC, operates first, in a series of two passes at first, then followed by four, repeating the double sequence throughout. The mylar, card, or computer image, does not reflect the passes made by the knit carriage KC. The latter is set to knit, does not engage the belt, and does not advance the pattern. It helps to look at an expanded repeat to understand that indeed, transfers are made in 2 directions.
Each transfer design segment of the repeat is 6 rows in height and completed with 10 combined carriage passes. The lace carriage, LC, operates first, in a series of two passes at first, then followed by four, repeating the double sequence throughout. The mylar, card, or computer image, does not reflect the passes made by the knit carriage KC. The latter is set to knit, does not engage the belt, and does not advance the pattern. It helps to look at an expanded repeat to understand that indeed, transfers are made in 2 directions.
Referring to design row numbers, not necessarily those on a row counter:
1. LC preselects for transfers to the left as it travels to the right
2. LC makes transfers as it moves to the left, no preselection occurs, remains on the left side
3. KC, moves to the left, completing the first knit row, creating loops on needles emptied by transfers, the pattern does not advance and remains on the same row
4. KC, moves to the right, completing the eyelet stitches, the pattern remains on the same row, KC then stays on the right
5. LC moves to the right, no preselection
6. LC moves to the left and preselects for transfers to the right
7. LC moves to the right, transfers to the right, no preselection
8. LC returns to the left, no transfers or preselection, stays there
9. KC moves to the left, and the pattern remains on the same row
10. KC moves to the right, and the pattern remains on the same row, KC then stays on the right 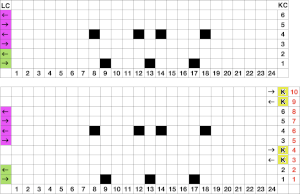 Those familiar with eyelet formation in the more traditional transfer lace will notice the differences here, where the geometric shapes are technically superimposed on a mesh whose structure is revealed depending on where the transfers creating them take place. The fabric is easy and very quick to execute since most of it is in stocking stitch. The proof of concept swatch:
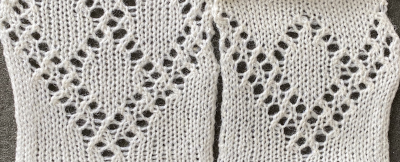
 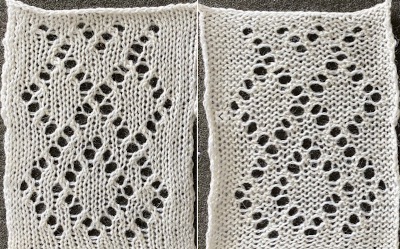 The design was not planned as continuous, but is easily amended to be so. Here an alternate version is shown, with 2 linear repeats on the left, and a single expanded repeat to its right
 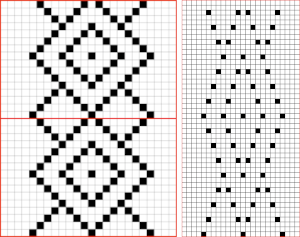 As for that mylar repeat, this is an image of the shapes with the chart collapsed, eliminating blank rows between black pixels.
 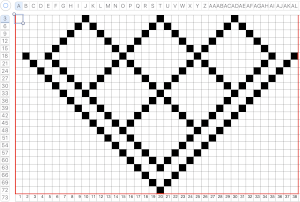 The resulting partial test used as drawn
 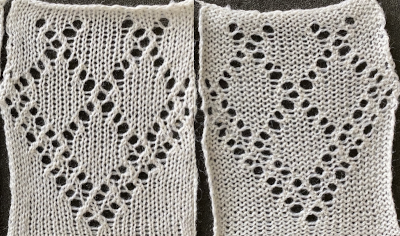 In fabrics designed this way, using the image as drawn (left), or mirroring it horizontally, does not visually change the result. This does not hold true in more complex transfer lace.
 Several large-scale designs based on this method are found in Brother-electro-knit-lace-patterns-3
 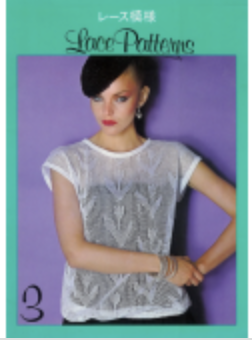 This random chart from the publication shows a pattern where the number of transfer rows between knit ones has more variation. Again, knit rows are marked in the column on the far left. Those marks on a mylar would remain visible on the outside of the machine, above the card reader as one progresses through knitting. Memo windows or handwritten charts may be the only option for accurate tracking, depending on the machine model and the row count variations. The repeat may also require it to be flipped horizontally. Simply reaching a row with no needle selection does not always mean the location for the 2 knit rows has also been reached.
 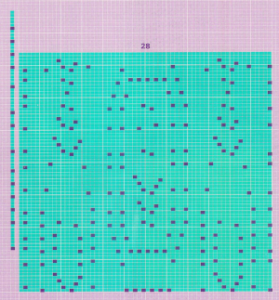 2024:
2024:
The above is listed as a fine lace pattern. Most such patterns can be executed as standard transfer lace as well.
The addition of the ArahPaint guess weave from grid tool makes the process of converting charts such as the above easier and quicker.
The final BW chart 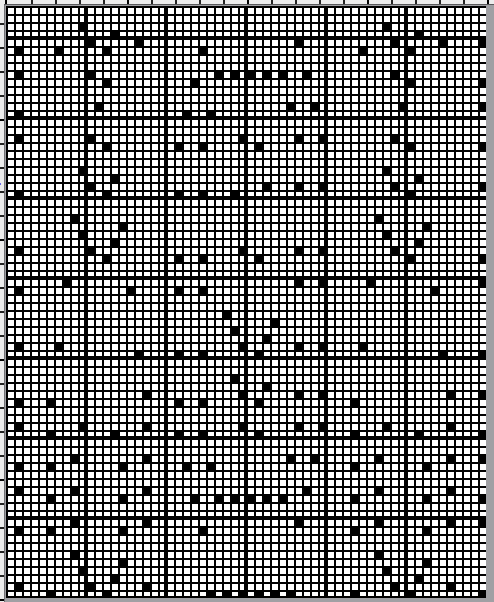 and the associated 60X74 png. Depending on the machine model, the file may need to be mirrored horizontally before any knitting.
  in repeat
  The original image had markings for mylar that inform the frequency of knit carriage passes, which extend above the start and end of mylar markings to allow for the fact that the first design row is scanned below the row visible to the knitter on the exterior of the machine.
 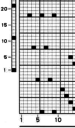 When the png repeat is loaded into machine memory, reading begins on row 1. The knit row single pixel markings on the original can still serve as guides as to how many passes of the LC are followed by 2 knit carriage passes
  The column on the left indicates the number of LC passes before two knit carriage ones, the column on the right reflects the corresponding design rows.
 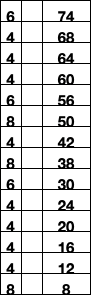 The image from the publication, with the color modified for clarity
 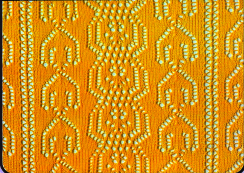 My sample was knit on a 930, hence mirrored horizontally, on 60 just stitches.
The yarn is a softly spun rayon with a tendency to split, and at the end of the second full repeat several stitches dropped, accounting for the length of the swatch;-) 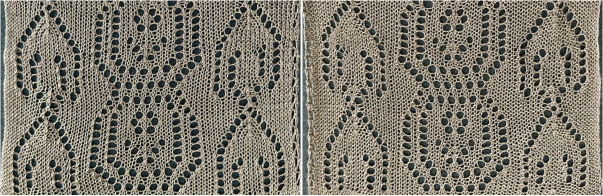 The second volume
  is also available as a free download, and in addition, mylars are as well.
The latter makes for clearer stitch and row counts and easier file conversions.