This blog “chronicles the patterns found in a late-Victorian composition book that was used by an anonymous east-central Illinois knitter as a knitted lace sample book.” The accompanying photostream.
Category: Online Resources
Getting there
I have been continuing to experiment with “automating” some versions of the staggered leaf, and have reached a “final” punchcard version. Wanting to add a border on the top and bottom and getting the 2 ends to “match” without a center pivot point led to the resulting fabric below (the swatch is not properly blocked).

The punchcard for the leaf pattern is over 100 rows in length.
I actually had never purchased anything on eBay. The length of the card repeats I want to play with led to my looking for punchcard rolls. “Back in the day” the ones available were clear, and not numbered or marked in any way, a relative “pain” to use. Through an online search, I found this item and purchased it. The order was filled very quickly. The roll is of sturdy stock, with Studio numbering so a bit of added markings are required for use on Brother KMs. I live in an area with no local suppliers for this sort of thing, so buying directly from overseas was an option I had not considered before and proved to be a positive experience for me.
Knit terms: translations
Prior to google translate, google chrome, etc. barring having friends that spoke the language and knit, there were some resources for translations:
Brother: Japanese symbols for knitting (booklet)
Key to Japanese patterns by Jody Foster (booklet)
Japanese for machine knitters by Mary weaver (book 1983), now partially available for free download online
Knitting Languages by Margaret Heathman (book 1996) includes limited vocabularies in 10 languages

August 1/2020 update:
Garnstudio knitting terms translated into 17 languages; their glossary of knitting terms
another international glossary of knitting terms
a few in Italian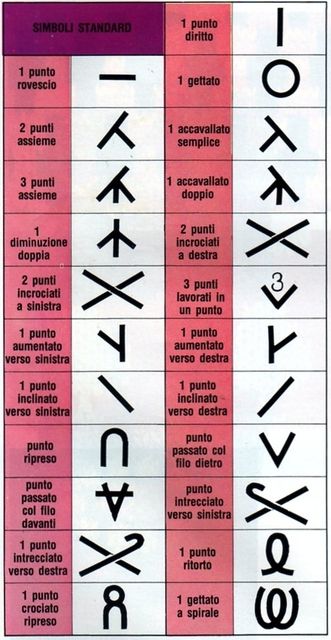 German
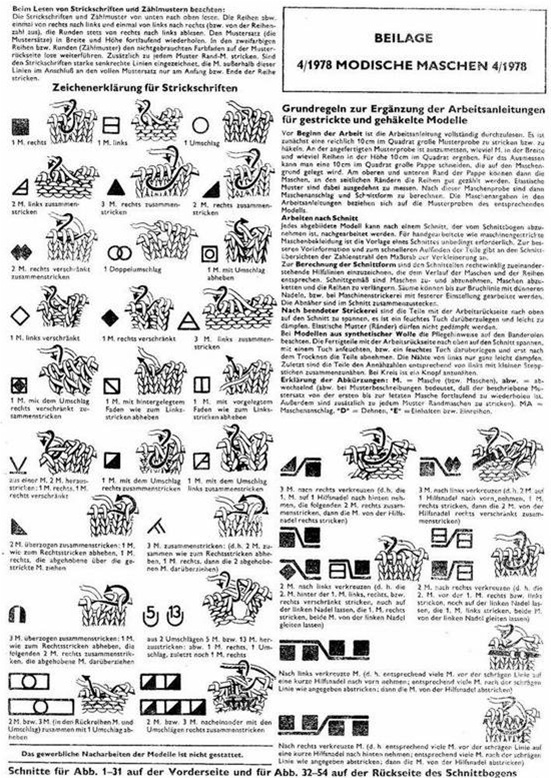
 From/for different countries
http://www.knittingfool.com/Reference/KF_Symbols.aspx
Anna Burda magazine symbols PDF includes HK how-to illustrations: ab2 2/1/15
Verena chart from older pubs easily found on Pinterest
Japanese
tata-tatao for Japanese basics and charts
dancingbarefoot’s japanese pattern tutorials
series of topics updated 2020 link Clearwater knits
Fleegle’s blogspot
garment instructions
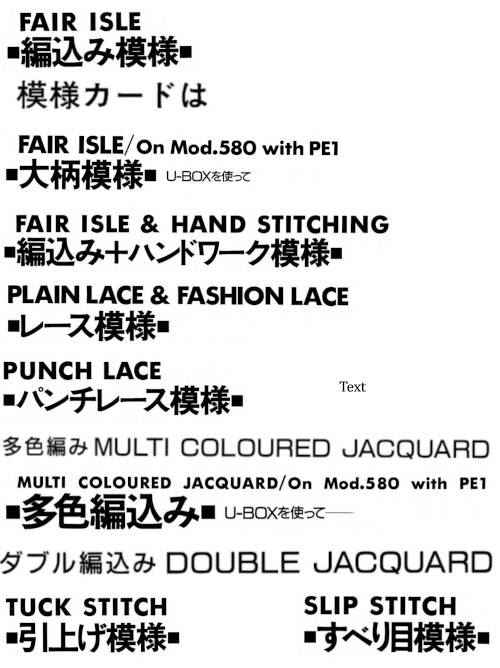
Machine knitting: some grabs from electronic and punchcards books follow, giving an indication of the variety of fabrics that may be produced on Japanese knitting machines. They are in a large format for easier visibility. The names of some of the stitch types have evolved over the years or differed from one brand of KM to another. From Silver Reed publications
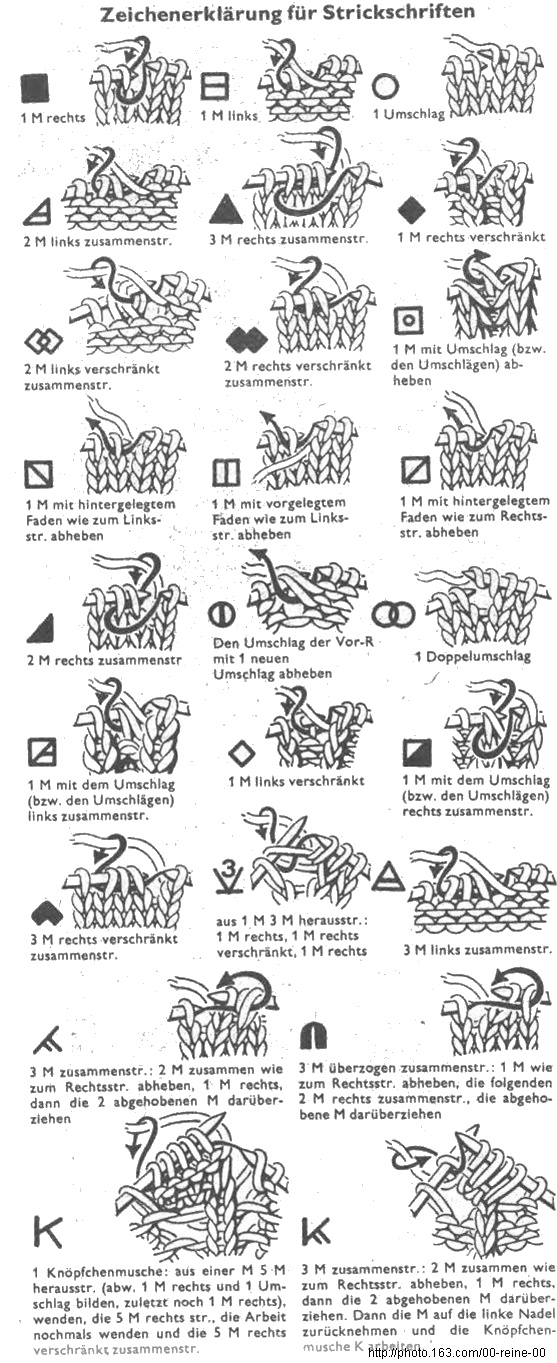
 and from Brother
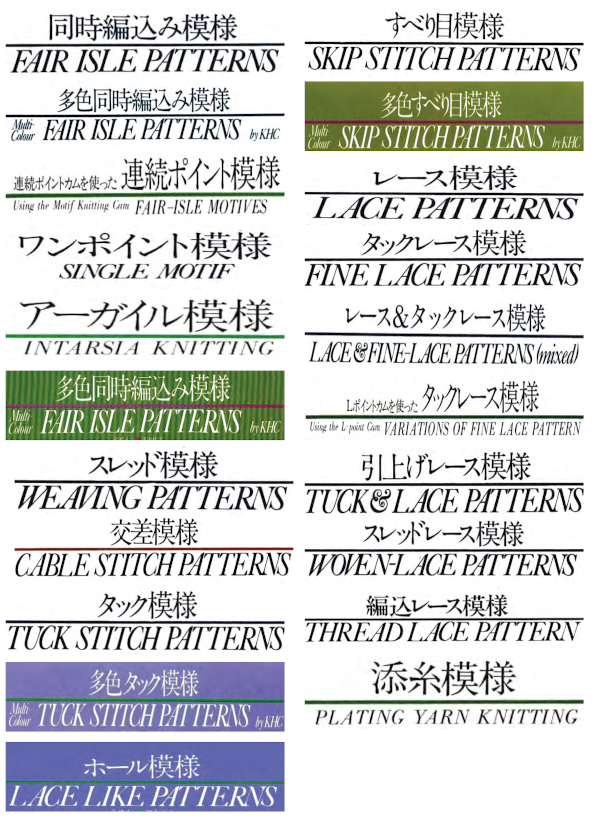
In addition, for English machine knitting abbreviations see Jessica-tromp.nl and sewwhatyvette.com
A few i-cords and more to try
The top illustration below creates what some demonstrators back in the day would refer to as a heart cable trim. The width of the strips of knit may vary, and the size of the holes need to be accommodated to suit the subsequent threading. The second illustration set results in a more traditional “pretend” cable. I-cord could be used for the second sample. Narrow strips of knitting will curl in, however, and in many instances may be substituted for true i-cords. Because each pass of the carriage knits a row as opposed to slipping alternate rows, the knitting is twice as fast.  In the instance below a series of holes are created for threading cording (or other chosen material)

The following illustrates the threading option with a single length of the cording, which will need to be secured at each end with some stitching. Separate colors could be used on alternate sides for more color variation, and other threading sequences as well

some publications with inspiration photos

its online relative

part of another image

from MonTricot Magazine #26, 2011

A hand knitting book with many ideas for cord and strip use that could easily be adapted for machine knitting

A commercial foreign knit incorporating cables and woven cords link no longer active in 2019

Holding and “cables”
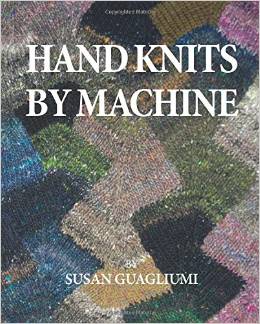
Susan Guagliumi has written 3 books on hand techniques on the knitting machine
her first classic

her previously most recent
 published November 2014
On her website, some of her articles and Studio KM publications are available for free download. Included are ones discussing a horizontal cable, two-color electronic cable. 11/12/15 Please note: the site now requires subscription and login, links, as posted here as they are, will fail to connect.
In creating large-scale cables in the past tension changes, supplemental threads, and other ways to compensate for moving a larger number of stitches on a metal bed (things start to get hairy when crosses become larger than 4X4) have been discussed. An interesting, clear, possible solution to produce textures or macro cables such as in this piece

may be found in her books and may be viewed in her youtube video. Handknit interpretations that also add lace to the mix may be found in Shirley Paden‘s portfolio photos of garments, she is the author of

Using punchcards to track cables and twists in pattern 2
This post was originally written intended for punchcard machines only, with the passage of time electronic pattern tracking, samples and associated repeats were shared.
Links to some later posts including cable manipulation and patterning
2023/05/30/a-return-to-plaiting-and-double-bed-hand-transfers/
2021/03/11/slip-stitch-patterns-with-hand-transferred-stitches-double-bed/
2021/02/01/slip-stitch-patterns-with-hand-transferred-stitches/
2021/05/09/double-bed-embossed-patterns/
2012/01/19/using-punchcards-to-track-small-cables-in-pattern-1/
2011: Cables seem to be in vogue once again in myriad permutations. They pose some interesting issues when created in machine knitting. Interweave Knits Winter 2011 published an article on “Cables 101” that includes a way to color code and graph cable crossings. “Back in the day” of regular, worldwide machine knitting seminars, several authors provided collections of machine-knit cables including George Le Warre at Passap universities (copyrighted, George presently in England).
Simple crossings are a good place to begin and produce texture. If one is not interested in freeform but rather constant, recurring patterns it is possible to use punchcards to produce visual cues when stitch twists and crossings are to occur. This is not an option in Studio Machines, easy on Brother because of the fact that needles pre-select, and Passap pushers may be used for a similar set of clues with a bit more fiddling.
When color-coding information for referencing as one knits, it is possible to be generous with symbols or edit down to bare elements. For example, one way to approach a schematic follows below, where knit stitches are illustrated as well as cable crossings. Red indicates stitches moved to the front, and the green indicates those traveling to the back in each cable set. In hand knitting, vertical or horizontal bars would represent knit and purl stitches. Since these are identical in this HK graph, they could all be eliminated
A

B the isolated repeat

The choice then remains whether or not to revert the crossings to match the HK pattern. One way to do that is simply to reverse positions for colors. The mantra becomes “red moves first, green moves second and over red”.
With all machines, if the knit carriage is left set for normal knit, even if the patterning option is engaged (KCI or KCII if there are any needles out of work) needles will be selected, but the fabric produced is stocking stitch. The usual considerations are in order: the number viewed on the card outside the machine corresponds to the design row being read by the reader, but the punchcard holes in view are not necessarily the same as the design row selected. Because one is producing the cables on the purl side of the knit, if hand knitting charts are used the cables themselves will be mirrored. In many instances, this may not matter, but if one is using the twists for representational crosses ie. in trees, owls, diamonds, and other geometric shapes, it is a good idea to scan the repeat, mirror the image vertically, and then begin translating it into machine knit interpretations. Relatively easy with simple scanning and printing software (ie. the flip horizontal function in Preview, a bit harder by hand.
When I can I color code my cards: ie. with lace I draw a line across the card when I reach each knit row sequence with a color pencil. This provides me with an easy-to-follow visual cue as to when the rows must occur, and also facilitates returning to the previous selection sequence when mistakes in patterning occur.
Some basics: with a punchcard, there is no row length limitation, but repeats are limited to 24 or a factor thereof. In this particular use wherever needles are selected, one has a visual reminder to move those needles in the desired direction.
I used the cards below to illustrate the idea in my intro to knitting classes. When needle selection occurs in the first, remove the selected stitches off the machine with a 3 prong tool in each desired location, then insert a second 3 prong tool back through the front of those same stitches, in turn removing from the initial tool used. Rotate the twice transferred stitches 180 degrees consistently either clockwise or counter-clockwise throughout, and return them to their original position on the needle bed. The result is a consistently textured fabric with no counting stitches or rows between repeats.

a swatch using it

This card begins to address regular cable crossings, mine was punched in repeat the full 60 rows. Color may be assigned to help with opposing twists’ directions ie. to left (pink) or to right (green) when the corresponding color bar appears just above the card reader.
Polymer tales.
Switching to the abbreviated cowls/collars I found I needed lighter weight large “buttons”. These are hard to find or often expensive enough that in production the added cost would affect pricing significantly. As an avid collector of craft and multi-media supplies, I have a significant stash of polymer clay dating back from months to decades. In an ah ah! the moment I made prototypes for what I thought might solve the button weight and supply problem. After the fact, I began to do searches on the care of polymer clay buttons and methods used in making them, which in turn led to a big oops! moment.
I recommend dry cleaning for most of my items unless they are felted ones, in which case hand washing or even a gentle washing machine cycle in cold water works just fine. Polymer clay it turns out does not like dry cleaning chemicals. If used on items cleaned that way it is recommended that the button be covered with plastic wrap and aluminum foil prior to exposure to cleaning agents. Hot water washes and driers also damage the clay, cool water hand /machine gentle washing appears to not be a problem.
Here are some online sources on these related topics: for a wealth of information on polymer buttons. Ready-made molds and ideas may be found here. Button shanks are available if that method of securing the buttons is desired.
The option I am choosing to pursue is making the button removable when the item is cleaned, which led to a search for button covers. Local chains that carry sewing notions had not even heard of them. A local mom-and-pop craft store, however, had an endless supply in their “backroom” dating back to when they were “in vogue”. Have to love elderly owners that are the shop version of inventory software and can just “go to” things that have not been out on the selling floor in years.
For anyone not familiar with them, here is an image of the item, available in a few sizes depending on the source.

The plan of the moment is to affix the baked clay to the flat metal surface with glue such as E6000 and further test the idea. Having the removable cover also means clay could be painted and finishes could be varied in ways that would not be possible if the item was to undergo dry cleaning. My sample first efforts which I will torture/test are below. If not buttons perhaps all that clay may mutate to use in shawl pins.

Entrelacs
Entrelacs abound in knitting at the moment. In thinking about perhaps composing my thoughts for a post on the subject, I searched online and found some very good sources on this subject. One is found at howtoknitasweater.com. The author, Cheryl Brunette also shares an article on lace . Here are 2 of my teaching samples, executed on 4.5 mm machine
front view

a rearview with ends woven in
 …
…
Oh the math! “magic formula”
There are many knitting programs that will perform the necessary calculations, as well as a variety of knit calculators. The diophantine formula is the basis for what is known to some knitters as the “magic formula”. In the early 1980s, Alles Hutchinson authored a small book on the subject. There is a bit of personal leeway in the results, and the formula may be used in calculating even complex shapes with the proviso that one has the patience to break such shapes into series of simpler ones.
There are many online resources for information and calculators to sort out the math, including a triangle calculator. The original website’s offerings are now closed, but the info remains available here
https://web.archive.org/web/20200224005535/http://www.getknitting.com/ak_0603triangle.aspx
Using the gauge to match the previous post of 4S and 6R per inch the calculation for the pie divided into five triangles breaks down into the web calculator result pictured below:
 The longhand method for the same calculation follows and also translates to: bring into hold 2 stitches for 4 times, 1 stitch for 80 times. Stitches in shaping are proofed as above: 88 stitches shaped over 84 rows.
