A recent MK forum request for a HK trim look alike led me to the following experiment :
the hand-knit trim

There are multiple ways to achieve knit and purl combinations on the KM. Brother garter carriage will do so “automatically” albeit slowly, ribbers may be used in combination with main beds, ladders may be latched up by hand, or one may use the garter bars to turn work over. When large widths are required the options are to use multiple panels, or to knit the fabric sideways letting the width become the length. Some HK fabrics are impractical if not impossible to duplicate on standard home knitting machines, and compromises are chosen. I tried to create a distant relative of the proposed trim, with a bit of family resemblance.
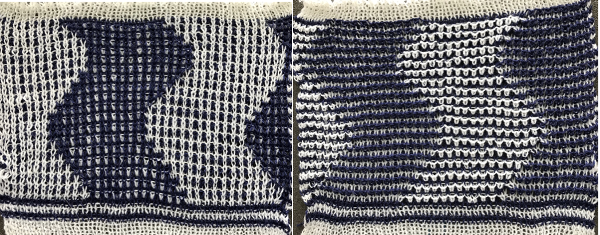
Below the short section to my garter bar is pictured. I mark every 10 eyelets with nail polish on my GBs to help with tracking stitch counts (do same with centers of ribber combs). The photo shows it in the position in which it needs to be held to take stitches off the machine prior to turning them over. The hollows under the eyelets (1) provide room for the needle hooks to slip under the yarn and catch the stitches when work is flipped over. Hollows under eyelets occur on the side with the convex ridge (2). There are many online sources for using the bars, now available in multiple gauges, including an article by Susan Guagliumi.

my working graph

I worked my edging on multiple of 12 stitches. The purl/knit symbols represent how the knit will appear when viewed on the side where the held shape is convex. Work begins by knitting foundation rows and using waste yarn at the start with open stitches on the first row of knitting if the ruffle is to be seamed/joined at its ends upon completion. The magenta/green rows represent respective whole rows to be turned to the reverse side using the garter bar after each knitting sequence is completed. Testing first is required to establish the optimum stitch size for a gauge that will allow for easy stitch movement in transferring stitches on and off the garter bar:
arrows on the blue ground indicate the position of KC at beginning of sequences
end knitting of first “purl” section COR, turn work over (magenta)
COL: knit one row across all stitches, carriage moves to the right (pink). I find it easier after holding starts to move the carriage to the opposite side by taking it physically off the machine and leaving settings alone, results in fewer yarn tangles and problems for me.
COR: set the machine for hold except for the first 2 stitches on right. I tried one stitch at a time first, but the wedge was too deep, so I began working bringing stitches to hold 2 at a time, carriage side first. Stitches could be held opposite the carriage as well, but that created a set of additional holes when one returns to knitting those stitches in the opposite direction, and a pointy edge (segment marked with dot #2, more on a later post on miters and spirals). The number of stitches brought to hold can be varied as needed, the goal here is a symmetrical result.
COR: when only 2 needles at left are left in hold opposite carriage, knit an even number of rows (orange area, I chose to knit 4, then 6 rows in my test)
COR: when the last 2 stitches on right have been knit for 2 rows (green) transfer all the stitches to the garter bar
Get carriage to left, COL: return stitches to needles, knit for an odd number of rows (magenta, COR), turn work over
COL: knit one row across all stitches to right (pink)
COR: begin holding sequence again
I began the sample with 5 rows in between the mitered shapes and then tried 11. This is labor-intensive if produced in significant lengths, so a choice can be made depending on personal taste and patience. Though it could be attached as one knits the item it is intended to trim, there is enough going on I would probably estimate the length, take it off on waste yarn, and hang it onto the larger item. If longer, the trim may be unraveled to suit. If an addition is required it may be added on but at least working with the much larger bulk of materials will not be for the duration. Holding lever may be set to knit for single passes prior to turning work over in sections using holding, or stitches may be pushed into work by hand.
dot 1 rests on “killed acrylic” repeat test, the remaining sample is knit in wool: dot 2 marks the extra holes when the holding sequence is changed as described above

with five “purl” rows between turning and holding

11 “purl” rows between turning and holding

the reverse side

about half the wool portion of the ruffle was pressed, the knit became smoother, the edges less rolled. Those are properties that can become a design choice/decision
If an all stocking stitch ruffle serves the purpose this could be the start of the working repeat for using slip stitch to knit programmed needles selected to patterning position; here the black dots represent areas that knit, white squares stitches in holding. The repeat must be an even number of rows, using it as drawn, the starting side depends on whether one is using a punchcard machine or electronics

…
For some hints on how to use the garter bar see later post


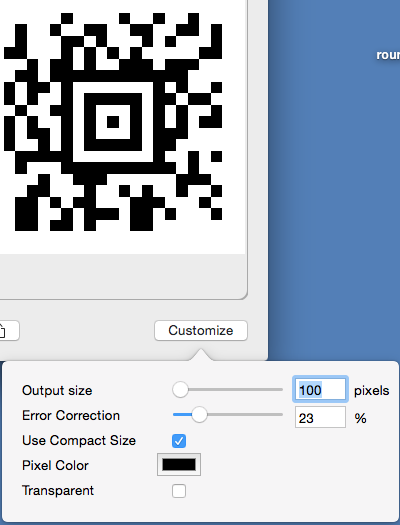
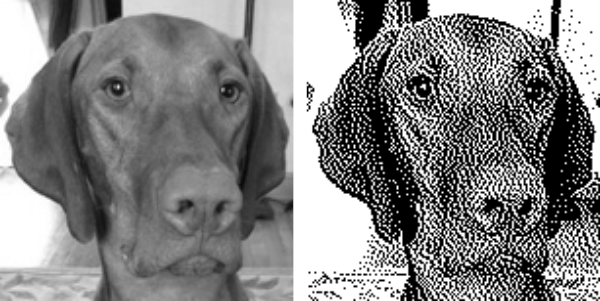
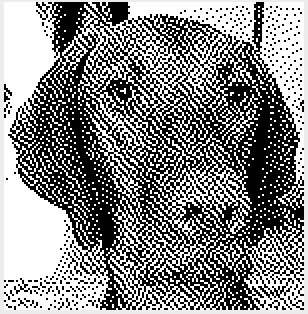
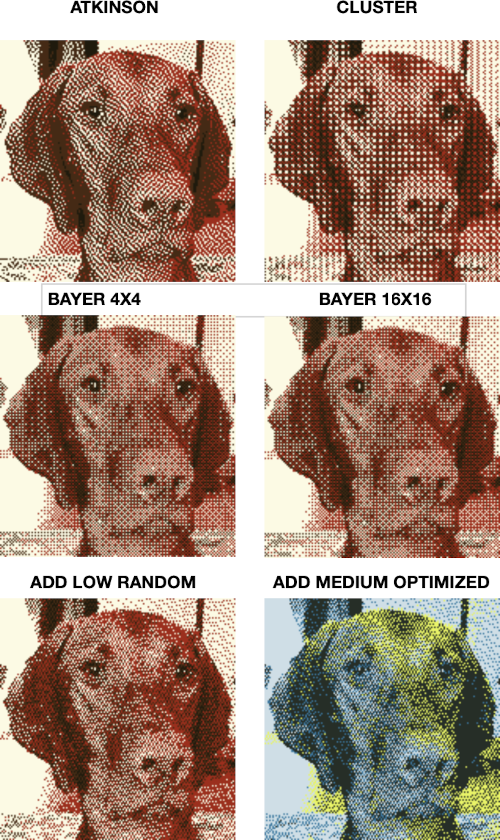
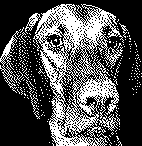
 May 24, 2019 a greyscale mode scaled image processed in
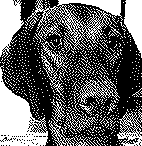

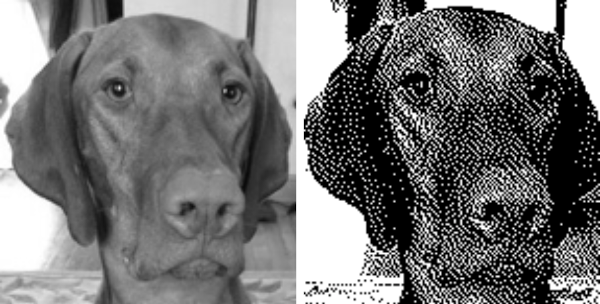
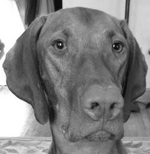 The image is used with the kind permission of Rocco’s owner. I have used this image before, when I posted previously on some ways to reduce colored images to B/W for possible knitting using a Mac computer, please see post on 013/03/14/ color-reduction- conversions-mac-os/. Gimp offers some alternatives to the familiar dithers and is available, free, for both PC and Mac platforms. Tutorial links on Gimp edge detection available online as of May 2019 are listed at bottom of the post.
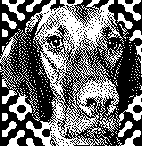


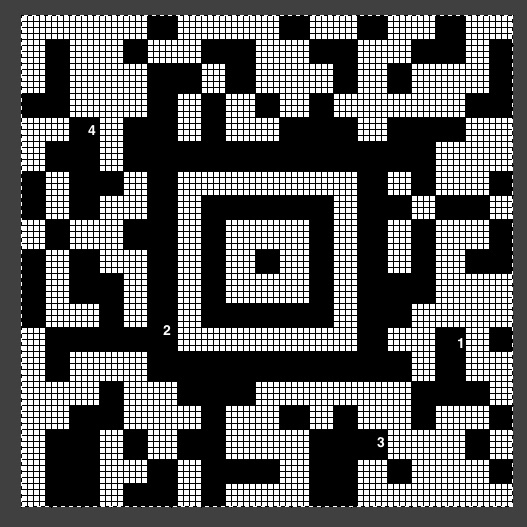
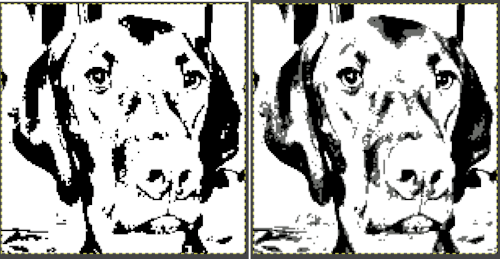
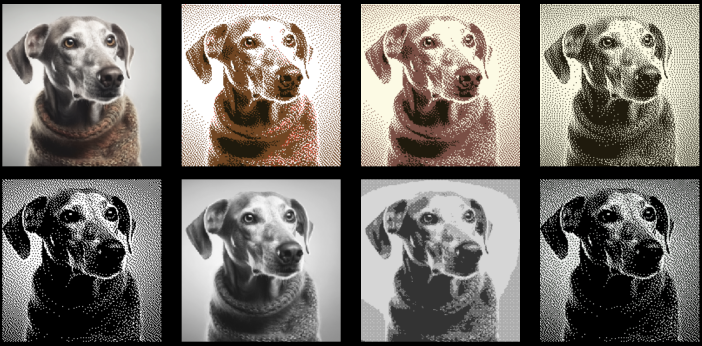
 Difference of Gaussians


 adjusting B/W with Threshold
 after a bit of “tweaking”
  Image_Mode_Indexed, rendering it “knittable in 2 colors”


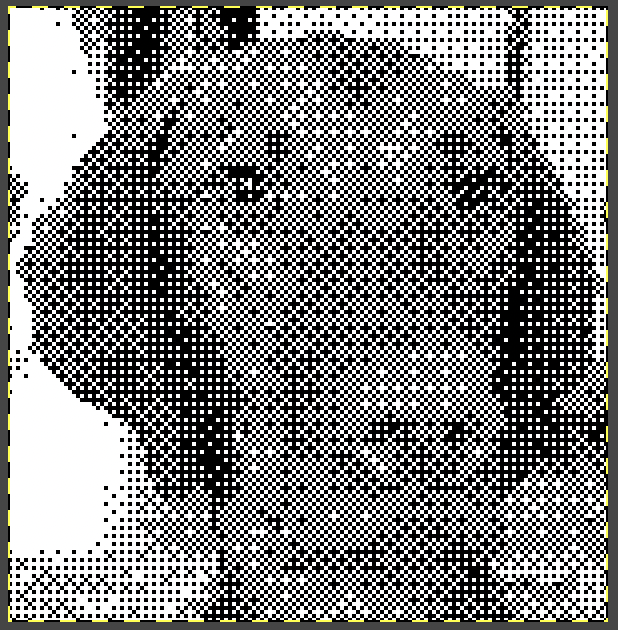
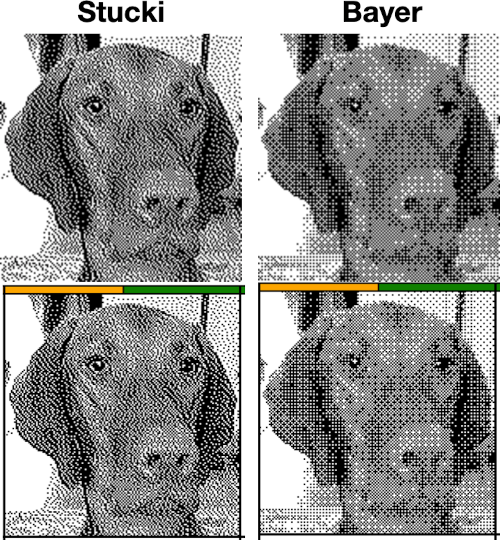
 default Stucki
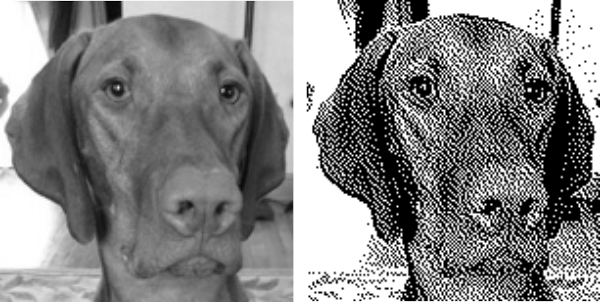
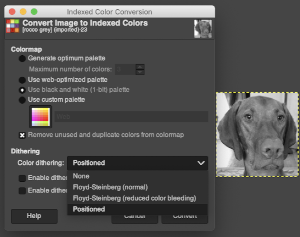
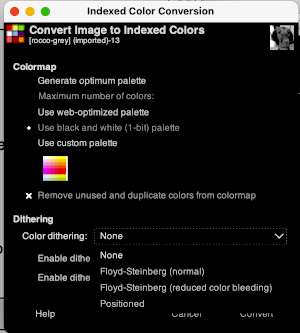
 Check dithered results, downloaded images may be in RGB Mode. Prior to any knitting, they will need to be converted to B/W indexed.
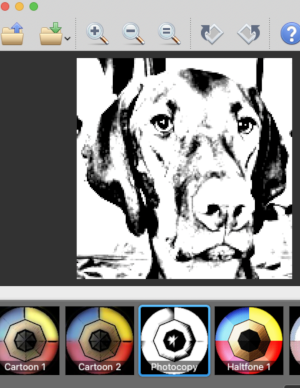 imported the result into Gimp and saved it in indexed 2 color BW and in turn, 3 color indexed mode, no color adjustments, finding the result pleasantly simple
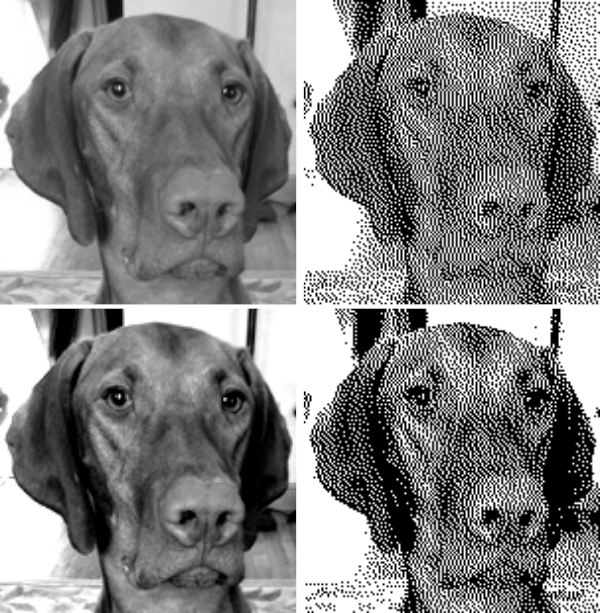
 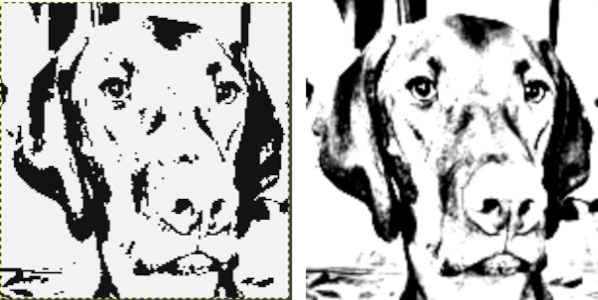 beginning with the greyscale generated image followed by Mode changes in Gimp, indexed 2 color BW, then indexed 3 color, there appear to be very subtle differences with a bit more detail:
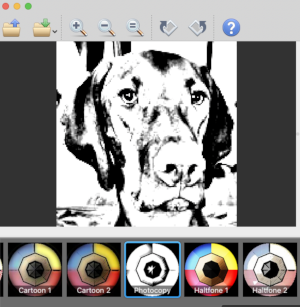
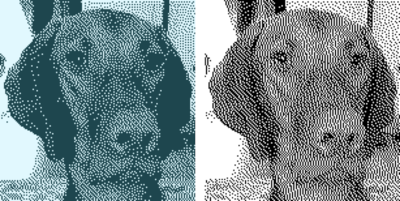
 It is possible to reduce images to 4 or 3 colors using the program as well: a slider for color count is used to choose the final number of colors in the reduction. Again, these instances have no added manipulation
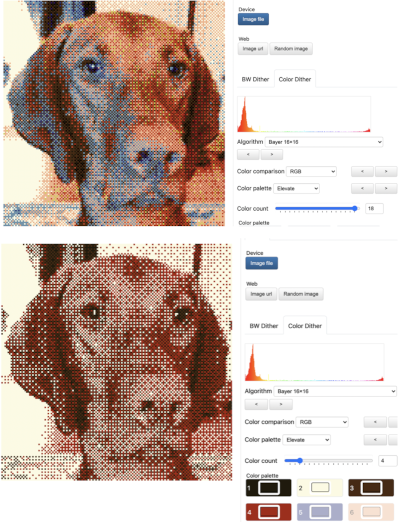
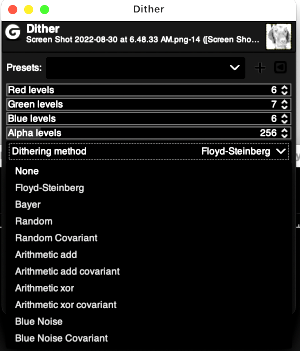
 To retain the quality and size of the dithered image, download it, rather than using a screen grab. The software used to separate the chosen dither may alter the result somewhat. I am writing my posts using an iMac M1 with OS 12.0.1. At this point Ayab is not operable, img2track does open images, but in this case, with interesting distortions, and it does not download any files at all.
 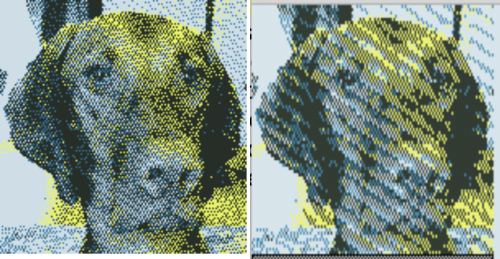 Yet another dithering
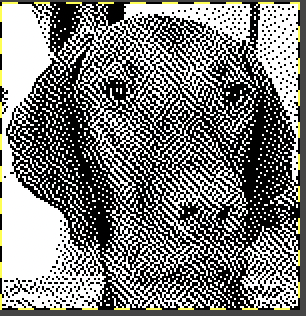
 On odd-numbered rows beginning with row 1, mark all empty squares in the even-numbered light-colored row immediately above it with purl symbols.
  All unmarked stitches throughout the design are knit, whether, on the “wrong/right” sides, all dashes are purled, patterning occurs on the second row of each color. To visualize the full pattern one may use the add row below feature to expand the graph (the chart below is missing the very first row).
  Now add the second row of each color and grounding stripe (s) at bottom of the repeat. Most patterns will start the illusion immediately after casting on with dark color, row 1 above. I was interested in my sample having a border of sorts on its top and bottom.
  The resulting knit swatch

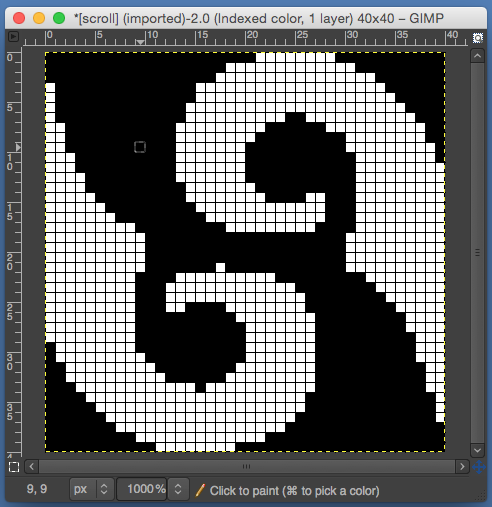
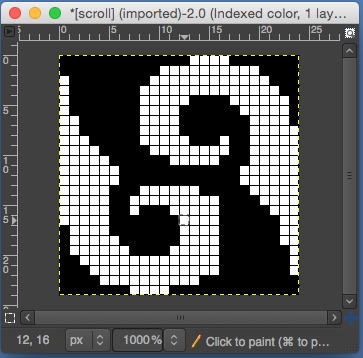
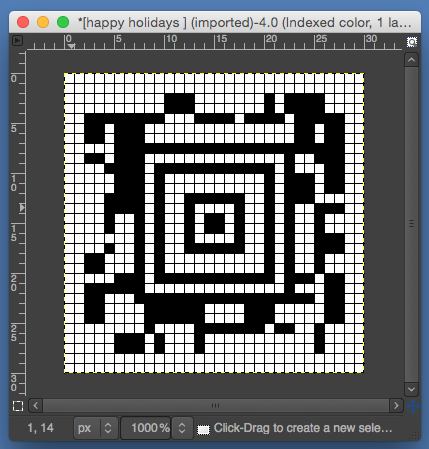
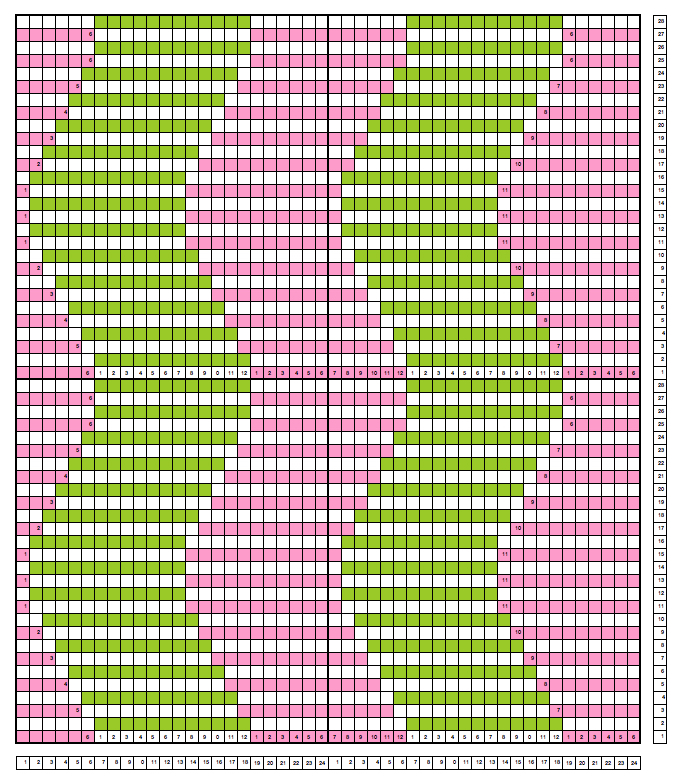
 the actual repeat
  color inversion begins on row 1 and follows every other row (if numbered these would be odd rows)
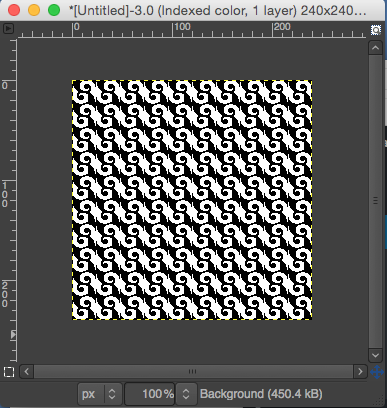
  testing the repeat through filter/ map/ tile
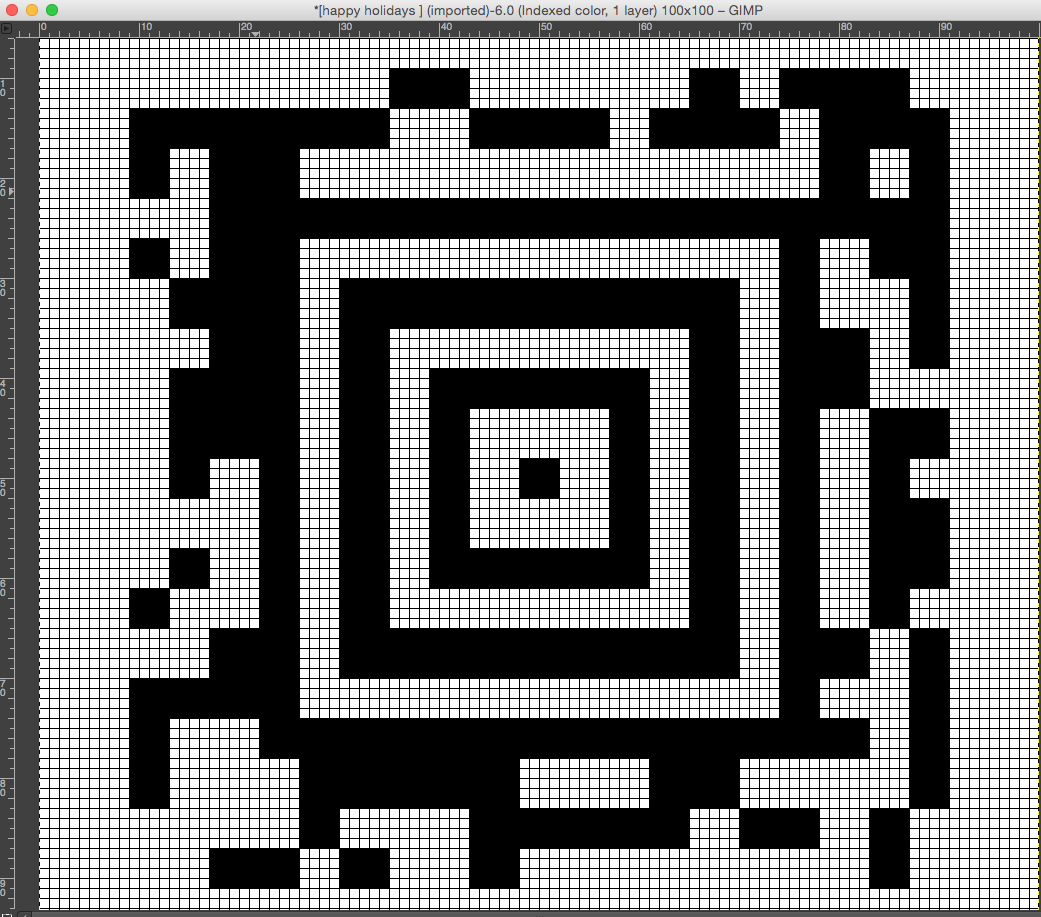
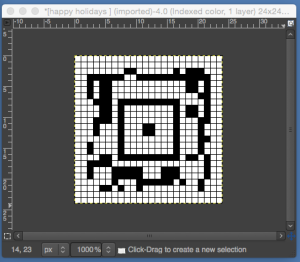
  a working chart that can be printed to suit with dark/light row markings and blank squares for tracking knitting rows in the execution of the pattern
  A larger version with stitch and row counts marked. The chart represents half the rows in the actual knit. The cast on row counts as knit row 1, color 1, and following the chart beginning with row 2 knit the black squares and purl the white squares. *Change color, knit one row (odd#), on the next row follow the chart, knitting the black squares and purling the white (even#).** Repeat from * to **.
 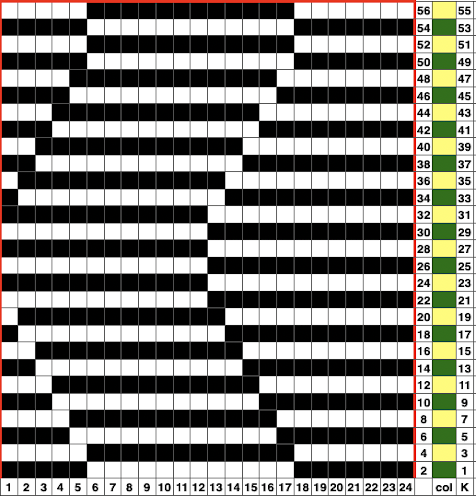 the knit swatch: “shadow side”

 Follow up: