I have probably owned this accessory since the early 90s. After making a faint-hearted attempt at using it at the time and failing, it has been stored in the original box in the interim and just came out of retirement. The multiple languages operating manual for its use may be downloaded from http://machineknittingetc.com/brother-ka7100-ka8300-transfer-carriage-user-guide.html. There are several video tutorials available on Youtube. As a group, they generally illustrate simple transfers across an entire row in structures such as ribs used for bands and cuffs. This one is offered by Knitology 1×1, Elena Berenghean, a young knitter publishing very good machine knitting video instruction on a huge range of techniques.
The tool is designed for the standard gauge and transfers only from the ribber up to the main bed. It is best to use yarn that has some stretch. The recommendation in the manual and in youtube videos is to perform the transfers with the pitch set to H. My own ribber is balanced, I found I had problems with transfers in that position, several carriage jams, and to get things to work properly in half-pitch I had to use the racking handle to move the ribber needles slightly more to the left for the transfers. The needles containing stitches to be moved, need to be slightly to the right of the needles with which they will share yarn, that spot may turn out to also be just wide enough to allow for the pattern to be worked without changing the ribber pitch. The yarn used is a 2/18 Merino, knit at tensions 3/5. 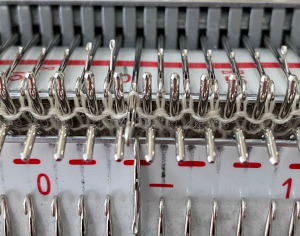 In terms of positioning the carriage, a wire that is akin to that found on Passap strippers is on its underneath. In positioning the carriage on the beds, check visually that it is indeed lying between the gate pegs of both beds prior to attempting to travel with it to the opposite side
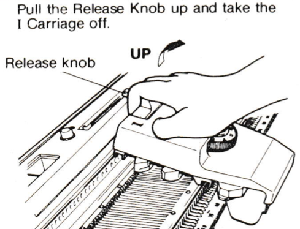
 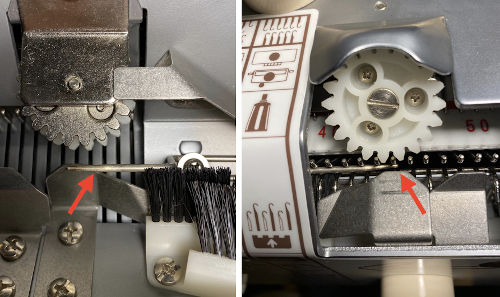 If any carriage jam occurs, it takes cautious wriggling to release the wire and carriage. Upon completion of the transfers, simply lift up to remove it from the beds.
Generally, the ribber tension used needs to be set on 4 at the minimum. The last row just prior to transfers will likely need to be knit at a looser tension than the remaining rib. If the stitches are too small they will not be picked up for the transfer. Folks familiar with lace knitting are aware that just the right amount of weight can make a difference in forming proper transfers. With these fabrics, too little weight may result in loops forming on gate pegs, too much weight, and stitches may remain over closed latches on the ribber needles and not share their yarn for transfers. Again, the transfer carriage operates only from right to left.
Studio instructions for their version of the accessory actually offer some different and more specific recommendations. When knitting full needle rib all the needles or pattern segments the machine generally will be in Half Pitch. Though there are needles in work on both beds, the ribber should be set to full pitch, aka P position, “point to point” prior to transfers, bringing them in close alignment in order to facilitate the process.  Passap machines accomplish the same by changing the angle of the racking handle to other than the full, up placement in order to achieve the necessary alignment.
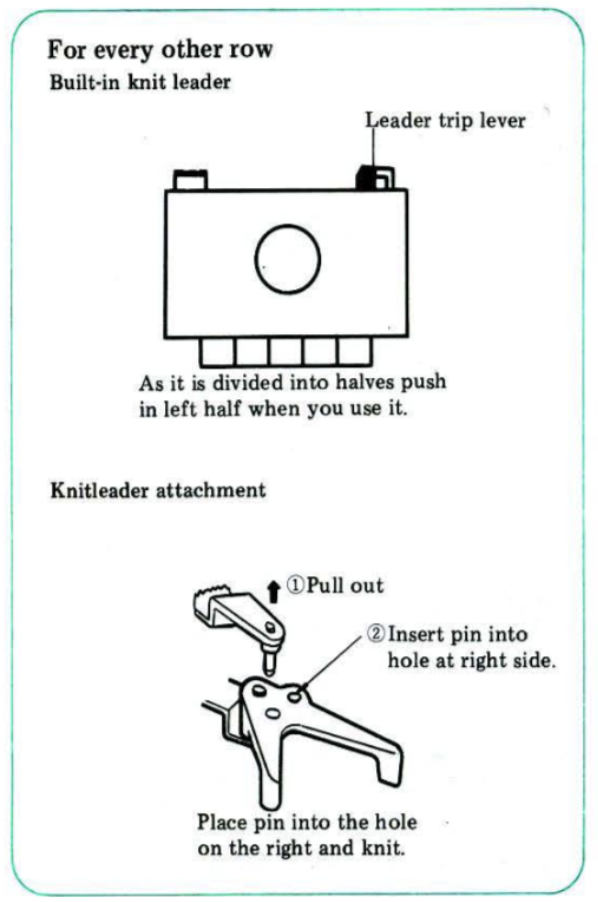
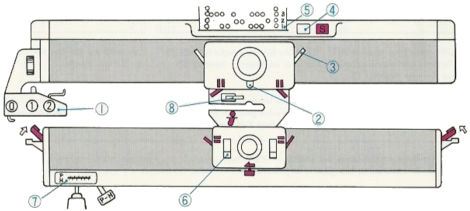
The Brother accessory and its parts, have clear imprinted illustrations for use
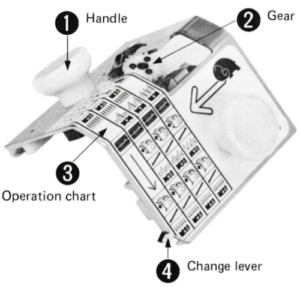 The change lever has only 2 positions, up and down respectively
 Its position is determined by the number of needles on the ribber one wishes to transfer.
The carriage manual recommends its use after knitting a last ribbed row to the left, but it is possible to use it with both knitting carriages on either side, as long as there is generous space to clear all stitches when the accessory is placed on the bed, moved to the opposite side, and removed. An extension rail may be needed to achieve that amount of clearance.
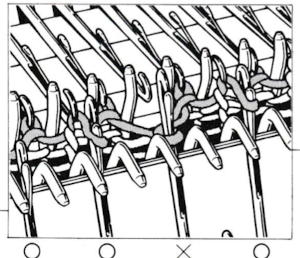
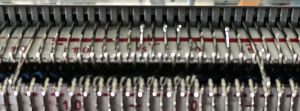
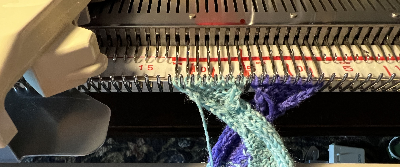
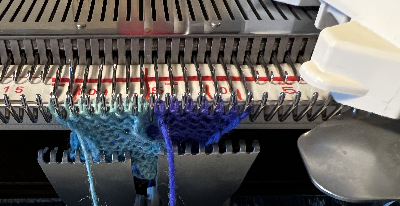
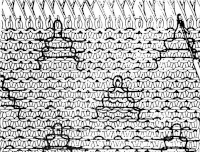
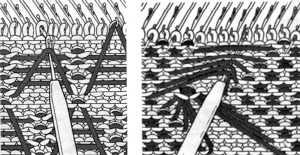
Operating slowly, one can watch the process of transfers while moving from right to left. Though skeptical, I found the transfers happened easily, with occasional skips. I worked with hand-selection of needles on the ribber to create a pattern, first with hand-selection, then with racking the ribber position to change the relationship of needles on one bed to the other, initially transferred after every 2 rows knit. The knit carriage was set to knit both ways, the ribber to knit in one direction, creating loops on the selected needles, and securing them in the other, allowing for the loops on the ribber needles to be transferred up to the main bed, before working 2 more rows. The “errors” in patterning were operator errors in needle selection as stitches were dropped, and not all the required needles were then returned to work position. Not a technique I would use for all-over fabric, but good practice.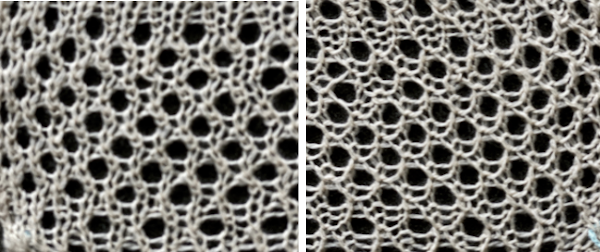 When the transfer occurs properly, the ribber needles will have yarn placed over closed latches, ready to be dropped, the yarn is shared and looped over stitches on the main bed, akin to tuck loops, outlined in the photo with the black oval. The first image is from the manual for the accessory, while in the photo, one improperly transferred stitch is outlined in red. To prevent dropped stitches from happening, any such locations will require a hand transfer to the opposite bed before dropping the remaining ribber bed shared stitches
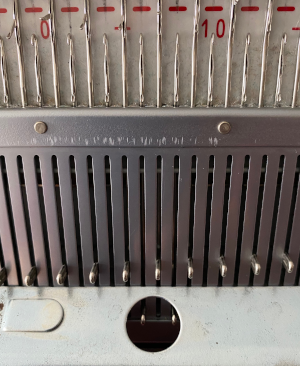
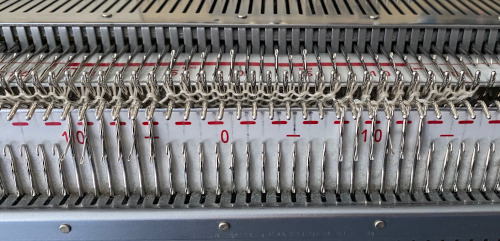
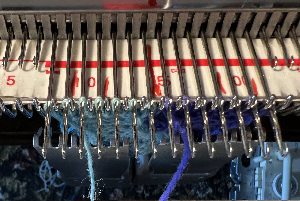
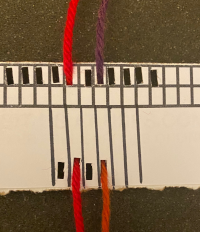
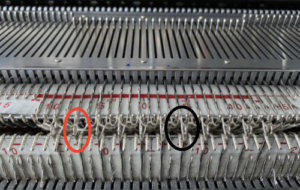 For my test I used EON needles on the ribber, planned alternating selection for each new transfer. This could be done by selecting dashes and blank spots on needle tape ie. dash in the above photo, blank spaces below
 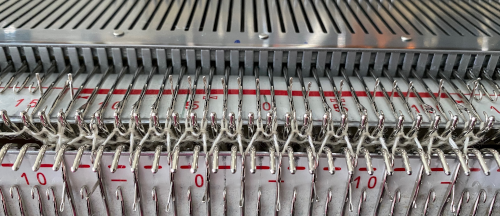 It was faster to achieve the effect by changing the ribber relationship to the main bed using racking by one position ie 10, 9, 10, 9, etc. prior to picking up the subsequent set of loops. The errors in the test swatch were from failing to bring all the needles back up to work after dropping their stitches. Using a tool ie. a ribber comb placed over the out-of-work needles prior to dropping stitches made the racking process far less error-prone, will keep the appropriate needles from being accidentally taken out of work.
  My first attempt at creating shapes includes a band at the bottom where the EON transfers as above were made, but every row. Simply bringing needles into work on the opposite bed creates an eyelet. They can be eliminated by sharing stitch “bumps” on the opposite bed, but for the moment they are a design feature. The texture created appears in the areas involved on both sides of the knit
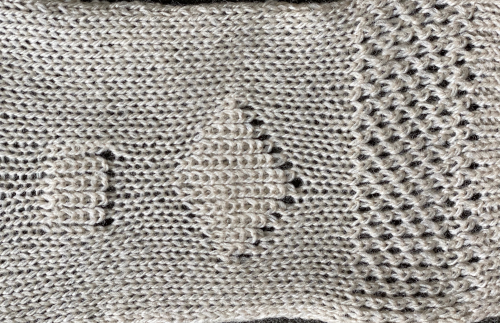
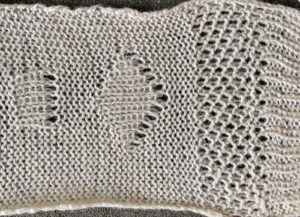 It is possible to transfer single needles at sides of shapes ie
 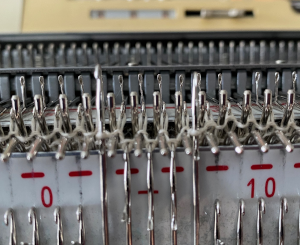 or whole rows, but the change lever needs to be set to position accordingly.
Many knitters have one of these tools in their stash, they are sometimes referred to as “jaws”, intended to facilitate transferring between both beds, and patterning was intended for Studio punchcard machines. 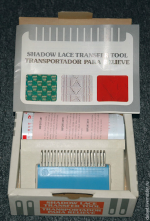
 The enclosed punchcards:
  Shadow lace tools are marked side 1 and side 2. Some are blue on one side, cream or white on the other, the blue side is side 1. The process always begins with side 1, or blue. When the stitches have been removed, the jaws are closed, allowing the stitches to slide over to side 2. The jaws are once again opened, and the stitches are transferred to the opposite bed. Studio machines select and knit in single pass rows. Brother preselects for the next row of knitting while knitting any one row in pattern as well, so transferring in pattern from the top bed down with such a tool would be problematic to maintain proper pattern needle selection.
To transfer from the ribber up on any machine, place the teeth of the jaws on the needles on the ribber, holding it with both hands. Pull needles up until all stitches are behind the latches, then push down with another tool or one of your hands until all stitches are on the jaws.
Release the tool from the ribber needles, and rotate it away from you, toward the main bed. Close its teeth so the stitches are transferred onto side 2.
Open teeth, place eyelets over the main bed needles, and stitches are transferred onto the main bed by rotating the tool away from you just a little and tugging down a bit.
On Brother, the possibility of having patterning on the top bed to help track patterning on the ribber in some way comes to mind. This was my start, with the first draft of electronic repeats. 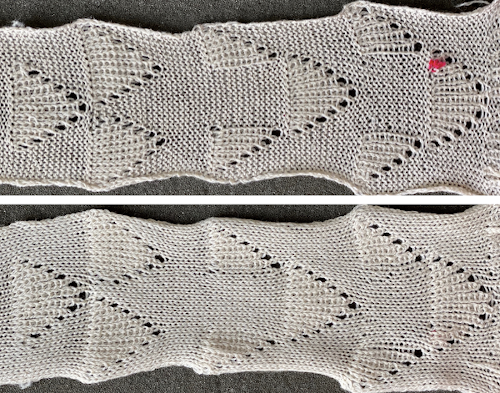 I stopped when I began to have some tension issues, loops on gate pegs, and a distracted brain.
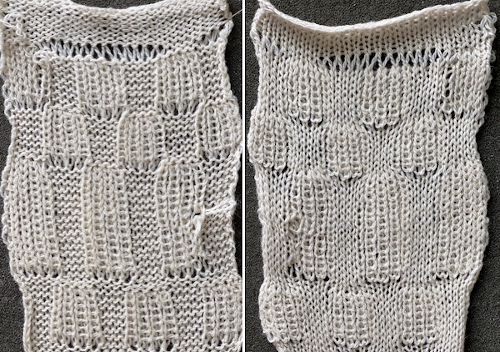 Transfers of stitch groups, whether by hand or using the accessories are made on rows where no needle preselection occurs on the main bed
  This series is a proof of concept for my approach to developing electronic cues
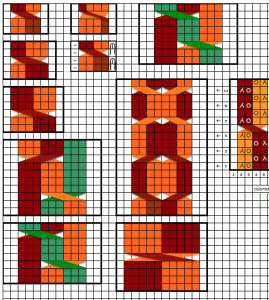
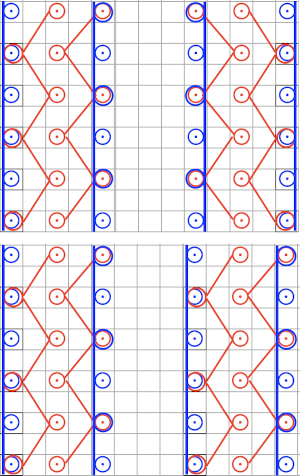
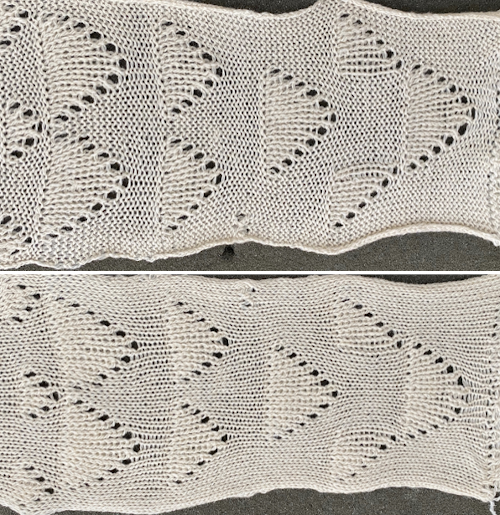 The original repeats were modified to include 2 blank rows between segments that allow for transfers between beds not hampered by needle preselection on the top bed. The motifs are color reversed, but not the blank rows between them.
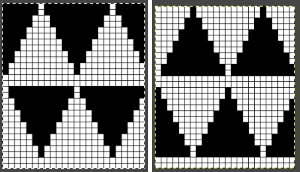
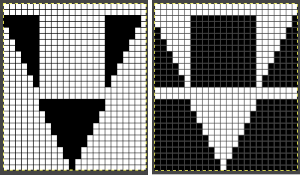 The knit carriage is set to select needles KC I or II, end needle selection does not matter. All needles on the top bed knit every stitch, every row, whether or not those design rows contain black pixels. No cam buttons are pushed in. Blank areas between black ones indicate the number of needles that actually need to pick up loops on the ribber to create shapes, filling in spaces between selected needles until an all-blank row is reached for making transfers. The chart on the far right illustrates a shape where the easiest method becomes one where stitches on the ribber are manually transferred to the top bed in order to reverse the shape and maintain every row preselection. The selected needle corresponding to the black square marked with the top of the red arrows is pushed back, the ribber stitch below is transferred onto it, the needle with the couples stitches is brought to E position, moving across the bed in proper locations prior to knitting the next row.
 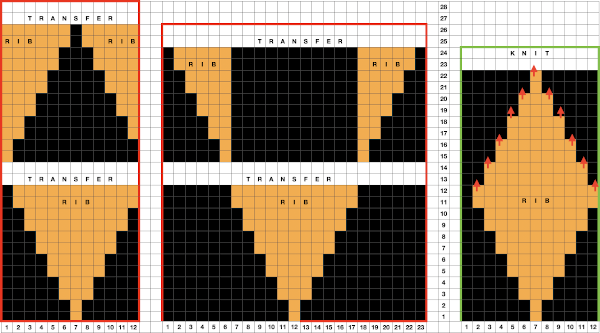 In this repeat, the side vertical panels of ribbed stitches are added. The knit stitches on each side of them roll nicely to the purl side, creating what in some fabrics can actually be planned as an edging.
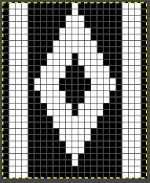
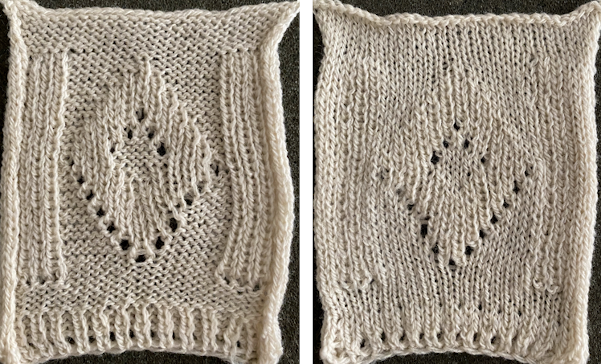 My takeaway is to test the accessory with some patience, sort out the sweet spot for the ribber needles in relation to main bed ones in terms of handling transfers and yarn thickness, use colors that allow for easy recognition of proper stitch formation, keep good notes, and “go for it”.
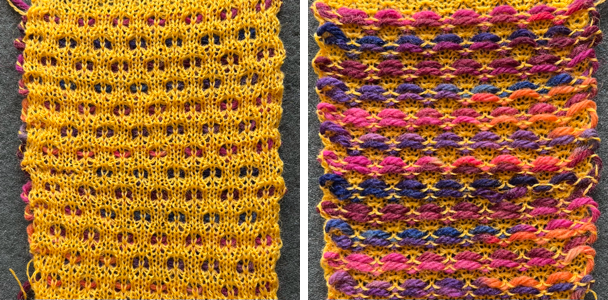
One way to add color to the mix is to use the plating feeder.
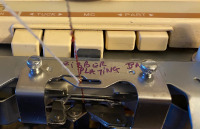 In the first sample, equal thickness yarns were used, the colored yarn was a rayon slub with no stretch and slippery nature.
 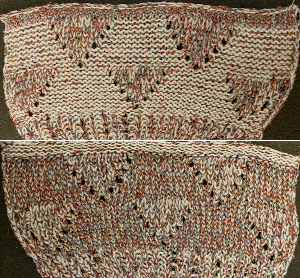 The bottom of this test used a wool yarn of equal weight to the light color, which proved hard to knit. The red is a 2/48 cash-wooll
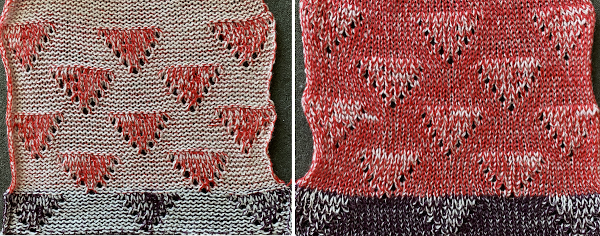
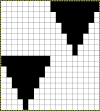 A very narrow test for a possible pleated pattern
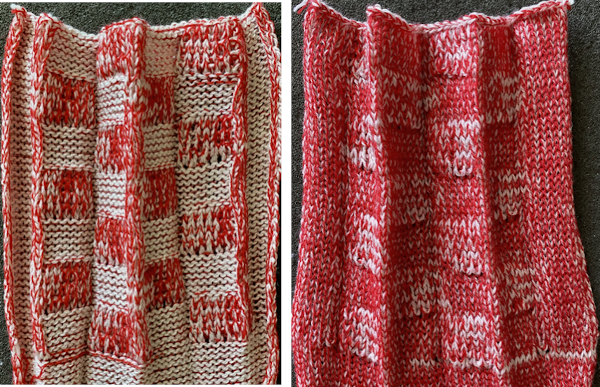
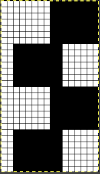
It is possible to construct the same type of fabric on a striped background. It can be achieved low tech with graph paper and pencils if needed, using a simple paint program, Gimp alone, this is my process using Numbers and Gimp:
1. determine the desired shape, width, and height, checking that it also tiles properly
2. create a table with square cells the same width as the number of stitches in your design, twice its height; use an even cell size ie 20X20 pt
3. hide all odd-numbered rows from the top of the table down, the table will shrink from 20 rows to 10
4. draw your repeat
5. unhide all rows
6. copy and paste the table; double the cell pt height only to 40, making the repeat twice as long
7. mark corners or part of the edges with another color to make it easier for Gimp to identify them, select all and remove borders, grab the image with an added surrounding colorless border
8. open the screengrab in Gimp, use crop to content, fill colored squares with white, change the mode to indexed BW, scale the result to the appropriate size, in this case, 18X40, export png 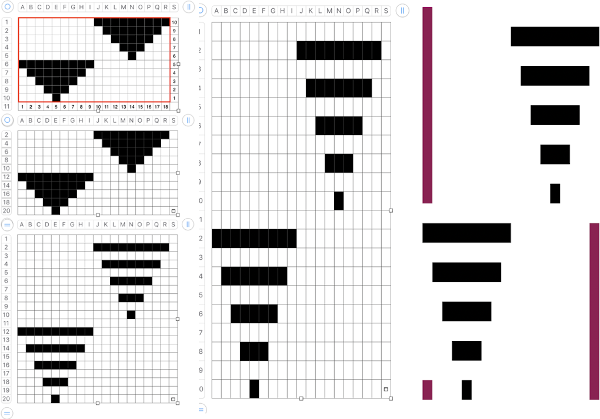
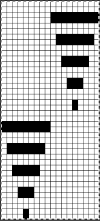
 Cast on for EN or EON rib. Transfer all the main bed stitches down to the ribber. Extra stitches can be cast on and transferred in addition to the planned width of the repeats to create a border on either side of the designs. During patterning there will be stitches in work on both beds at intervals, so the pitch needs to be set to H while knitting. When the top of the piece is reached, transfer all ribber stitches to the main bed and bind off.
The first preselection row is knit from right to left in the contrast ground color.
With COR bring all the needles to be worked in the pattern color to B position on the top bed.
The knit carriage is set to slip in both directions. End needle selection is canceled. The ribber remains set to N/N for the duration. Knit to the left and begin changing colors every 2 rows.
The shape increases are created automatically, with eyelets at the edges where each stitch is picked up for the first time on the top bed. COL when the first needle is preselected in this case for the start of the next shape, transfer all previously formed design stitches on the main bed down to the ribber, continue knitting 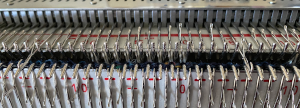 If any stitches are pushed all the way back or in mixed alignment during transfers,
 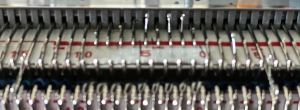 be sure to return them all to B position, not disturbing the needles already preselected for the next pattern row,
  repeat as needed.
 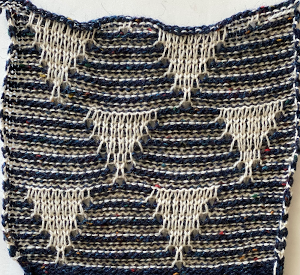 Because one color knits with every carriage pass while the other slips behind it not knitting for those 2 rows, the striped background fabric will become distorted depending on yarn and stitch size used, most likely particularly noticeable at the top and bottom edges of the piece.
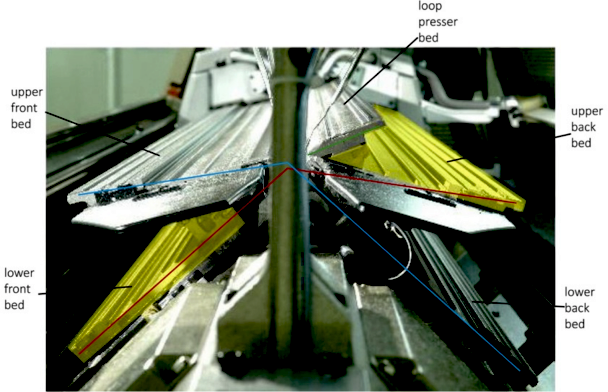 and compound needles
 ![]() that facilitate whole garment shaping makes complex structures possible that may only be partially reproduced on home models.
that facilitate whole garment shaping makes complex structures possible that may only be partially reproduced on home models. One accessory that would make things easier to reproduce more textured knit and purl variations would be a Brother G carriage,
 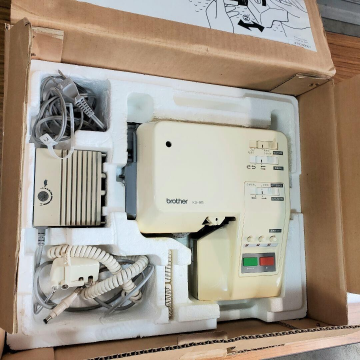 which operates on the top bed and slowly and loudly produces programmed patterns on both punchcard and electronic Brother models.
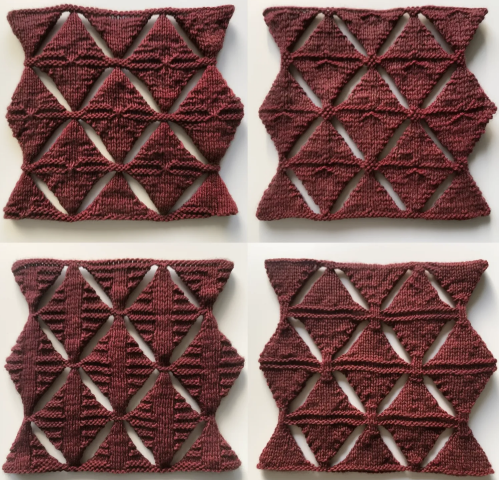 and a “simpler” variation.
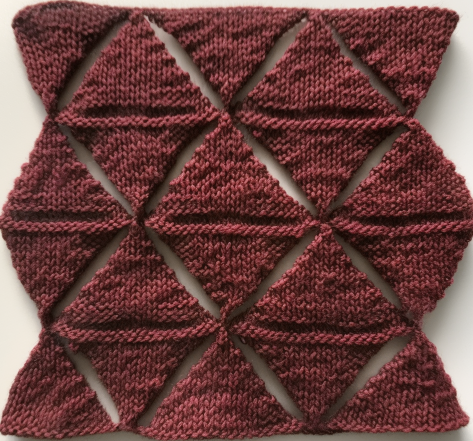 In hand-knitting concurrent shaping of both sides can be considered.
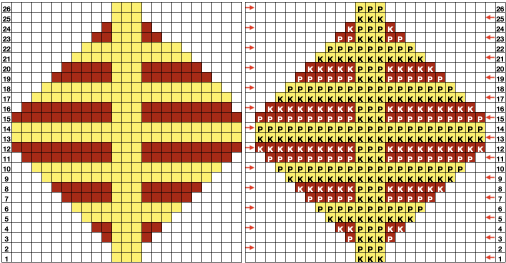 Machine knitters constantly look at the purl side when working on the top bed unless ladders are manually reworked into knit stitches or the work is turned over.
 The standard and bulky garter bars offer sections that may be joined together for use on the whole needle bed, while the tool for holding, transferring, or turning over small stitches offers only 30 eyelets, the red lines on it were made with red nail polish, a handy way to mark KM tools or even linkers at fixed intervals to save constant counting.
 If the yarn supply is to be kept continuous, the knit carriage and yarn need to be brought to the opposite side before resuming knitting.
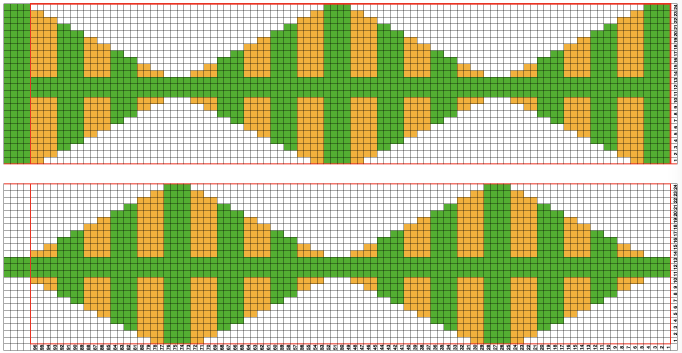 and an illustration of how strips might be joined to produce slightly different side edges.
 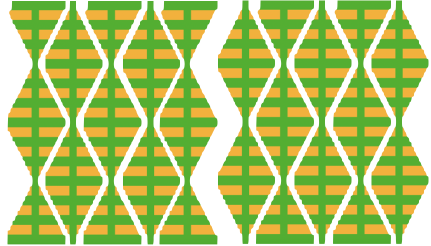 The diamonds are formed by increasing and decreasing on both side edges.
 To increase one
  If both sides are shaped at the same time, the length may get affected by slight differences in stitch height formations on the carriage side as opposed to opposite the carriage.
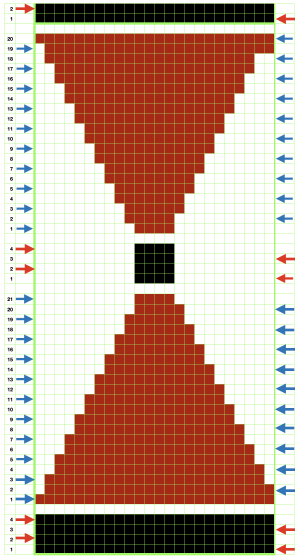 The proof of concept:
 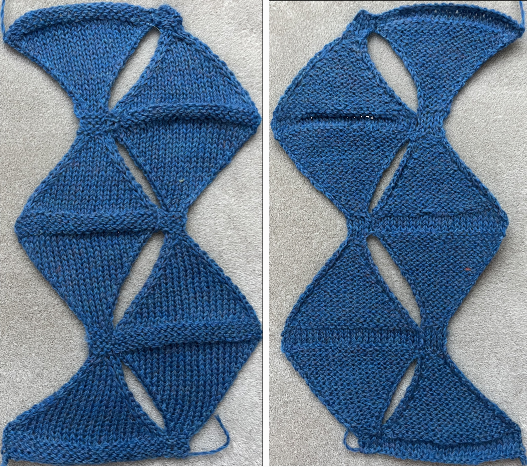 The machine-knit sample aside from a quick hand-knit on #8 needles, attempting garter ridges, offering a lesson in gauge and texture.
 A first draft plotting out arrangements for alternating knit/ purl ridges: the center column can be adjusted to any width, and cables or other manipulations could occur at the narrow pivot points.
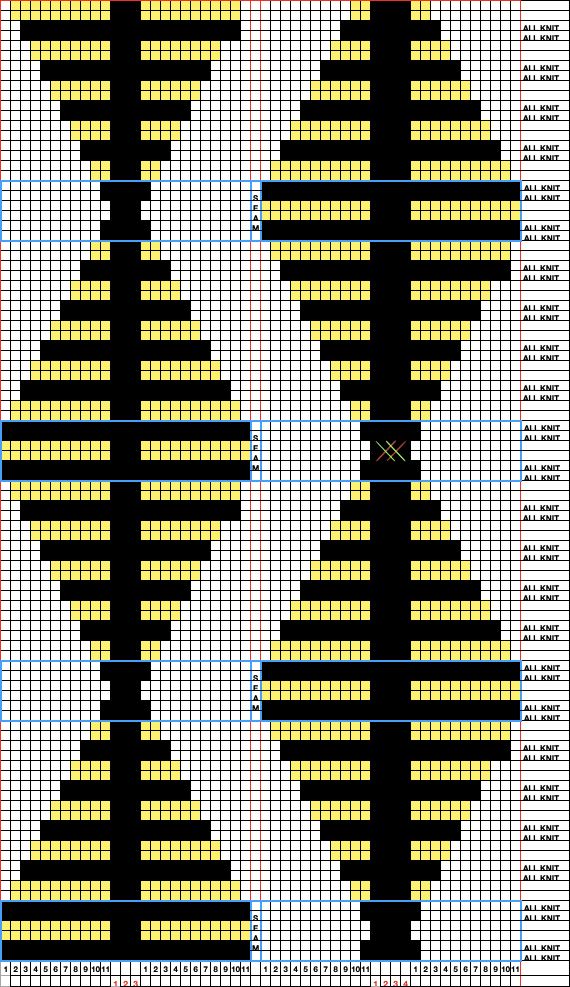 A Youtube video showing building the fabric using the short row technique: https://www.youtube.com/watch?v=H7WrYOV2A6w&t=1297s
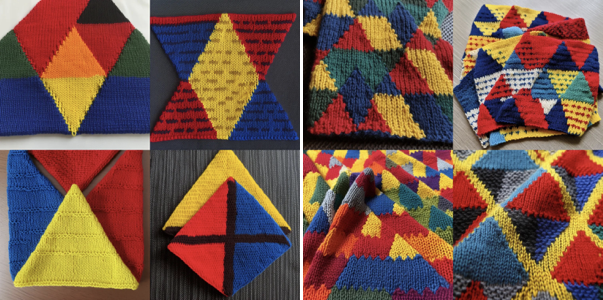


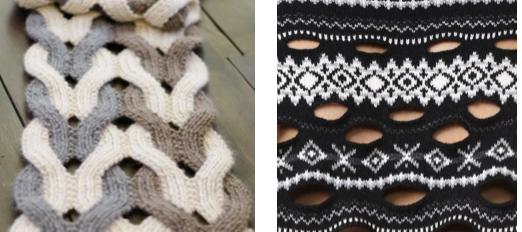
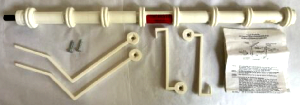
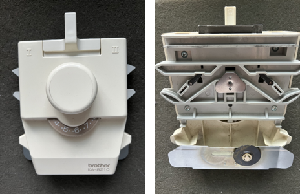

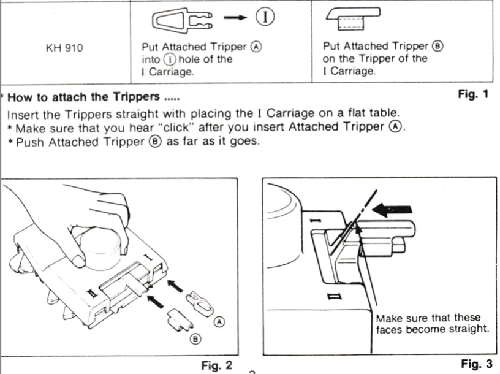
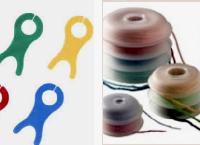
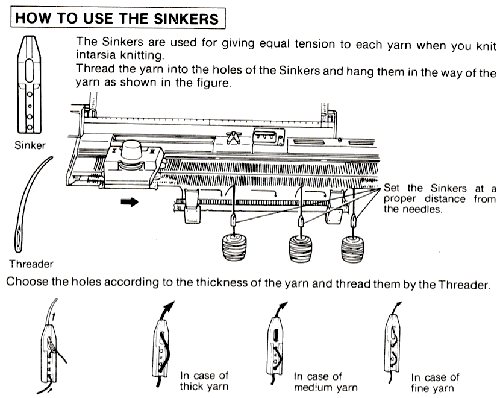
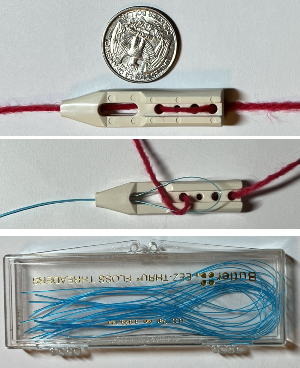
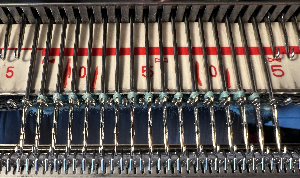
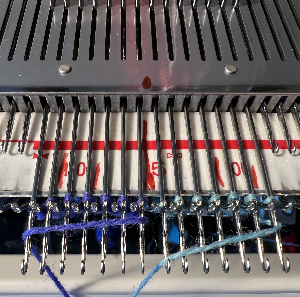

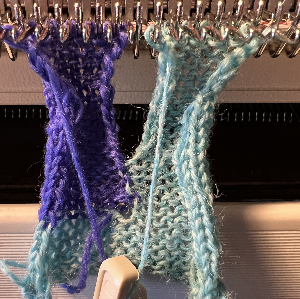
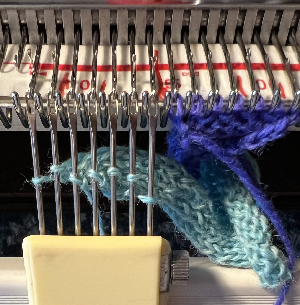
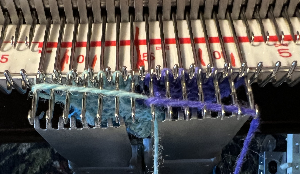
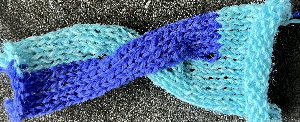
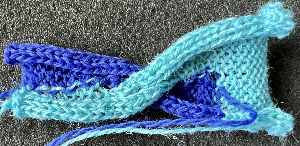

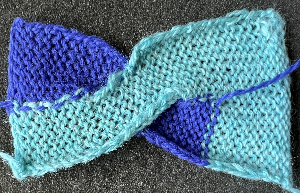
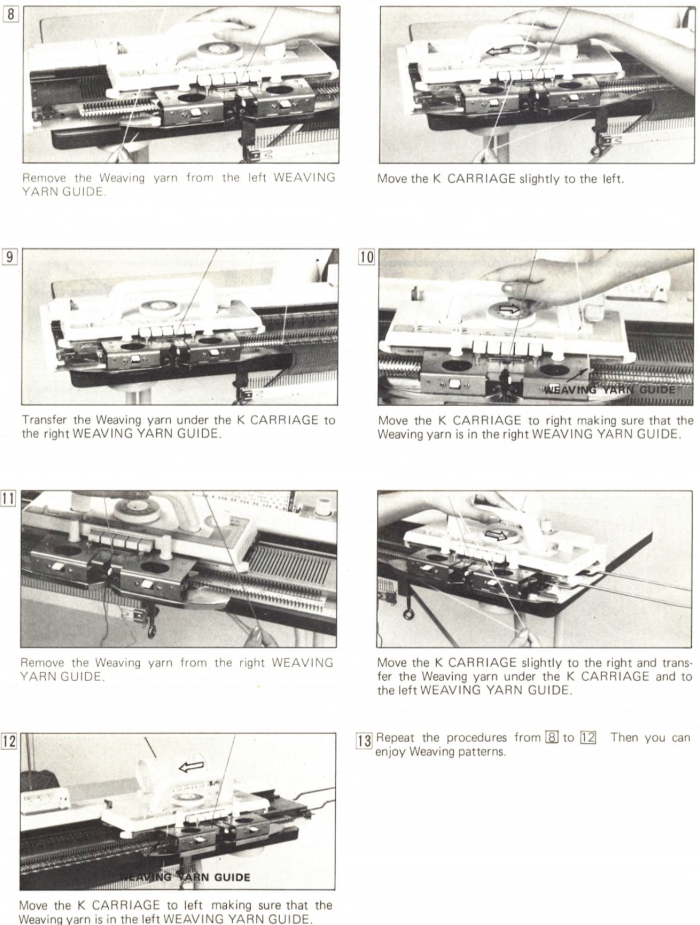
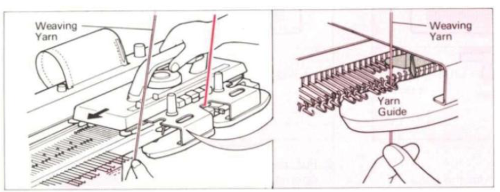 The “yarn guide” is that mysterious notch in each arm of the sinker plate. In the Studio accessory, the
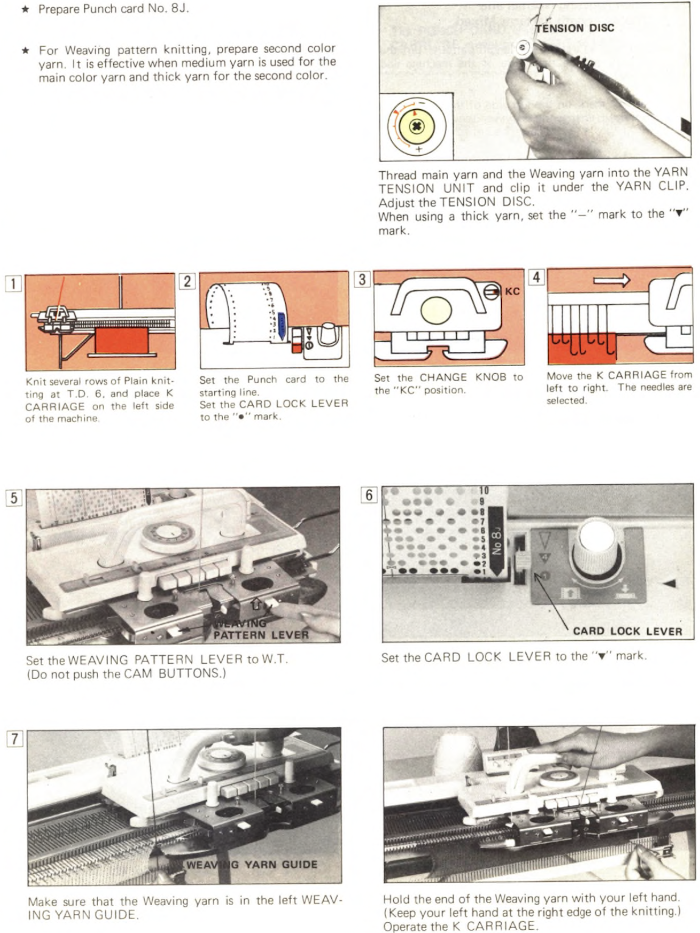
 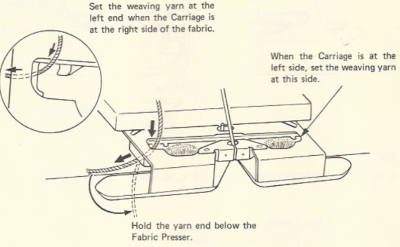 Start the piece with waste yarn and some evenly distributed weight based on fabric width. Make sure the weaving brushes are activated. In Brother standard, their position is changed using the corresponding lever, in the bulky 260 the L and R wheel brushes need to be placed in their corresponding slots.
 In general, the knitting yarn is thinner than the weaving one. The tension needs to be adjusted to accommodate the surface yarn, not the background one. The tighter the tension the firmer and narrower the weave.
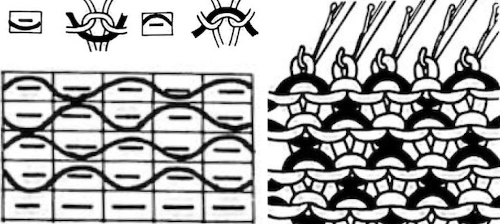
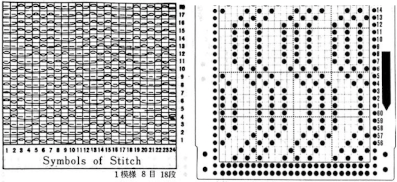
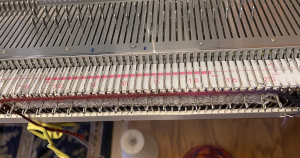 Locking the card, as with any other pattern, will repeat the same needle selection, creating vertical repeats that resemble twill weaving on a loom.
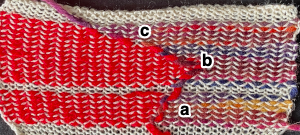
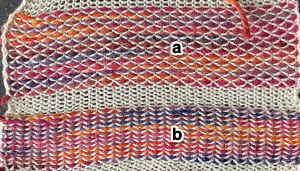 a: because stitches are actually knitting every other row, slipping while the needles on each side of them knit, they will alternately be a bit elongated; b: same needles knit every row, so their appearance is consistent.
 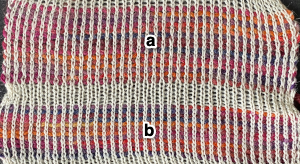 Depending on the difference in yarn thickness, the knit stitches in the ground become forced apart with what can be significant “bleed-through” on the reverse of the weaving to make that a really interesting fabric feature as well.
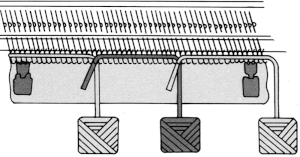 the “wraps” needed in each direction

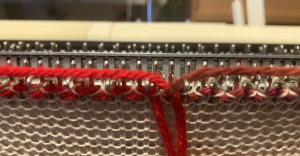
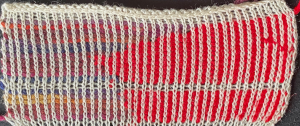 To create isolated shapes: lay the yarn in any chosen area
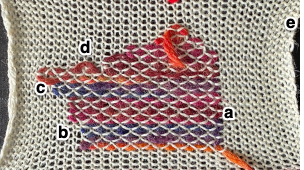
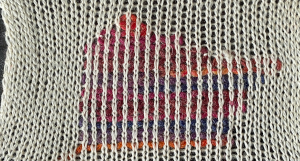 The ground yarn and color may be changed for added striping and color interest. Sharp angles are created by crossing over two weaving needles, and more gradual ones by crossing over more needles. Blank areas of ground may be left as well.

 A later experiment combining

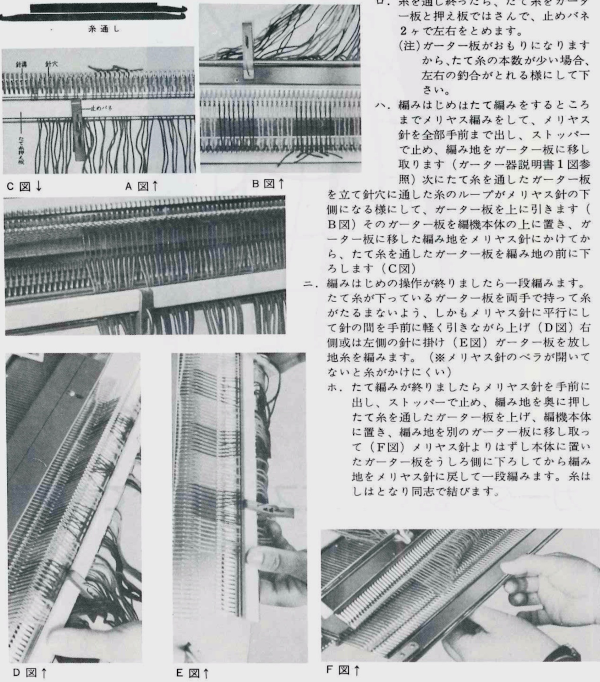
 This is the wrong way to feed the yarn, as the row gets knit woven in, the yarn will be locked in place and cannot be advanced to proceed up the knit
 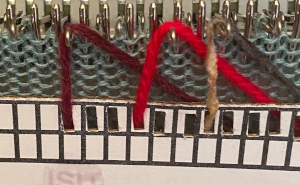 The way to have continuously available yarn
 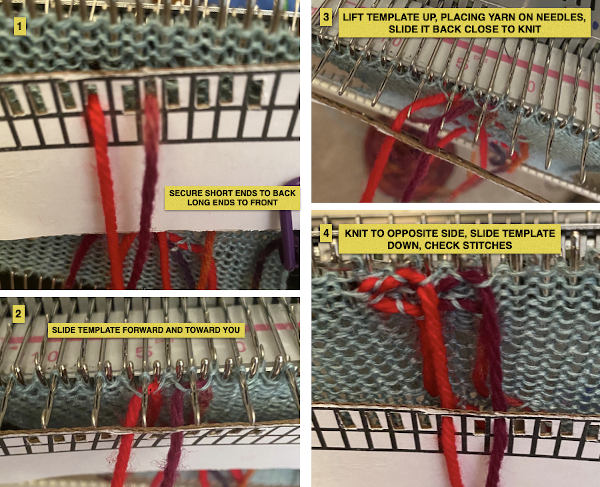 Adding a second set of holes for the yarn stabilize the short yarn ends and maintain even spacing throughout, some tape could be used in addition to secure the ends on wider widths of vertical weave
  A spreadsheet or graph paper may be used to plan the configuration of the weaves including double wraps, this was executed using Numbers, individual bobbins might be a practical consideration
  In my own experience most hand techniques and single bed textures are far easier to execute with the ribber removed. It is easier to view progress, move up weights, and correct mistakes. That said, my machines are all set up with the ribber brackets, not flat, I feel it helps slide the knit down toward the gate pegs, and in my opinion that makes textures and even lace easier to produce. I have ribber covers, they can be improvised if needed with paper or cloth, never use them since I see no reason for moving the knit on the top bed in front of the ribber. If the ribber is removed, it is worth checking its balance once more prior to returning to any rib knit. Ultimately this sort of thing is about personal preference, no steps are ever universally applicable and correct.
 In terms of positioning the carriage, a wire that is akin to that found on Passap strippers is on its underneath. In positioning the carriage on the beds, check visually that it is indeed lying between the gate pegs of both beds prior to attempting to travel with it to the opposite side


 For my test I used EON needles on the ribber, planned alternating selection for each new transfer. This could be done by selecting dashes and blank spots on needle tape ie. dash in the above photo, blank spaces below
 My first attempt at creating shapes includes a band at the bottom where the EON transfers as above were made, but every row. Simply bringing needles into work on the opposite bed creates an eyelet. They can be eliminated by sharing stitch “bumps” on the opposite bed, but for the moment they are a design feature. The texture created appears in the areas involved on both sides of the knit
 It is possible to transfer single needles at sides of shapes ie
  or whole rows, but the change lever needs to be set to position accordingly.
 The enclosed punchcards:

 Transfers of stitch groups, whether by hand or using the accessories are made on rows where no needle preselection occurs on the main bed
  This series is a proof of concept for my approach to developing electronic cues
 The original repeats were modified to include 2 blank rows between segments that allow for transfers between beds not hampered by needle preselection on the top bed. The motifs are color reversed, but not the blank rows between them.
 The knit carriage is set to select needles KC I or II, end needle selection does not matter. All needles on the top bed knit every stitch, every row, whether or not those design rows contain black pixels. No cam buttons are pushed in. Blank areas between black ones indicate the number of needles that actually need to pick up loops on the ribber to create shapes, filling in spaces between selected needles until an all-blank row is reached for making transfers. The chart on the far right illustrates a shape where the easiest method becomes one where stitches on the ribber are manually transferred to the top bed in order to reverse the shape and maintain every row preselection. The selected needle corresponding to the black square marked with the top of the red arrows is pushed back, the ribber stitch below is transferred onto it, the needle with the couples stitches is brought to E position, moving across the bed in proper locations prior to knitting the next row.
  In this repeat, the side vertical panels of ribbed stitches are added. The knit stitches on each side of them roll nicely to the purl side, creating what in some fabrics can actually be planned as an edging.
 My takeaway is to test the accessory with some patience, sort out the sweet spot for the ribber needles in relation to main bed ones in terms of handling transfers and yarn thickness, use colors that allow for easy recognition of proper stitch formation, keep good notes, and “go for it”.
 In the first sample, equal thickness yarns were used, the colored yarn was a rayon slub with no stretch and slippery nature.
  The bottom of this test used a wool yarn of equal weight to the light color, which proved hard to knit. The red is a 2/48 cash-wooll


 If any stitches are pushed all the way back or in mixed alignment during transfers,


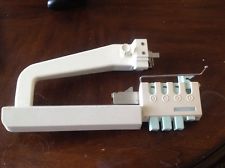
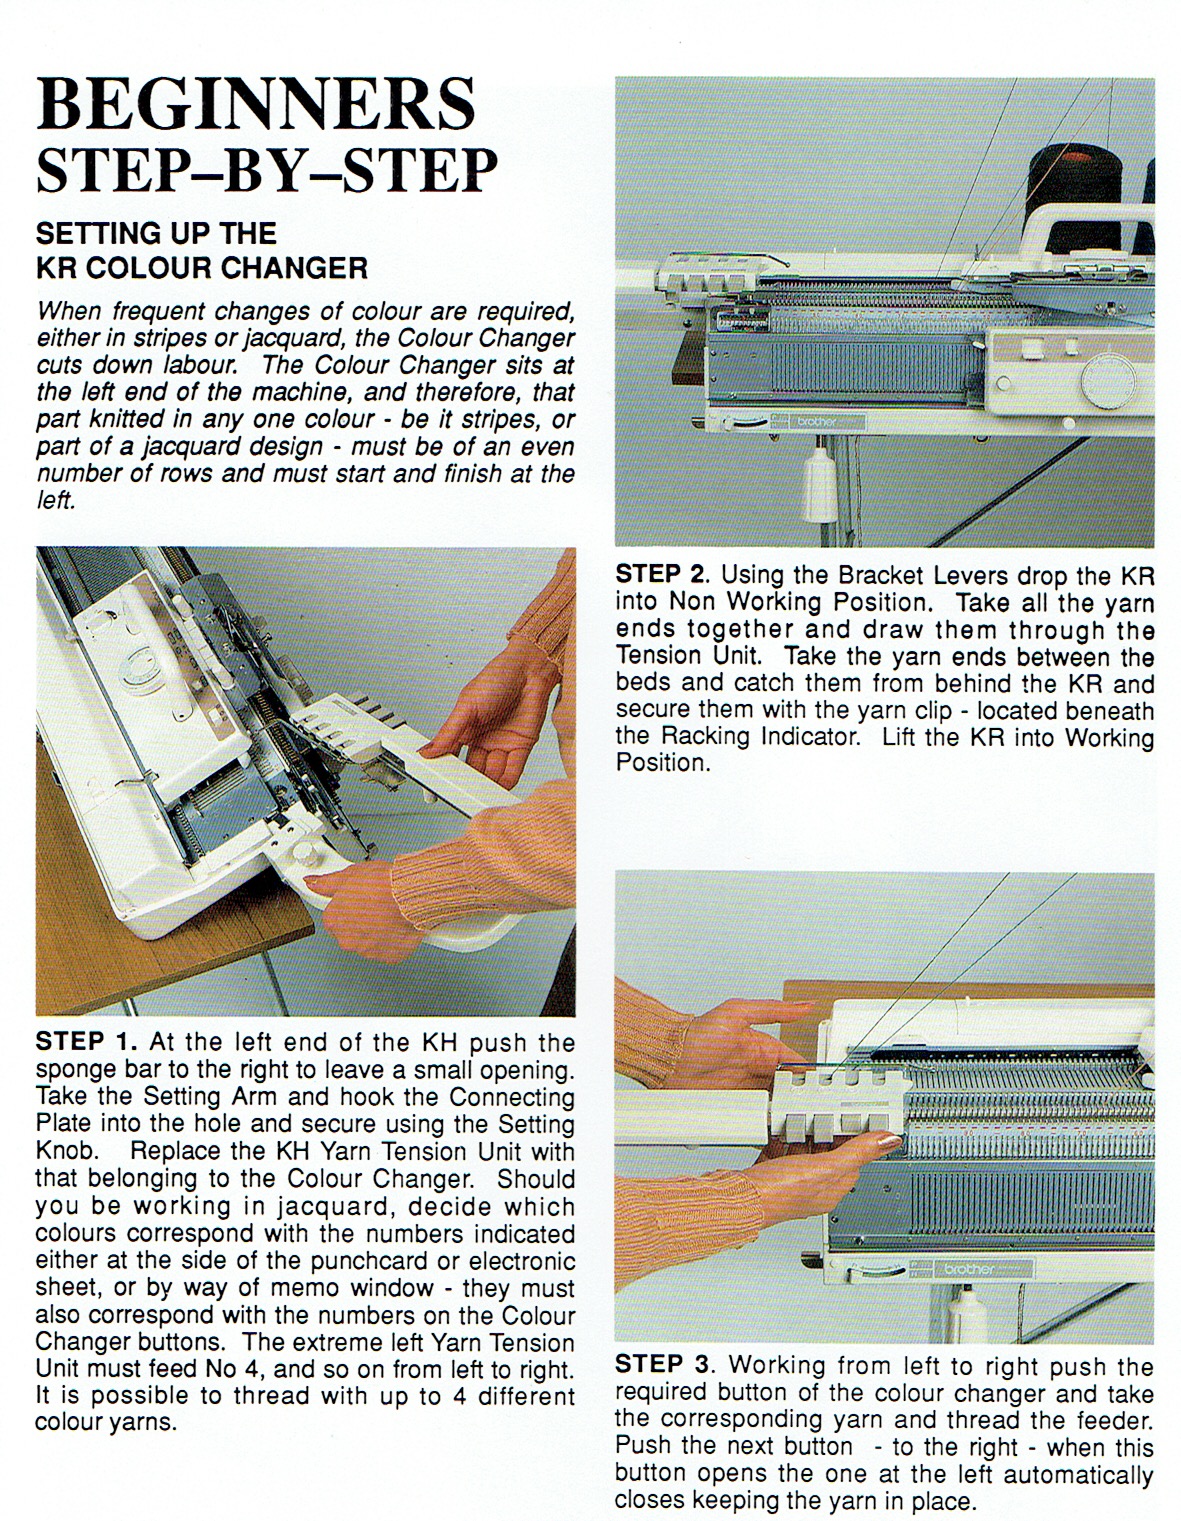
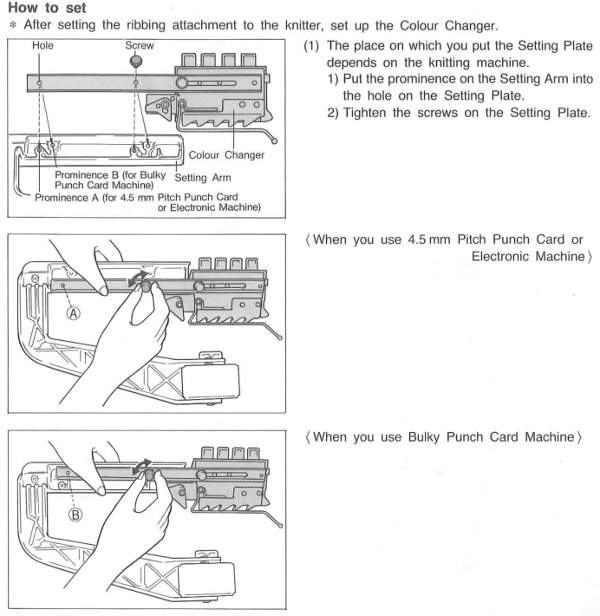
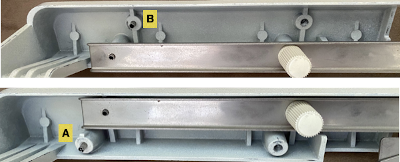
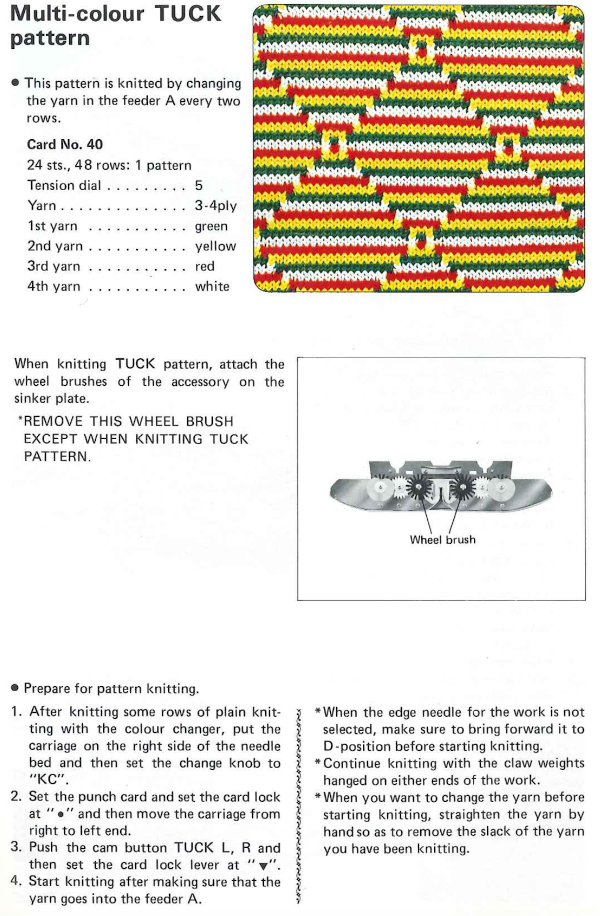
 from the KRC 900 manual
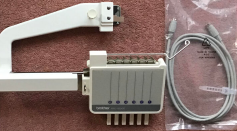


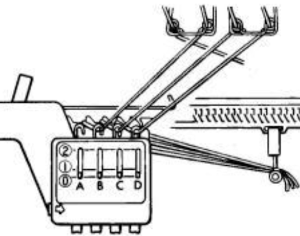
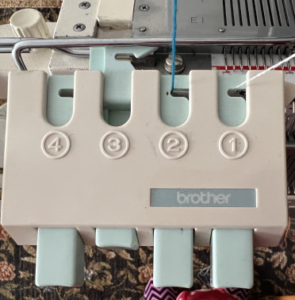
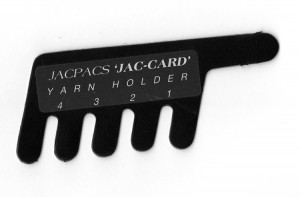 An
An 