My son recently introduced me to Midjourney and generated many images capable of inspiring a range of machine knits. The interpretation and execution may not be as simple as would initially appear, particularly to non-knitters.
Commercial knitting machines are left out of this conversation. The fact that they have multiple beds, ![]() and compound needles
and compound needles ![]() that facilitate whole garment shaping makes complex structures possible that may only be partially reproduced on home models.
that facilitate whole garment shaping makes complex structures possible that may only be partially reproduced on home models.
Japanese machines such as mine use two beds, with the ribber/ second bed added for knit and purl combinations, which may be lowered as seen below when not in use, or removed altogether. 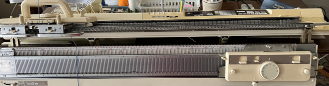 One accessory that would make things easier to reproduce more textured knit and purl variations would be a Brother G carriage,
  which operates on the top bed and slowly and loudly produces programmed patterns on both punchcard and electronic Brother models.
The initial Midjourney inspiration, 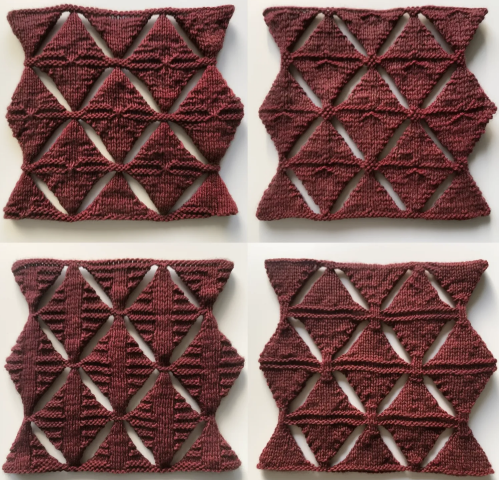 and a “simpler” variation.
 In hand-knitting concurrent shaping of both sides can be considered.
When working on 2 needles, because the work is turned over, knit and purl execution will change when ridges visible on both faces are planned.
Knit stitches are rectangular as opposed to square, often in a 4/3 ratio.
This chart begins to illustrate the actions involved. 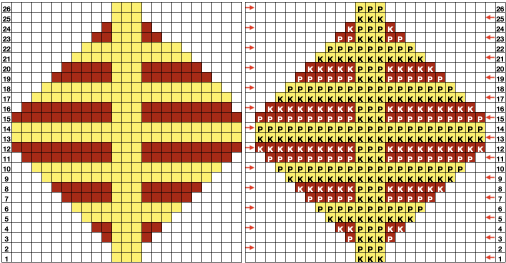 Machine knitters constantly look at the purl side when working on the top bed unless ladders are manually reworked into knit stitches or the work is turned over.
Turning the work over is executable using a garter bar accessory, available for use on multiple gauge machines. 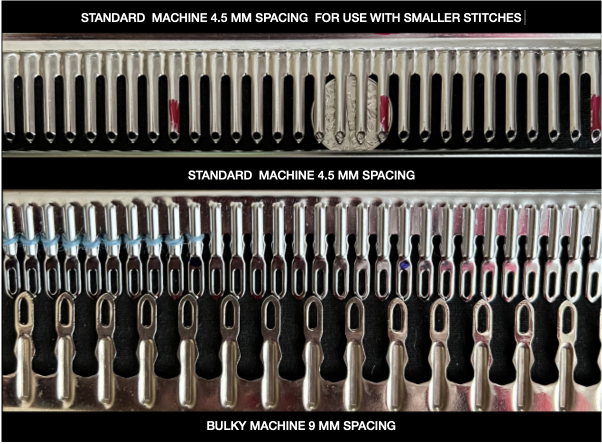 The standard and bulky garter bars offer sections that may be joined together for use on the whole needle bed, while the tool for holding, transferring, or turning over small stitches offers only 30 eyelets, the red lines on it were made with red nail polish, a handy way to mark KM tools or even linkers at fixed intervals to save constant counting.
The work is pushed off onto the garter bar with the curved ridges up and returned to the machine to create the purl ridges after turning the bar over.
At that time, the needle hooks will grab the stitches from back to front and the bar can be removed.  If the yarn supply is to be kept continuous, the knit carriage and yarn need to be brought to the opposite side before resuming knitting.
Spreadsheets offer a way of visualizing steps ahead of any swatching. Not aiming for a direct copy of any of the Midjourney results, this is a start with 4-row sequences
 and an illustration of how strips might be joined to produce slightly different side edges.
 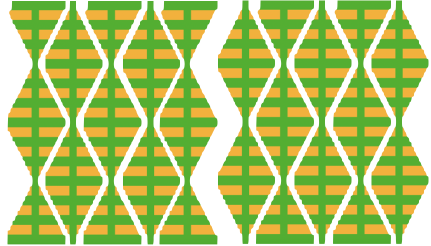 The diamonds are formed by increasing and decreasing on both side edges.
The sample is knit in a 2/8 wool, which even when knitting at tension 9 yielded stitches far too tight to remove onto the standard gauge garter bar, the 30 stitch tool was used.
Stocking stitch tends to roll to the purl side. For a cleaner edge, fully fashioned shaping is used.
From the Brother knitting techniques book, to decrease a stitch: 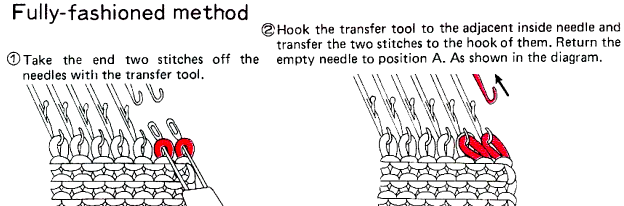 To increase one
 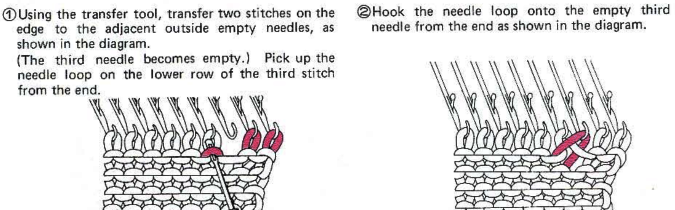 If both sides are shaped at the same time, the length may get affected by slight differences in stitch height formations on the carriage side as opposed to opposite the carriage.
In the test swatch increases and decreases were made consistently opposite the carriage, resulting in shaping on alternate sides every 2 rows.
Charting out the concept: the arrows represent the direction the carriage will be moving.
The blank row occurs where the knit is turned over.
A single row is knit across all stitches to the opposite side after the knit is turned before returning to shaping.
The last 2 rows in the chart would be the first 2 in the following shape.
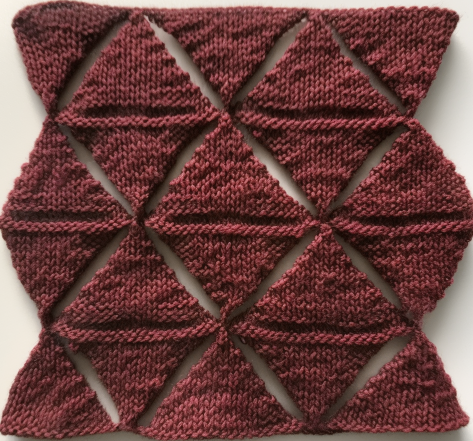
The black cells represent what will become purl rows on the knit ground. 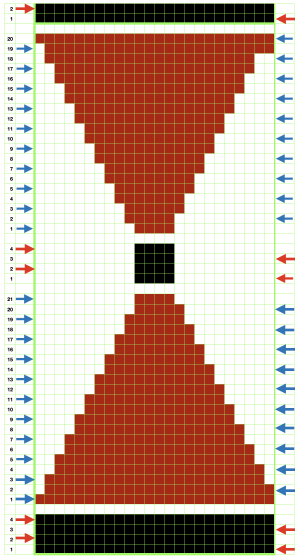 The proof of concept:
 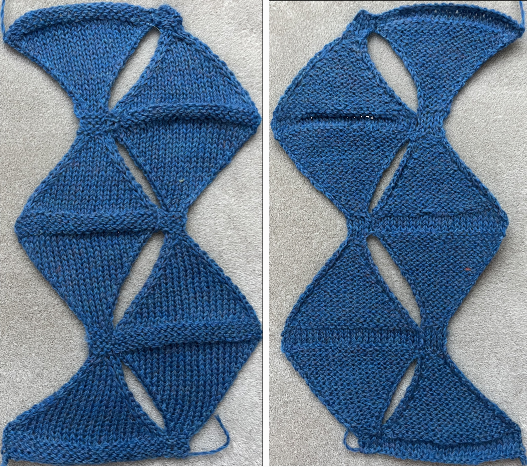 The machine-knit sample aside from a quick hand-knit on #8 needles, attempting garter ridges, offering a lesson in gauge and texture.
In a final piece, the shaping in the hand-knit would be carefully considered.  A first draft plotting out arrangements for alternating knit/ purl ridges: the center column can be adjusted to any width, and cables or other manipulations could occur at the narrow pivot points.
Seaming or joining would occur in areas where rows are outlined in blue. Those areas could be lengthened as well.
The chart can be further marked for beginning with either a half or a full diamond. For hand knitters, the yellow cells would be purled with knit side facing, and knit with purl side facing. 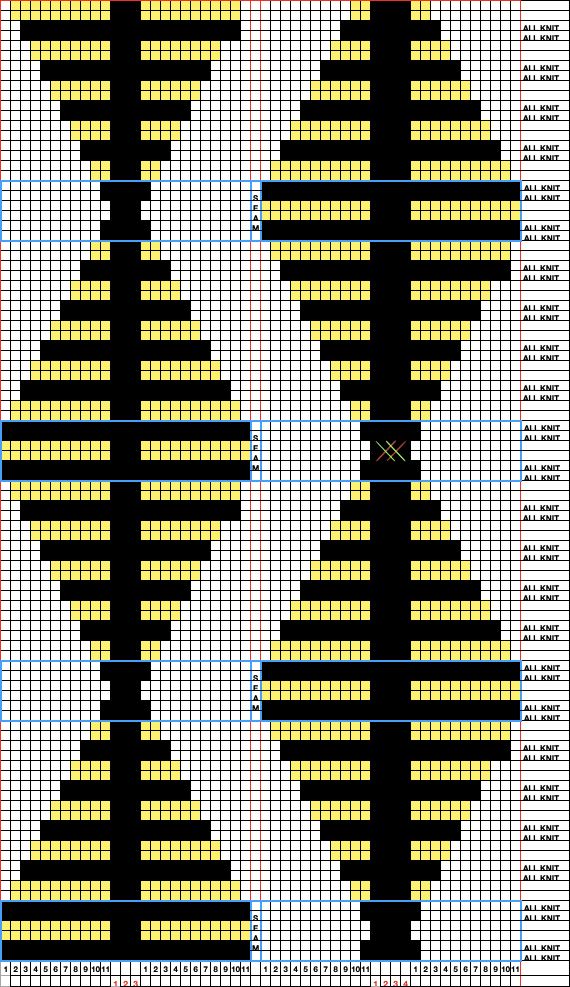 A Youtube video showing building the fabric using the short row technique: https://www.youtube.com/watch?v=H7WrYOV2A6w&t=1297s
For anyone with intarsia or multicolor fondness, some AI color renditions based on triangles as well 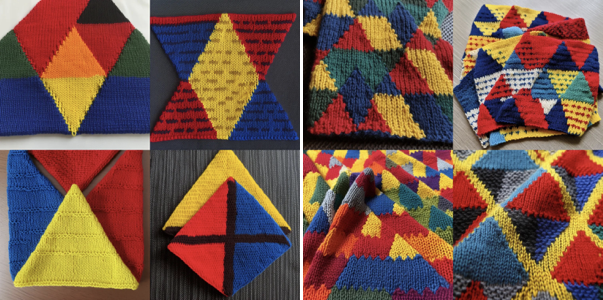
On a very different note, large, nonrepetitive AI-generated portrait images may be superimposed with brushes in any chosen design repeat to render designs such as these: