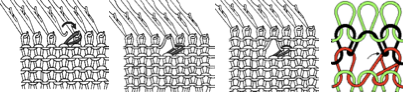
There has been a long thread in the machine knitting FB page lately that arose from a share of these 2 images. 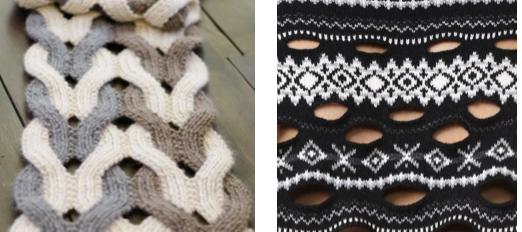 There are three hand-manipulated methods available on most machines. True intarsia knits all parts of a design simultaneously and is best suited for complicated designs. Short-rowing is best suited to diagonal shapes, while the slip method is to vertical shapes. Both knit designs one section at a time and have no floats between shapes on the purl side.
True intarsia is also called bobbin or tapestry knitting.
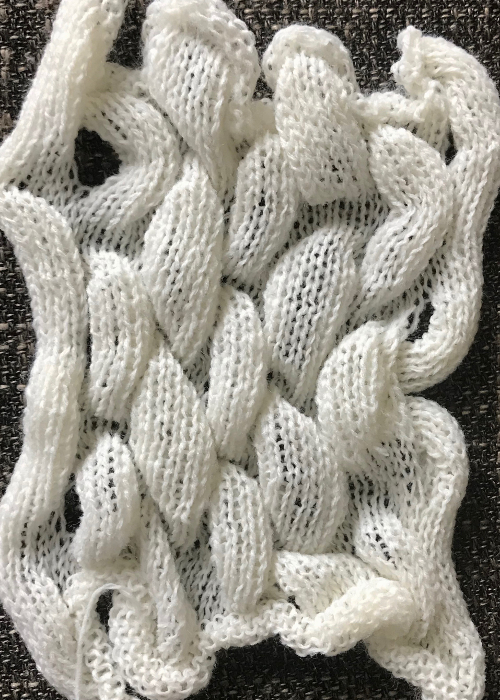
Members contributed their concepts along with some of their swatches illustrating the idea that effects similar to the cables on the left could be executed in intarsia.
One member shared an Instagram link with a body of work by cari + carl using the technique.
I have been knitting for decades. Intarsia on the knitting machine along with cables or most hand-technique-only finished garments is something I have avoided at times, simply because they were too time-consuming when knitting items for sale in shows or even galleries, at others because some evoke my personal flight response.
I used to hand knit as well, preferred lace, intarsia, and most definitely complex cables knit on 2 needles.
Prior to attending a design school as a student, I worked in a shop that happened to sell knitting machines but whose main income came from selling yarn and lessons to hand knitters. As part of my responsibility, I had the job of hand knitting bulky intarsia sweater samples which at the time featured large images, often of birds or other animals, that were sometimes wrapped over the shoulder and onto the back or sleeves.
As I began to work on Brother machines, I acquired all the related accessories. My intarsia carriages other than in demos were stored unused for years. I gave away my yarn-brake years ago, 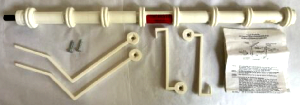 and very recently shipped my Brother 260 bulky intarsia carriage to a Parsons student, so by default any of my experiments at present will be knit on a standard km.
I was stuck on the idea at first of large stitch count cable crossings being made by using holding techniques and initially could not imagine how the same could be done using an intarsia carriage. It took a while for me to sort out in my brain that slits may be created in intarsia by simply not wrapping stitches as the knitting continues and maintaining color changes across the row of knitting, resuming yarn crossings in the areas that require joining.
Some considerations: using the intarsia carriage, the stitches are formed in stocking stitch, so the resulting knit strips will tend to curl to the purl side, far more noticeable in narrow strips, perhaps less so in yarns that will result in stitches that are permanently set by blocking. Using bulky yarns on appropriate gauge machines may also lessen the curling.
Experimenting with familiar yarns helps determine whether the familiar knit carriage tension when using them on the single-bed matches that achieved when the intarsia carriage is in use.
My Brother Machine Intarsia Standard carriage is the KA-8210 model: 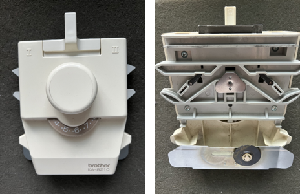 It was intended for use on early Brother punchcard models listed in the manual. Trippers were required to advance the row counter in later models.
 The B tripper doesn’t engage in my carriage, the A tripper does, and triggers the row counter in my 930.
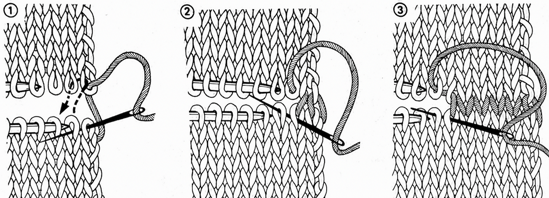
The yarn placement for intarsia knitting is the same as that used in knit weaving.
“Sinkers” are provided with the accessory, and frequently turn up in the “identify this please” questions in forums. I have a tendency developed early on to use clothes pins as small weights when needed, used them in the swatch that follows, and if bobbins filled with yarns are used instead of the yarn balls or cones, their weight will be enough to keep yarn lengths manageable.
Each area of color has its own yarn supply, usually wound on bobbins.
Yarn bobbins are available in a variety of materials and sizes from cardboard to plastic or even wood. The overall shape may vary, but the concept of wrapping yarn around the center of a narrowing shape and slipping an end through a slot to secure it is shared by all types related to the image on the left. It is possible to make your own in similar configurations out of any material that will hold its shape.
The clamshell version became my preferred version of the tool. The small ones come in handy for holding ravel cords or even wire. 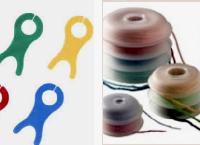 When knitting more than a swatch it is likely far easier to work without a ribber in place. I like to do all my knitting with the main bed anchored and angled with ribber clamps rather than flat.
 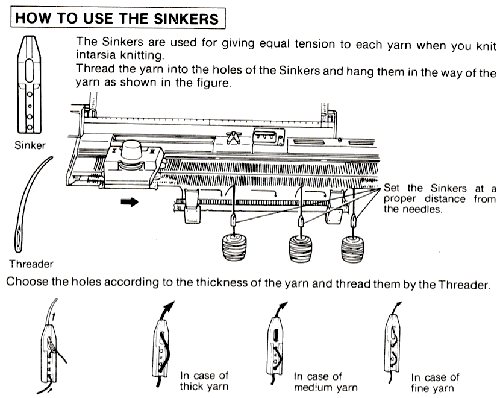 If the threader is missing from the supply of sinkers, floss threaders can help, and are also handy when beading on the machine. The used yarn here is 2/18
 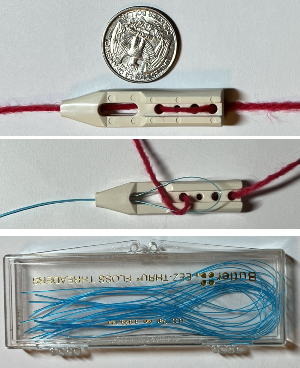 To knit: begin with a familiar yarn. This carriage may actually produce a different stitch size and resulting gauge than the result when using the same tension number on the knit carriage, a factor if the plan is to combine intarsia segments with the main carriage for any stocking stitch across all needles in use.
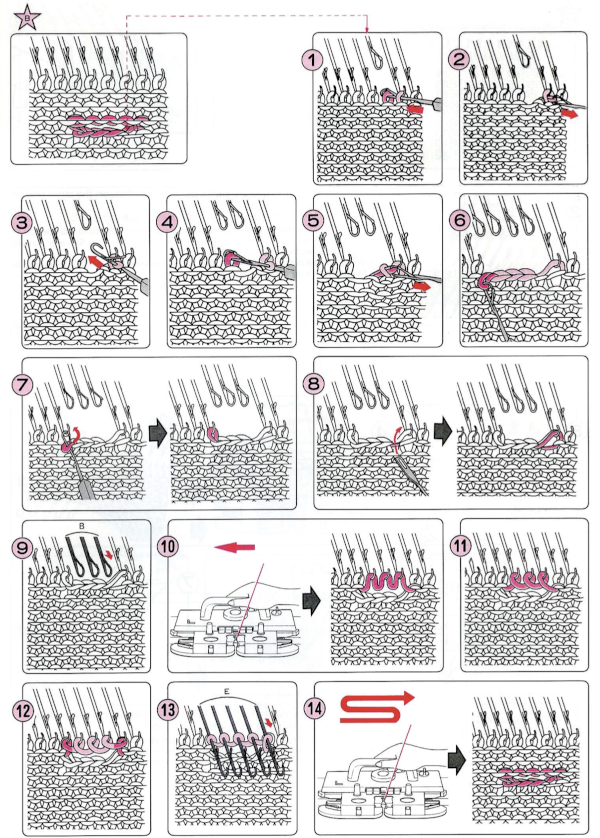
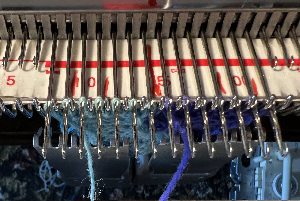
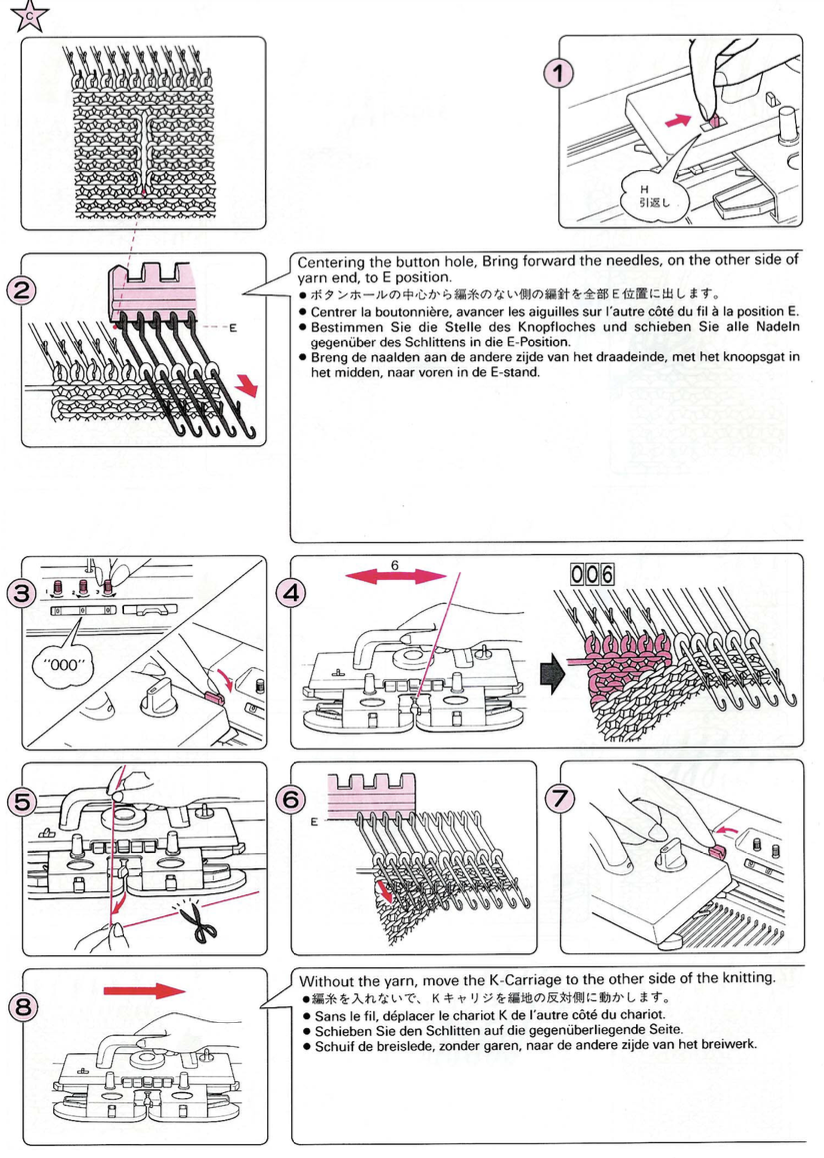
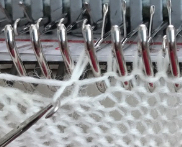
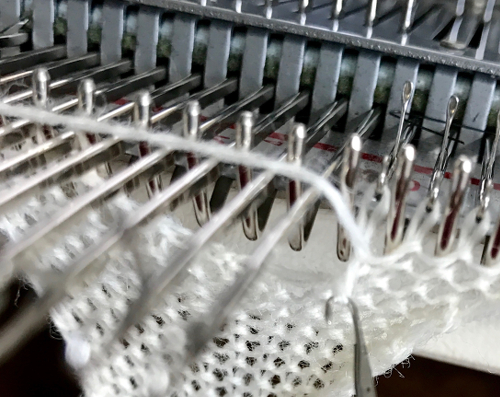
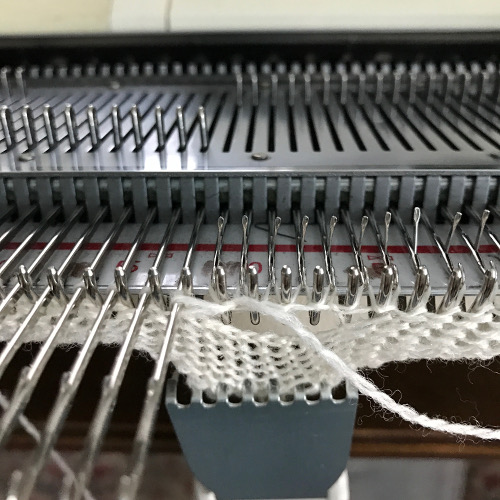
Brother knitters are familiar with the preselection of needles when patterning. When using the intarsia carriage all the needles in work, B, are aligned in the D position. They are seen below just behind the latches.
Knitting may begin on either side. Start on waste yarn and ravel cord if working on a large piece, cast on, and knit one row unless casting on in different colors matters.
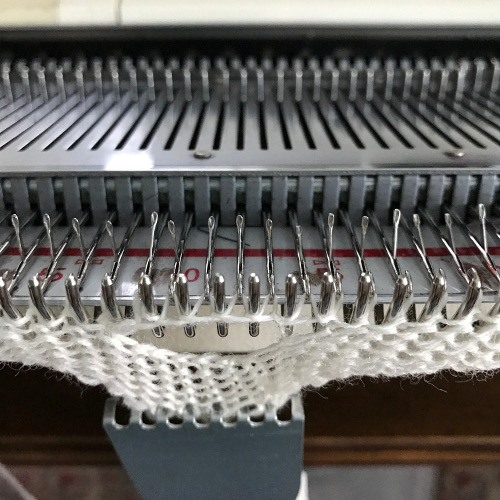
Remove the knit carriage and continue using the intarsia carriage, beginning with it opposite the side on which the knit carriage had been removed, leaving a yarn end. 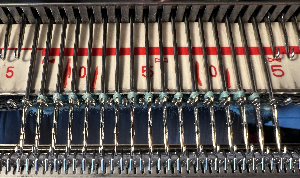 If any latches are closed, the stitches will drop on the next intarsia carriage pass. They will drop as well if the yarn skips being laid over any of the needles in the D position. There will be an eyelet at the very start of the process which is eliminated when the yarn ends are woven in. A reminder for Studio knitters: Brother needle positions are A, B, D, and E, C was present in very early models but was then eliminated permanently, while Studio kept the alphabet in proper order.
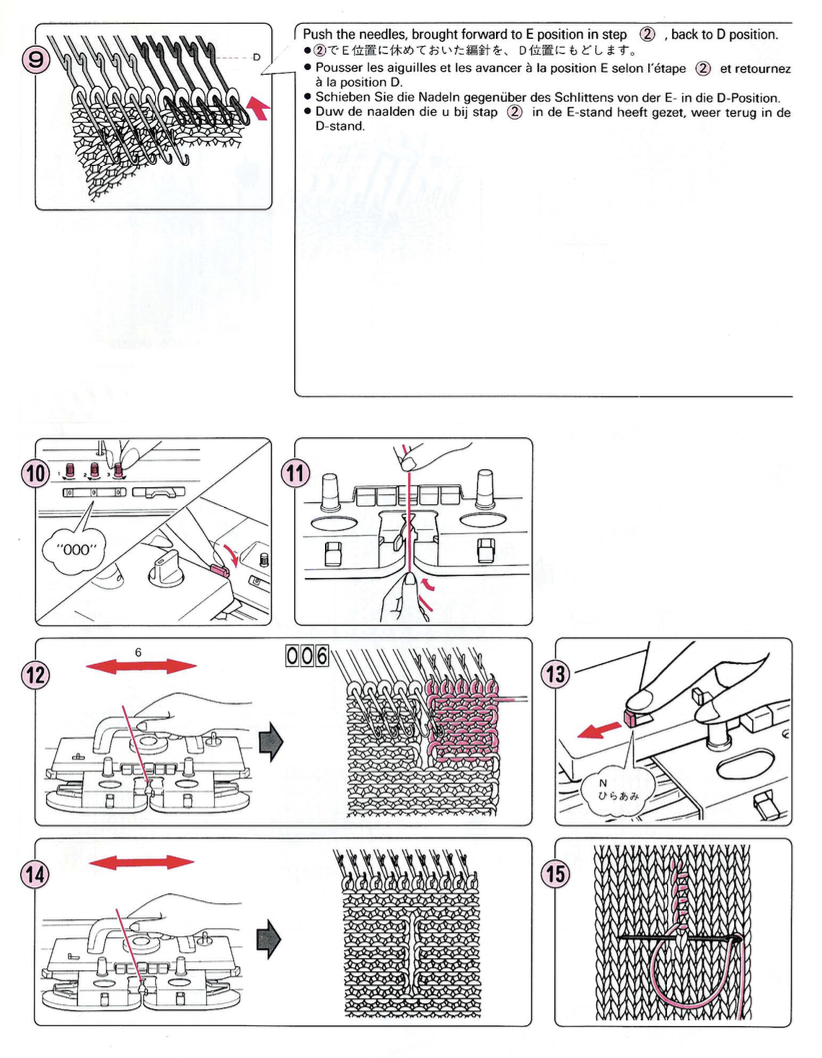
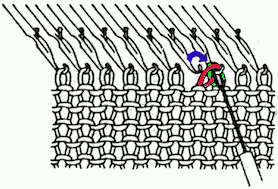
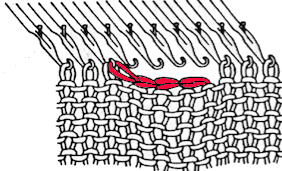
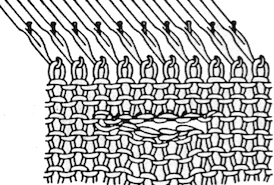
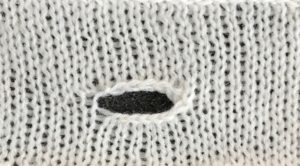
Laying on the yarn 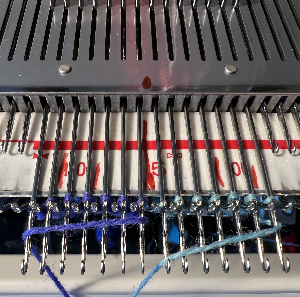 An illustration of the crossings to eliminate holes.
 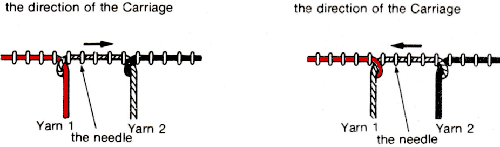 I had initially begun on an uneven number of stitches, then decided it was more practical to be able to use 7 prong tools for my planned cable crossing, so I decreased on each side accordingly.
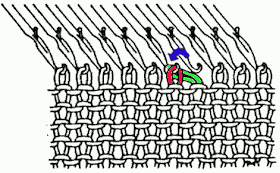
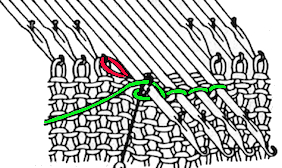
Eliminating the crossings will deliberately cause separations between the colors.
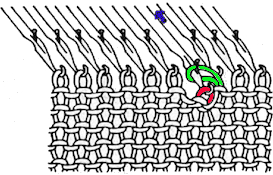
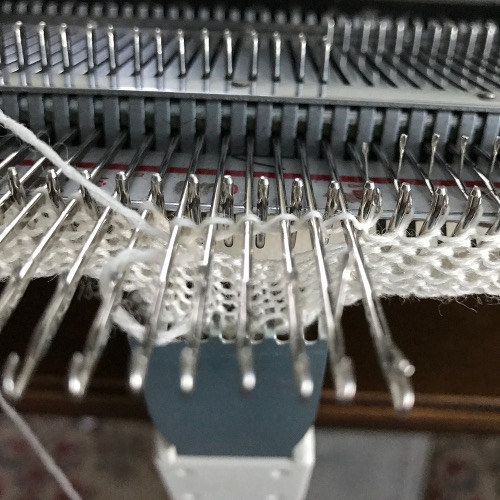
If the intent is to cross the resulting strips, then the side of each where transfers stop matters. 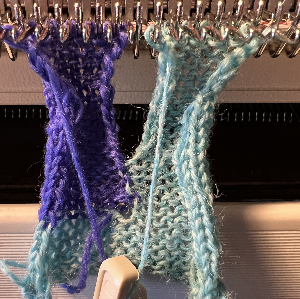 Using the appropriate tools remove the stitches onto them.
 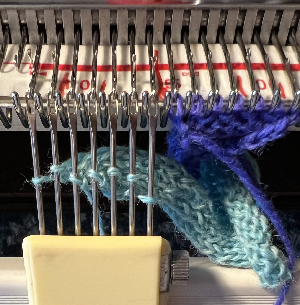 The yarn ends need to be kept free for the next intarsia carriage pass, the needles are aligned in the B position after the cable crossing is created.
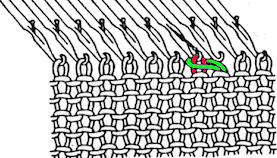
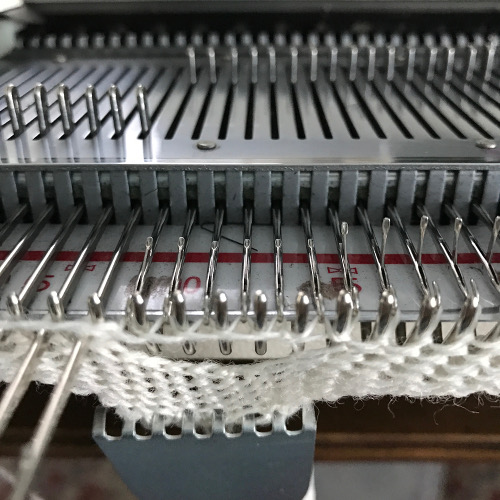
 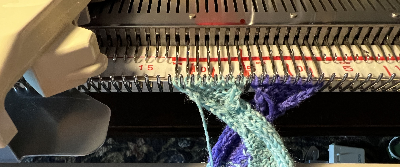 Remove the carriage by sliding it off the bed or using the release knob
 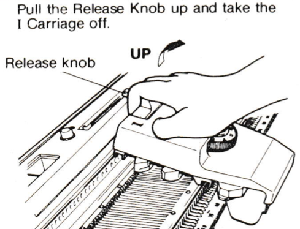 Return it to the opposite side to make a free pass and return to the side of the needle bed where the necessary yarn ends will be available to proceed.
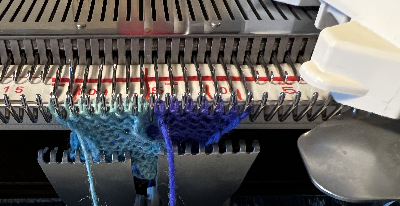
 Resume wrapping to join the strips once more
 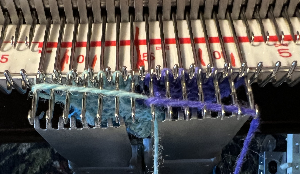 Knit to the desired length, and bind off in one or more colors.
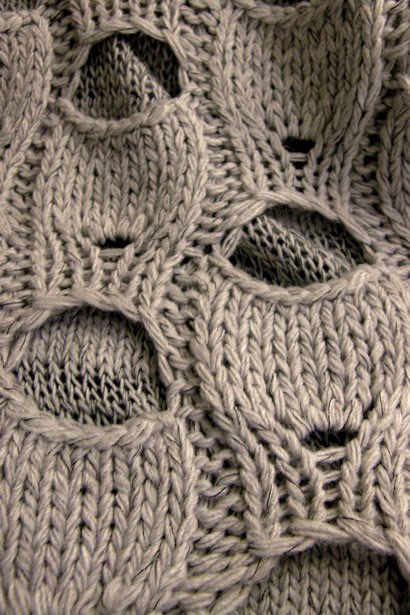
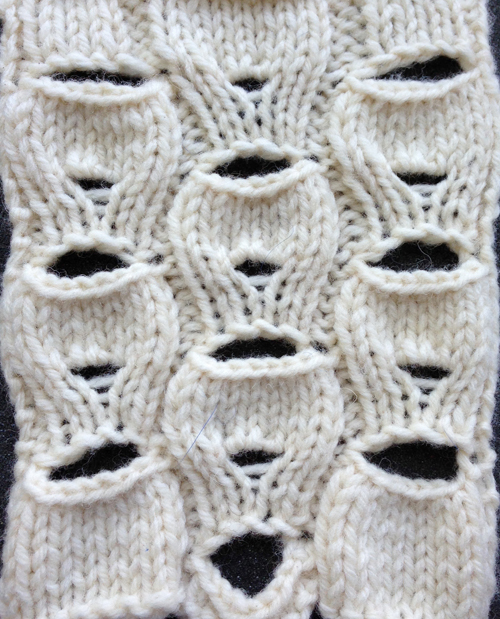
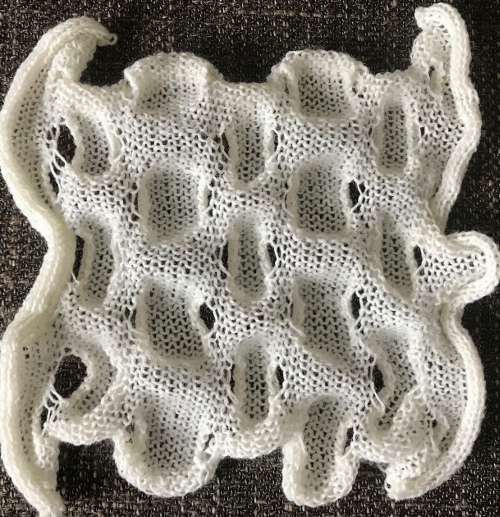
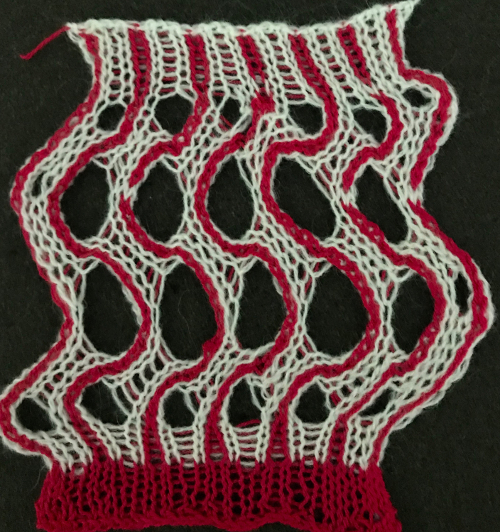
When off the machine the stocking stitch strips will curl. 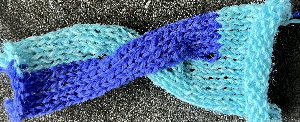
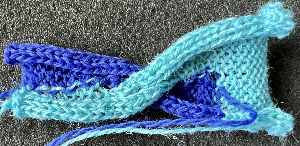 Here the knit is exposed to steam and some light pressing
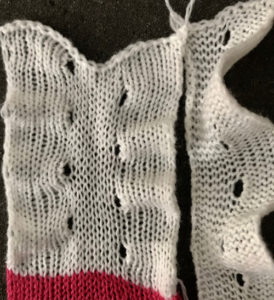
 This gigantic swatch, for me, is the end of my intarsia knitting, though it is best to never say never.
Tips and techniques for the Studio AG 50 Intarsia Carriage
Brother Intarsia without an intarsia carriage
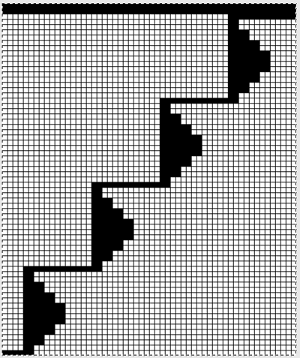
If cable crossings are the goal for this and following slit techniques, planning the crossings in color can help track the process. This is one of my earliest illustrations for doing so, from my Excel days, followed by a series of later blog posts on the topic. 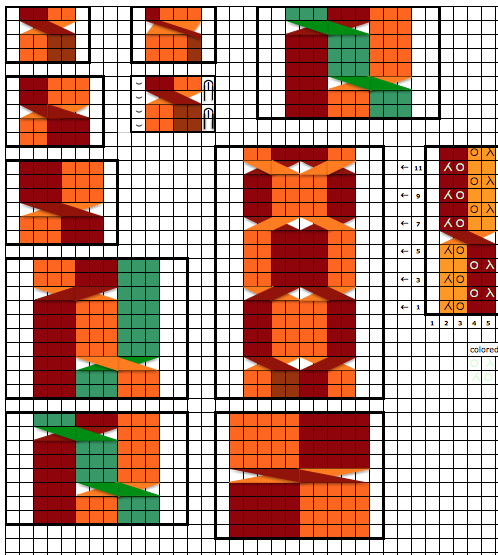


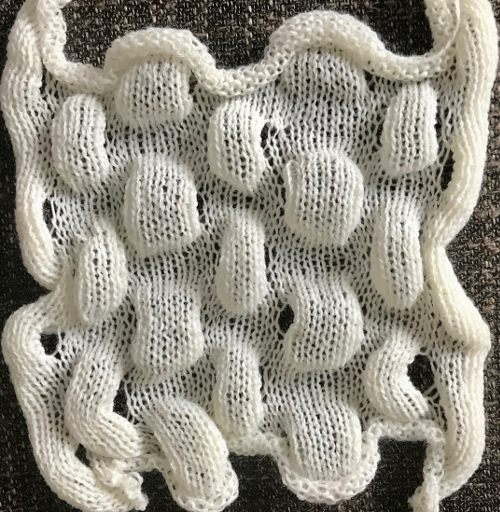
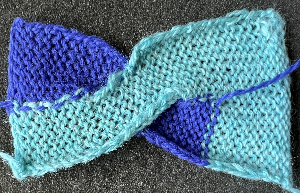
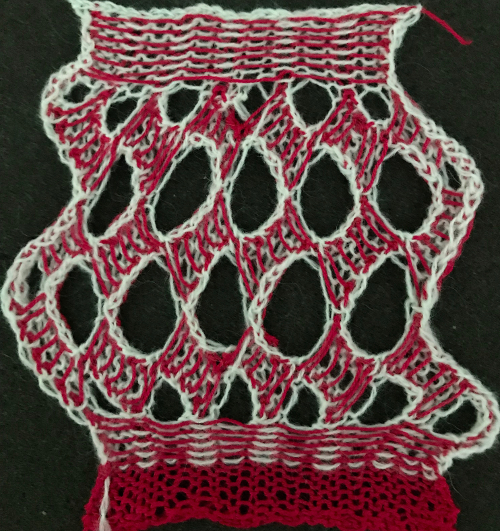
 with a touch of steam and light pressing
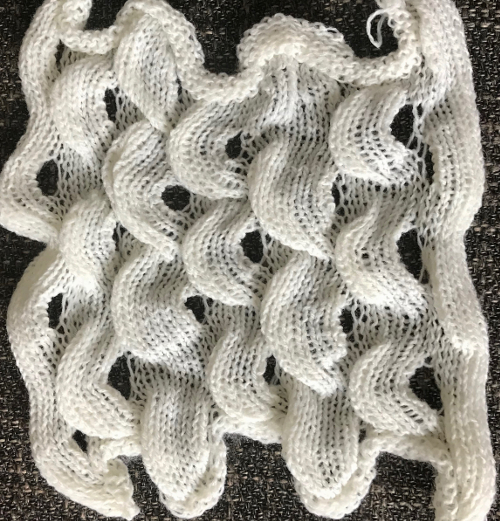
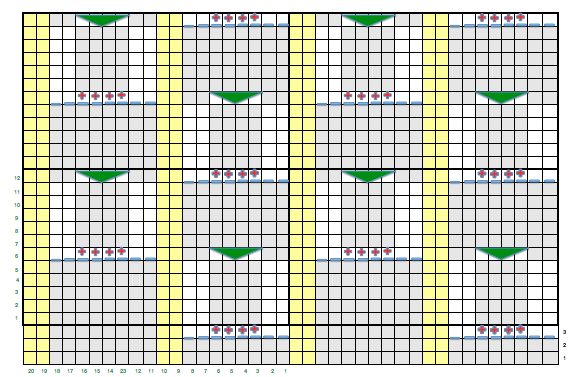
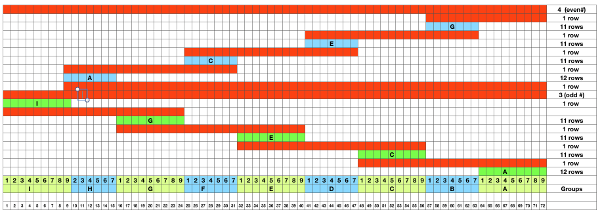
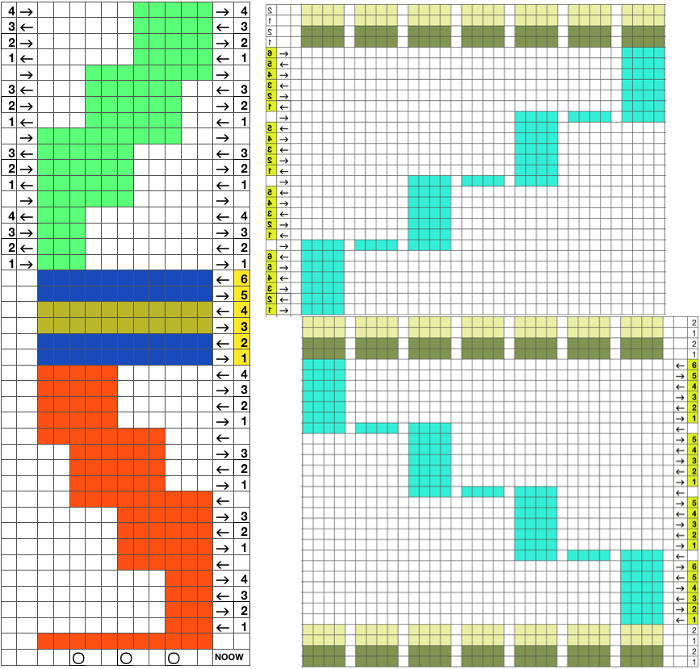
 This is the isolated repeat for converting the pattern to a file suitable for download
  and its mirrored version for knitting from the opposite side
 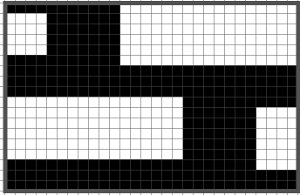 My test swatch was knit on the 930, using img2track. Because not every needle on the bed is in work throughout the knit, end needle selection must be canceled (KC II). The knit carriage after the preselection row is set to slip in both directions. Because only a few rows are knit on the red blocks in the chart, the result is subtle. The white yarn used in many of my tests happens to be a 2/24 acrylic, so on the too thin side, and likely to be well flattened if pressed.
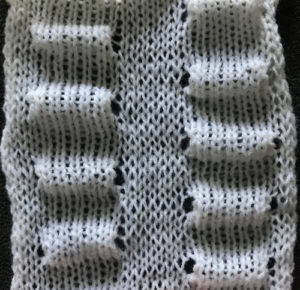 Often, the edge stitches on the carriage side will tend to be a bit tighter than those formed away from it. The same repeat may be used to create very different fabrics. Eliminating the all knit columns on either side of the center produces a piece with “ruffles” on either side of the center as the outer edge of each shape is no longer anchored down. The principle was used in knitting “potato chip” scarves popular in both hand and machine knitting for a while. Having a repeat on one side of an all knit vertical strip creates a ruffled edging.
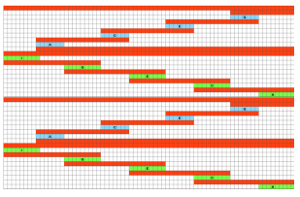
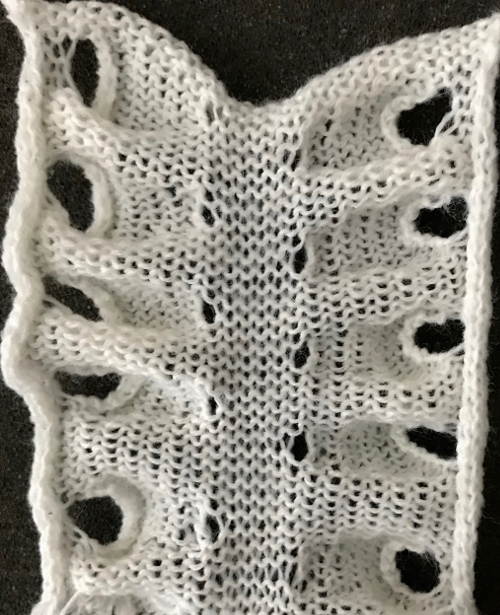
 Note the effect of the added all knit rows on the “wave” of the piece on the right.
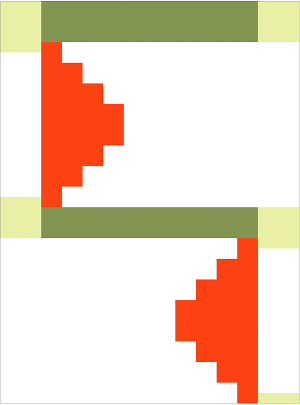
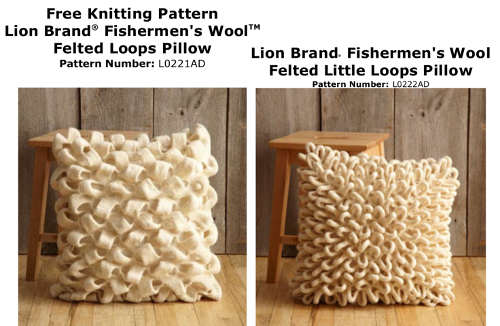 The shapes for the “bumps” may be changed, moving away from rectangular formats. Small repeats are used for the purposes of illustration here, but they, in turn, may be scaled up, rendered asymmetrical, vary in placement, and more. My design steps began with this idea
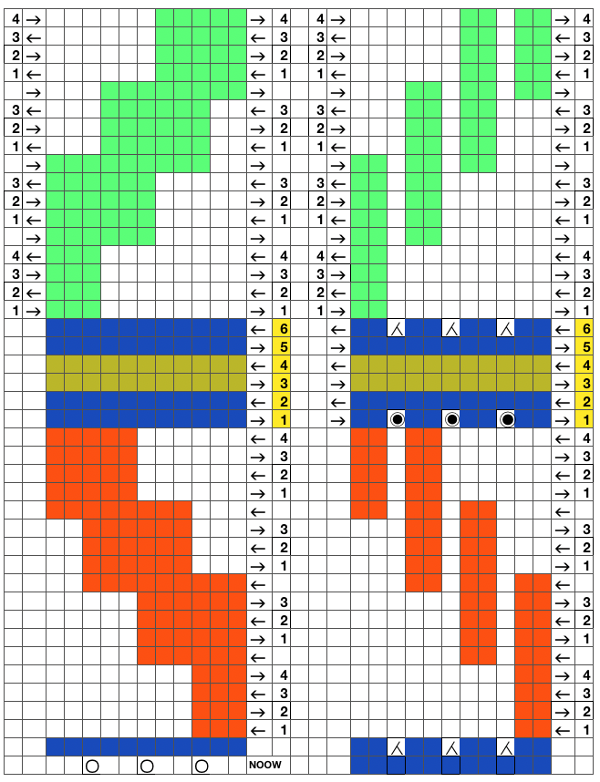
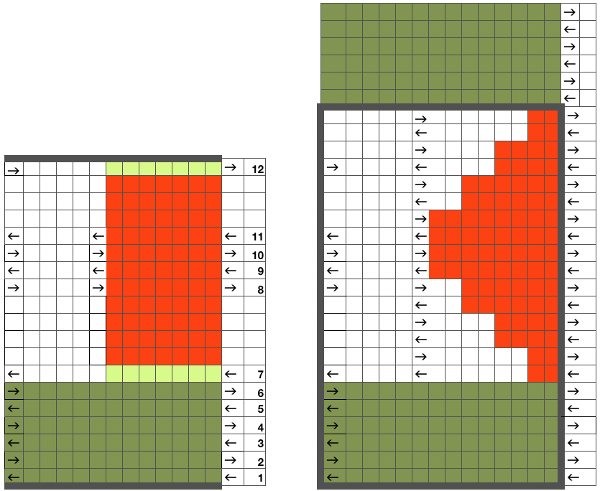 Following the goal to achieve bilateral placement along a central vertical knit strip, with vertical knit strip borders at either side, here shapes point in the same direction
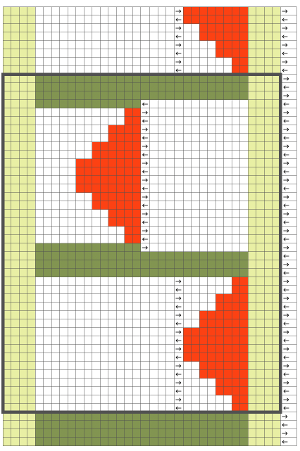
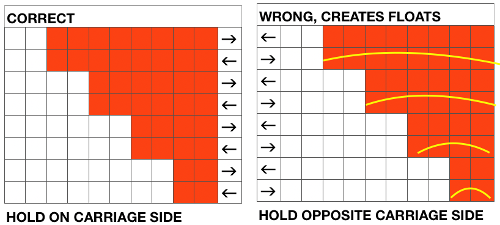
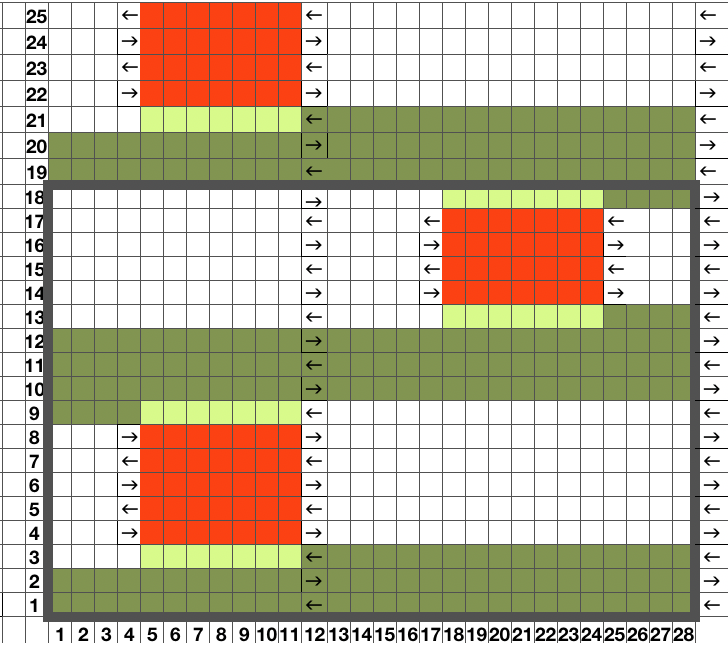
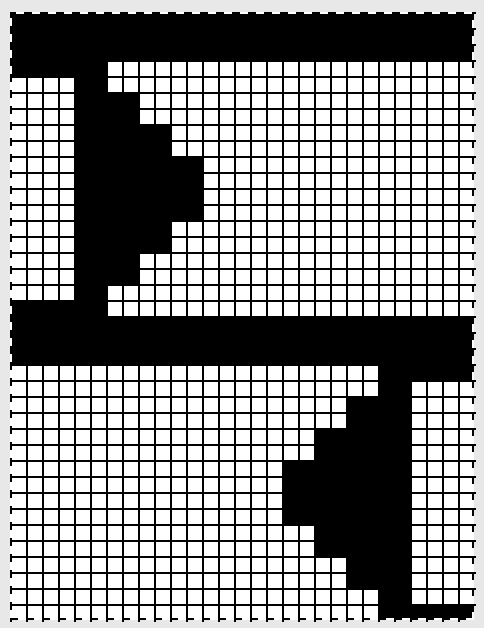 I ran into an interesting problem for the first time. I had entered the row and stitch counts on my chart, used those counts to scale the image used for my repeat down to size for knitting, kept getting floats where there should not have been any, could not understand what the error in the repeat might be. What was happening is that because of the wrong row number used in scaling, there was an extra pixel row in the first test swatches resulting in knitting errors. The final repeat is 29 stitches wide, 38 rows high. This is the resulting swatch
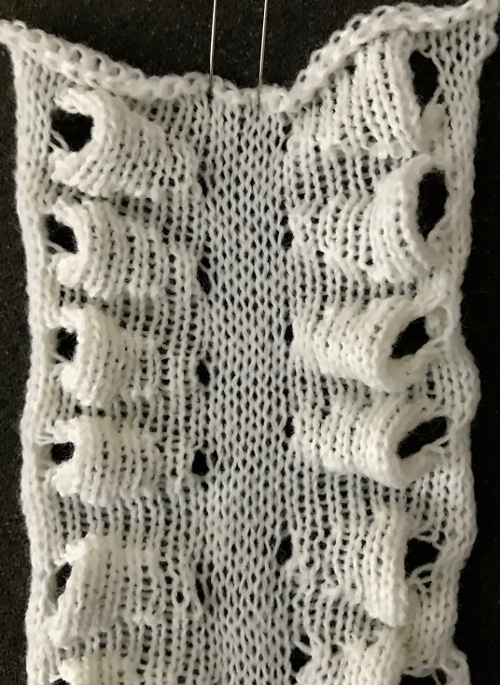
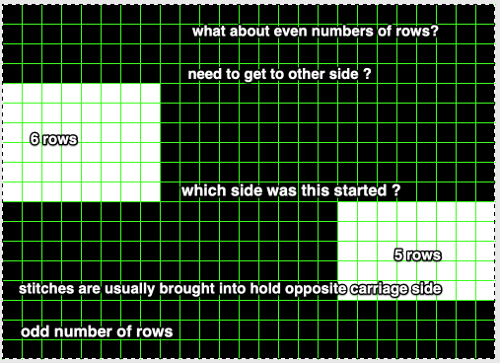
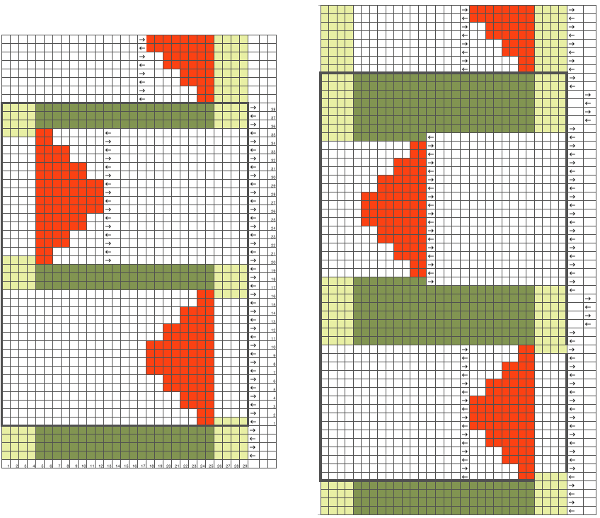
 Once more, the repeat could be reduced down to eliminate side knit strips, or limit shapes to one side only for a one-sided ruffle. What about repeating the same slit horizontally across a row? Repeats become very long, arrows are intended again as guides in the knitting direction.
 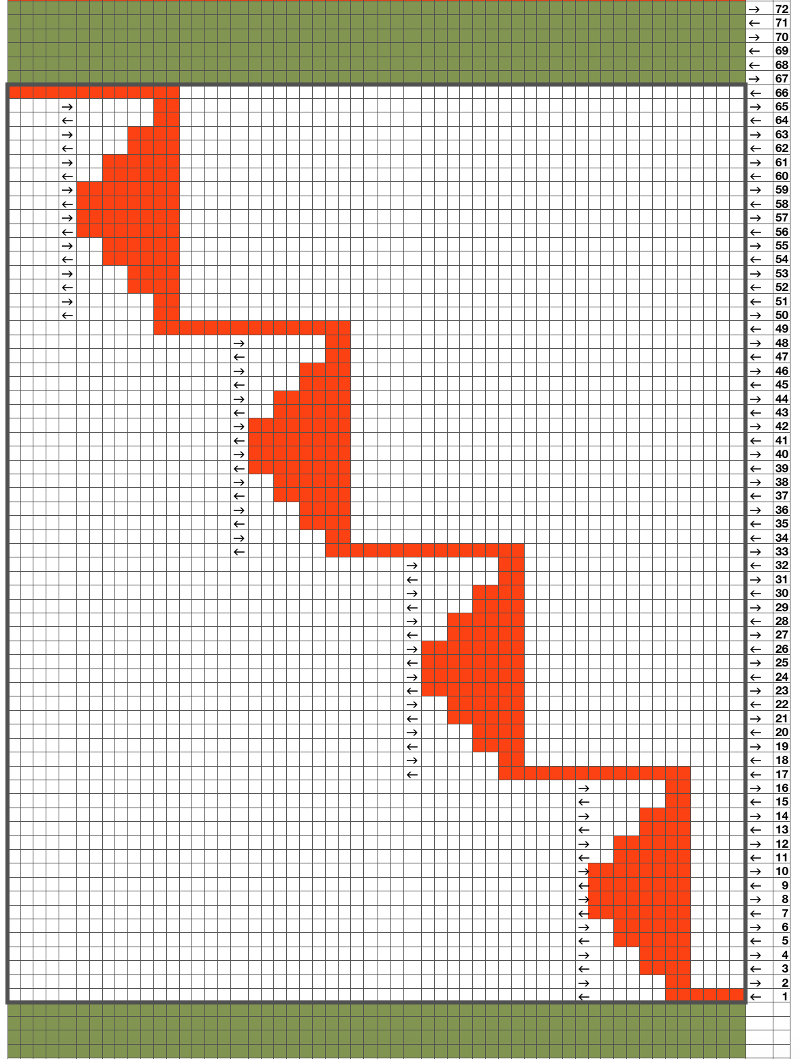 An even number of rows (green) at the end of the outlined repeat will return the carriage to begin knitting it from the right side once more. An odd number of rows added at its top will prepare for knitting the motifs beginning on the left.
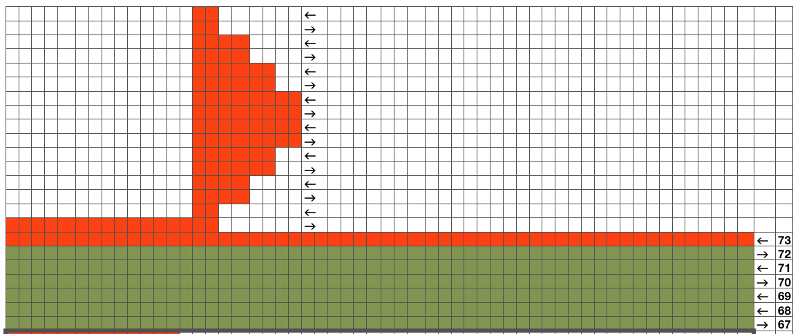
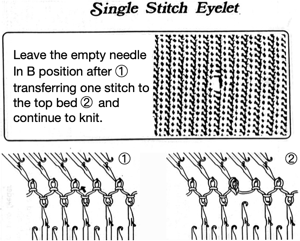
 Pushing unwanted needle groups back to the D position will make them knit rather than being held, which is another way to vary the texture distribution across any single row
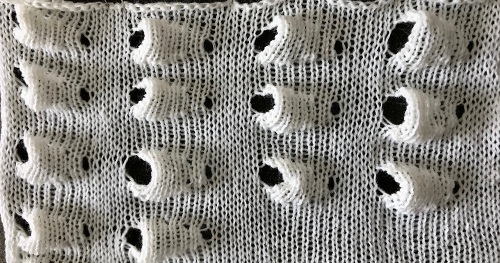


 This version is from an ancient Brother manual, always test techniques on swatches using the yarns intended for the final piece