In the past few years, in many runway collections, knit pieces have featured slits that happen either/both horizontally or vertically, with some effects achieved by turning the fabric sideways.
My first post on horizontal slits was written in 2016.
This post will share published references describing additional various methods for creating them.
A review of grafting aka Kitchener stitch is illustrated here for hand knitting and used in some of the buttonholes/slits that follow. 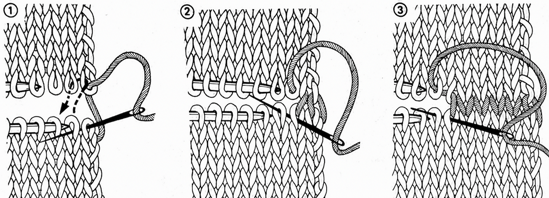 Some single-bed buttonholes were illustrated in the post. One of the many resources
  Horizontal single-bed: using a ravel cord and tapestry needle
 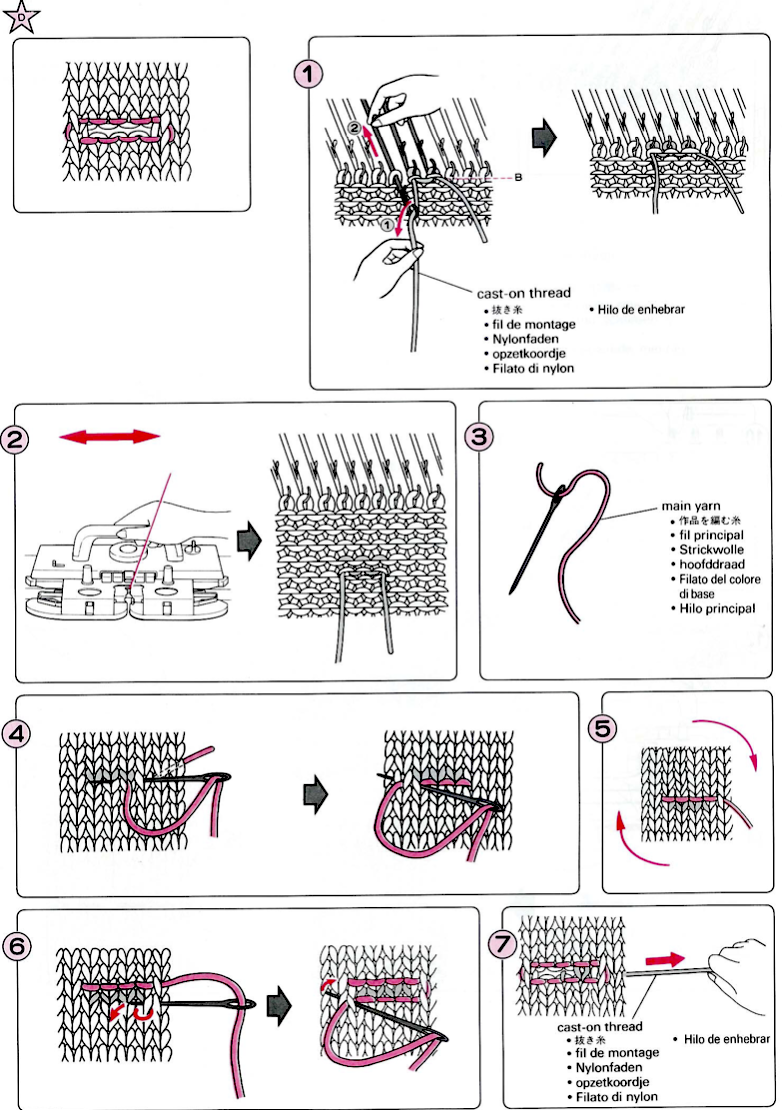 A vertical option
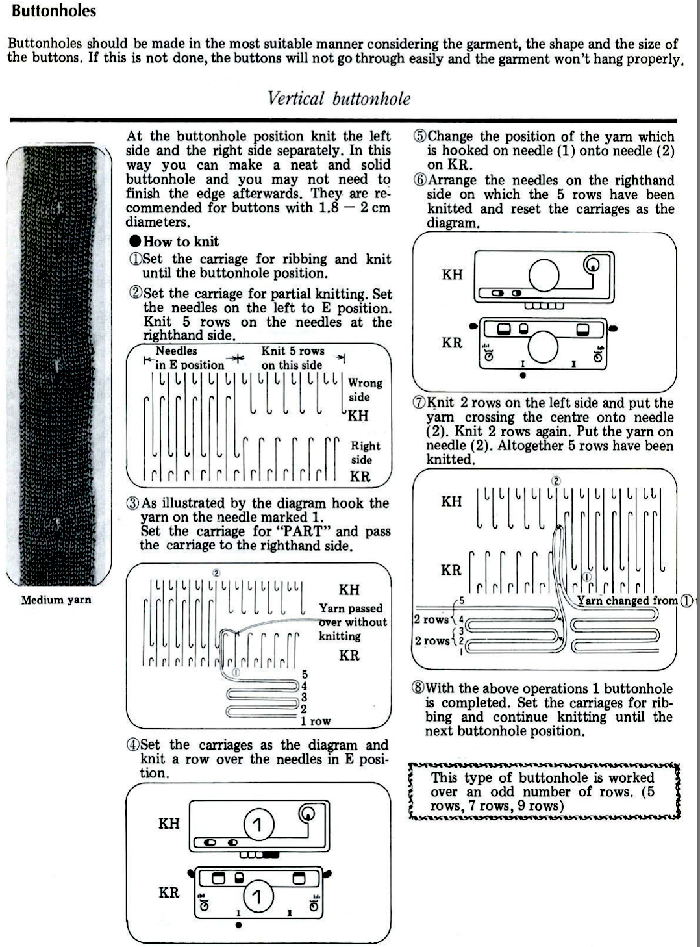
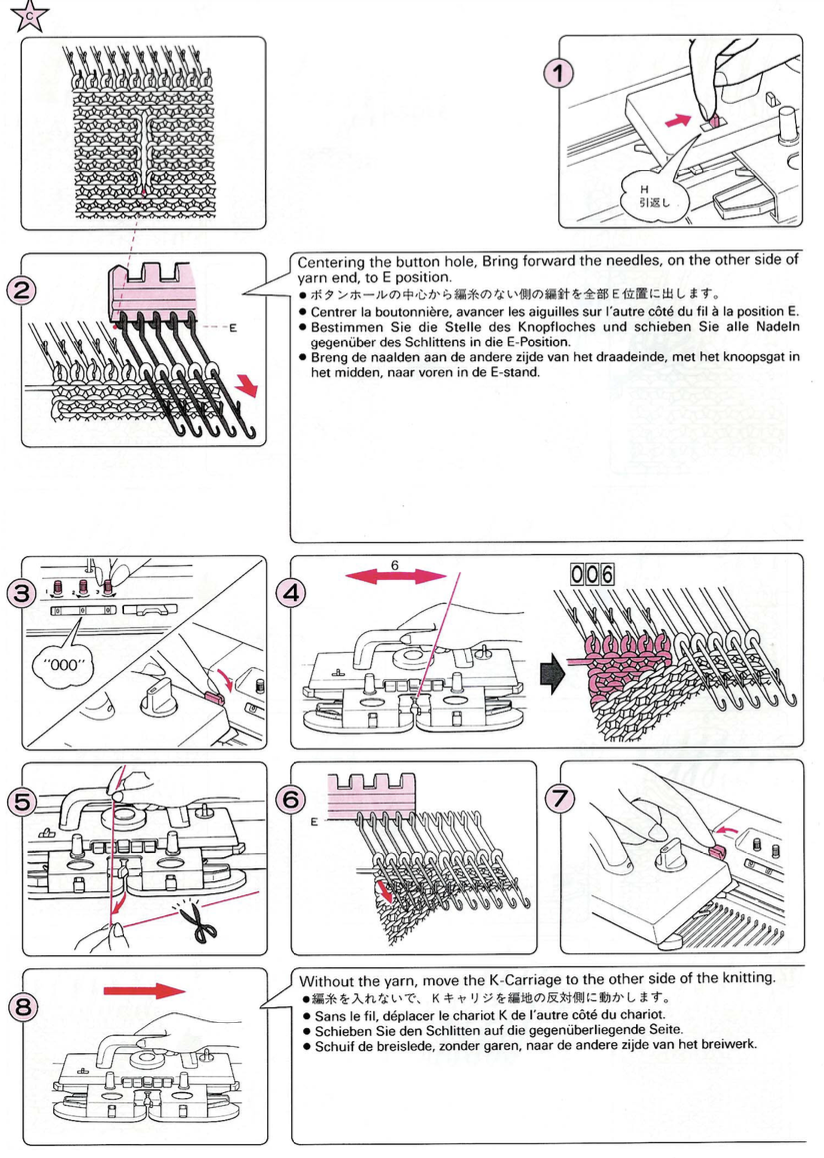
 Single stitch eyelet in knit one purl one rib, suitable only for small buttons
 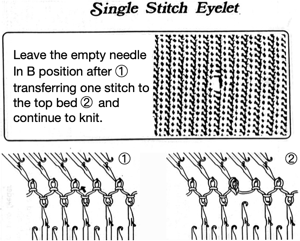 Another version: leave the needle in B position out of work for a few rows, slide latch tool under a couple of the resulting floats, pick up the next in the hook, and latch-up as shown.
 ![]() Using waste yarn/ ravel cord followed by sewn bind-off, possible on unfolded fabric bands
Using waste yarn/ ravel cord followed by sewn bind-off, possible on unfolded fabric bands 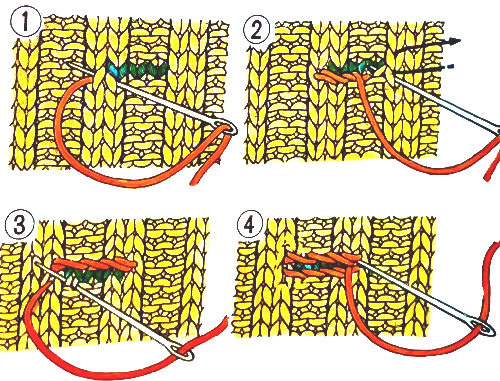 An interesting translation in the publication of horizontal 😉
 The published reference to waste yarn here implies the use of a contrasting color yarn in a fiber content that allows for it to easily be slipped out when the process indicates. Any smooth yarn that will not break easily and can be knit at the same tension as the knit piece for a comparable gauge may be used, ie crochet cotton or nylon. Although yarns that shed may function for this purpose, they may leave contrasting bits of fiber and color behind in the finished knit that will not be removable.
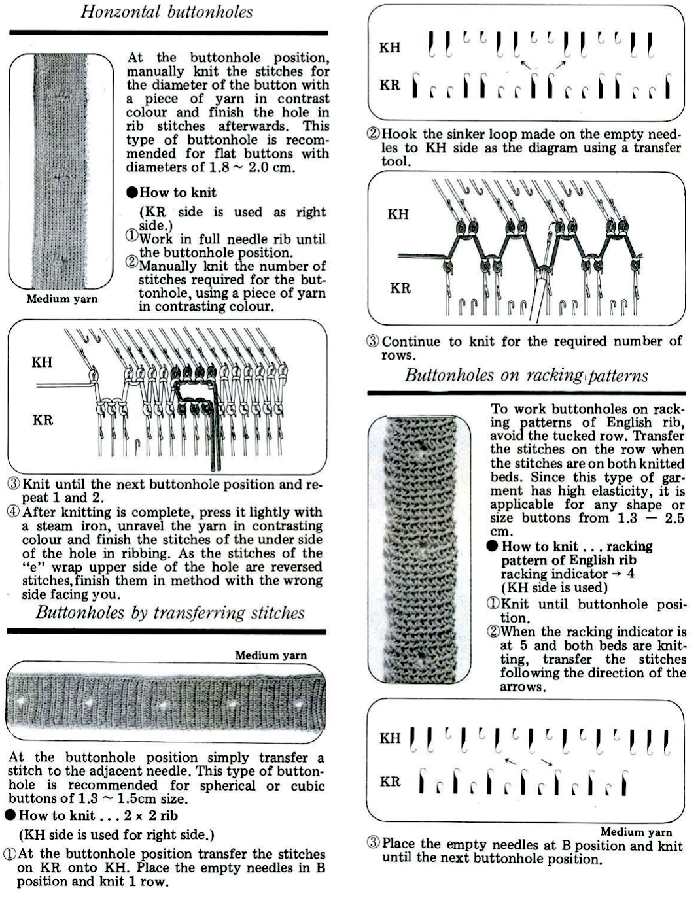
Double-layer buttonholes may be used in stocking stitch bands applied to the side edge of a garment ie cardigans upon completion of the piece or may be planned in hems if the piece is to be turned sideways. 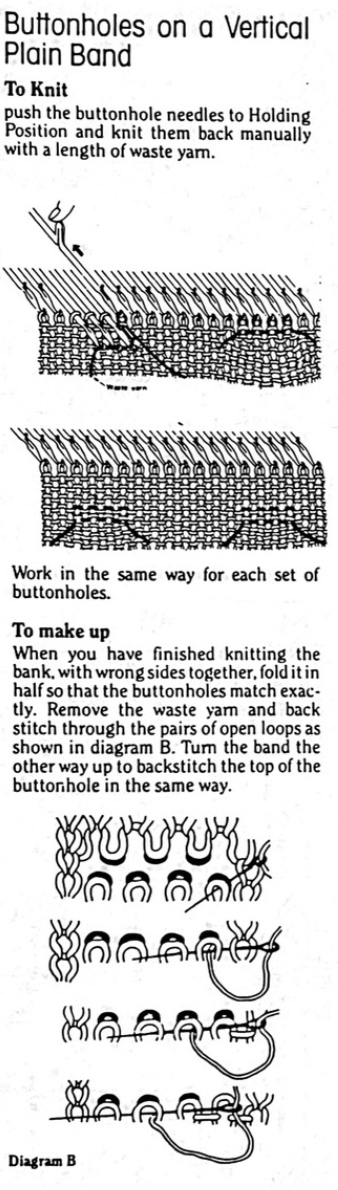 Here they are folded horizontally on a band that will be applied to the finished edge ie of a cardigan’s front
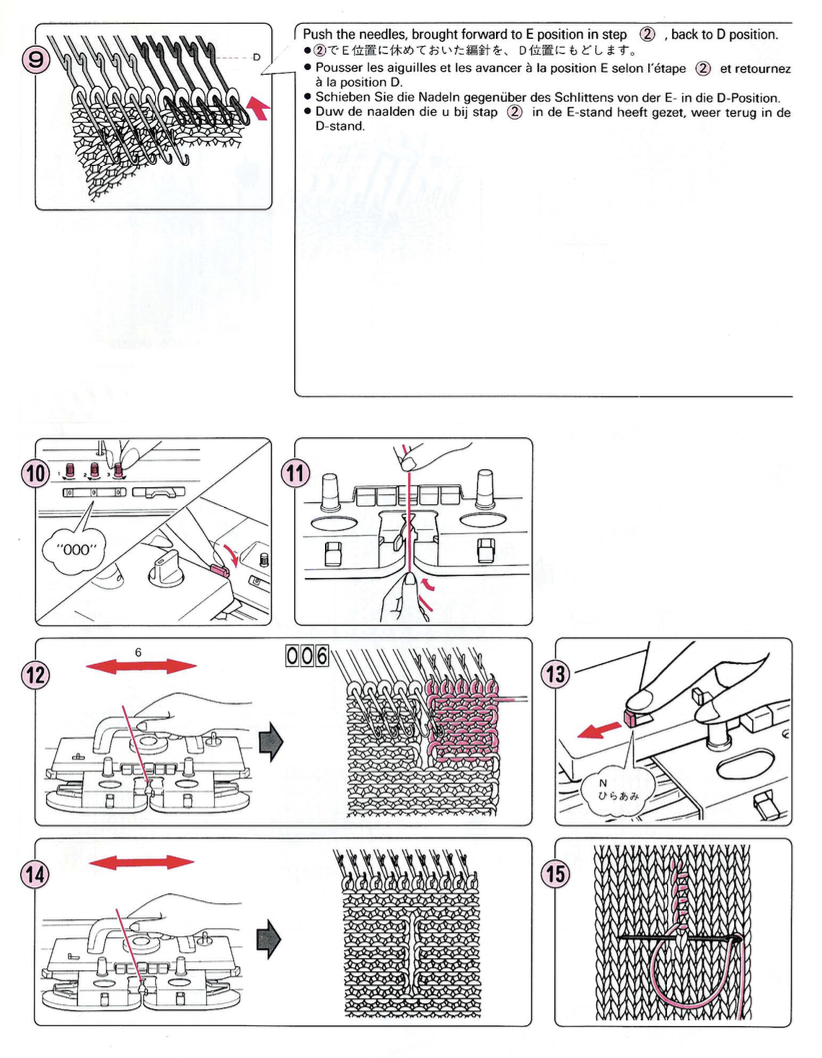
1: push the required needles to hold, knit them back with waste yarn
2: continue to the position for the next slit, and repeat
3: with a transfer-tool pick up the sinker loops of the first slit that were
created with waste yarn
4: place the sinker loops onto the needles in the holding position
5: push the needles back into the working position
6: knit loops through pre-existing stitches
7: to complete the lower edge of the buttonhole transfer the second
stitch to the first stitch of the buttonhole
8: transfer both stitches onto the empty needle
9-11: repeat the process
12: pick up the loop below the waste yarn
13: place the loops on their respective empty needles
14: continue to knit, and pull out waste yarn after a few rows to check for proper formation of the buttonholes 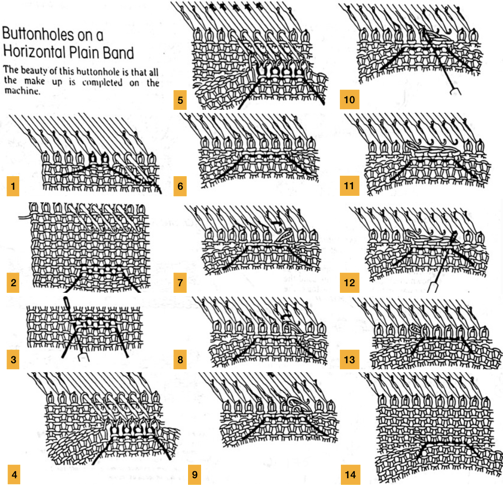 It is possible to work across a whole band, here the joining method uses a tapestry needle and is akin to grafting.
 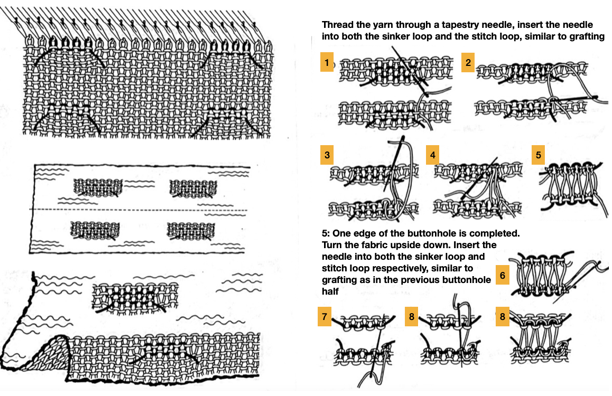 Buttonholes folded vertically are actually worked on live stitches. Pressing the fabric helps to set them.
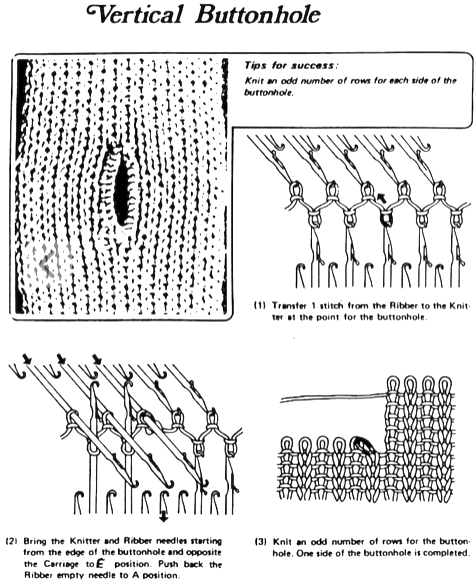
 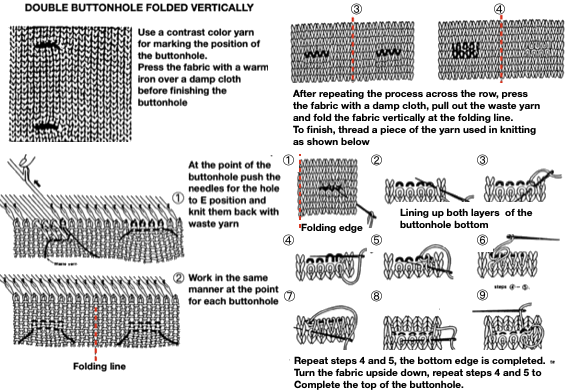 Another view:
  This method uses holding on the ribber to create vertical openings tappet tool. The latter is the ancient term used for what has come to be known as a latch tool