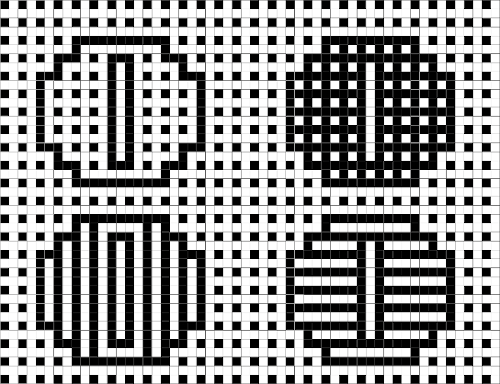
Designs may be developed to incorporate lines and grids by outlining motifs, filling in the results with grids or lines, and even color inverting the results.
From an early 2013 post:
Each number on the grids below represents 2 consecutive rows of knitting. The design may be elongated in the drawing of the final repeat itself prior to punching holes, marking mylar or pixels, or elongated using the built-in setting in the KM used, whether electronic or punchcard.
Color changes are required every 2 rows.
The grids:  After a motif has been separated, usually color 1 is represented in row 1, and all odd-numbered rows
color 2 is represented by row 2 and all even-numbered rows
long horizontal lines in mazes usually occur on odd-numbered rows
even-numbered rows typically have no more than 2 black squares marked side by side
on odd-numbered rows, the white cells slip
on even-numbered rows, the black cells slip
odd-numbered rows are knitted in the primary color (black cells)
even rows are knitted in the contrasting color (white squares)
Forming shapes and or text on the vertically symmetrical grid:
 2023
2023
These single-bed knits are ideal when float control is an issue, or when one wishes to reduce the bulk of fair isle techniques. There are, however, geometric design restrictions and the resulting patterns may be too “busy” for some.
Separated designs interrupted by black or white lines rather than single-cell dots are knit using slip stitch on the single bed, or in every needle rib with the knit carriage set to slip or even tuck in both directions on the top bed, and the ribber set to knit in both directions, a very different fabric.
The basic procedures for drawing figurative repeats may be worked out using graph paper or image processing programs, depending on what tools are available.
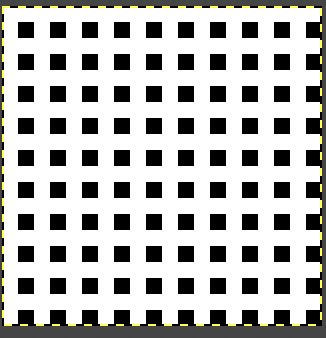
Working in Gimp, generate a file in a basic grid, which in turn may be tiled to any dimensions needed. ![]()

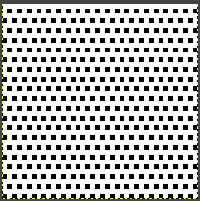 Using the bottom grid is problematic in creating figurative mosaics using the connect-the-dots technique. Attempted vertical lines do not connect cleanly.
 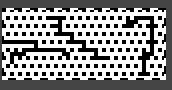 Cautious planning is required in executing figurative designs.
Clean-up will often result in solid color surrounding shapes or the addition of some short solid lines.
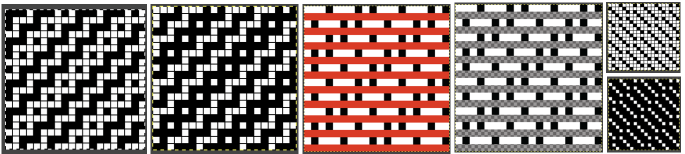
Doodling with blocks on both grids in a spreadsheet. 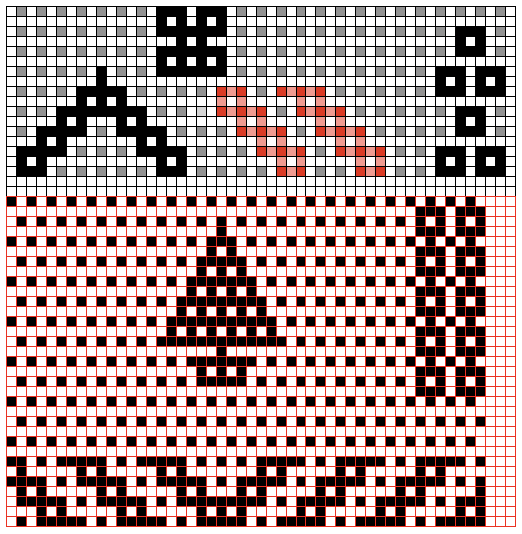 Text becomes more complicated if one seeks to emulate favorite fonts or to work on a small scale.
A spreadsheet using multiple colors may make the drawing easier to start with. By necessity, repeats will once more need to be large.
With practice, one develops favorite ways of reaching the chosen goal.  Large shapes may be superimposed on either dotted grid for final editing depending on what sort of border one wishes to add in designs for end-use in large pieces such as blankets.
 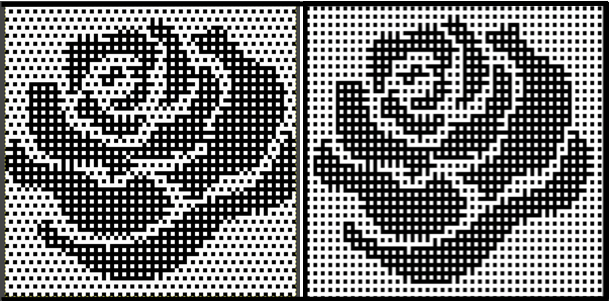 Figurative drawing occurs on rows marked with black pixels on the grid where black dots line up vertically.
White rows remain blank except where the black dots in the shape’s outline need to connect vertically.
After the outline for the motif is created, the filling-in of the shape is executed connecting dots once again.
By necessity, these shapes need to be large.
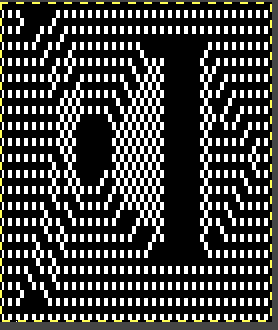
My first design is 68 stitches wide by 40 high. ![]()
 Processing the image is done on the same design. When color-separating Mosaics the design is not elongated.
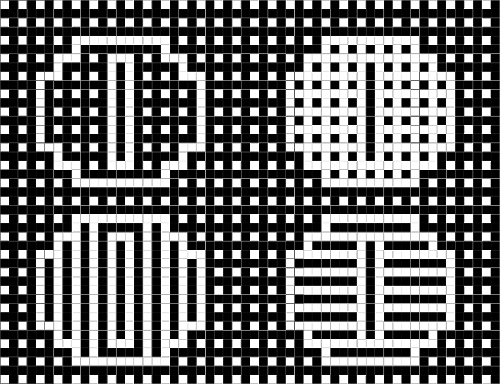
Using the steps described in previous posts on a copy of the initial file: color invert, ![]()
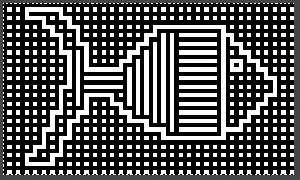 It is interesting to observe that the knitted result matches this image.
The file may begin as black and white indexed, but prior to adding colors the mode needs to be changed to RGB.
Add a third color beginning on every other row beginning on row 1, 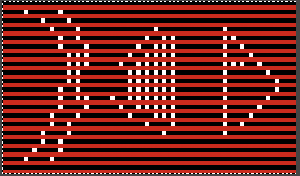 using layer, transparency, and color to alpha, the third is removed, leaving black and white.
  The alpha file is copied and pasted on the original resulting in a knittable mosaic repeat that requires elongation X2.
Check that the file is in indexed BW mode prior to saving it for knitting, it will need to be elongated X2 if used as is. ![]()
 The above doubled in height, now 68 stitches wide by 140 high, may be knit as is.
 Those solid black areas are OK. On the corresponding design rows, needle selections on nearly every needle will take place, those needles will knit the color in use at the time.
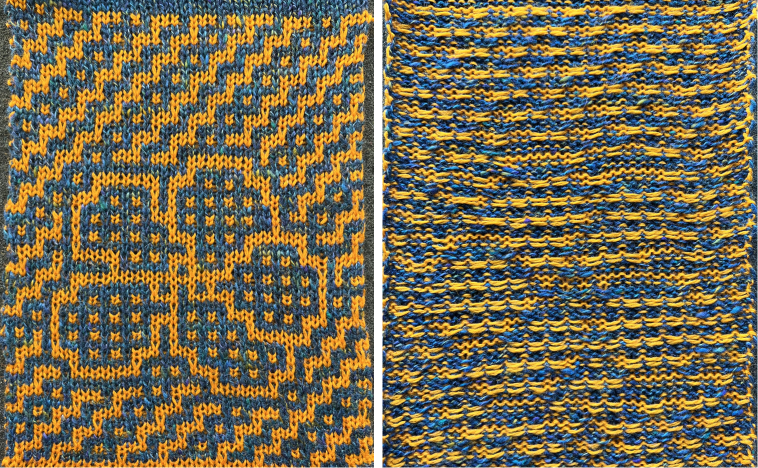
The tuck setting is possible, the final appearance will be quite different. For my swatch, I used the slip setting.
Slip-stitch pieces tend to have vertically straight side edges, while tuck ones tend to have wavy ones.
The floats on the purl side are still only 2 stitches wide.
The all-knit areas are not reduced in height, so they ripple initially and became flattened with blocking in this case, but caused the top and bottom of the horizontally striped segment to curve.
Starting knitting using the light color as opposed to dark will color invert the design.
The blue yarn used here is wool and the yellow is acrylic.
The swatch was steamed and pressed.
The dark color is dominant. 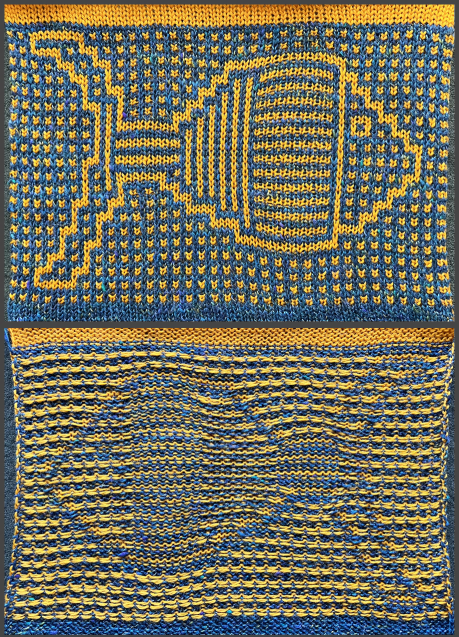 Visualizing the color inverted image using the photograph of the swatch rather than actually knitting it:
 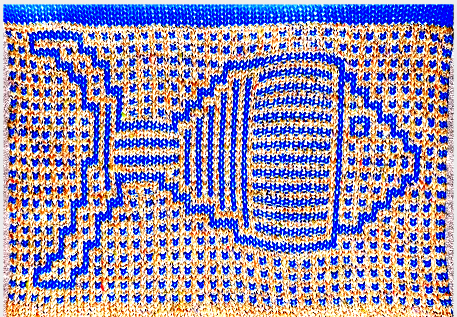 A 48X46 heart to play with for DIY
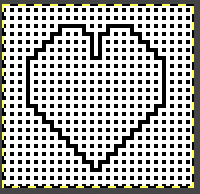
![]() Beginning in a spreadsheet followed by transitioning to Gimp can use a similar dot-to-dot design concept. It offers the opportunity to make adjustments before fixing on placement for the final black pixels over other colors. Moving away from dot to dot to “visually pleasant” does not necessarily work.
Beginning in a spreadsheet followed by transitioning to Gimp can use a similar dot-to-dot design concept. It offers the opportunity to make adjustments before fixing on placement for the final black pixels over other colors. Moving away from dot to dot to “visually pleasant” does not necessarily work.
The flower design chosen and committed to for the moment is 37X32, visualized on possible backgrounds, and placed on a final one drawn with straight diagonal lines in pattern, for the test knitting ![]()
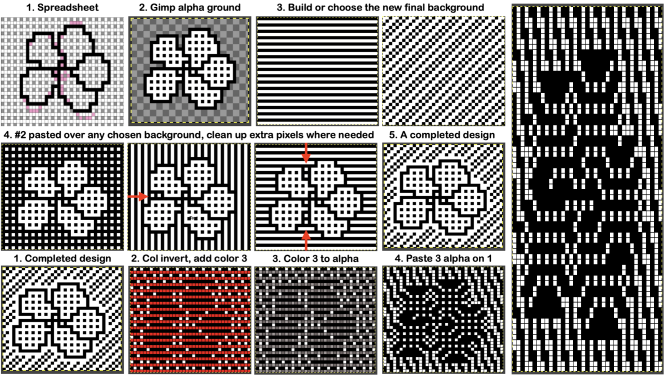 Aside from whether accurate tiling is possible for that final repeat, it has far too many white rows uninterrupted by black squares. As in any slip-stitch fabric, a stitch is held in every white cell or unpunched area location until a black cell or punched hole follows it, the result is very elongated single stitches on the knit side:
 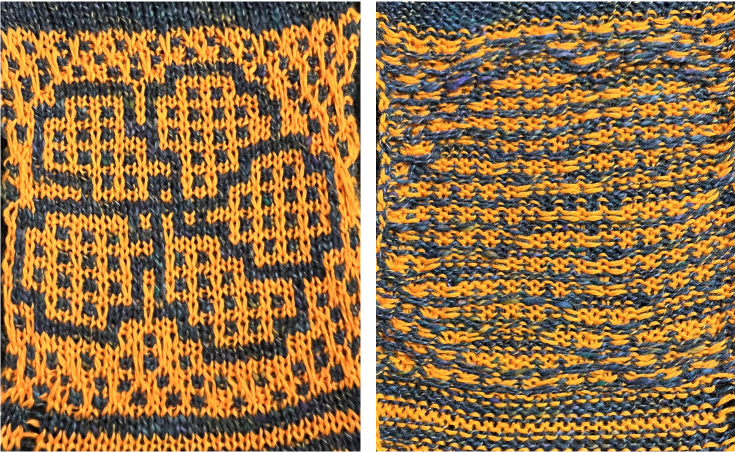 There is a limit as to how big a part of any final mosaic repeat can truly be freeform.
It helps to develop a library of personal grid variations, to be willing to observe some basic rules, and to have an affinity for the overall look of the results.
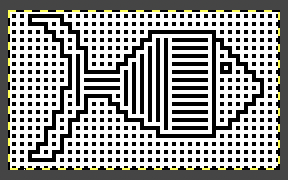
In terms of the basic grids, the horizontal stripes have already been shown in the fish to produce 2-row all-knit stripes in alternating colors where they are placed in the design.
The vertical stripes create this result when proofed, and it can be recognized in the png for the body of the fish 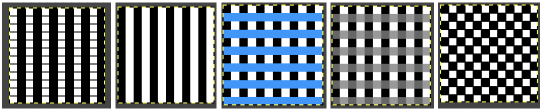 Developing a DIY background: I find it easier to work on such designs on a large table in Numbers, which allows for placing a variety of colors and in the same document more easily, and then converting the outcome to a BW indexed png in Gimp.
 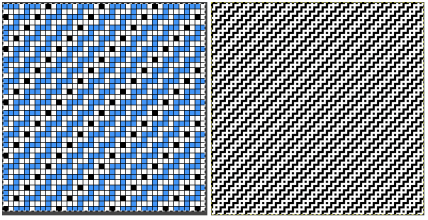 The smallest isolated repeat, in this case, is a square, 20X20
 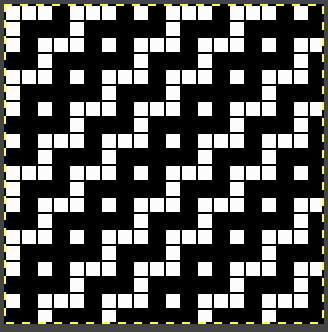 Make certain it tiles correctly before proceeding:
 The final file doubled in length shows no areas where extended slip stitch rows might be an issue. This step is not necessary as one begins to trust the process.
  Returning to that flower, on the white-to-alpha ground, a 37X32 saved file, open it in Gimp.
Open a second file, using the background-repeat, and tile it X2 in both height and width to a matching 40X40 size.
Copy and paste the flower onto it in what appears to be a visually pleasing location, clean up the surrounds, and save the png. 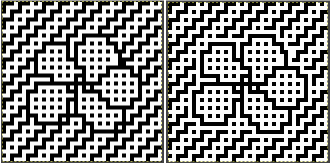
![]() Proceed with the now familiar steps:
Proceed with the now familiar steps: 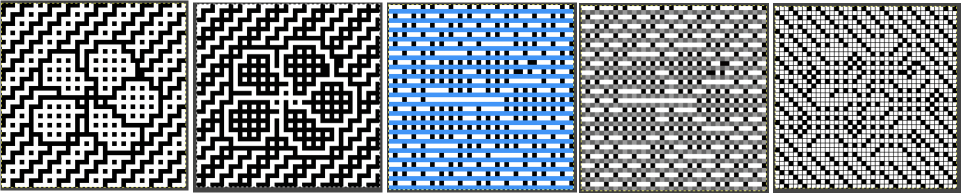 The final repeat must be elongated X2, color inverting may provide a better sense of what cells knit or slip, and it may be used to knit the design.
 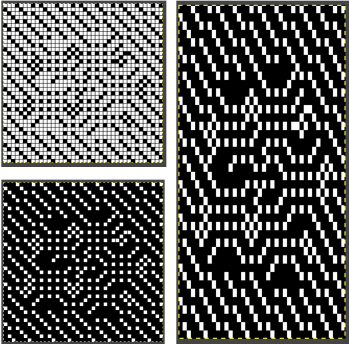 The working 40X80 repeat:
 ![]()
 Once again, the completed swatch visually matches the original file, color inverted.
The latter provides a sense for guessing if the knit results are pleasing and it offers a way to explore different colorways or matching yarn colors.
Pursuing the dot-by-dot concept can lead to endless DIY designs. Playing with motif scale in Numbers: 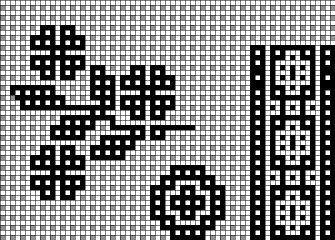 Isolating part of the design in Gimp: 42X44
 ![]() A variation using multiples on an 80X80 canvas.
A variation using multiples on an 80X80 canvas.  Loving that DIY background? To create a frame
1. choose a finished canvas size, ie 120X120, and fill it by tiling the DIY background
2. open a second file to, in this case, 80X80, in any color including white. I chose yellow as a way to place black border lines more easily
3. copy and paste the second file onto the first
4. add a solid color border at the inner and outer edges of the frame, outlining the shape at its center. 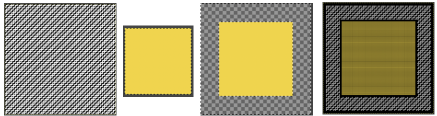 At this point, any image also 80X80 may be simply opened in Gimp, copied, and pasted over the yellow.
 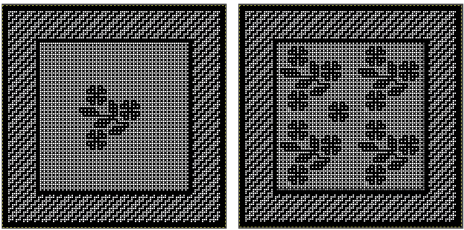 Files to play with: the frame with a transparent center
  to be pasted in place on other graphic files,
  Here with a dot-to-dot center to draw on,
  and the file with central flower motifs to use or edit further.
  The final choice then needs to be made as to how to use the final image.
One option is to separate the motif for use as a single bed 2 color slip stitch, and the second is to simply use the built-in KRC color separation in electronic machines to knit it as DBJ.
Motif definition requires large-scale designs limited by patience and imagination.
Autofill, command key and other shortcuts can help execute them more easily and quickly in spreadsheets as a first step.
This start of a hummingbird, inspired by a small segment of a Pinterest find, is already 54X101 pixels, ending my exploration of these knits for the moment. 
When editing or developing large images a series of guides may be useful. To configure them, see pos:t Gimp update for Mac 2