11/23 Outside the topic of this post, ArahPaint 6 and its tool Guess Weave from Grid has become my preferred method for converting published design repeats including those intended for punchcard machines for use on electronic models.
Two samples: A black-and-white published card repeat isolated using ArahPaint,
 the 24X48 PNG
 ![]()
and, from the Russian site, #4559, 24X134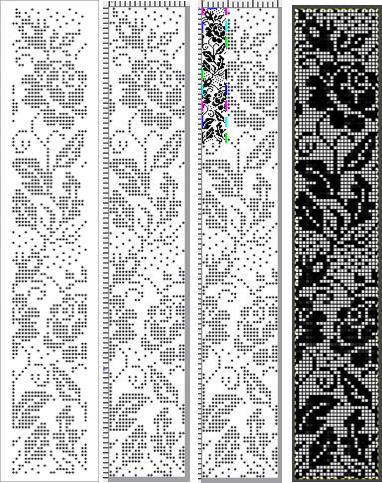
![]()
 9/23
9/23
The latest Gimp update download: 2.10.34
Recently some Pinterest stitch pattern finds turned up in Ravelry along with questions with regard to using them in electronic models.
To review some of the editing required, in this case, for a tuck design 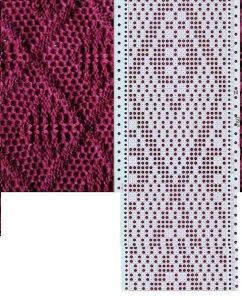 The pattern is the typical 24-cell width. Row numbers are confusing and not specific to a brand. The repeat was likely punched using a roll rather than a single factory-numbered card. The magnified, manual count totals 62 rows.
The stitch type is not specified in the pin, it appears to be a tuck pattern breaking the rule of no side-by-side unpunched squares at regular intervals.
Assuming the shared card is correct and missing only the standard initial 2 all-punched rows, using software can help assess design accuracy. The latter proves useful if one is planning to punch cards as well.
The first 24X62 cropped design is shown to have faulty alignment when drawn in repeat. ![]()
 With a few rows removed, the final 24X48 repeat aligns properly
 ![]()
 When two needles are tucked side by side, and those same needles are brought forward prior to being knit on the next pass, there will be wider loops across them. Tension and weights may need to be adjusted more than once to avoid problems.
  The swatch was knit using an unknown fiber that was scorched in part when steamed/ pressed, as seen in the image on the left.
 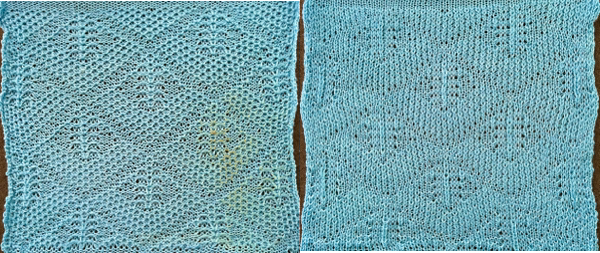 Another look at the inspiration swatch shows the knit was actually turned clockwise, a reminder that rotating knits can vary the appearance of the results.
 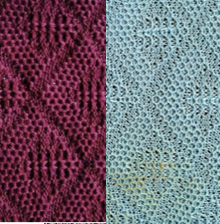 Reviewed and edited, 12/2022
There is a Russian online site offering a huge range of punch card designs. The question of how to convert the site files for use in electronic machines surfaces periodically and did so again recently in FB groups.
My posts with information related to this topic:
Brother KMs: punchcards and their use
Numbers and GIMP: online punchcard patterns to electronics 1
color exchange Gimp update for Mac 2
A Russian language tutorial on converting punchcard images using DAK
A recent video offering on navigating the site in English, begin viewing on minute 5
The site link
Small previews link for FI
The translated site link offers larger previews
The options in English for working with published cards 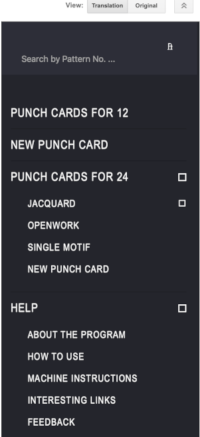 The help menu is available after the card is chosen
 ![]() Designs are presented on pages that list them from longest to shortest row counts for the complete repeats. Punchcard users can reproduce holes as given. There is also an option for entering a new design and it appears, in turn, one may be able to generate a separation for its use in DBJ.
Designs are presented on pages that list them from longest to shortest row counts for the complete repeats. Punchcard users can reproduce holes as given. There is also an option for entering a new design and it appears, in turn, one may be able to generate a separation for its use in DBJ.
Beginning with a smaller design intended for machines with 12-stitch repeat restrictions simplifies the view and processing of it for newbies. The published patterns are offered Silver Reed ready. The option for converting the cards for use on Brother 260 renumbers it with the appropriate location for the number 1 row marks required by the operation of the different brand’s card reader. Toyota versions are also available. Making the holes larger is a boon to reproducing the drawing correctly regardless of end-use. Splitting the card into segments is helpful when using factory blanks with a 60-row maximum repeat, and often also when processing the image for use on electronic machines, which is affected by screen size views available to the software user. 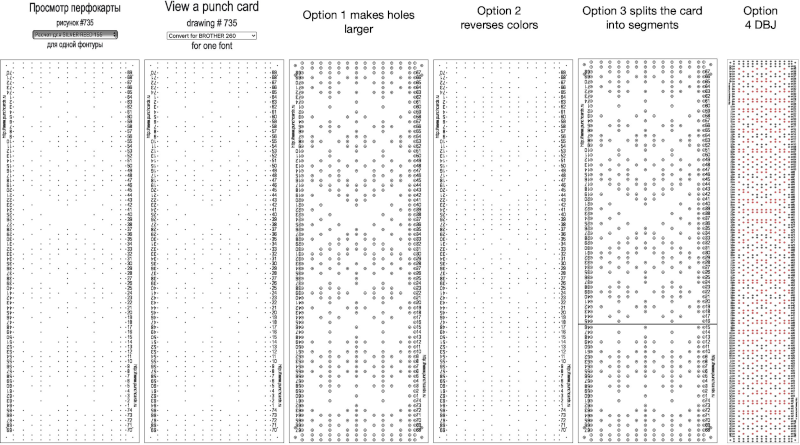 For some reason, I found the commands erratic when working on the translated version of the site, and fared much better in the original language publication.
In the 2022 adaptation, the small previews were chosen for conversion to pngs rather than the full card templates used below.
The chosen card image may be dragged onto one’s desktop. I use Numbers to create my tables. The 2 all-punched rows, marked with blue arrows, and any standard vertical rows of holes on each side of the provided designs need to be isolated and eliminated. This is a 12-stitch repeat required for use on some machine models or useful when using a thicker yarn on every other needle to achieve the same design, every other vertical row is blank.
A: the table with cells 20X20 sized to match the number of rows and stitches in the original. The card image is arranged in the back of the table with the constrain properties option unchecked in its image-arrange menu.
B: cells corresponding to marked holes are filled in with black since the final goal is to create an indexed BMP or PNG. Not all programs for downloading to electronic machines read BMPs. Gimp does, and once opened they can be exported in the PNG format.
Using and holding down the command key during cell selection helps perform the coloring cells in action on groups, clicking on any cell again while still holding the key down will deselect the fill. Release the key, choose the fill-in color, repeat, and continue until the holes in the full design are filled in.
C: click and hold the command key, select every other blank vertical column marked with letters at the top of the table, the blank vertical rows are selected, release the command key, right-click on any of the same letter selections again, and choose to delete selected columns from the pull-down menu or after marking the rows directly from the table menu at the top of the screen. Eliminate all cell borders. The result shows how the pattern will appear when used to program fair isle.  Screengrab the final image surrounded by extra white cells, and open it in GIMP.
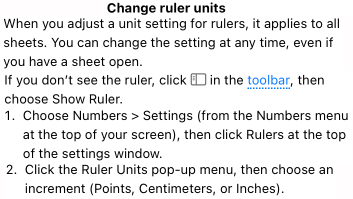
Change the mode to indexed BW, crop the file to content thus excluding any extra white cells, and scale to the original design’s 24 by 74 dimensions. Punched holes are now pixels; export the knit-ready PNG.
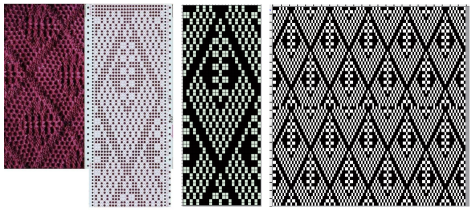
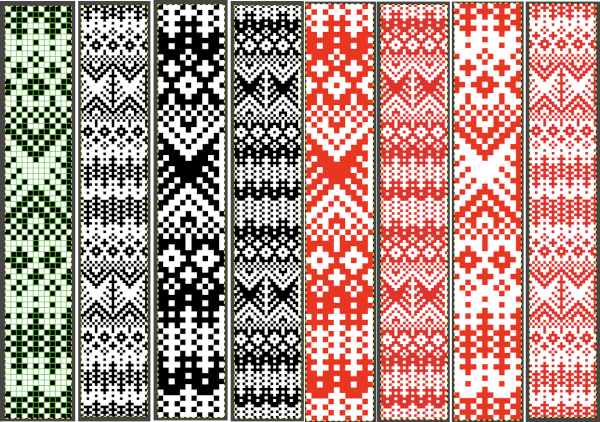
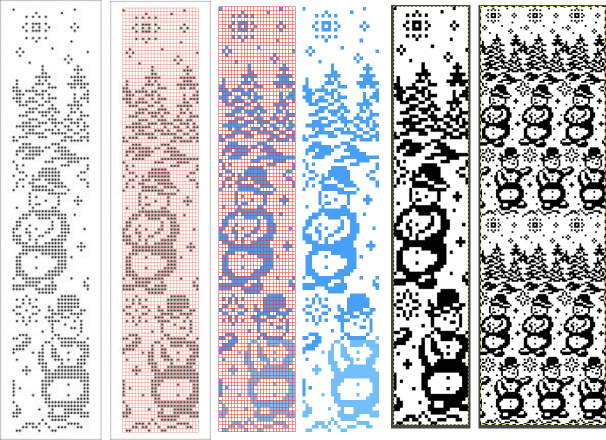
Using the filter, map, and tile options allows one to check on horizontal and vertical repeat alignments for any errors and begin to imagine how the repeat might appear on a finished piece. Color exchange may be used on the BW files converted to RGB mode to visualize the knit using specific colors. On the far left below the final PNG is shown magnified X 800 with a superimposed grid, then filter-map-tiled to 48X148 size. It is followed by a BW color-reversed version of the same, as well as color-exchanged ones. ![]()
![]()
 Getting a preview of how a finished garment might appear, here the tiled version is 192 pixels in width and one may glean some idea as to whether that repeat should ever really be used in a sweater or even a blanket. Further image scaling or cropping can happen based on the knit gauge.
 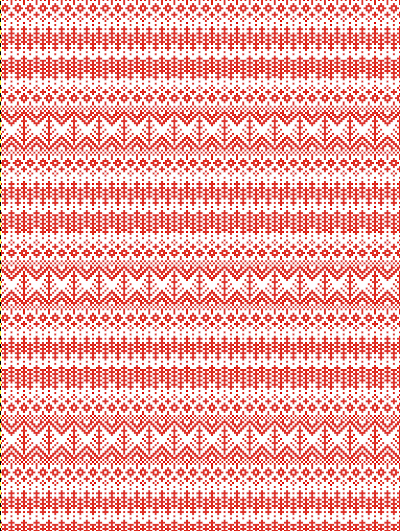 A very quick rendering imagining pattern and color placements using a simple sweater outline
 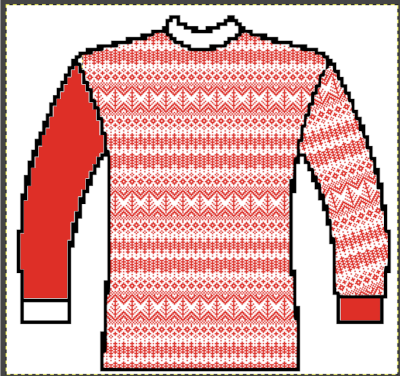 Collections of every other needle repeats for processing with a similar approach may be found in these volumes, available for free download
Chunky punchcard patterns 12 stitch  Patterns of Knitting With Creative Punch Cards Juki 12 Stitch
 Both volumes include accompanying swatch illustrations.
In machine knitting, the word lace is used in categorizing a large variety of knit fabrics. The terms include:
simple lace, executed with carriages that transfer and knit in a single pass
multiple transfer/ fashion/ fancy/ lace: executed with carriages that transfer only
lace and fine lace combinations
fine lace
tuck stitch combined with transfer lace
tuck/ pull up lace
transfer lace combined with weaving
punch/thread lace
ladder lace
punch tuck rib
drive/drop stitch lace
If one explores the second selection for 24 stitch cards looking for openwork patterns for 24 stitch cards, the resulting 20 pages of repeats do not differentiate between the lace categories, so the onus is on the visitor to determine proper repeat use.
In addition, the option for switching machine brands does not readjust for changes required for the pattern to read correctly in the alternate machine brand card reader. As an example, transfer lace cards are shown with blank starting rows, ending with punched holes, a Studio brand feature, and in some cases with a punched row ending with blank rows, a Brother feature.
If changes are made in machine brand selection, the only adjustments in the new image appear to be made to the numbering sequence, but not to the punched or unpunched starting and ending rows.
For punchcard users or enlarged views: printing the PDF breaks the repeat into segments required if one is using individual 60-row maximum length factory cards and not a punchcard roll. On the far right, the a difference in relative size between a factory punchcard and the PDF image printed without any adjustments. ![]() Filling in the dots with a black marker renders the to-be-punched holes more visible through the card, making marking prior to punching easier and faster.
Filling in the dots with a black marker renders the to-be-punched holes more visible through the card, making marking prior to punching easier and faster.  For a better, printed match size, after capturing the image from the PDF for a single page outside image edges, opening it in Gimp, and cropping it to content, it is then possible to scale the results to measurements of a factory punchcard equal in width and adjusted for the number of rows in the image. My card required print measurements were 14.1cm by 26.1. Scaling executed with an aspect ratio that is too long.
 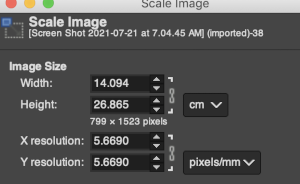 breaking the chain-link, removing size constraints
 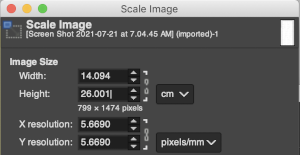 The result with printing to match the card stock measurements was extremely close to the desired size, useful, but hard to photograph
 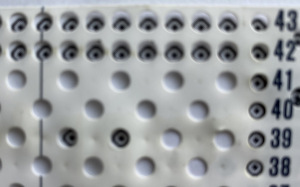 Entering patterns: the translation
 ![]() Working with the Russian menu:
Working with the Russian menu:
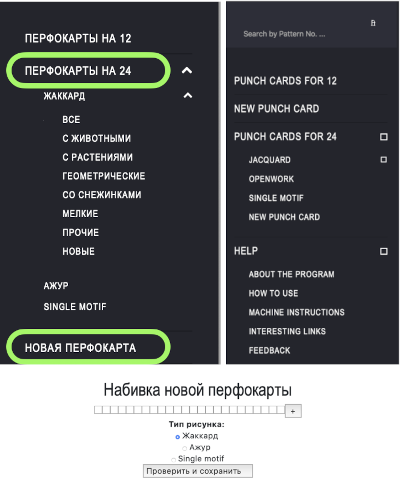
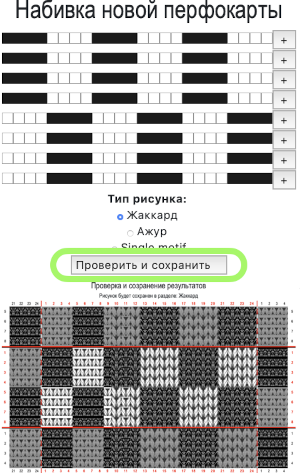
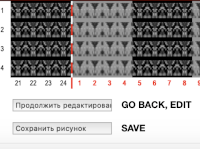 The saved pattern will be assigned a number, in this case, 9831
 In the 24-stitch repeat FI area of the site, enter the assigned number into the search field on the upper right changing the view to larger holes if preferred, the option also becomes available to separate for 2 colors DBJ translated to “recalculating for 2 fountains”.
Screengrab or save pdf, depending on needs.
2022: This process appears complicated, but with some familiarity with both Numbers and Gimp, can be fairly quick. Revisiting the site, I made the accidental discovery that working with images as shown below, by superimposing a Numbers grid to these point measurements, developing the designs became quicker and easier to manage 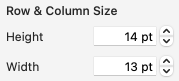 Two instances: from any black and white chart
 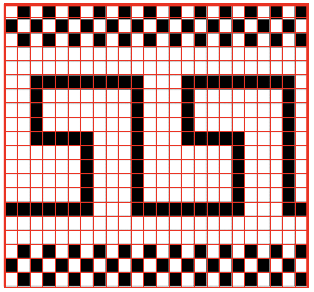 and a seasonal 24X120 repeat from this website.
 ![]()
 Beginning with a published and gridded punchcard model: I am used to converting patterns for testing and using them on electronic machines. If the goal is only to have a printable template for marking holes to be punched, see the very bottom of this post for the quickest method.
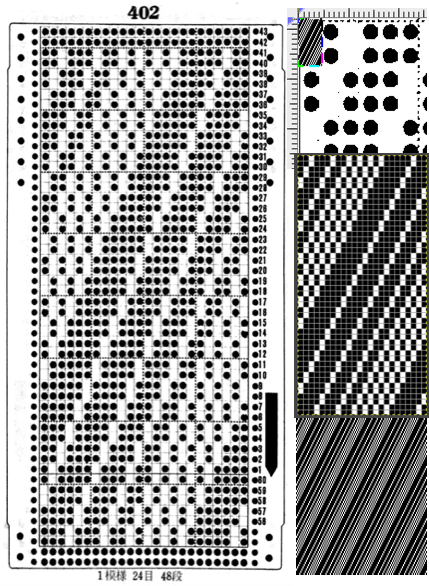
The technique steps reviewed as applied to pattern # 403 as seen in this scan 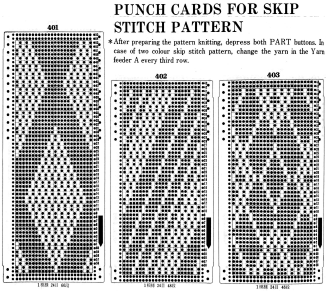 Open the image in Gimp, and crop to the outer edges of the selected punchcard. Eliminate unnecessary information by using the select tool and bucket filling each area including non-repeat information with white. Adding a visible pixel line along one of the edges of this image will help locate handles for adjusting its size on the white spreadsheet ground. Save the result.
 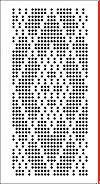 In Numbers, at 100% magnification,
  create a new table, 24 cells in width by 48 rows in height. Using a thicker cell border in a contrasting color is useful, here the border style is set to 3 points.
 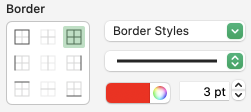 Drag the image onto the spreadsheet, place the mouse pointer on and hold it in place on any one of its handles, appearing as white squares along its edges to a larger size than the table,
  then use Image Arrange and uncheck constrain proportions.
 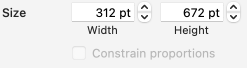 Select the whole table,
  and drag and position it in front of the image.
  Using the image handles adjust its size and place it for easy tracing.
Size and position in the Arrange menu will help with fine-tuning. 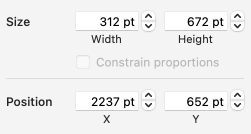 Fill in the cells above the white squares visible beneath with any color that will facilitate keeping track of the marks.
  Move the table away from the image at the end of the process. Visually check for any obvious errors in the overall repeat.
Scaling while retaining the odd number value resulted in patterning errors.
The problem was solved by resizing the table cells to even numbers, 14X14 points. 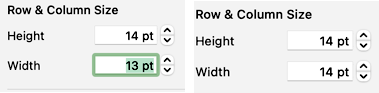 Remove all cell borders, and set the zoom at 50%.
  Screengrab the result with a white border around it.
Open the grab in Gimp.
Use the Image and Crop to content option.  Set Fuzzy select to select by color
  click on the contrast color, and pixels will be surrounded by broken lines
  select bucket fill to black,
  click on rectangle select,
  and then anywhere in the window to fix the result, the dotted lines will disappear
  Follow with these steps
Image Mode menu, convert from RGB to BW Indexed 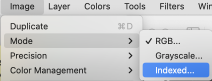 Colors Menu, and choose Invert.
  Image Scale to 24X48
 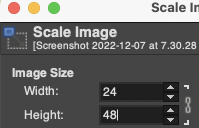 Magnify X800,
 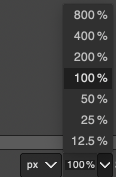 Show Grid,
 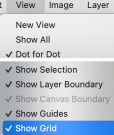 and check for any errors.
Save the file.
Filter, Map Tile for the repeat alignment check. 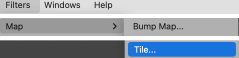 The resulting, proofed repeat, 24X48
 ![]() The top row of images summarizes the steps using Numbers, and the bottom row the results using Gimp
The top row of images summarizes the steps using Numbers, and the bottom row the results using Gimp 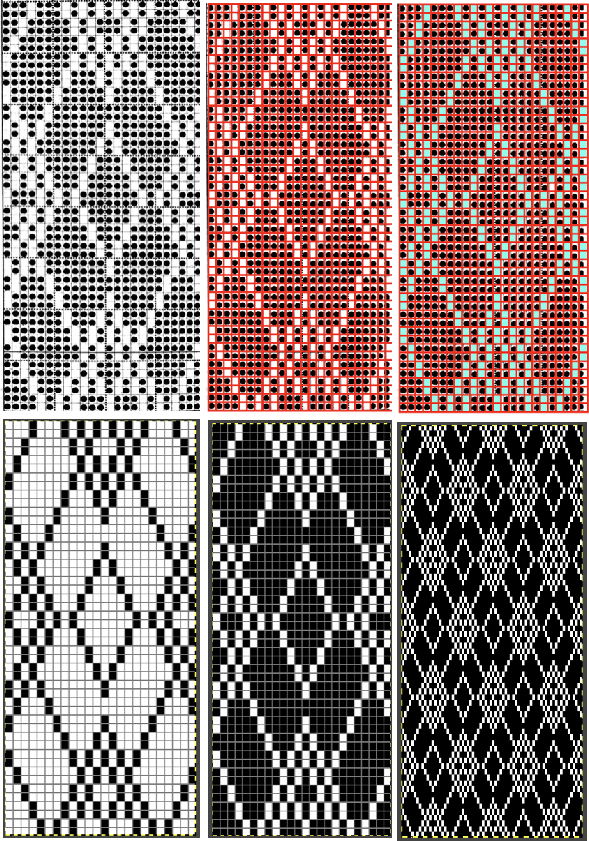 See punchcard templates for more information on associated settings, including downloadable spreadsheets.
 Using the setting for centimeter ruler units, a partial segment of the above table’s repeat was printed. The result is shown ready for tracing over an improvised light box
  The squares on the card with black cells beneath them may be marked with any tool. For the result to be knit in the tuck stitch setting, users would need to punch all unmarked squares. If only the marked squares are punched, the pattern card could instead be used for thread lace in machine models with that capability.
A slightly different approach for pattern 8095 from the Russian site. Prior to committing to the process, check the row numbers in the PDF, and make certain the repeat is correct. This one happens to have a missing, blank row 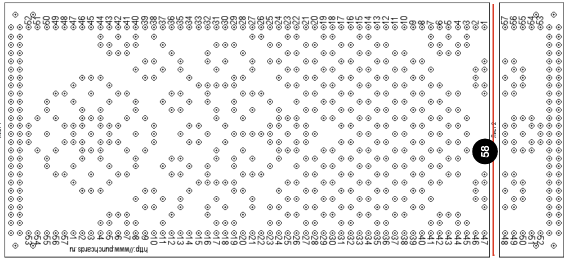 Using the small preview from http://perfo.12rus.ru/index.php, download it
 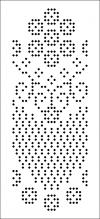 Open it in Gimp
Crop the image to eliminate the border
Fuzzy select by color the background which only appears white. Bucket-fill the ground with white from the Gimp palette, and only the repeat will remain 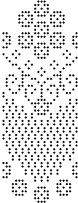 Do not convert it to indexed
Create a Numbers table containing 24 cells in width, and 58 in height using the centimeters ruler setting, with cell size set at 0.5cm wide by 4.5cm high. The full table size will measure 10.8cm by 29cm.
Drag and drop the design image onto the sheet, resize it to table measurements, position it underneath the table, and begin filling in cells.
A: in some instances, it is possible to work all in black. As I progressed up the repeat I had to readjust the image placement slightly
B: the image size was tweaked to measurements of 11.2X29.1, and a separate color cell border is used
C: the full repeat is separated into sections to fit on standard letter sheets when printed. 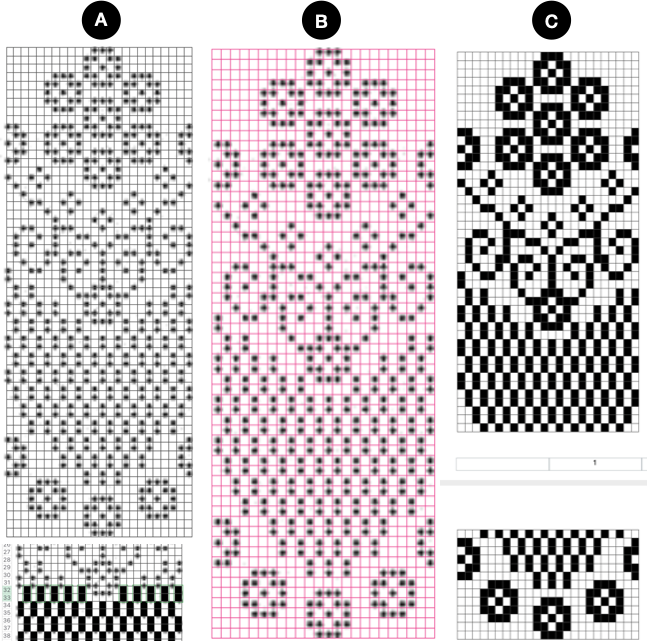 The result:
 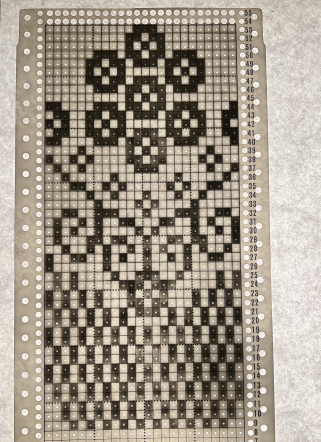 The electronic repeat:
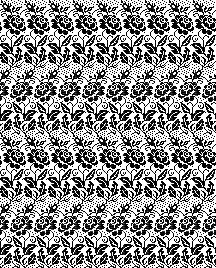
 ![]() Before committing to a knit, using Gimp, Filter, Map, Tile, check alignments. In addition, the result helps visualize whether or not the result is what was expected
Before committing to a knit, using Gimp, Filter, Map, Tile, check alignments. In addition, the result helps visualize whether or not the result is what was expected 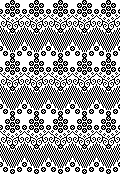 If the only thing needed is a traceable template for punching holes using the 11.2X29.1 measurements in resizing the cropped preview in Numbers, open it in its own sheet, watching its placement
 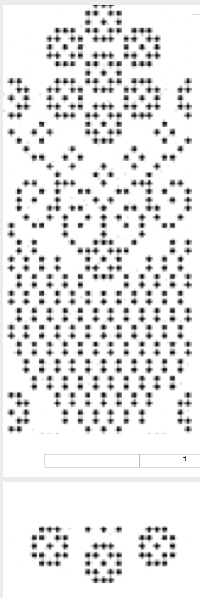 and you are good to go!
 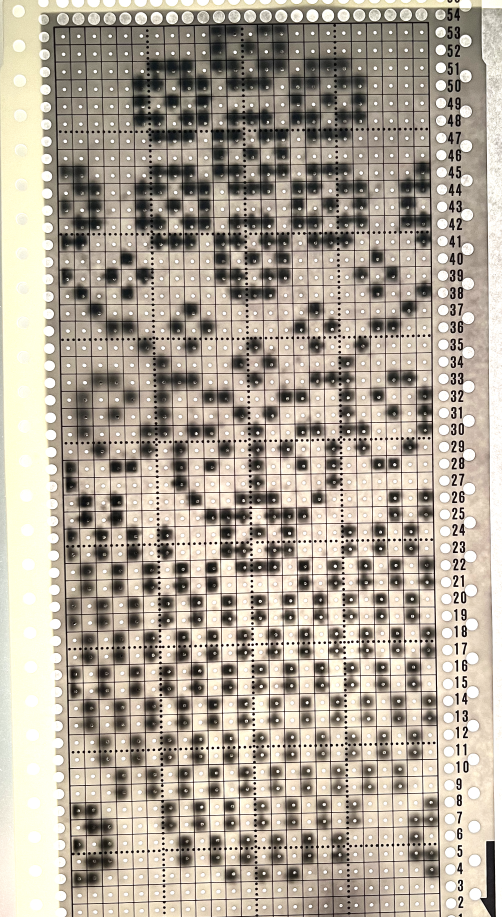 Working in Gimp alone, the alternatives to working in pixels:
 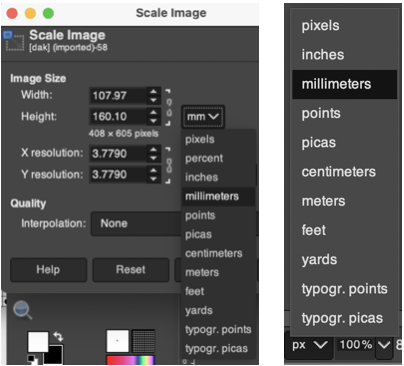 Using a screengrab of a DAK DBJ color separation: the repeat itself is cropped to its edges with the rectangle select tool. The size is calculated using the formula for the width and height of cells in the unit measurement of your choice, ie cm or mm. Even though scaling is done with the chain link broken, the program will round off the values to very slightly different numbers.
 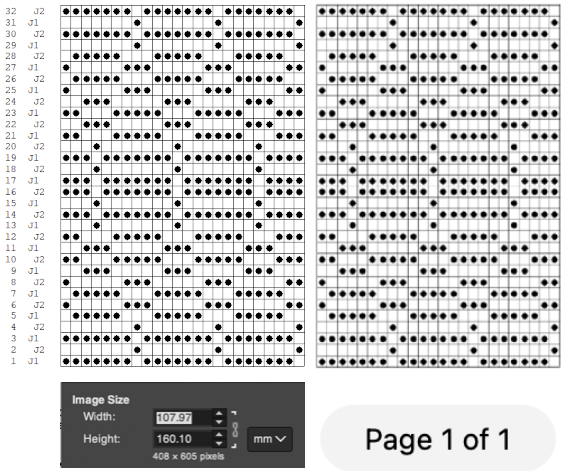 The printed repeat underneath a blank punchcard is ready for marking.
 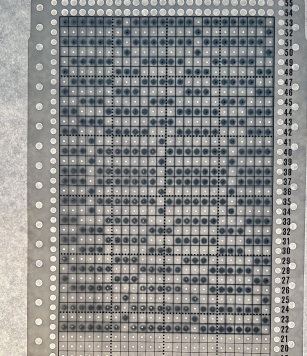 When using Numbers, the program will separate the repeat into segments for you if needed. My charts and results have been produced using default document borders.
If using only a paint program ie in the above case Gimp, the user is in charge of dividing the template into segments that will fit on the printed pages. Using legal-size paper can in many cases avoid printing on multiple sheets.
Some math is inevitable, the considerations involved:
in terms of mm and cm, 1 mm= .1 cm, ie. 216 mm+ 21.6 cm, a shift to the left with the addition of a decimal point
Working in cm: using punchcard 8095 once more
Each square on a blank punchcard is 4.5 cm wide and 0.5cm high
Full punchcard: 24 stitches, the fixed width for punchcards = 10.8cm
58 rows, the variable, in this instance = 29cm.
In printing, using default borders:
US Letter: 45 X 0.5 = 22.5 cm = maximum # design rows
Full repeat = 58 rows X.5= 29cm.
First sheet: 45 rows X.5=22.5cm
Second sheet: 13rows X.5= 6.5 cm 22.5+6.5=29cm
On Legal: 61 X 0.5 = 30.5cm = maximum # design rows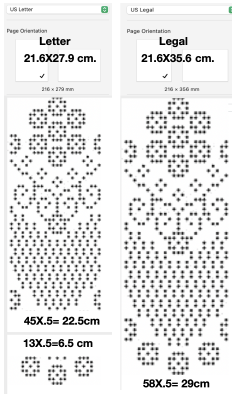
It is possible to download a PDF of each card from the website. When downloaded and printed as given, my result can be seen as obviously off-scale 