Over the years I have avoided ribber fabrics that involve hand manipulation of stitches in addition to patterning. Runaway stitches are hard to see and repair.
In these fabrics, transfers are made by hand with multiple transfer tools. As stitches are moved, the last of the stitches transferred on the purl side (in this illustration 4 stitches), one will lie directly behind one of the stitches on the main bed (marked in red), sharing the same needle hook space. As the next row is knit, the needle emptied by the transfers picks up a loop. The following knit carriage pass will complete the stitch on the needle holding the loop, and the eyelet.![]()
There is often confusion about the terminology, English, or half fisherman rib has only one bed tucking every needle, in a single direction, with all stitches knitting in the opposite. Here that bed is the ribber, the knit carriage is set to knit throughout. Illustrations from the Brother Ribber Techniques 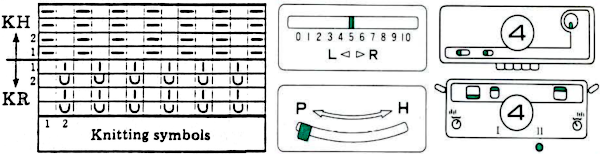 Fisherman, aka full fisherman rib, is a tubular tuck with each bed tucking in one direction, knitting in the other
 My recent posts reminded me of a repeat from an older Brother punchcard pattern book that combined lace transfers and fisherman’s rib.
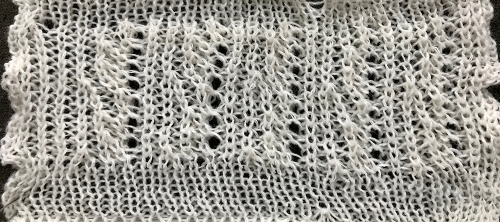
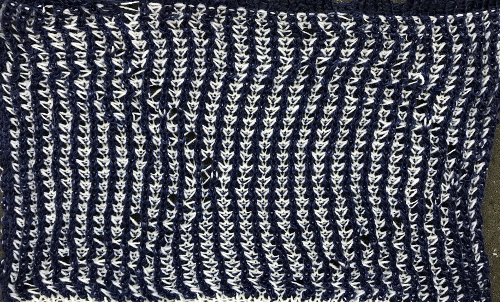
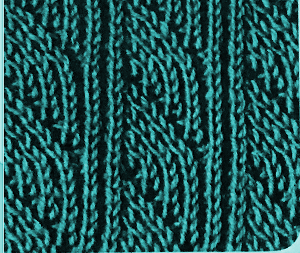 The original repeat is shown on the left, designed for use on punchcard machines. In this instance, the main bed knits in one direction and tucks in the other while the ribber knits every row.
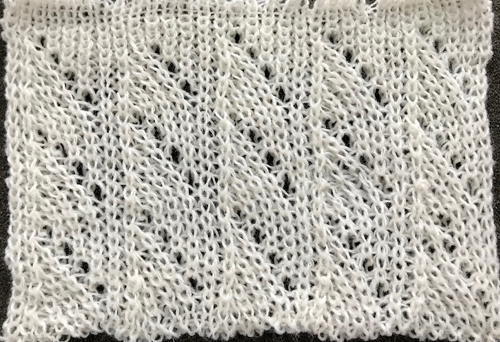
  Stitch and tuck loop combination transfers are made every 4 rows, prior to knitting that row in the opposite direction. The machine is set for half fisherman’s rib. Tucking happens on the top bed on all needles in one direction only, the ribber remains set to knit both ways throughout.
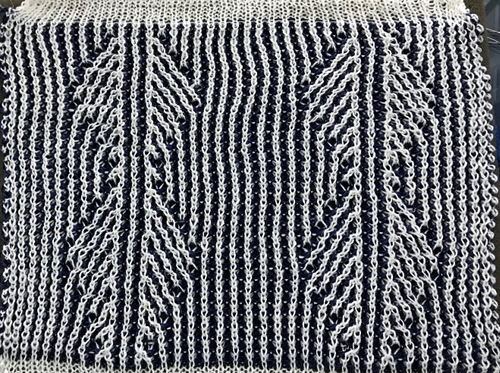
 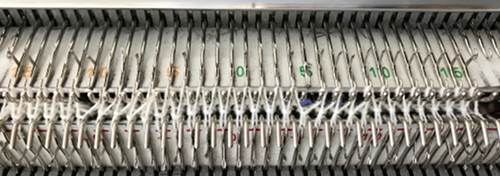 If all transfers originate on the same spot, a vertical line of eyelets is produced
 Can plaiting give me 2 colors the “easy” way?
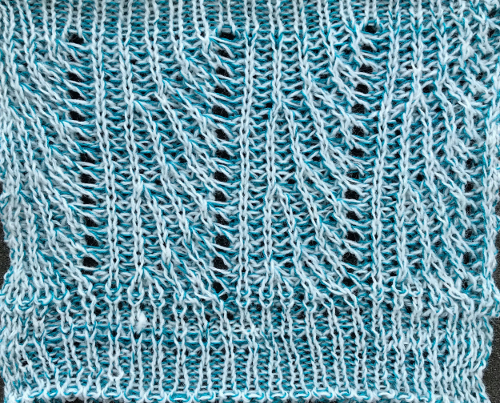
 If transfers move to the right or the left, an arc will be created
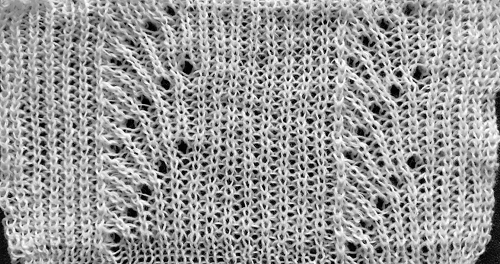 Aiming for the punchcard pattern book inspiration I began at first by marking up the needle tape with a water-soluble pen to help track repeat segments
 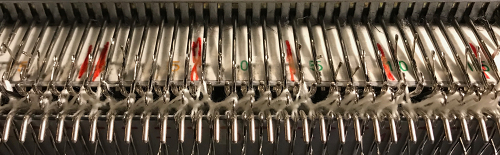 After a short trial swatch I sought to automate needle selection to serve as a guide for moving stitches across the needle bed
![]()
 The main bed is set to tuck in both directions. White cells tuck, black cells knit. Rows in Brother preselect for the next row with each pass of the carriage, so on even number design rows as the carriage moves to the opposite side, all needles will form tuck loops on the main bed. The next row will be preselected, with some needles now back in B rather than D position. With an appropriate transfer tool, move the stitches on the nonselected needles to the adjacent selected needle to their right after pushing it back to the B position. After each transfer, push all worked needles and their stitches as well as the now empty needle to the E position. As the carriage returns to the opposite side an all knit row will be completed. Several tension adjustments may be needed to ensure loops do not get hung up on gate pegs as stitches move across the bed, while still being loose enough to knit off properly.
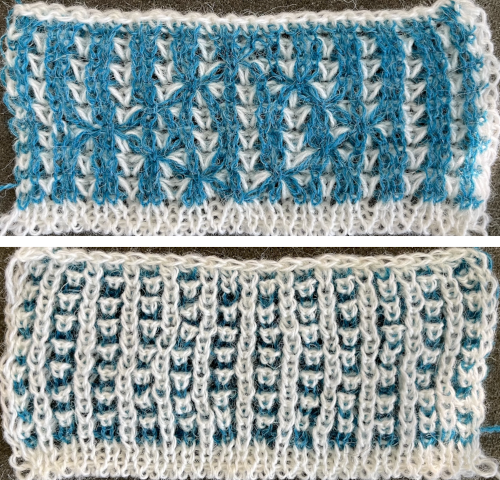
The charts below reveal planning for a more complex fabric, a 2 color repeat with mirroring of the original above, colors are changed every 2 rows with setting changes on the ribber. For more detailed instructions see 2 color ribbed brioche stitch on Brother knitting machine 1.
Seeking new geometry, the repeat “inspiration” is mirrored horizontally. The final repeat is on the far right. The knit carriage is set to tuck in both directions throughout. On white cell design rows the main bed tucks, and the ribber is set to knit. For added directions see 2 color ribbed brioche stitch on Brother knitting machine 1. On most or all-black cell rows, the main bed will be knitting, the ribber is set to tuck. In this fabric, the transfers are made on knit stitches created on the previous row prior to moving the carriage back to the opposite side. All transferred stitches and the empty needle are brought out to the E position prior to moving the carriage to the opposite side, which will be creating the second all knit main bed row. Transfers are made every 8 rows, with pairs of transfers being made toward each other, no longer all in the same direction as in the single color sample 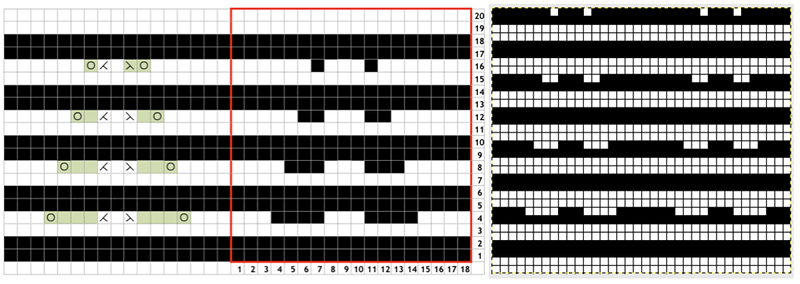 The central repeat is color reversed to achieve the final repeat on the above right in order to produce those transfers on knit rows. The final row count needs to be a multiple of 4 rows in height. Here is a 2 widths 36 stitch X 32-row repeat chart
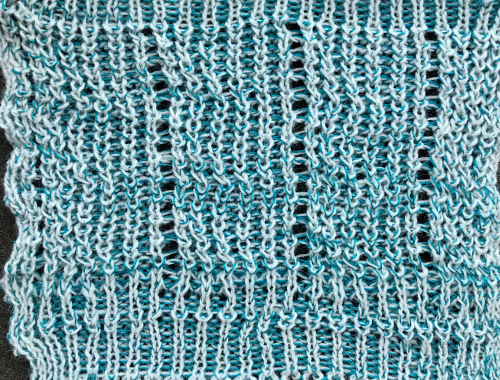
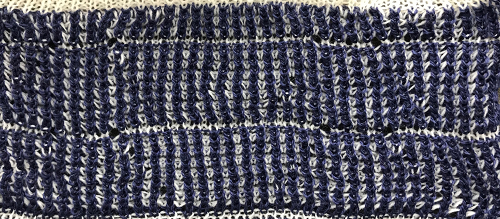
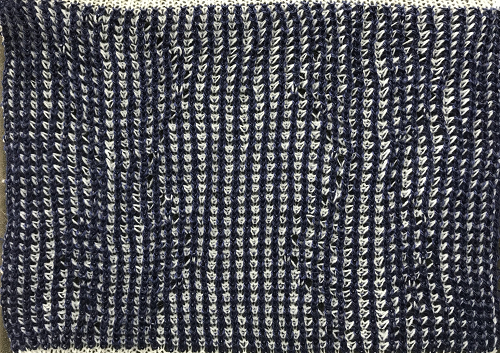
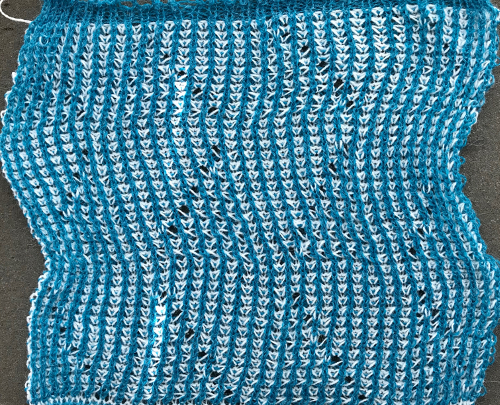
  The extra line seen occurs when one forgets to reset the ribber to tuck, and stitches are all knit on a “wrong row”. It is by coincidence that they seem to occur in the same spot in the repeat
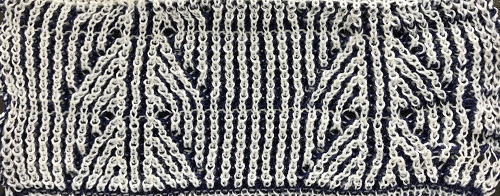
 more accurate knitting
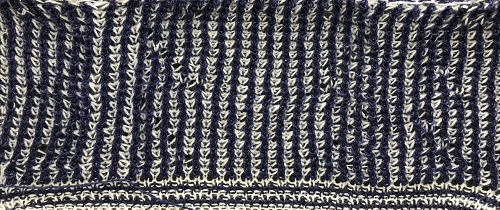 On the bottom half of the swatch below the difference is the result from when one carriage knits every row on both beds, requiring a change on the knit carriage as well, canceling its tuck setting with every other color change
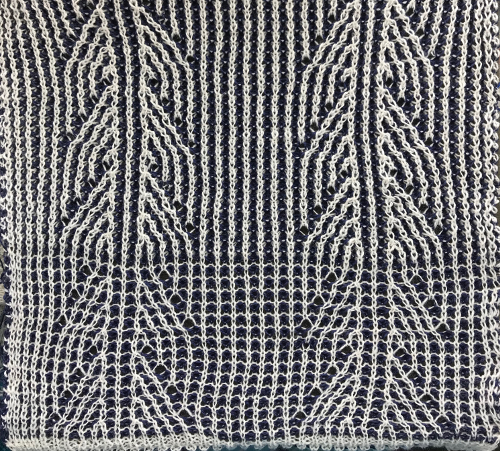
 The last repeat may be flipped vertically as well. It then needs to be edited so those white squares land on the row after an all knit row, not below it. The final repeat on the right is 36 stitches wide by 64 high. There are still 8 rows between transfers. On the left is the first resulting chart, on the right the amended chart places selection for transfers on the proper row.
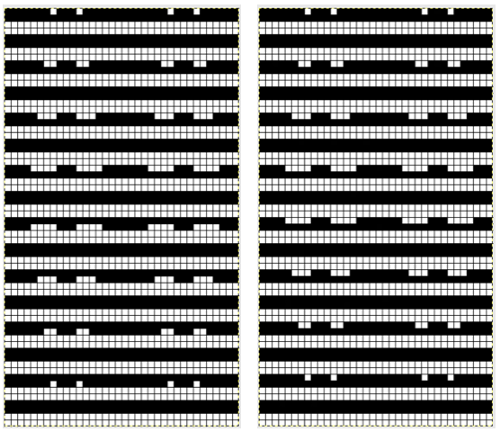
 the germ of one last idea, the repeat 14 stitches wide by 96 high, max transfer seven stitches (odd #)
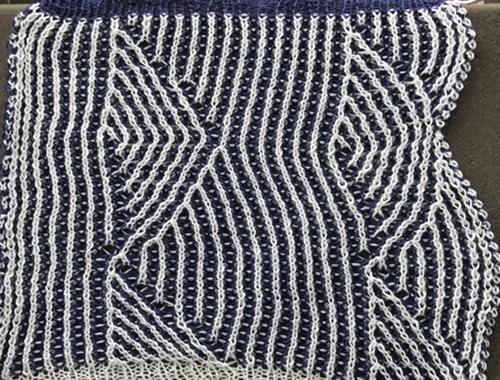 playing with ideas a bit more, max transfer six stitches (even#)
This was my attempt to shoot for a recurring shape and planning on having transfers land on like color, the repeat is 8 stitches in width, 112 rows height. Six stitches are the max number transferred. More would give a wider curve, the final repeat would be exponentially longer 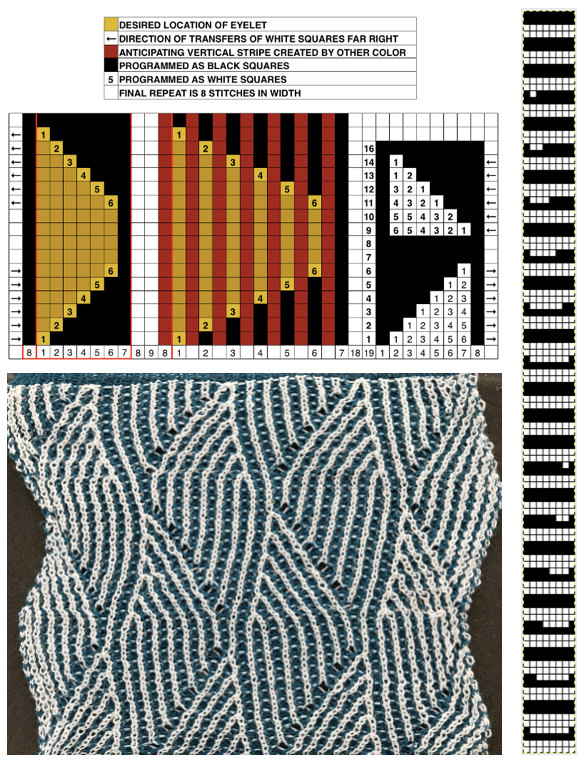 its reverse side :
 When the main bed tucks in both directions with one color, knits in both directions with the other:
  I did try to eliminate those lace holes. On the right of the swatch as shown below I threaded a needle and attempted to close the eyelets with stitches, getting closer to the line one might get in a hand knit. On the left, I hooked up loops to fill the empty needles. The latter changes the intersecting lines completely
picking up only the white yarn from the tuck loop below the transfer 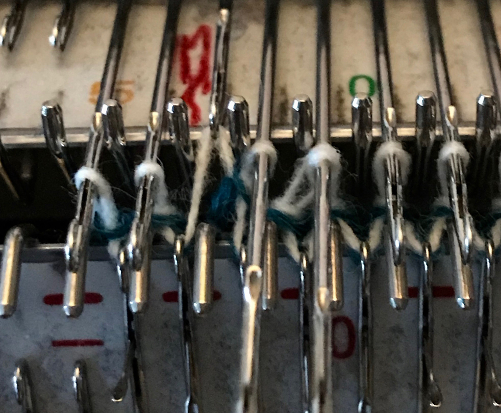 bringing filled in needle back to E position prior to knitting next row
  the difference in intersecting lines at the outer edge of my intended shape.
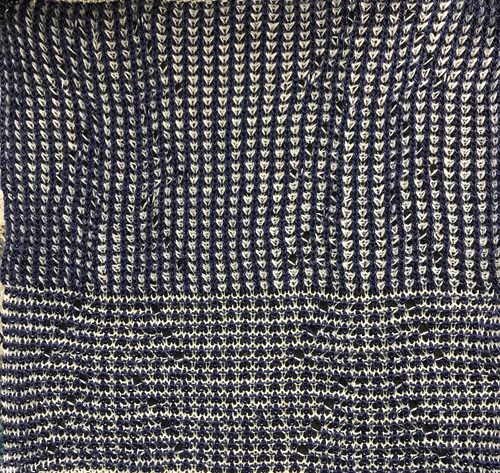
 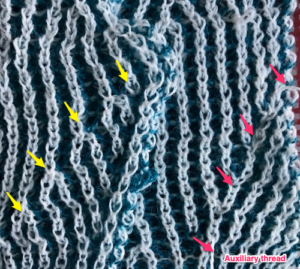 This is what happens when a new design is being tested, and the lili buttons “accidentally” happen to be engaged on the ribber