The first single-bed machines to produce what is now referred to as knit-weaving were the Japanese model ones from the early to mid-1960s.
The Knitmaster 302 had a separate brush unit operated manually to guide the yarn above and below stitches.
On the Brother 585 and 588 models the weaving brushes were built-in and were pressed into place.
Early patterns used aran-weight yarns as weft on 12-stitch machines.
From 1971 onward as 24 stitch machines came on the market, the wider repeat allowed for the use of thinner yarns in the technique.
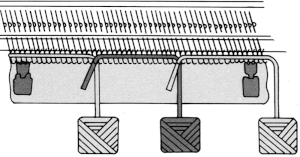
Later manuals including those for some electronic models describe this achingly slow method when using a single-color weaving yarn fed through the yarn mast 

 The subsequent technique shift advice was made for using an intarsia-like method for more colors:
  The method is so much faster than when using the mast and knit carriage it makes little sense to use the former.
The technique begins with the carriage on your preferred side, from the right or left, the yarn is generally laid in starting on the carriage side, with the long end to cone or ball away from it. 
 The wraps are needed in each direction:
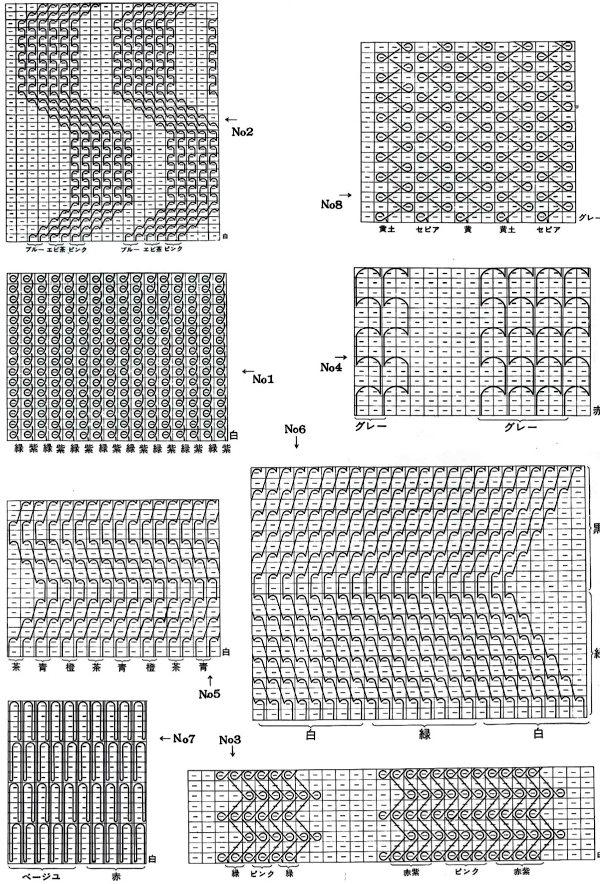
![]() For work on the machine, swatches, punchcards, tools, and more information on types of weaves, ie laying in the yarn with vertical wrappings
For work on the machine, swatches, punchcards, tools, and more information on types of weaves, ie laying in the yarn with vertical wrappings  for more info on horizontal weaving, see Knit Weaving 1.
The resulting knits often lose stretch and drape widthwise, a consideration when making garments. As an alternative, one may knit pieces sideways.
Some ways to push limits, new swatches:
Knitweaving encompasses an extensive range of fabrics. At times the type of machine available places constraints on materials.
One way to use chunky and bulky yarns on standard machines when they do not work with the ground knit on every needle, an option is to use every other needle patterning.
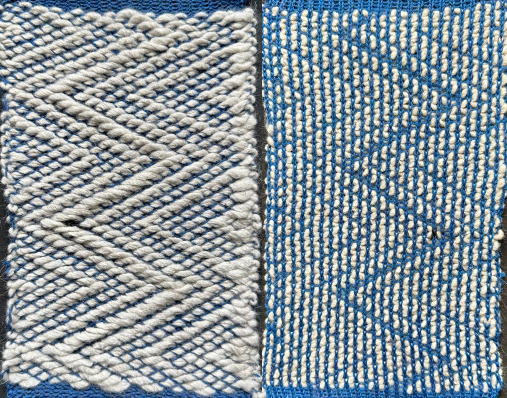
A visual comparison of yarn thicknesses for beginning experiments  Here a commercial twine is used, programming a 4X4 repeat,
![]() and laying the weaving yarn over the preselected needles when the long end of the yarn is away from the knit carriage, thus adding extra all-knit rows between woven ones.
and laying the weaving yarn over the preselected needles when the long end of the yarn is away from the knit carriage, thus adding extra all-knit rows between woven ones.  This yarn has been in my stash for decades unused, it is 92% wool, and 8% polyamide. It was e-wrapped in alternate directions on every row, with care to maintain the thrumbs below sinker plate levels during carriage passes.
 ![]()
 An option for electronic models: open a PNG suitable for knit weaving, as this 24X24 one, double the PNG in width before downloading it, or use the double-wide button after the fact, cast on every other needle, and continue in the technique. Planning the repeat on the needle bed would render better edges than in my swatch, if there are multiple non-selected needles on either side, bring the last needle on that side out to E before laying the yarn for the next row of pattern.
![]()

![]()

More browsing links
A return to loopy knits
Machine knit fringes 4, long loop patterning
Long loops: a bit on method
Knit weaving 2: swatches, experiments
Knit weaving 1
Tuck stitch meets knit-weaving
Lace meets weaving on Brother Machines 2
Lace meets weaving on Brother Machines