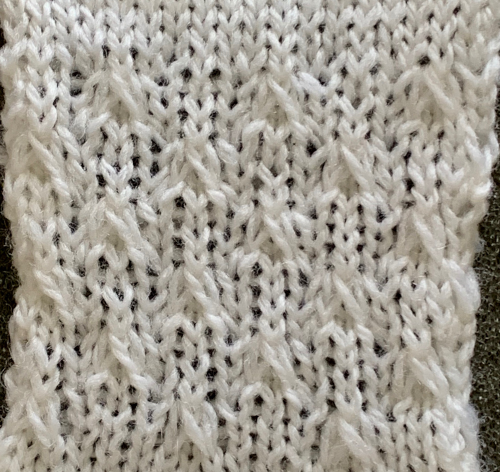
I was contacted via a comment here about the possible methods for reproducing this handknit pattern 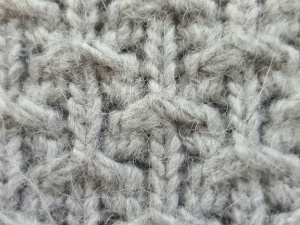 Observations: there are elongated loops on the knit side of the fabric, likely created with slipped stitches. There appear to be eyelets on the purl side. The total number of stitches remains constant throughout the knit. The row repeat spacing is fairly close, so at least to start with I tried single repeats to achieve the look, was not pleased with any of the initial results. That led me to an online search for what would visually appear to have similar qualities in handknit samples. Knittingfool.com is an extensive resource and, to my eye, this slip stitch pattern, “little birds”, shares similarities with the above swatch
 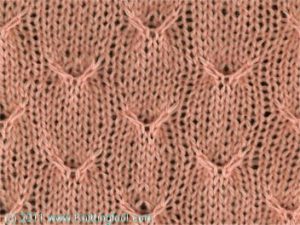 as do “oats” found in a 1984 handknitting publication
 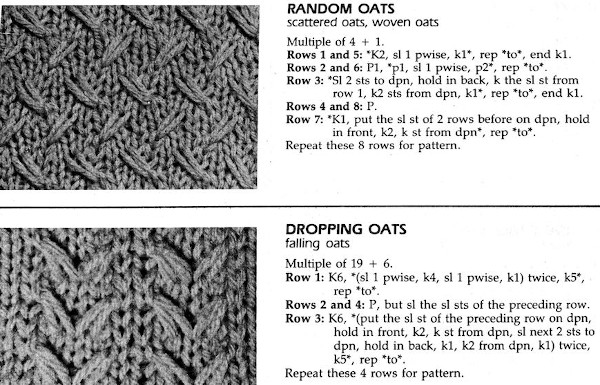 I have a hard time with longhand written instructions for patterns nowadays, have grown so used to creating or working from published charts. As usual, I plan out tentative repeats and ideas, began with this, toying with where to place slipped stitches
 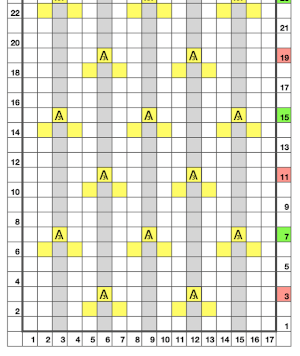 and then transitioned to translating any repeats for use in machine knitting, keeping in mind that in hand knitting actions are made as the row is being knit, while in machine knitting they take place prior to returning the carriage to the opposite side thus knitting that row. This was my first repeat after replacing cells with squares representing knit stitches with black and white planned pixels for electronic download.
 On the machine, the distance between stitches is fixed, so for any crossings or lots of movement across the needle bed it is best to use yarn with a bit of stretch, and a stitch size large enough to allow for the desired actions. I found slipping for 2 rows only did not create enough loop length, so I changed the slip stitch areas to 3 rows in height.
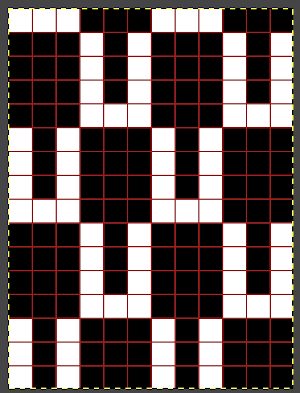
 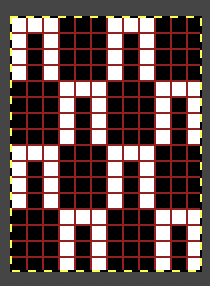 The slip stitch setting is used in both directions throughout. White squares represent areas where needles on the bed are skipped/slipped, not being selected forward and thus knit. This happens for 3 rows, resulting in the required elongated stitches. On the 4th pattern row, the group of 3 not selected needles is where the stitch transfers and crossings occur. Any cabling, eyelet fill-in, etc, needs to be performed prior to knitting that row and moving the carriage to the opposite side. The work is always done with purl side facing, so matching the direction of patterning to a hand-knit may also require mirroring of crossings, depending on your knitting machine model. The goal is to have the K3tog with the long loops in front of the single knit stitch in the center position.
To execute the slip stitch crossings in front of the center knit stitch on the knit side of the fabric transfer the center stitch in the group of 3 and hold aside, take the left elongated stitch and move it onto the now empty needle at the center position of the group of 3 transfer the elongated stitch on the right onto that same center stitch. This may be done in the reverse order to have loops move in the opposite direction on the knit side of the fabric.
 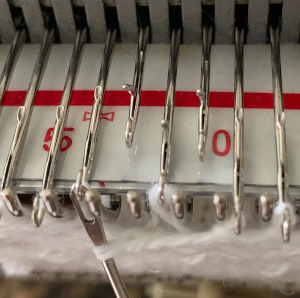 Move the stored original center stitch back onto that center position, there will now be 3 stitch loops held on the single needle
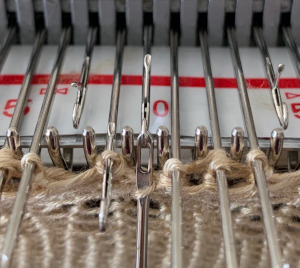
 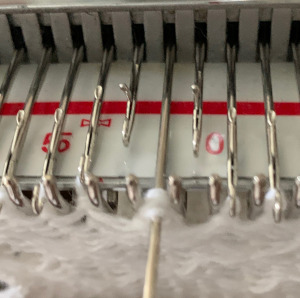 fill in the empty needles to avoid large eyelets, picking up from the row below
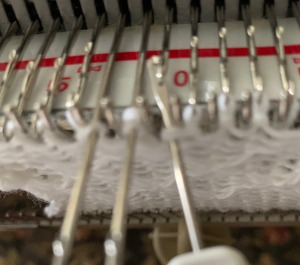
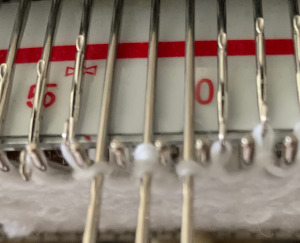 repeat the process across the bed, bring all the needles used out to hold position prior to knitting the next row
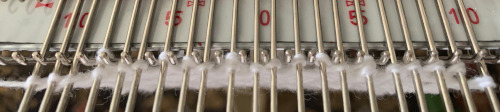
 The yarn used was 3/8 wool at loosest tension possible, the result is subtle as any spaces between stitches get pretty well filled in. Moving on to denser patterning
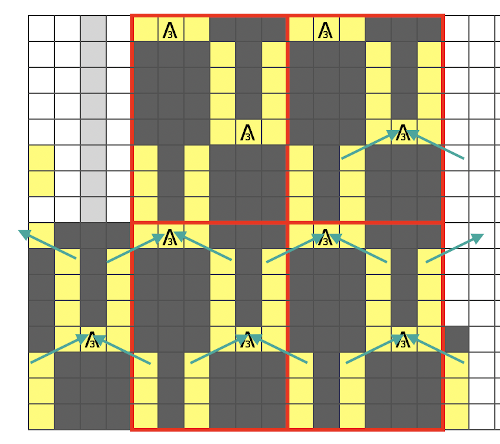
 The elongated stitch crossings now happen every 4 rows, but across two needles, not one. I used a tightly twisted rayon for the test swatch thinking they might be more visible, but the openness in the stitch formation because of the fixed spacing on the metal bed confuses the texture a bit. Simply leaving the empty needle out of work and continuing to knit (1) created too large an eyelet to my taste. Trying to pick up the third slipped loop (2) had the same effect. The best result was obtained by picking up from the row below on each side of the three stitches that are removed and then returned to the needle bed (3).
When pattern row 4 is reached, the not selected stitches are removed on a 3 prong tool, the elongated stitches are moved onto the center needle of the now resulting group of 5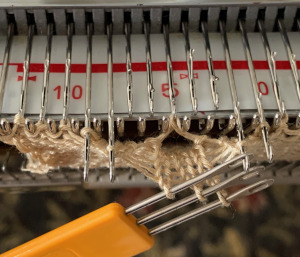 e wrapping the third row of floats can be tested by inserting a single eye tool front to back, twisting either counter or clockwise and rehanging on an empty needle, thus casting on an “extra” stitch
 going back to picking up from row below
 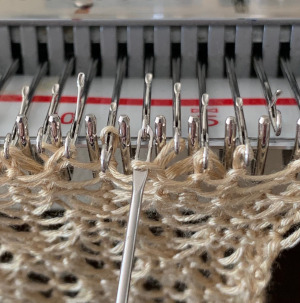 this shows the number of skip stitch floats in each test
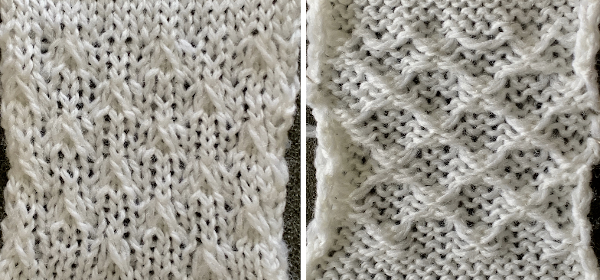
 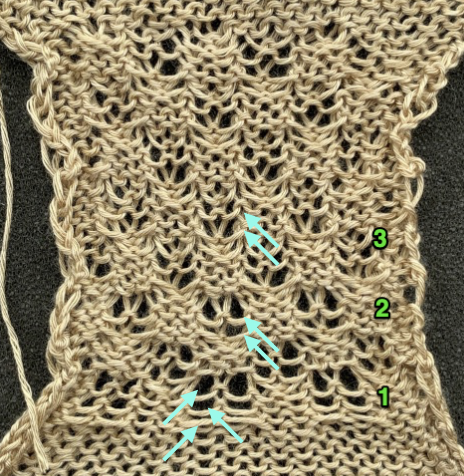 the appearance on the knit side
  comparison to the handknit.
  Charting the actions for a hand-knit version: the top images illustrate the moves on the purl side while on the machine, below it those on the knit side when hand knitting the pattern
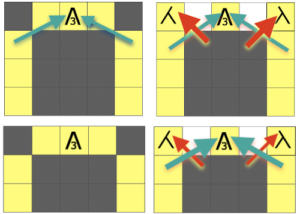 Plotting out borders and repeats for a small test including make-1 increases in order to keep the total stitch count constant. I do little hand knitting nowadays, so when doing so I add as much information as possible including some stitch counts until the pattern is established and I can visually follow it more easily.
 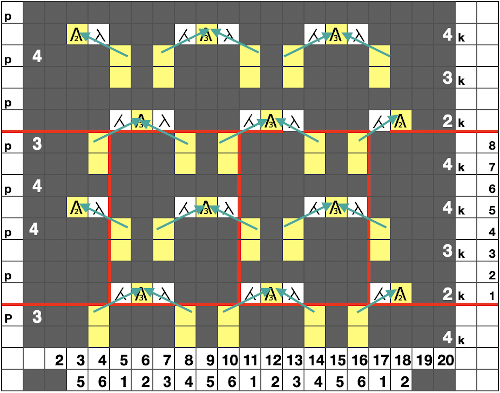 The resulting test swatch
 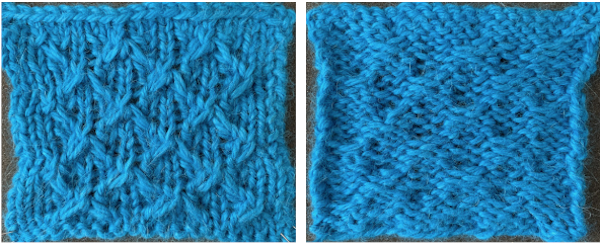 Comparison with the original: I knit 3 together through front loops, so my long stitches are crossed in the opposite direction of the original. Knitting through the back of the 3 stitches would reverse it and yield a matching result.
 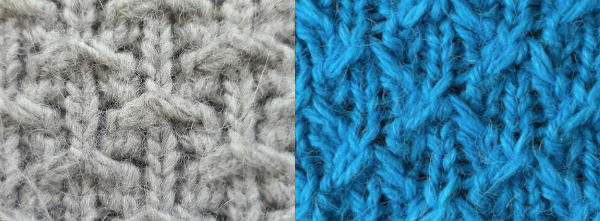 This is an illustration of the method I used to “make one”, in my swatch I kept the direction constant
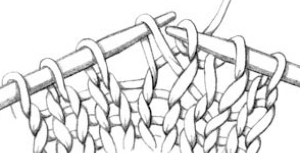
A later post that includes color explorations: Slip stitch patterns with hand transferred stitches, single bed