My previous post, ArahPaint meets Gimp in knit design 1, provided some information based on the assumption the reader had previous experience with a paint program, more specifically, Gimp, and an understanding of the development of knit repeats for various stitch types and techniques. At the time I had planned on expanding it. The information included some points on the following topics:
Magnification
Grids
Drawing in repeat
Image duplicate X
Drawing lines
Color exchange
Image scaling
Fill with custom brush repeat
Designing a tuck and a lace mesh repeat
Dividing large images
Returning to the topic now, I am including more information on designing repeats for knits that are by necessity limited in size and resolution, and am exploring some of the new features.
The updated program may be downloaded from https://www.arahne.si
The company provides a thorough manual that has been amended with the addition of 14 pages to include recently added features/ changes https://www.arahne.eu/pdf/apaint4-EN.pdf
The present menu options in Arah:  Examining the toolbox:
 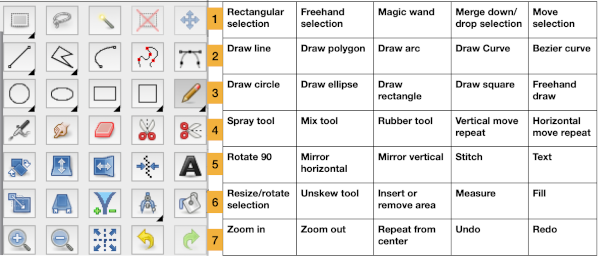 When positioning the mouse pointer over any tool and a brief period of hovering over it, the information on the tool becomes visible as a brightly colored rectangle. The name of the tool appears below its pointer, its keyboard shortcut is also displayed to its right.
  Selecting the tool changes the color of the box containing it to a darker grey as seen here for the draw circle tool on the left
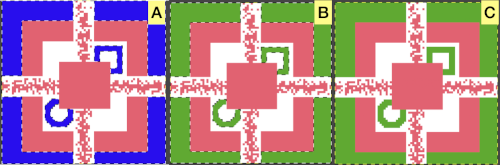
 ![]() The “empty” shapes may also be used to highlight specific spots in pre-drawn charts or images while controlling the size of the line, seen here over the square tool.
The “empty” shapes may also be used to highlight specific spots in pre-drawn charts or images while controlling the size of the line, seen here over the square tool. ![]()
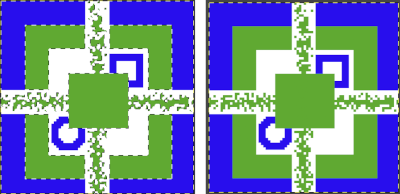
![]() Double-clicking on the shape drawing tools will fill shapes with color, enabling drawing each of them with color or fill
Double-clicking on the shape drawing tools will fill shapes with color, enabling drawing each of them with color or fill 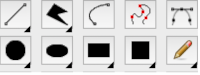 The foreground color in both programs determines the color used to draw. In Arah, the foreground color (black) is drawn with the left mouse button, and the background color is drawn with the right mouse button (white), making it possible to work with any chosen pair of colors without the need to constantly change the drawing color positions.
 ![]() There are other operations in the manual where the use of middle mouse clicks is suggested. In the magic mouse, Apple has eliminated it. There are some third-party downloads available for anyone wishing to restore it.
There are other operations in the manual where the use of middle mouse clicks is suggested. In the magic mouse, Apple has eliminated it. There are some third-party downloads available for anyone wishing to restore it.
Options for tools appear below the toolbox once a specific tool is chosen, they may apply to only one tool or to several.
Rectangle select in Arah will have a moving dashed colored lines bounding box formed around the selected area. 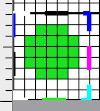 Placing the pointer inside the area will move the selection. Moving the pointer to a corner using the left mouse button on the dotted lines of the dashed rectangle will resize it.
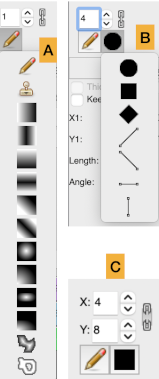
Clicking on the merge down/drop selection tool will remove the dashed outline.  In the drawing mode, the default for standard drawing is indicated by a pencil. Clicking on it with the size set to one pixel brings up options shown in A. If you set the width of a line to be more than 1 pixel, then you can choose the shape of the pen, which influences the look of the starting and ending points of the line and the shape of a single-click drawn object.
Line width sets the width of lines, rectangles/squares, ellipses/circles, arcs, polygons, and brushes, B.
The options appear when a number greater than one is entered. If you break the chain’s link by clicking on the chain icon, you can set the width in the x and y direction independently, C.
 Gimp still fails to create square pencil brushes accurately in consistent increments in size, leaving the only option for using the desired shapes to be saved in preference folders for repeated use or to work temporarily from the clipboard.
The built-in circle brush may be used, with the following results for values entered from one to eight
 Other small shapes can be drawn by filling in individual pixels. Using the rectangle tool, and a variety of other means, patterns are saved for future use or from the clipboard (until one quits the program), or in the preferences pattern folder, becoming a handy feature for filling in backgrounds or pattern segments for specialty fabrics.
Both programs share chain links that may be kept closed to preserve aspect ratio in the designs, or broken to allow for disparate pixel settings.
In Arah, a personal brush library of pngs may be saved in a personal folder for repeated use.
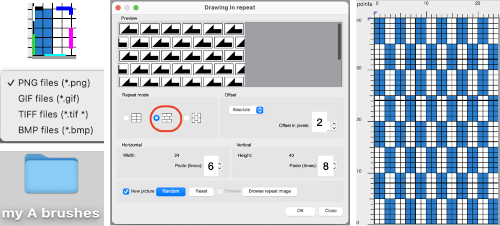
Drawing in repeat makes for easy creation of a filled canvas including pattern shifts, for example, the punchcard repeats are a fixed 24 stitches wide and a minimum of 32 rows for the card to rotate continuously. An even number of repeats in height will produce a correct brick punchcard configuration. For any DIY pattern design, it is helpful to understand some of the rules for the specific knit fabric and how smaller repeats need to align in width and height.
 At any point pattern fill may also be added in variable patterns, here using the stitch tool set at variable lengths
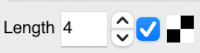
 Easy and fast dithering effects to part of an image or all of it, here an 80X80 pixel canvas is used along with gradient fill on what begins as a square filled with a solid colored ground
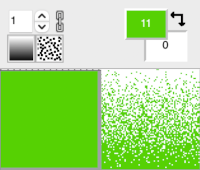
Rectangles, squares, and ellipses may be drawn from outlined to filled.
Double-clicking on the icon will activate the fill function, doing so again will return it to empty shapes, and one may easily toggle between them in the same design. Wider lines or filled shapes may be set to be solid or gradient fill. The process is easy and quick.
Keep in mind while having fun drawing that especially when you enter the territory of multiple colors per row in machine knitting the color separations for programming them in any machine become more complex, and are far easier in electronic machines if software such as Ayab, img2track (my preferred), or DAK with their respective cable connections for download are available. Dak allows for a print template of the separations which may be saved and in turn be pixel-redrawn or punched for use outside its universe.
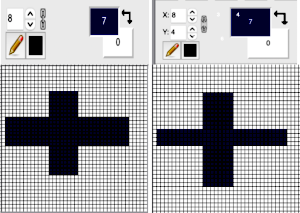
This is an 80-stitch design, committing to it for knitting a scarf, 80 stitches are likely if knit on a 4.5 mm machine to yield somewhere between 7 and 10 inches in width. Tiling in Gimp, or drawing in repeat in Arah helps visualize the full piece and estimate the minimal number of rows to be knit based on the gauge while remembering that 6 carriage passes will be used to complete each design row unless using the heart of Pluto separation in Ayab or separation B in Dak are used. Here 800 design rows are represented.
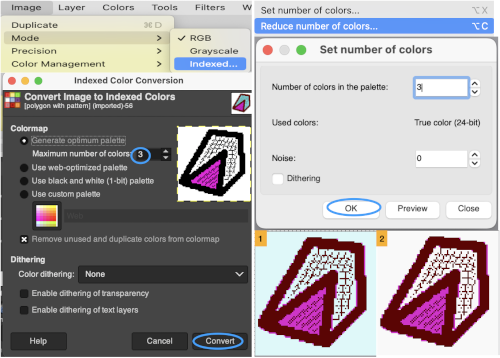
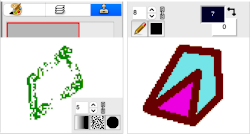
 Changing colors in the image further helps one decide whether it is worth committing to knitting it.
The new color test image, also 80 pixels by 80:
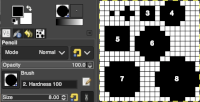
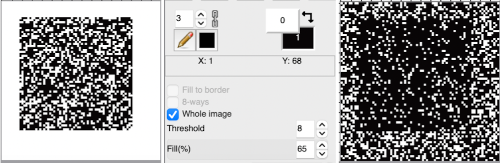
 The paint bucket tool Gimp in the latest update no longer works on specific areas of the design, but rather, fills the whole canvas. The fuzzy select tool is now used to fill in isolated areas or switched to select by color to fill all areas drawn in that specific color. Selections will be outlined with a bounding line A, bucket fill is used to alter the selection B. Click on the rectangle tool and then in the working window outside the image to remove them and set the results prior to exporting them. Selections are filled with the foreground color.

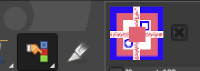
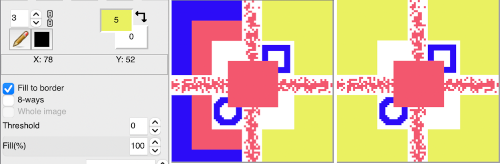
 In Arah simply click on each area to be filled in with the new color sequentially. There are, in addition, other fill options in Arah:
 Fill to border fills in all pixels in each area selected no matter which color they are until the background color is reached, in this case, white
Changing single colors globally is easily done by adjusting the palette for the specific color. Double-clicking on either foreground or in this illustration the background color will load a palette window including it. There are 2 ways to alter the shade, one is by moving the cross-hair, outlined by a circle, and the second by using the slider, pointed to by an arrow. 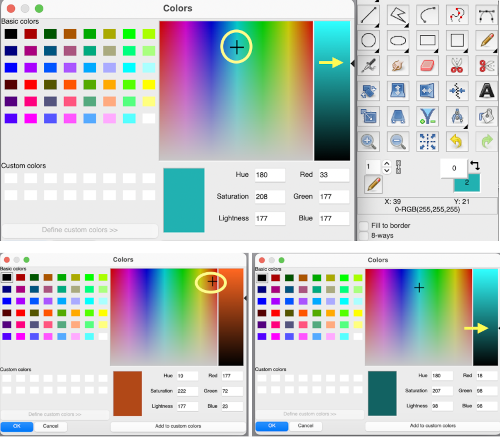 The new color is then changed after clicking OK, in this case altering the foreground color, no need for using the paint bucket.
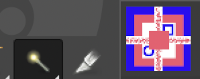
  The spray tool, on the left, may appear similar in appearance to the color picker in Gimp, shown on the right, but functions very differently, creating a spray in the foreground color. The shapes of the pixels and their size may be set in varied values, but the function is of limited use in small repeats.
 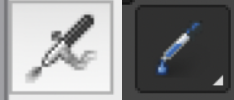 The way to activate the color picker in Arah is to press the Shift key, the mouse pointer will change to the familiar dropper and then click on the pixel in the desired color to select it.
The stitch-tool is an interesting new addition, is useful in drawing points to break up long floats, ie in fair isle knitting, where floats longer than 5 stitches are not recommended. 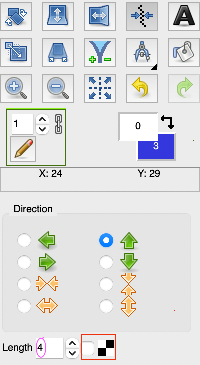 The provided repeat, intended for plain weave, is fixed in size, 2 stitches wide, and familiar to machine knitters as the one found in basic punchcards provided by manufacturers, with the card often numbered one in the packet. The repeat filled the card, with no breaks in the pattern. There was a whole publication on using CARD 1 in 100 fabric variations by Kate Armitage.
Using the tool: changing the pencil size or leaving it at 1 does not have any effect on the results, the pattern is a fixed alternating 1X1.
The arrows determine in which direction the stitch line will follow the shape. The length is set to the distance between the two points in any direction.
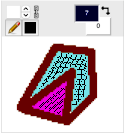
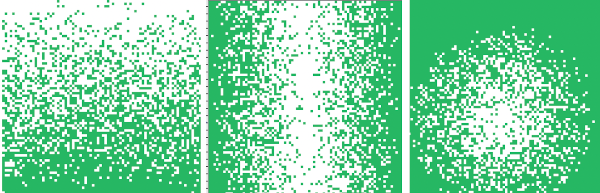
To enable the tool, click on the box to the left of its icon. The resulting effect depends on the base image size and may be used on more than one color. Here the effect was used on filled circles 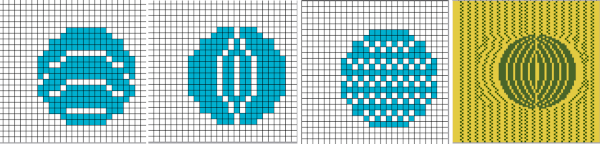 Using the options on full square canvases yields results that can easily be translated into knitting patterns. Note that the effect, however, does not extend to borders in all directions. The saved “stitched” image can in turn be cropped to meet knitting repeat needs.
Some effects: without enabling the plain weave repeat ![]() Engaging the repeat: the intermittent stripes may also be easily rotated
Engaging the repeat: the intermittent stripes may also be easily rotated 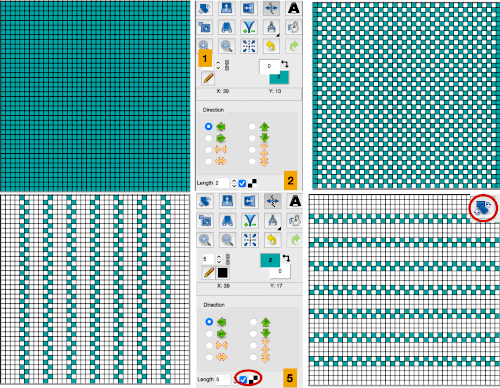 If no direction is highlighted, the bands form horizontally by default. After spaced bands are drawn, clicking in the horizontal spaces between them will form secondary motifs.
 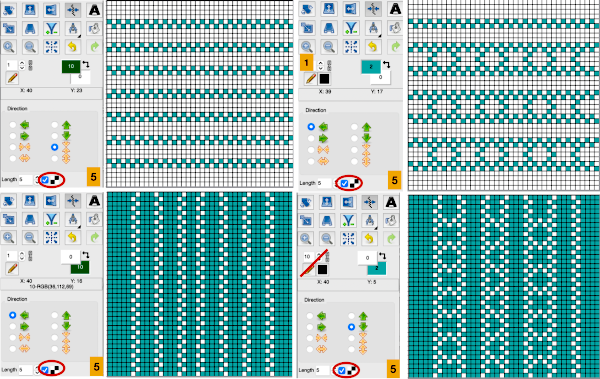 Square grids can appear to be suitable for tuck or slip stitch patterns,
  but the individual repeat would need to be isolated, and those horizontal lines would need to be converted to solid color as well, representing all-knit rows.
A workable reduced repeat:  Testing its alignment may be achieved by tiling in Gimp and drawing in repeat in Arah. There is another quick preview for doing so, the drawback is only that any repeat appears to be multiplied by a fixed X10 in height and width. Here the 4X5 original is repeated to 40X50 pixels
 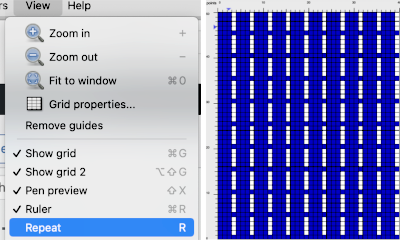 an 8X5 design repeats to 80X50 pixels
 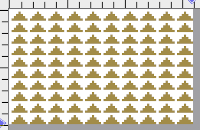 If you prefer to work with colored shapes rather than black and white ones, whether intending to print punchcard repeats in black and white or to use the file for download to electronic machines as a BW png, the easiest way to create the repeat is to begin to do so using a single color on a white ground or the reverse, and then to use the select by color tool in Gimp to bucket fill the color with black, or adjusting the color palette in Arah.
Large image color reductions or steps for color separations for more advanced fabrics aside from the size of the repeat require their own post.
A beginning idea for future discussions on methods for performing them and the question as to whether the presence of white or specific hues in pattern palettes matter in downloads