In a previous post I addressed some of the issues involved in using the studio mylars in Brother KMs. I have an enormous store of them from back in the day when it was only possible to have single patterns occupy a fixed number of rows, while the remaining surface for those rows was unusable. This fact changed when the company produced the EC1. I revisited this topic after a forum question on the subject. It would be convenient to produce consistent results with the Studio brand, and be able to use my stash of them as well.
It is interesting when one is trying to figure something out how sometimes the obvious may be missed. Instinctively this time, I simply lined up the bottom design row of both mylars before drawing the set line, disregarding the difference in length between the 2 mylars below it. This bypasses the 3-row difference in programming rows suggested in my previous post completely, while the shorter distance below the set line to the reader did not prove to be a problem  I had tested template markers on Brother mylars when ink pens were discontinued and I had no luck with permanent markers, found they shed a bit and pencils tips broke easily, while I could not be as neat in rendering small markings as simply by going the route of using a number 2 pencil on the mylar’s back ( I prefer the Mirado Warrior HB 2). Drawing with enough density “within the lines” on mylars is rendered far easier with one of these templates, at one point made available from Brother. Similar ones may sometimes be found in stationary or art/ drafting supply stores.
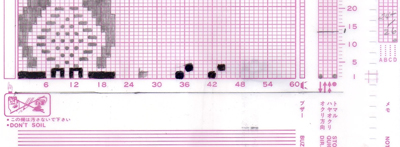
  The images below show my first “new” tests: on the left, I drew with the template marker over previous pencil markings, the squares repeat over # 36 was made with multiple layers of a sharpie (which smeared even after what would seem like adequate drying time), the ones over #42 are made with the template marker. The sharpie did not get scanned properly by the reader, all other marks did. There is a guiding pencil line placed where the set line familiar to Brother users would be. In the first narrow column to the right, the pencil marking corresponds to the first visible row (design row 1 in reader). The column on the far right (absent from Brother) could be used for additional cues in knitting ie. color changes, knit rows between lace transfers, etc.
the template markers are easily available here in the US, for a little over $ 4 now; frequently they are found in quilting departments of fabric stores. I am not certain which specific brand mine is, but this is what it looks like
the “pencil” that appeared to work when used on the back of both mylars is the Pentech rubberwriter, which seems to no longer be available (rubber coating is on pencil exterior; results were random on Studio mylar)
When used on the respective brand machines, the Brother reader scans 13 rows below eye level outside the machine,  while Studio scans 10 rows below
  This explains why the columns intended for memos extend up and beyond the last row which can have cells marked for pattern in each brand.
2021_ some FB knitters have mentioned having success with using whiteboard markers to make readable and removable if needed marks on Brother mylars
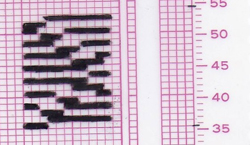
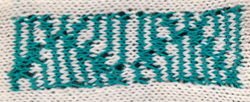
I had some erratic results as seen in the last post. Here a small success led to a bigger trial (template marker over motif previously drawn with studio electronic pencil) and I ran into a different problem: bands of rows on the mylar did not select; this may be seen in the image below (testing repeats for any stitch in FI makes drawing or punching errors easier to visualize), and recurred in a different area of the card, while at its very top nothing got read ->needles selected
———-
a couple of times over the decades of my knitting with Brother mylars I ran into this specific problem for no apparent reason, so I tested a different Studio mylar sheet, toward the top, and both the template marker and the rubber writer got to read/knit correctly
“going bigger” again, the pencil did not get read, while the template marker did
playing with a slip stitch on another part of the sheet (marker)
the “patterning errors ” in the image above (extra brown stitches third white stripe from the bottom of the swatch) were actually due to a bit of eraser left after its use on the mylar in the blank area of the card.
——-
In summary: there have been good results in my trials in using the template marker both on top of already rendered electronic pencil drawings or on previously blank sections of Studio mylars and subsequently having them read by my Brother 910, with limited results in having small repeats read when drawn on the back of the mylar in pencil, but not with larger motifs. There have also been some problems that are not immediately explainable.


Highly helpful, looking forwards to visiting again.