I am taking a break from lace, the two posts so far on using the module reflect my own experiences outside the program’s environment. The latter will continue to be the focus of my future posts when exploring the use of the software, with testing specifically aimed at adapting or using any of the Stitch designer features and output on Brother knitting machines.
Almost a decade ago I had a temporary leaf lace obsession, and it appears to have resurfaced. This pattern was offered in a Japanese machine knitting magazine, with no accompanying MK repeat. When transferring stitches by hand it is possible to move multiple stitches within a single row as well as to move stitches in opposite directions within the same row, making the published repeat executable ![]() When automating the repeat edits are possible and very easy using the lace module, these first drafts were created in Numbers,
When automating the repeat edits are possible and very easy using the lace module, these first drafts were created in Numbers, 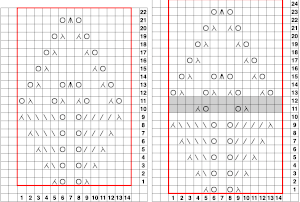 I have to admit the first time I tried to knit both the associated png, mirrored and not, I experienced patterning errors. Whether due to operator fatigue, static, or any other possible cause, on a different day both designs knit successfully, and my appreciation of the module is growing steadily. The results for this, a complex shape, are quick and awesome when compared to the amount of time it would take to draft the pattern outside the program.
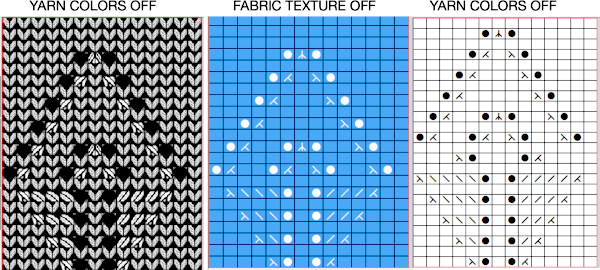
The design process, beginning with Dak: in this instance, the lace tool was used with what I will call the drag and stop method, initially on the fabric texture using the smart symbols.  At any time during the drawing process, several image view options are available and may be changed back and forth by deselecting features in this menu
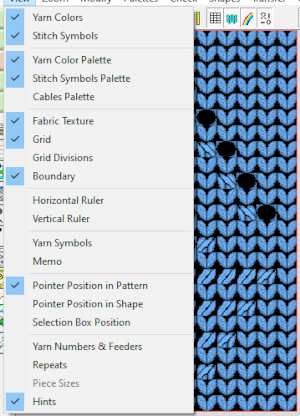
 An stp was created, the template is marked 74 rows in height, filled in as the stp was generated, right side facing
 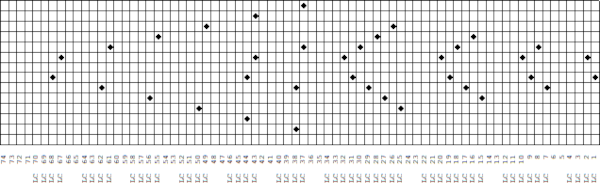 Numbers and Gimp reduced the template to a png 14 stitches wide by 52 rows long, needed to be mirrored using the number one button on the 930 for successful knitting,
 ![]()
 matches the original illustration. Dak makes slight modifications very easy. The untested brick repeat, 28X104, developed using Arah followed by its png
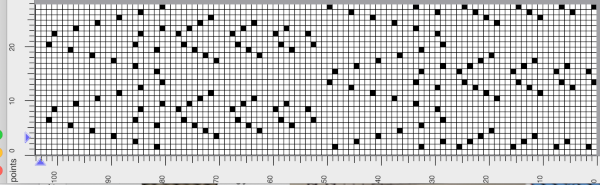
![]() changing that central shape
changing that central shape
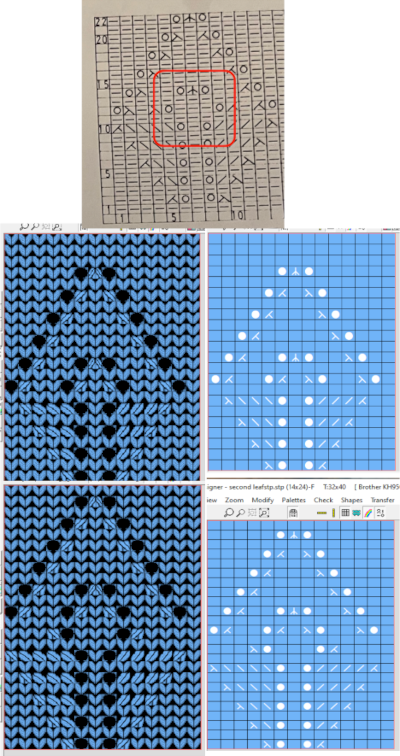 The amended design drawn in repeat in dak visualizing the knit,
 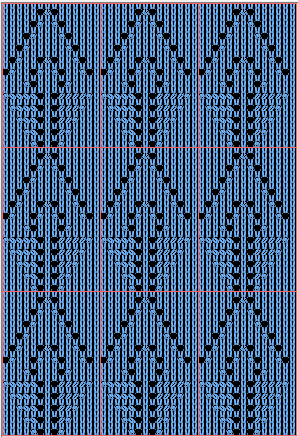 The print preview template:
 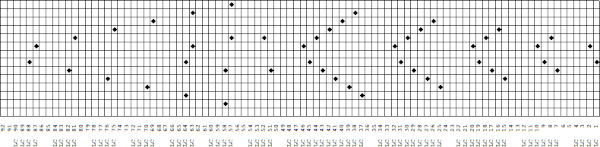 and converted for use on Brother electronics using Numbers and Gimp
 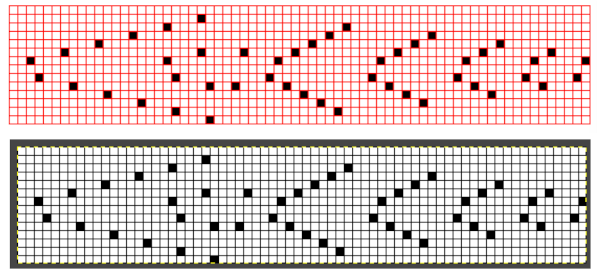 the resulting png, 14 stitches by 68 rows, also knit using the number one button on the 930
 ![]() the proof of concept swatch
the proof of concept swatch 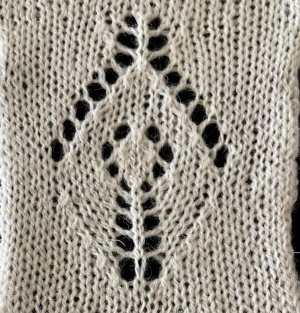 The brick repeat developed in Arah, now 28 stitches by 136 rows,
 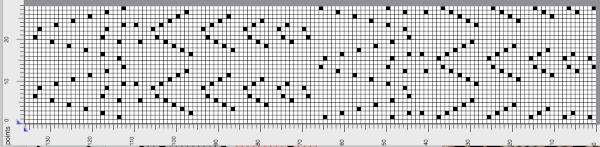 its png
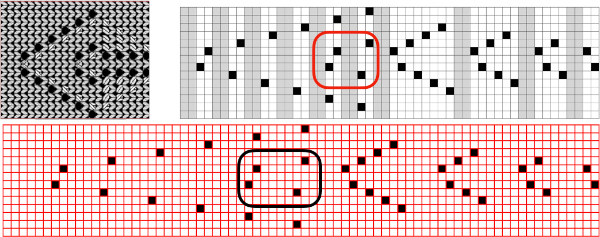
 ![]() comparing the initial three knit results for differences, the samples were knit using the same yarn at the same tension
comparing the initial three knit results for differences, the samples were knit using the same yarn at the same tension 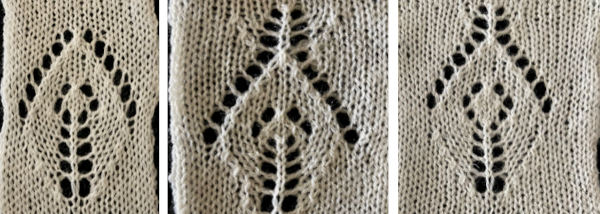 A test for the second brick repeat, here visualizing results with a screengrab of the stp.
 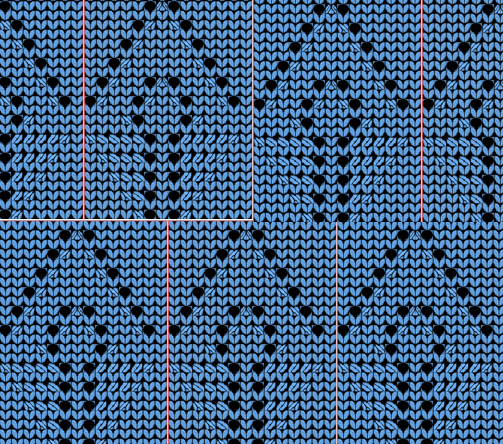 The test swatch is for a single repeat width, the initial yarn used ran out, hence the color change, the second yarn was thinner and broke, but there is enough to get a sense as to how the overall alignment of the knit shapes will appear, including that horizontal chevron between the shifting leaves. The png required mirroring when used on the 930.
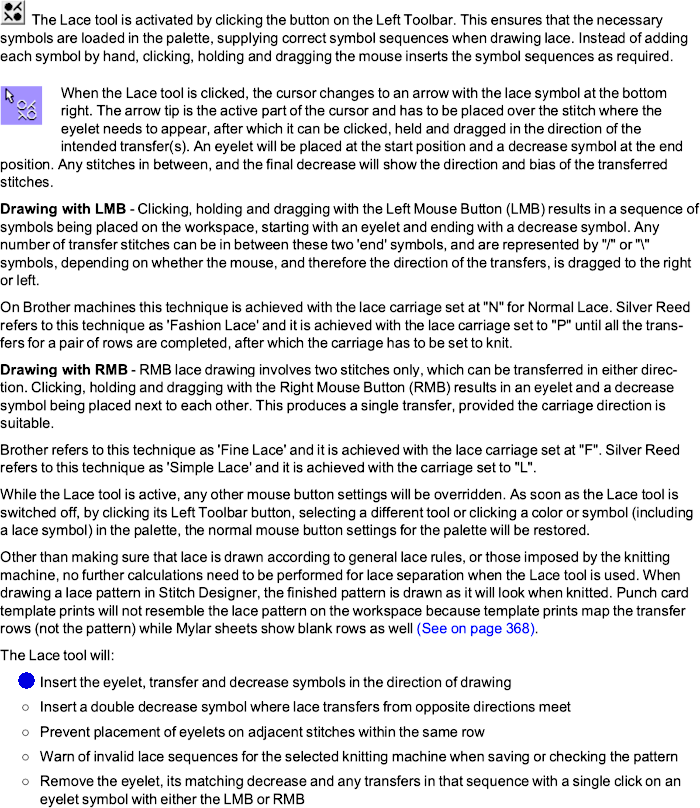
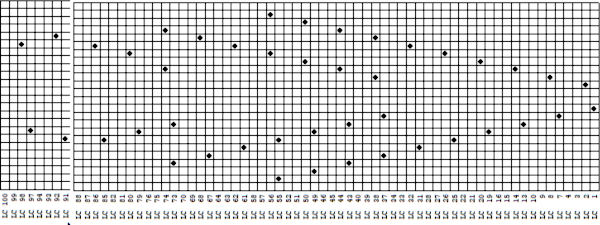
 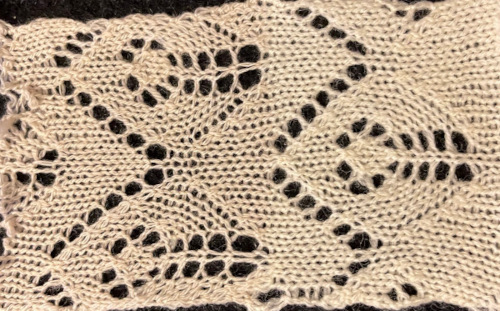 I became curious about reverse engineering from punchcard to an stp file: my first choice was of a “straightforward” but slow to knit pattern, 34 LC passes are made before any knitting rows follow. Ayab users have access to a huge library of knit-ready pngs, this was one, it also happens to be 24 stitches wide, so suitable for punchcard users. The published repeat as given is shown on the left, mirrored for use on my 930, left and right transfers are then marked in red and green respectively to check transfer placements. The right half of the image is then copied and dropped down a single row reaching the necessary configuration for Dak, allowing for the stp to be created.
 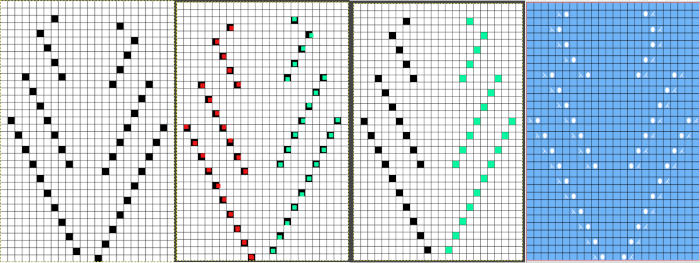 deselecting yarn colors in Dak provides a clearer view of transfers
 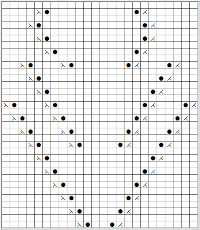 the 24X36 original png:
 ![]() A proof of concept swatch: the yarn was too thin for the many transfers and broke, so on the right, there are fewer stitches than initially planned. At the bottom there is a single instance of 2 rows knit after all the transfers, there are 6 rows knit after each transfer series in the remainder of the swatch. Color changes could be added in multiple places to interact with the wavy shapes
A proof of concept swatch: the yarn was too thin for the many transfers and broke, so on the right, there are fewer stitches than initially planned. At the bottom there is a single instance of 2 rows knit after all the transfers, there are 6 rows knit after each transfer series in the remainder of the swatch. Color changes could be added in multiple places to interact with the wavy shapes 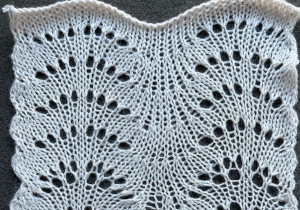 The template for the stp as first attempted is something quite different but would work if the pairs of blank rows between pairs of transfers are eliminated over its length except at the very top
 it would need to be drawn eliminating the pairs of blank rows between transfers to match the original repeat because all those carriage passes are consecutive. Drafts with no blank rows between alternating transfers are not accepted by the program and ruled out in any template preview as well.
 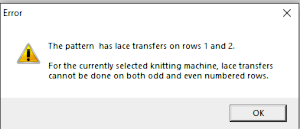 The complexity of working with a “simple” repeat: over the years I accumulated a notebook full of copies from Japanese magazine pages with what I believed to offer interesting potential, this repeat happened to be one. The markings for the knit rows on the right, and the two blank rows at the bottom identify it as suitable for Studio punchcard machines, and it would appear to be easy to translate for knitting on Brother thanks to those 2 blank rows between transfer cell markings.
 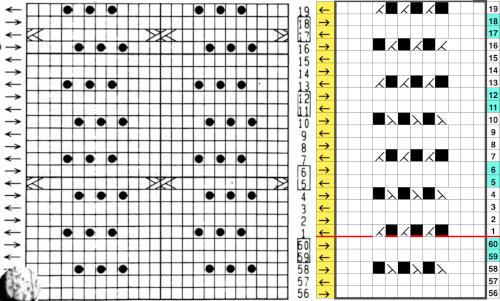 Developing the Brother repeat in Numbers for beginning with transfers to the left. The repeat is recognizable as a mesh variant, more information for mesh design repeats may be found in the post, the lace carriage is used for 2 passes, and then for 4 passes alternately
  the repeat on the right was created in Gimp.
 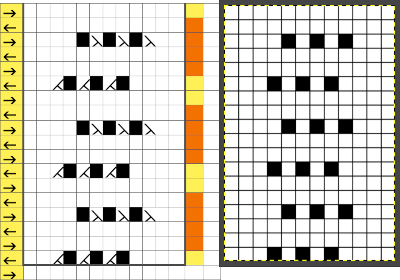 The 12X18 png
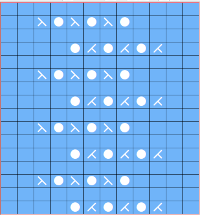
 ![]() was mirrored for use on my 930, some cables were added. A 1X1 crossing in the thin yarn used in the sample would have been nearly invisible. The placement, in this case, is at the top of the full repeat, after the first knit row before returning to transfers for design row 1, an easy way to track the hand technique. The 2X2 crossing used might need help with definition and placement in a wider vertical knit strip
was mirrored for use on my 930, some cables were added. A 1X1 crossing in the thin yarn used in the sample would have been nearly invisible. The placement, in this case, is at the top of the full repeat, after the first knit row before returning to transfers for design row 1, an easy way to track the hand technique. The 2X2 crossing used might need help with definition and placement in a wider vertical knit strip 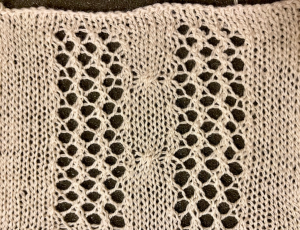 Creating the stp: the size of the png was used to create the image file, which required cropping, in Dak this would be the menu language after activating the proper tools. the stp size is 12X16,
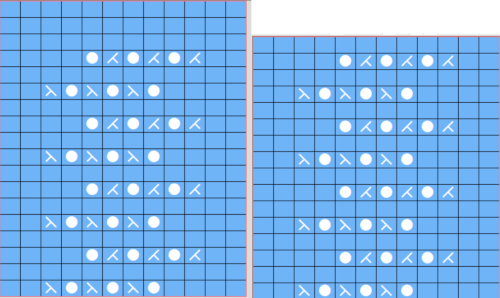 The template generated for a Brother punchcard machine illustrates the problems and some of the confusion if the template repeat is used for actual knitting, especially on the punchcard machines. Drawing the eyelet and dragging the mouse one cell to the left is the intuitive way to draw for transfers to the left. The symbols appear to be right-side facing by default and if they are in turn mirrored by the program prior to saving, when the templates are generated, the intent for use of the design would match. The numbers on the left are in the punchcard template, adjusted by cropping the two extra rows in the Brother electronic template by the software, do not reflect the actual design row numbers. The starting row is wrong for the Brother lace carriage operation from the left to produce the first row transfers to the left in actual knitting. As far as determining sequences for knit row placement, that is left up to the punchcard knitter’s experimentation. The minimum repeat for a punchcard to roll continuously is 36 rows, that fact needs to be considered if punching cards. The repeat shift for the first transfers to happen toward the left is illustrated on the right.
 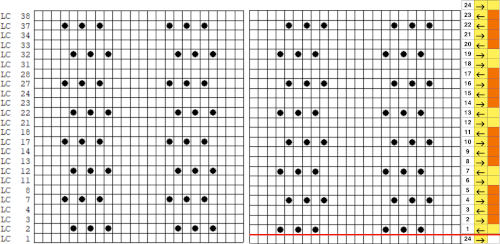 As initially given, with the lace carriage starting on the left, the first transfer row would be to the right. In many cases, this may not matter, but in this instance, where the knit rows happen after 2 or 4 LC passes respectively, the template offers another instance of the fact that the knitter using it needs to have previous understanding and experience in creating the particular stitch type. This version does not have an accompanying swatch.
 ![]() Analyzing the electronic template for interactive knitting: it is correct in marking rows for LC operation from the left with the first transfer row made to the right, matching the above chart.
Analyzing the electronic template for interactive knitting: it is correct in marking rows for LC operation from the left with the first transfer row made to the right, matching the above chart. 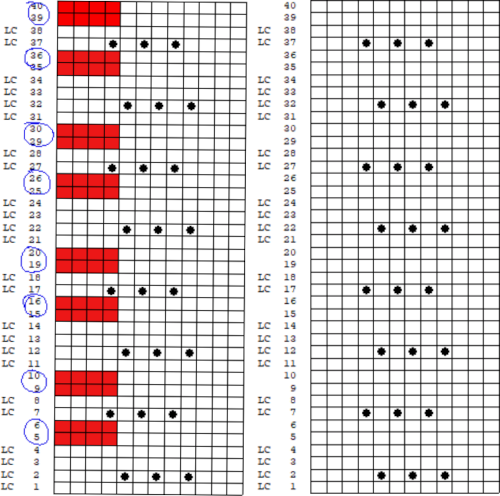 The LC operation is continuous
 ![]() Eliminating the rows marked with red would yield a workable punchcard repeat, with loss of the cues for the proper sequence for LC passes.
Eliminating the rows marked with red would yield a workable punchcard repeat, with loss of the cues for the proper sequence for LC passes.
In this case, it would be best to redraw the adjusted electronic repeat prior to punching any holes.
Getting that first row to transfer to the left can be achieved by mirroring the first stp draft, using the second selection, 
 the resulting electronic template yields the repeat with transfers in the direction intended, as seen in the proof of concept swatch and its repeat
 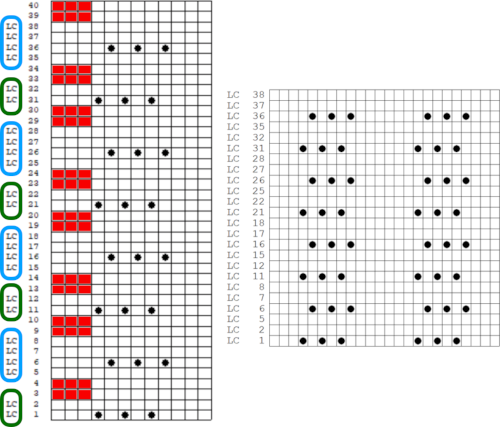 For good measure, the repeat is also drawn as stitches and produced the punchcard template with a first blank row identical to that generated when using symbols
 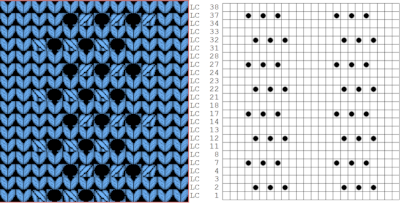 Using the pencil tool to draw the transfers differently resulted in a series of error alerts, so not an option.
For Brother knitters mirroring the self-drawn stp and altering the electronic template may be the way to go. Also, be alert that Brother and Toyota punchcard knitters cannot knit interactively because the interactive knit rows present in the mylars cannot be present in the punchcards, a fact that is acknowledged by the software company nearing the end of the content on the lace module. No mention is made of the fact that for successful knitting the knit carriage on Brother needs to be set to KCI or II for the pattern to advance properly during interactive knitting and that those rows need to be omitted if entering the pattern on a mylar sheet or are using the repeat for download to a machine outside the DAK environment and you prefer not to have the knit carriage selecting needles as well as the lace carriage.
In summary, the information on the tool presented in the manual for the module: