ArahPaint has become my most frequent go-to when designing repeats. A previous blog post explains the process used below.
More will be added as I review old posts.
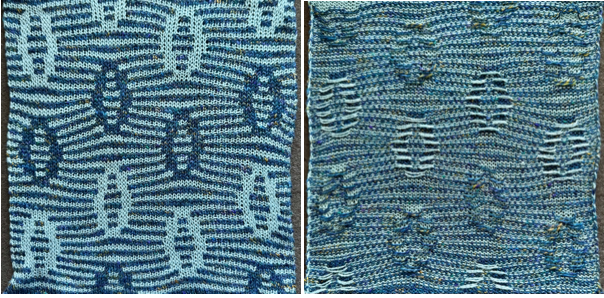
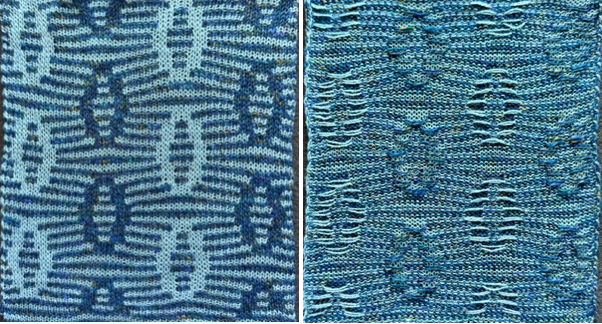
From 2013 Block slip stitch separations
 In developing DIY, beginning with symmetrical designs can lay the foundations for more varied pattern placements.
The re-drawn original 10X8 ![]() double length 10X16
double length 10X16 ![]() two-row brush
two-row brush ![]() filled 12X16
filled 12X16![]() brush fill, white color to alpha
brush fill, white color to alpha ![]()
![]() added surrounding space, 16X21
added surrounding space, 16X21![]() brick repeat offset by 11 rows, 48X42
brick repeat offset by 11 rows, 48X42 ![]() isolating the repeat, BW indexed, 32X21
isolating the repeat, BW indexed, 32X21 ![]() check tiling, 64X63
check tiling, 64X63  using a 2-row brush fill to visualize motif placements
  doubled in height for slip stitch knitting, 32X42
 ![]() double height, color reversed, in repeat for knitting 64X84
double height, color reversed, in repeat for knitting 64X84
 slightly different spacing, 28X20
 ![]()
 double height, in repeat for knitting. 70X120
 Shapes on a nearly balanced ground require added steps
24X11![]() 24X22
24X22![]() every-other row white color to alpha 24X22
every-other row white color to alpha 24X22 ![]() drawn in repeat 48X66
drawn in repeat 48X66![]() 48X66 mirrored
48X66 mirrored 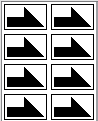
![]() cropped to 24X66, using red for visibility
cropped to 24X66, using red for visibility ![]() copy and paste on the first BW repeat converting white color to alpha: begin in center
copy and paste on the first BW repeat converting white color to alpha: begin in center ![]() continue with half repeats
continue with half repeats 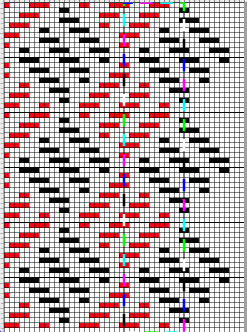 48X66 3 color
 ![]() isolating the 24X22 repeat
isolating the 24X22 repeat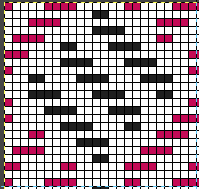
![]() BW version
BW version ![]() checking tiling
checking tiling  the color reversed PNG
 tested on 60 stitches, end needle selection on
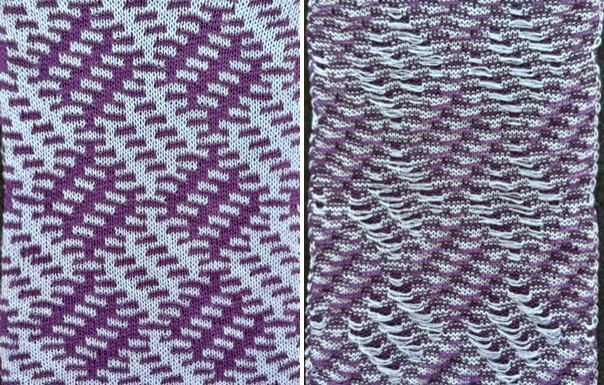
Tips on Single bed tuck and slip stitch fabrics 2: adding color