Any tuck repeat may be used in the slip stitch setting. The results for “safe” repeats executed in slip stitch may not be very textural or dramatic.
Though at times presented in color, the same patterns can be very effective in single colors as well.
Prior to testing multicolor patterns, I like to start the work with waste yarn, testing color changes there first, making certain colors are threaded properly, not crossed, and that the color changer is set up properly.
The Brother single bed color changer is unique, in that the yarn remains in the changer, not leaving it with each color change; its manual
In the absence of a single bed changer, some fabrics may be knit with the ribber up, using the double bed model. This is the only option available for the bulky machine. There is a limit as to the amount of tucking that can be achieved successfully since the ribber arm does not have the system of wheels and brushes that help keep loops and stitches in place single bed. Manuals
Instructions from the Brother single bed color changer manual 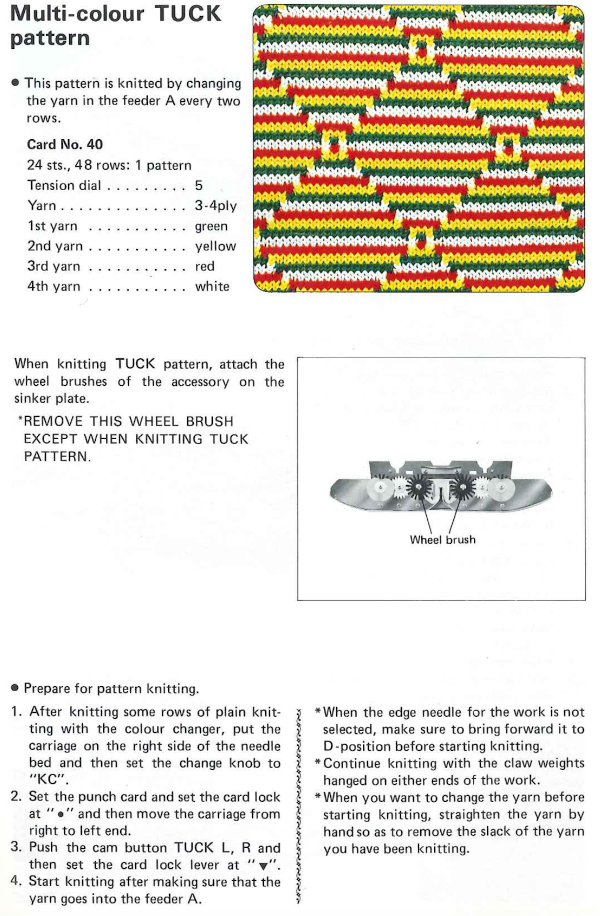
For Studio/ Silver Reed 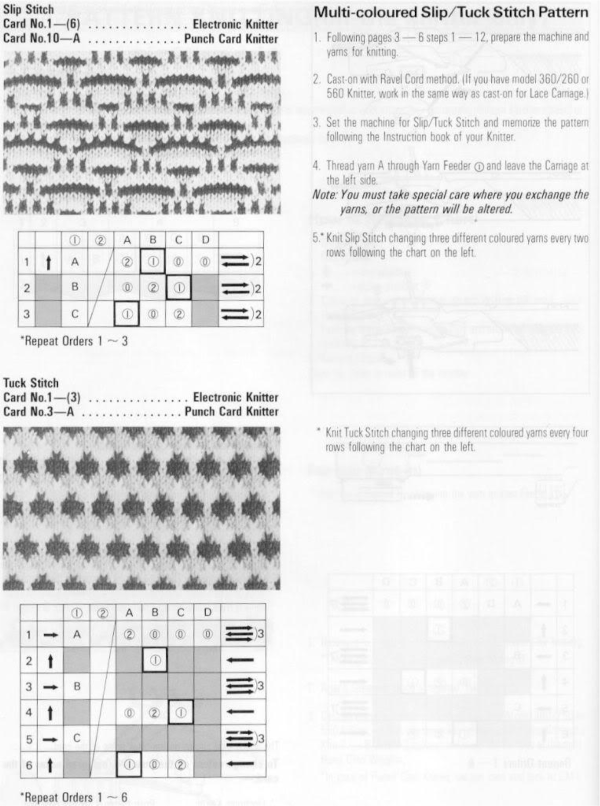
Punchcard volume collections are a great place to start to search for published repeats and subsequent DIY inspiration.
One such is Brother volume 5  Since the knit carriage needs to move to and from the left-hand side of the machine with each color change, an even number of rows in each repeating segment is recommended, but not necessarily required. The first preselection row is generally moving from right to left. End needle selection on helps the edge stitches knit. At times end needles will need to be pushed forward to knitting position by hand. Depending on how the repeat is placed on the needle bed, with some experience with a tuck or slip stitch, one can decide whether keeping the end stitches in the pattern creates a better effect at vertical edges. Analyzing 2 random repeats
 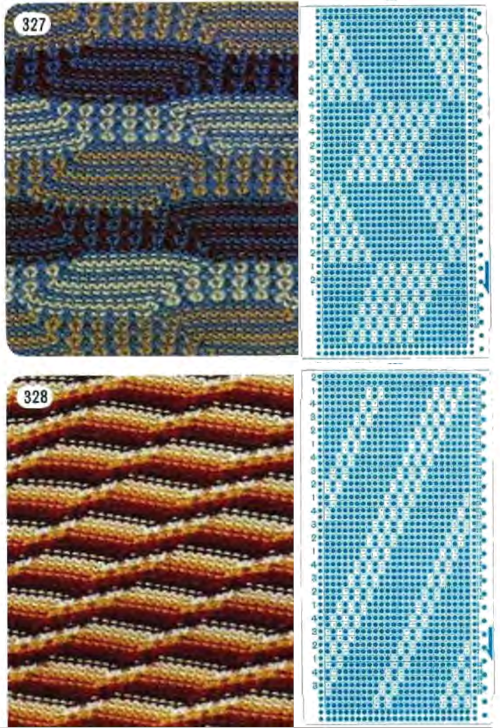 The respective .bmps
![]()
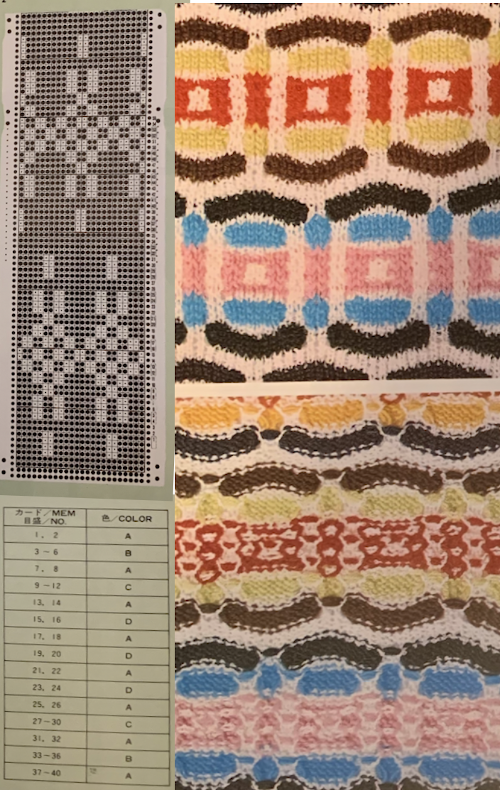
![]() As with all punchcards, the first and last 2 pairs or rows are not part of the design, they are necessary for the punchcard to roll continuously in the drum. Keep in mind that the card is reading design row one while your eye sees the row marked #1 by the factory on the card outside of the machine. Following the suggested color changes to match the specific swatch takes the guesswork out of the equation. In DIY or in trying a different color sequence, such guides may have to be shifted and marked accordingly. Specific color suggestions are given in the samples above in the left-hand columns. In #327 the order is in a variable sequence, which requires a bit more attention than #328. Follow the line below the #1 mark to the left, each card begins with color 1. Color notations in 328 are also next to those 2 all punched rows at the top. That is because those 2 rows overlap the first 2 design rows as the ends of the card are clipped together, front over back, for smooth, continuous, advancing movement. In 327 the sequence at the bottom would need to be hand-marked.
As with all punchcards, the first and last 2 pairs or rows are not part of the design, they are necessary for the punchcard to roll continuously in the drum. Keep in mind that the card is reading design row one while your eye sees the row marked #1 by the factory on the card outside of the machine. Following the suggested color changes to match the specific swatch takes the guesswork out of the equation. In DIY or in trying a different color sequence, such guides may have to be shifted and marked accordingly. Specific color suggestions are given in the samples above in the left-hand columns. In #327 the order is in a variable sequence, which requires a bit more attention than #328. Follow the line below the #1 mark to the left, each card begins with color 1. Color notations in 328 are also next to those 2 all punched rows at the top. That is because those 2 rows overlap the first 2 design rows as the ends of the card are clipped together, front over back, for smooth, continuous, advancing movement. In 327 the sequence at the bottom would need to be hand-marked.
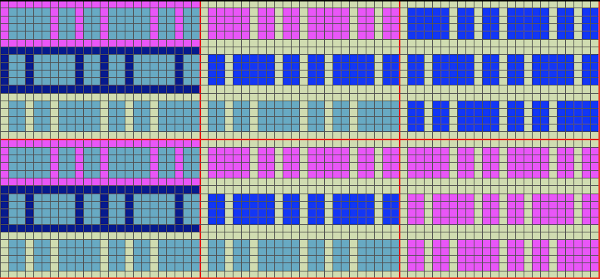
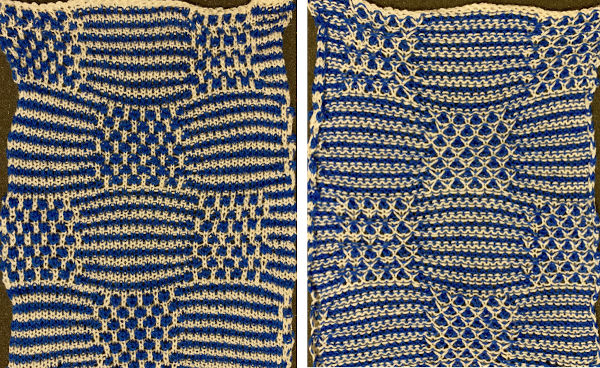
Before tackling patterns with moving components, these charts begin to analyze color changes in a ready punched or self-designed card which produces a honeycomb-like effect. The chart colors used are random picks from the palette, for illustration purposes only, illustrating areas where color changes may occur. The tuck/slip stitch held in the hook of non selected needles gets elongated and comes forward on the knit side, creating vertical lines in the color that is not knitting. The blue highlights the row where a single stitch, single row tuck or slipped stitch is created and the corresponding positions of the yarn on the knit side of the fabric 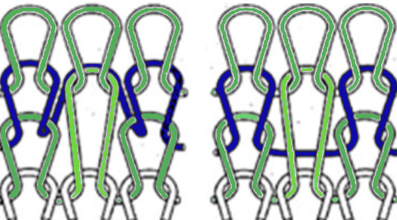 Four tucked rows is probably the limit on Brother machines unless one is working in fine yarns. In the first interpretation, the ground knits for 2 rows on all preselected needles. In the second, the surrounds of the interior striping knit for single rows only at the top and bottom of the repeat. Electronic repeats A and B on the right may be as small as a single 4X12 unit.
 The same card may be used, altering the color-changing sequence so the ground that will surround the tuck or slipped stitches changes as well. Using the same card would require a pattern start on card marking row 2, and an initial preselection row from the left to the right
 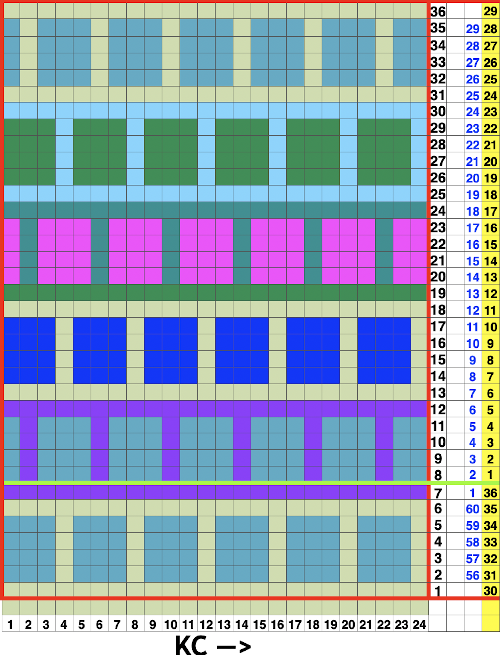 Keeping the 4 tuck row maximum the blocks of knit stitches between tucks can be varied, as can the movement of the vertical bars. The card repeat on the left would preselect from the right, while the repeat on the right would preselect from the left.
 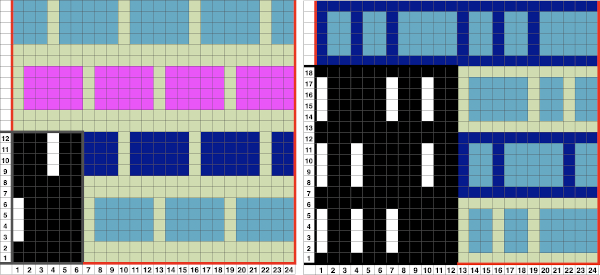 So the card on the right is already punched, and instead of changing the colors outlining the shapes, one wants them constant and with a start from the right? The workaround is to advance the card to the last row in the full repeat, #36, lock the card, and preselect toward the color changer continuing to change colors in 2 then 4-row rotations after releasing the card. Tiling the repeats multiple times as with any pattern helps isolate areas where color changes might work as well as give us a sense of pattern movement across the fabric. With so many tucked rows so close to each other, it is best to use thin yarn.
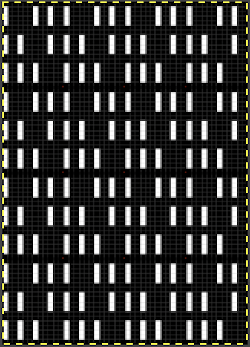
 For slightly thicker yarn, one possible “fix” might be to simply eliminate one of the 3 tuck bars across the repeat, again check tiling for any errors, or places for color changes. Here the shift is not completed, some tuck bars were not eliminated
  the “corrected” repeat without additional rows, some possible color changes can follow the colored chart suggestions
 ![]()
 Moving on to electronics, playing with symmetry the repeat now becomes 30 stitches wide, the tiled image check for the unaltered version on the left.
  The repeated adjusted two different ways in height to accommodate color changes in a few different spots
 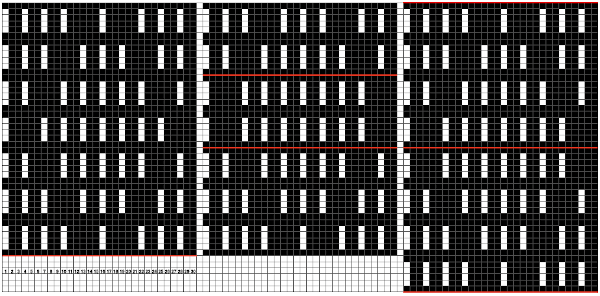 Working with repeats with tuck or slip bars that are only 2 rows high make for easier use of a range of yarn thicknesses. There are some surprises to be found when color changes are made as often as every 2 rows, sometimes using up to 4 colors. The extra all knit rows may be eliminated altogether.
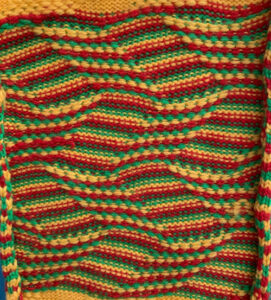
Beginning with a pattern that has large areas of black squares can help one understand what happens to the design as that knit ground takes on color striping in the same frequency as the color changes. The yarn used here is a 3/8 wool, making the fabric a bit stiff. The repeat is a larger cousin of card #327. Before the days of software tiling methods, on way to check repeats was to knit them up as Fair Isle. The large floats in this made it not its best use, the floats were sometimes caught with the companion color or looped. Had the long floats been consistently free, they could have been cut for a fringed look on the purl side and would have held in place well. 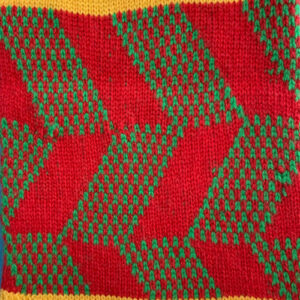
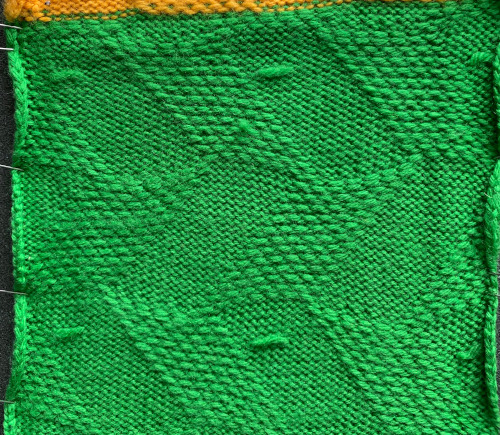
 Tuck knit in a solid color
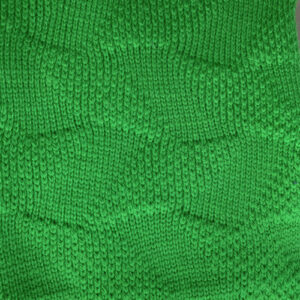
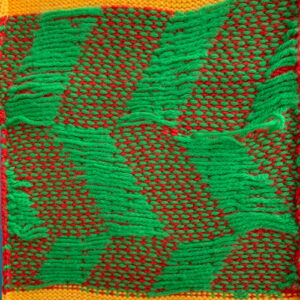
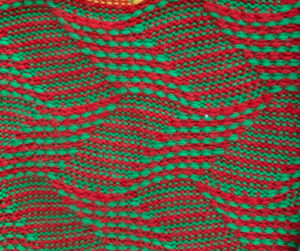
 Slip stitch in all variations has purl side edges which curl to a greater degree, the short skipped areas were probably due to too tight tension of too quick a carriage pass to the opposite side
 tuck alternating two colors every 2 rows
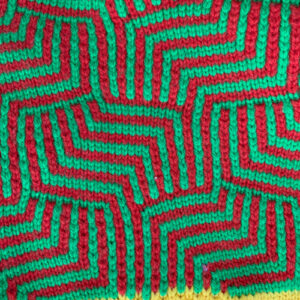
 slip stitch 2 color variation
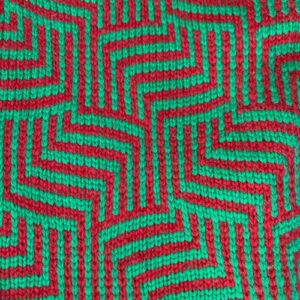
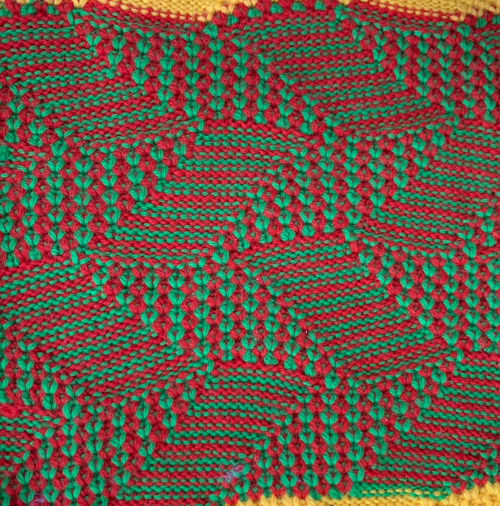
 slip stitch with the addition of a third color in the rotation
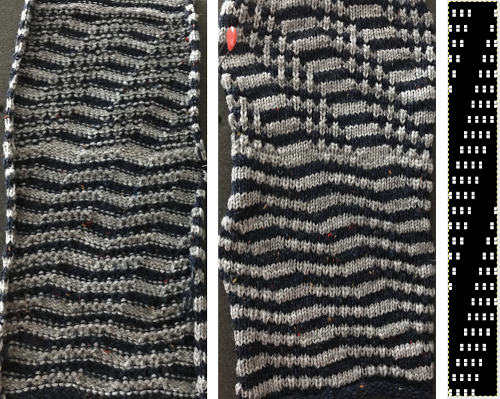
 The associated punchcard:
 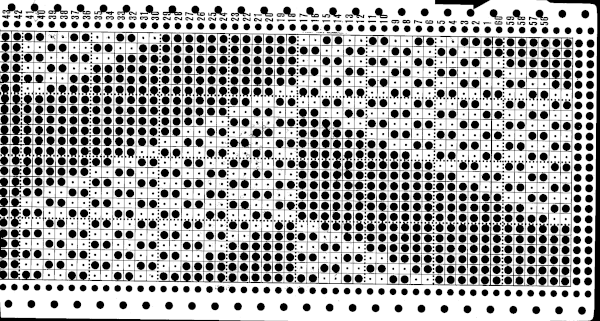 Some patterns using color rotations every two rows are referred to as mosaics, mazes, or floatless fair isle. They can be deliberately designed, but there are treasure troves of working repeats in punchcard pattern books that produce visual cousins and may also knit up as lovely fabric in single colors, and wonderful surprises at times when one designed for single color is striped. A few to try that are pictured with corresponding swatches shown on the knit side: from volume 5, the grey cells indicate the page numbers that correspond to the thumbnails in the downloadable version
 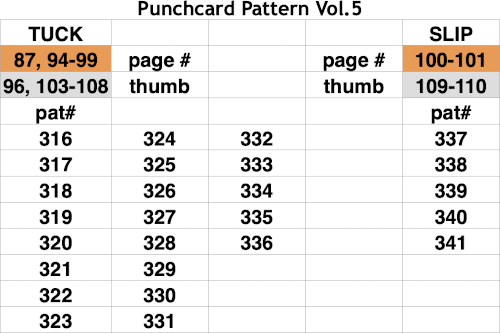 from Stitchworld, I have included repeat sizes, grey highlighted ones are suitable for use in punchcard as given
 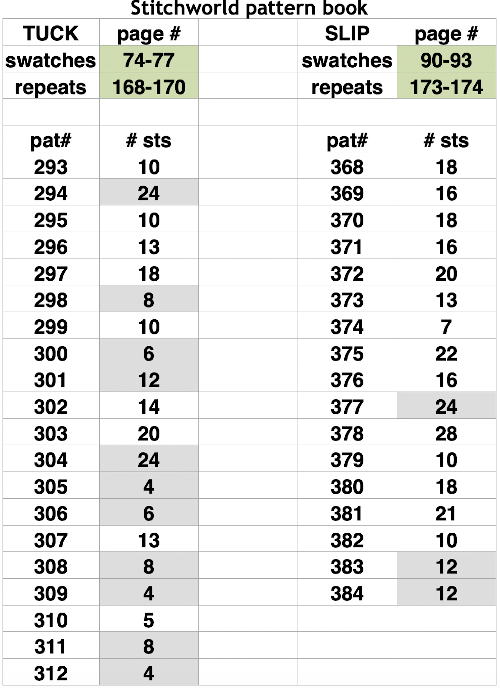 Brother yarn changers are numbered, from right to left, and their published card designs color suggestions reflect that. The lace extension rail must be used as the knit carriage needs to clear the color changer on that side in order for the colors to change properly.
 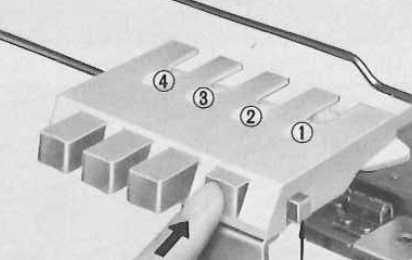 The Studio color changer color positions are marked with letters of the alphabet from left to right
  Some of the Studio punchcard pattern books showed both sides of the expected fabric assi\ociated with each card, here is a repeat that breaks the tuck rule of no more than one blank square side by side in any row.
 This swatch pattern from a Japanese magazine illustrates the difference in the formation of the tucked loops when two blank squares exist side by side. The repeat is 10X22, colors are assigned letters rather than numbers here as well
 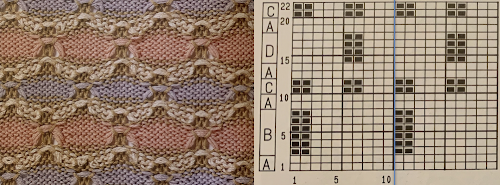 Another rule breaker: odd numbers of tucked rows with no added all knit rows. Experimenting with such repeats results in less organized all-over patterns, here colors are changed every 2 rows,
  every 4 rows
 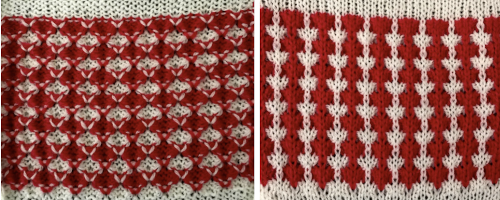 A single knit row may be added, for an added variation with color changes every 4 rows
 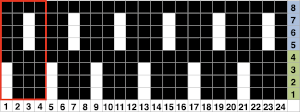 These repeats take shapes in another direction which becomes more textural and interesting when blank stitch areas are expanded for use in slip stitch setting
 This pattern, with color changes every 2 rows and two-row tuck sequences has an assumed interesting pattern shift.
 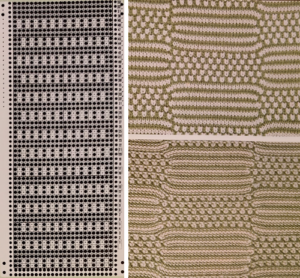 The tiled X2 horizontal repeats lined up side by side show that extra knit stitches have been added, shifting tuck stitch rows by one stitch in alternating directions, but just because it is published, it does not necessarily make the repeat correct. Those striped areas can only occur if there are solid all punched areas.
  Keeping the constraints of a 24 stitch repeat, reducing the width of segments to 12 stitches rather than 24, the original repeat as amended
  The tiled results for each
 24X56 repeat proof of concept swatch in a far thinner yarn than the book photo
 ![]()
 An approach to designing such patterns can begin with a template for color changing every 2 rows and taking colored squares away to indicate stitches that will be slipped or tucked.
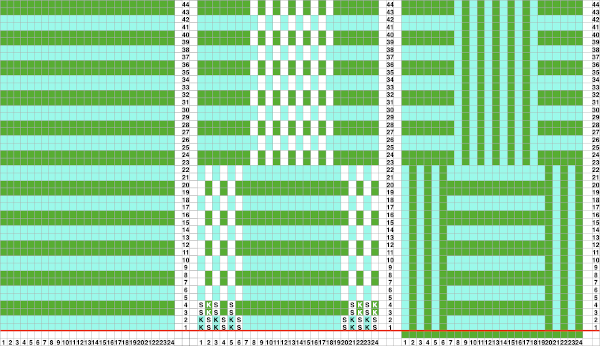 Repeats can be adjusted from wider electronic ones to the 24 stitch width constraint for punchcard machines, as well as shifted to change the resulting shapes and their colors on the knit side. The two-dimensional charts are not capable of reflecting the amount of gathering of the fabrics or distortions of the stripes on the completed knit
 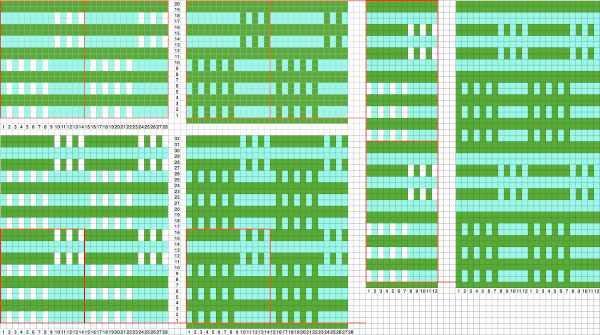 Japanese magazine publications often recommended many color changes, each for varied numbers of rows. Sometimes more is less. The number of colors may be reduced, and changing the numbers of rows used for each color as well can expand the number of fabrics produced from a single repeat. Good note keeping is a necessity if the intent is to easily reproduce the fabric at a later time.
Mixing things up for vertical designs: 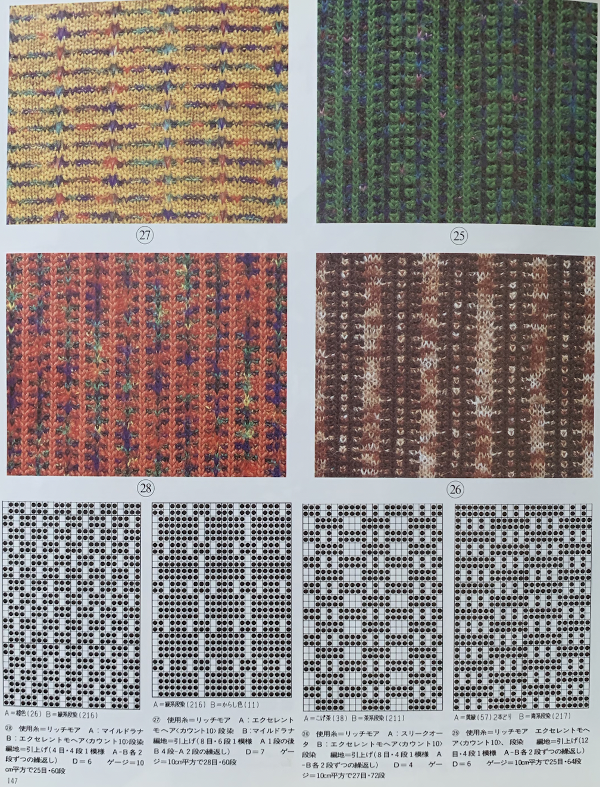 Adapting punchcard designs for use in electronics becomes easier once one is familiar with the stitch structure. This is a cousin of 328, 13 stitches X 52 rows. Tiling as in all designs helps sort out errors or missing pixels.
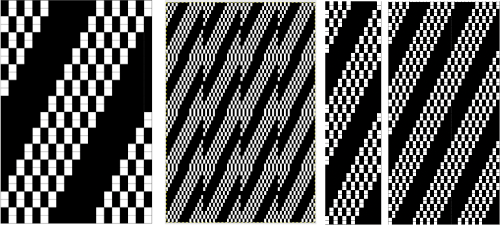 The “corrected” pattern, with the accompanying test swatches, the first knit in tuck stitch changing colors every 4 rows
 ![]()
 and slip stitch changing colors alternately every 2 rows, then every 4:
 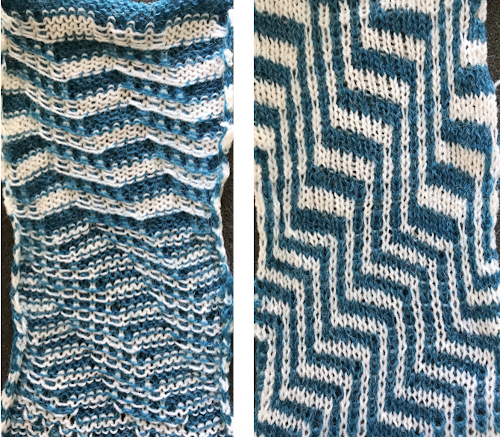 My blog posts on working with and designing mosaics (suitable for tuck and slip) and mazes (slip stitch only, multiple side by side unpunched holes or white squares in any row), in reverse historical order
2019/06/29/mosaics-and-maze…numbers-and-gimp/
2015/10/21/working-with-gen…-gimp-charting-2/
2015/10/03/working-with-gen…mazes-charting-1/
2012/10/15/mosaics-and-maze…design-to-pattern/
2013/05/06/mosaics-and-mazes-drawing-motifs/
2012/10/15/mosaics-and-maze…design-to-pattern/
2012/09/22/mosaic-and-maze-…-on-the-machines/