So you have some shapes you love and know: wanting to go large, mixing them up, requires thinking things through. Testing on small swatches will help determine holding sequences and whether the results are predictable or even liked. I no longer have access to Adobe Photoshop or Illustrator, so some of my image editing is now achieved in Gimp. Labeling below is with Skitch, and charting is with Excel.
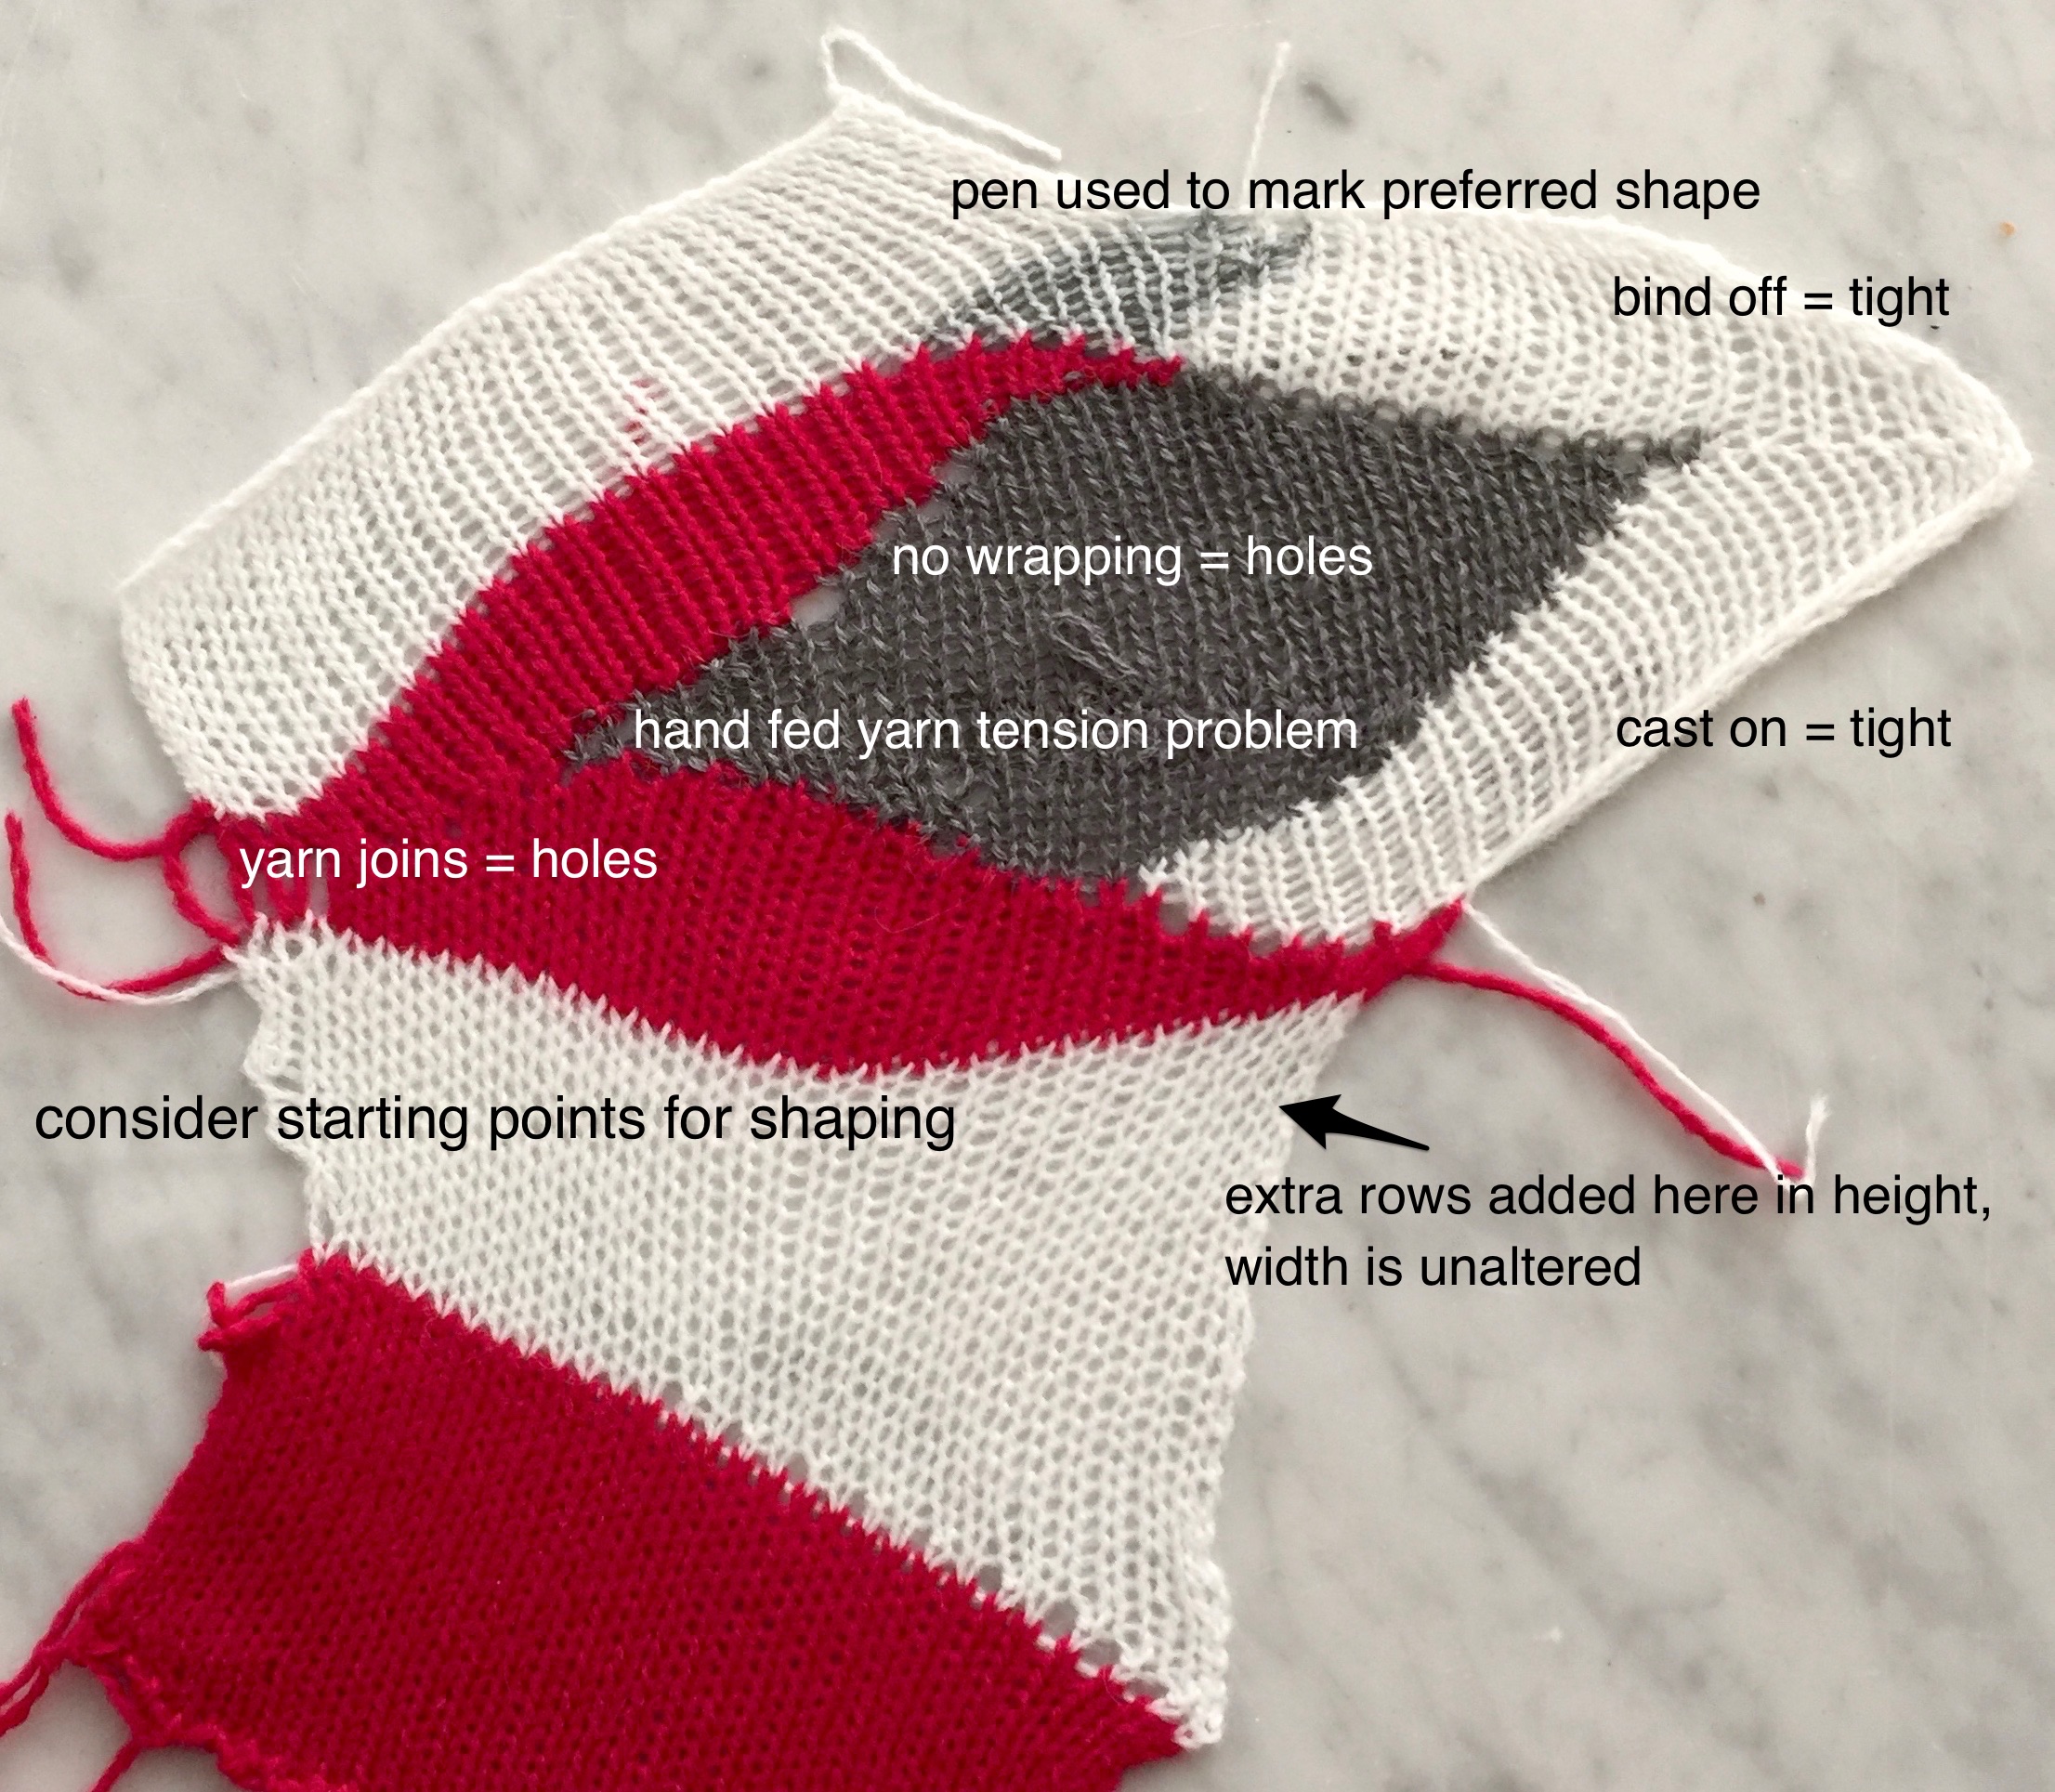
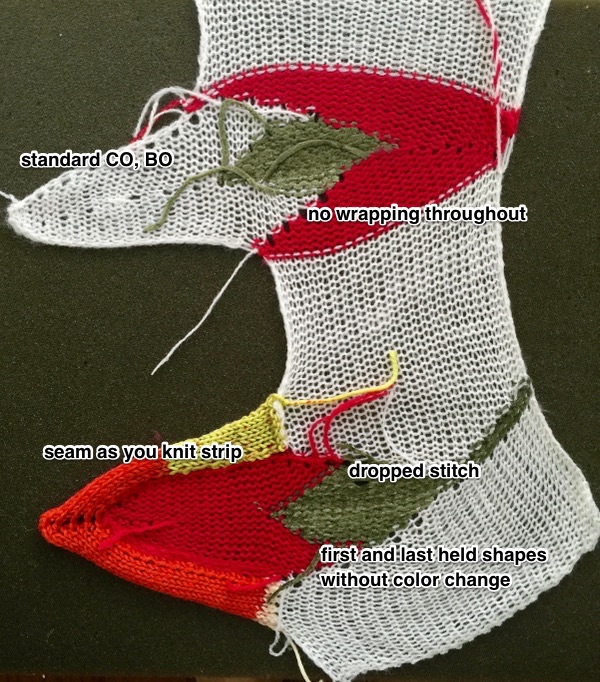
A starting freehand swatch experiment and some observations: shape variations in red areas occur by altering sequence for knitting first and last 2 shapes in the holding position
Planning possible sequences out in charting can be confusing. The image direction will be reversed on the knit side. Approaching the technique like intarsia with individual yarns or bobbins eliminates the need for some of the concerns where 2-row sequences or specific starting sides are necessary to keep yarns continuous or for the execution of the desired shape. Trying to imagine the shapes that create the larger one together in a simple 2D drawing can get one started, but then shapes need to be rearranged. I usually began by “playing”, trying to figure out steps needed, and follow that by trying to produce an executable chart. Making the process as easy as possible to track is always a consideration.
 possible stitch counts and adding a center-line “stem”/ stripe
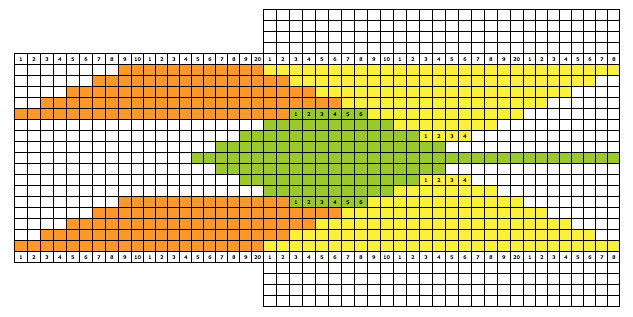 its knitting sequence
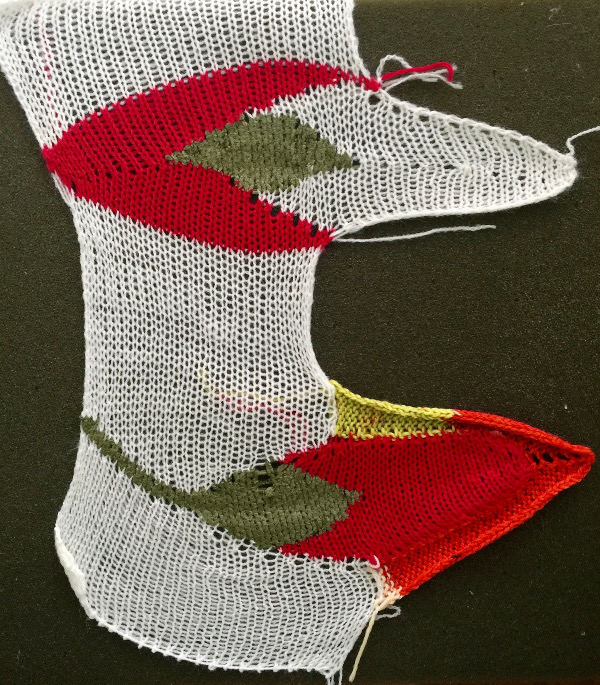
  a resulting swatch, stitch counts not consistent with the chart
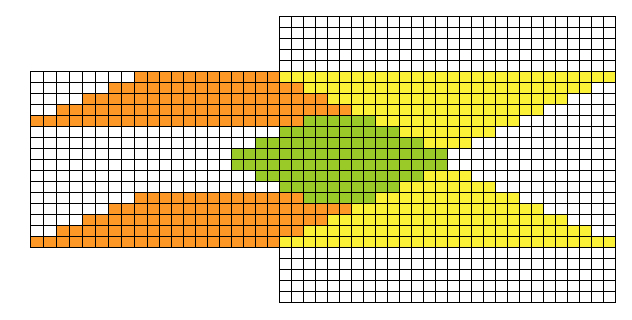
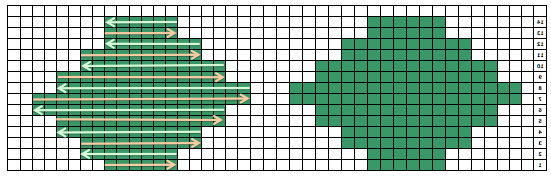
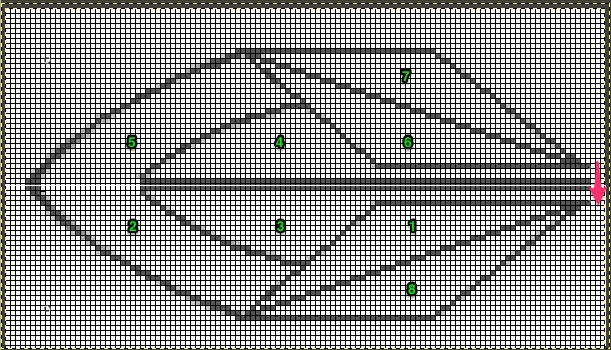
In the chart below the design is worked with 2 needles brought out to work or pushed back into work at any one time, making tracking changing numbers in hold unnecessary. Pink rows indicate starting and ending knit rows, orange “stitches” are cast on and bound off in turn, creating a shape extending out from the edge of the knit. Arrows indicate where shapes meet to create forms.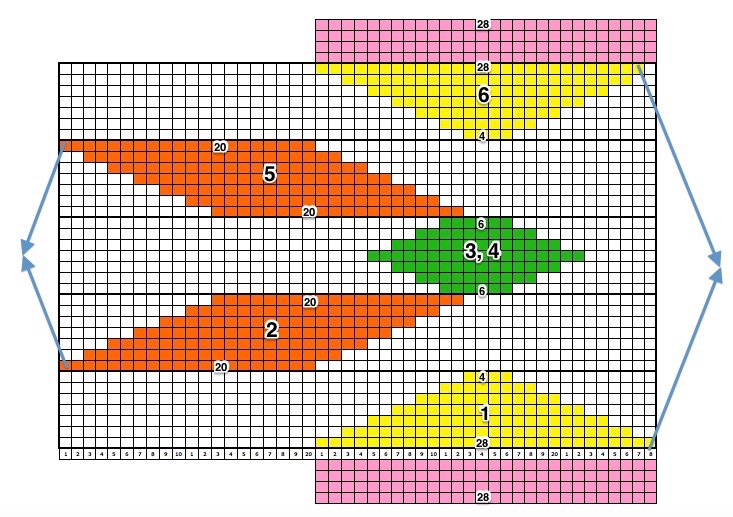
Holding sequence for each shape may be worked begin with carriage on either side; with experience, this may be planned at times to eliminate some of those cut yarn ends that later must be woven in. Getting back to arrows indicating carriage moves, using the center shape for illustration purposes and beginning with COR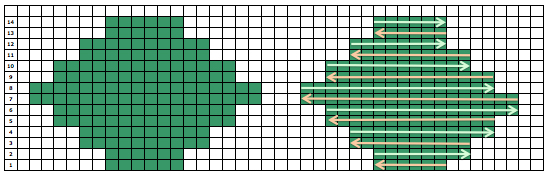 if beginning with COL, simply flip the image horizontally
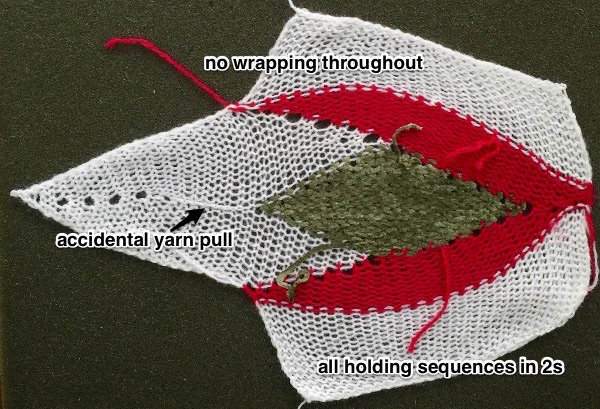
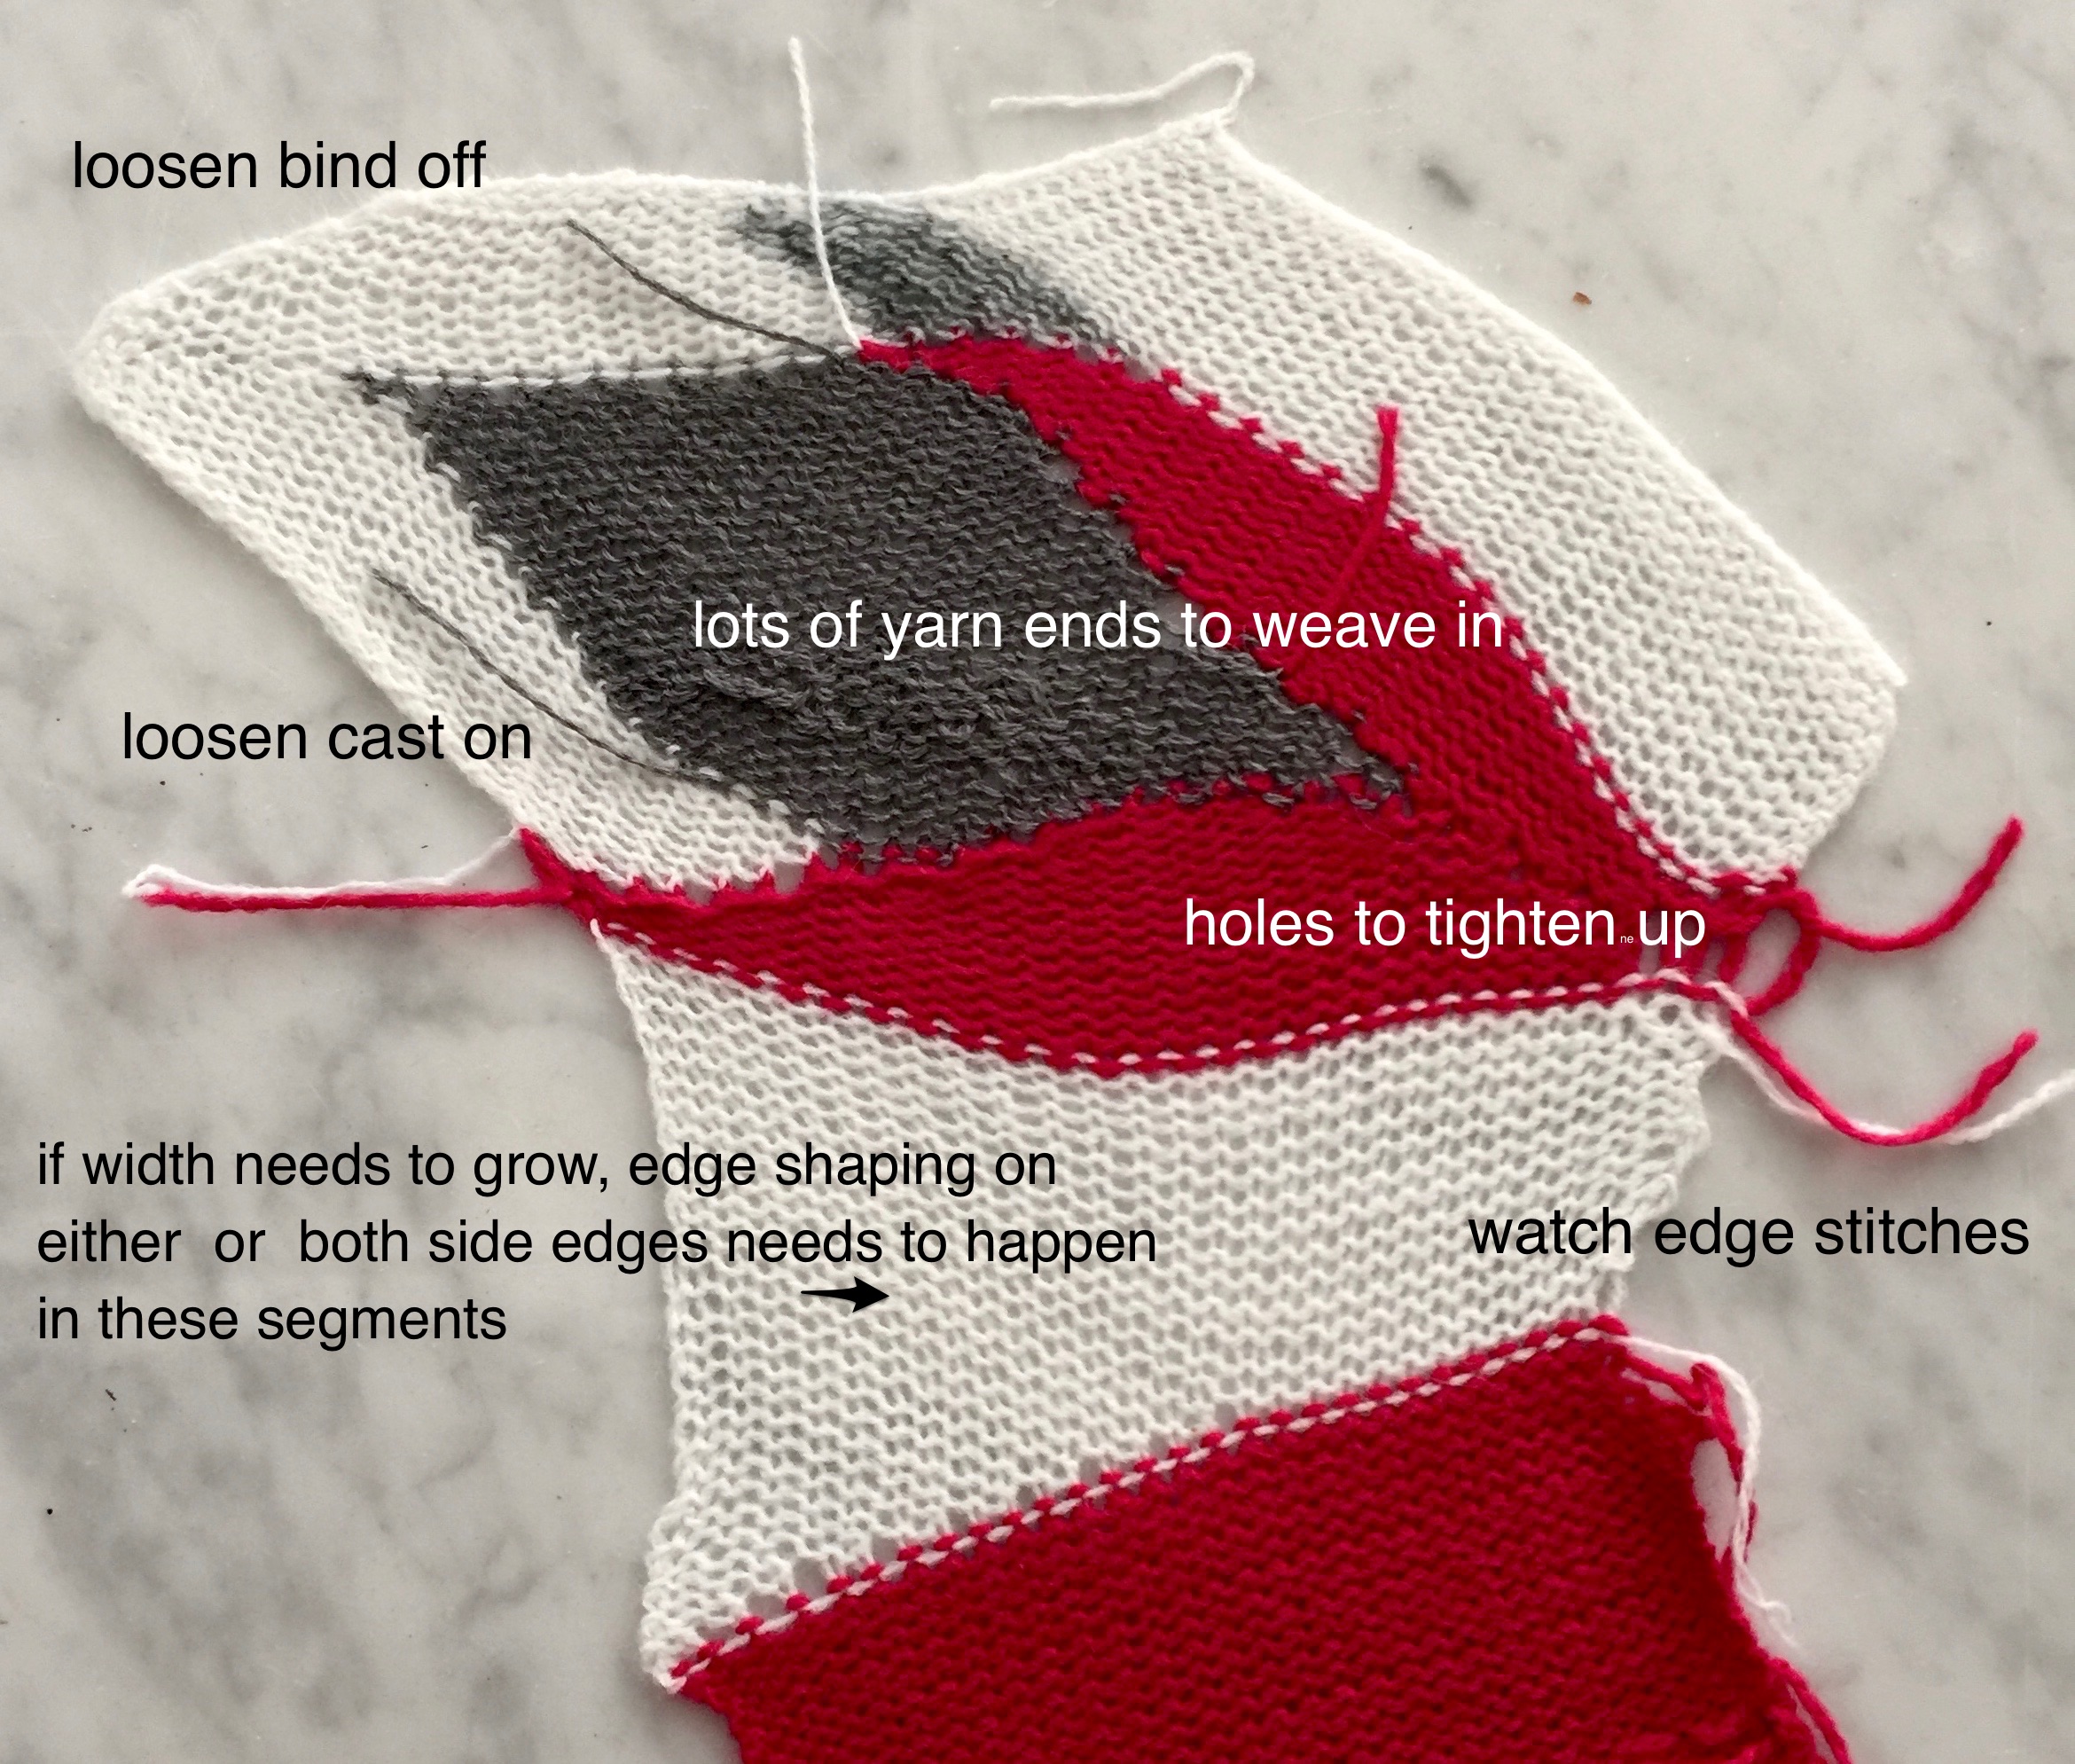
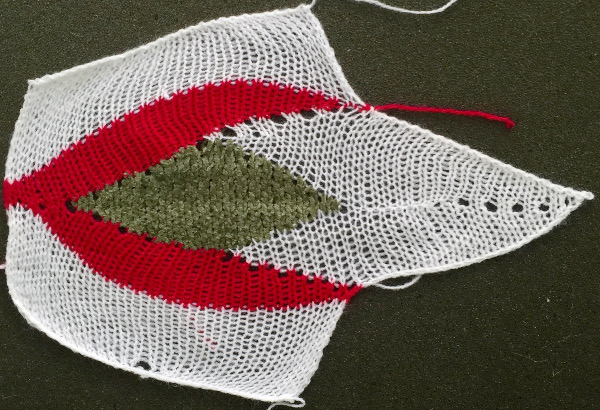 The yarns used were “throw away acrylics” in white and red. The green is a rayon chenille, which required a looser tension, resulting in the other colors looser than I would want in a piece of the final fabric.
An idea for a larger image in the process of being edited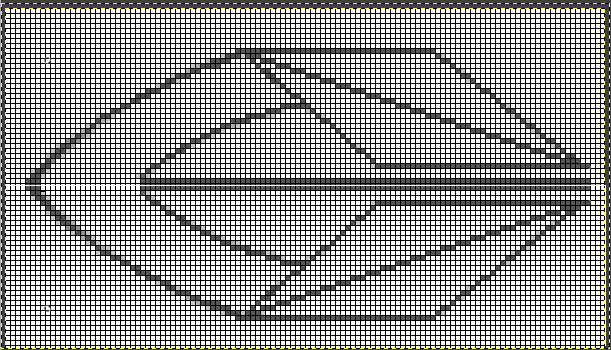 A possible sequence in knitting if it is to be executed as shown. The arrow marks rows that knit all needles across the width of the piece. The piece segments are numbered to create a starting line for later joining.
 If the goal is knitting as close to a flat circle as possible, eliminating rows will create a smaller center hole as well after the form is completed and seamed. Knitting segments 1-6 should be adequate
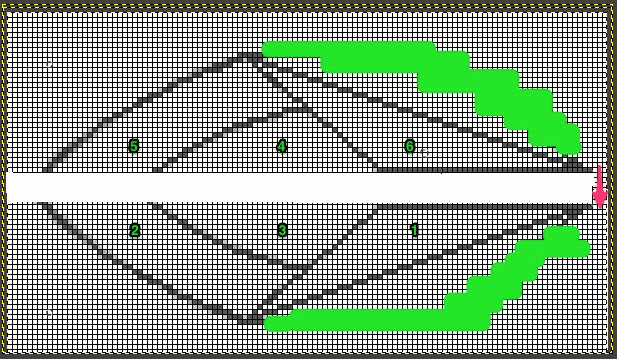 Larger pieces ie shawls, adding knit rows without adding stitches can be done by altering #8, 1, 6, 7. The red line indicates changing angles. Blue and green lines below indicate increasing rows knit at the center of shapes as a result.
 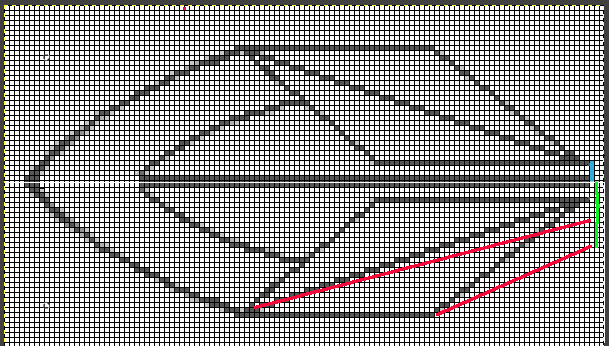 Knitting and cast on sequences flow around left purl edge, straight or diagonal edges on a chart such as above may become foundation rows that are later seamed. Sort out your sequence and preferences on smaller swatches, keeping notes as you go. Additional shaping can happen along the edges of any plain knit rows between shapes by increasing or decreasing on either or both sides to create crescent shapes or triangle variants.
Now a quandary if gauge matters: knit stitches are not square. One option is to generate a grid appropriate graph paper. In holding sequences happen in 2-row sequences. Graph paper cells may be created at twice the height desired. Each rectangle will represent a single stitch, 2-row sequence. To create your own knitting graph paper in excel please see post as a place to start. A common knit ratio is 4W X 6H. An editable workbook in 2W X 6H ratio that takes into account the following outline in 2 row holding sequences: landscape2X6. Links for designing knit graph papers online:
http://www.tata-tatao.to/knit/matrix/e-index.html
http://www.theknittingsite.com/knitting-graph-paper/
http://sweaterscapes.com/lcharts3.htm
http://www.thedietdiary.com/knittingfiend/KnittersGraph.html
http://incompetech.com/graphpaper/asymmetric/
Using the 4X6 model reduced to 2X3 this is a sample generated using excel, with borders in a 2X6 ratio, so in execution, every single cell represents one stitch and 2 rows knit. The shape is one from the shape menu in the program, easily resized. The yellow bars show the gradations in holding. These cells are too small for adding text within the program itself. The math can be double-checked: there are 70 stitches, 34 rows in the rectangle at the center of the shape. Holding happens over 5 chart units (10 rows actual knitting) at the top and bottom of the center shape; 70/5 = 14 X5, matching the drawing 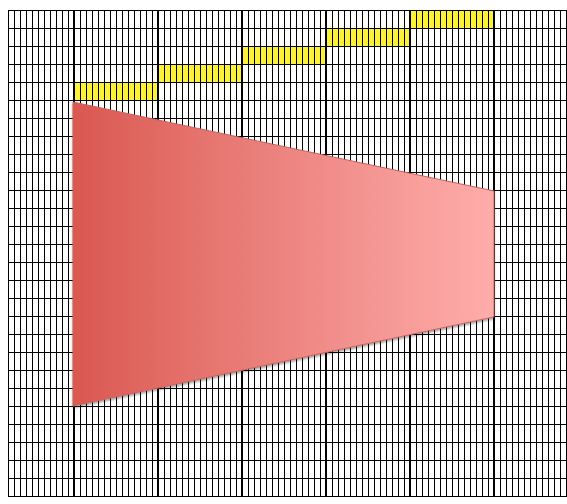 The accompanying, editable workbook Excel 2008 landscape2X6
So the goal is a shawl or garment, graph paper is becoming impractical to follow? Time to pull out your knit leader. Draw out each wedge or piece full size, number segments breaking sections into knitting sequences, and let the KL guide you. For consistency, if the same shape is to be repeated many times and accuracy matters, it may be worth “air knitting” it while noting shaping as you go, keeping a row by row flow chart. An editable workbook to help track holding patterns, increases, decreases, etc. as a starting point for your own preferences: tracking knit.
Gauge or shape does not matter? time to scrumble it all and be surprised!