I have recently become involved in a year-long project at UMass Lowell and will share details as they develop. Most of my blog posts are written for those who already have a basic knowledge of techniques. Since I may soon be involved in teaching basics to non-knitters on Brother models, I am in the process of getting some informational notes together and thought I would share them here as well.
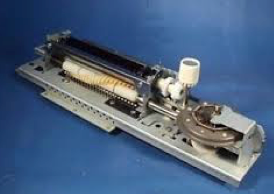
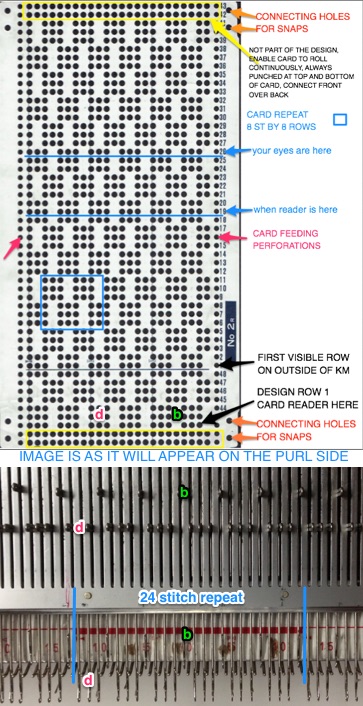
The first 24-stitch punchcard readers appeared in the mid-1970s. The reader sits on the far right of the knitting machine; it actually reads 7 rows below the row visible at eye level on the machine exterior, establishing a numerical relationship between motif repeat design rows and those viewed
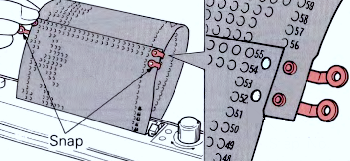
cards may be purchased pre-punched (1), as individual 24X60 blanks, or in continuous rolls (2); a card punch (3) is used to punch holes  rows: for any card to roll in a continuous pattern vertically (rows), cards are joined to form a roll. A minimum of 36 punched rows is required. Snaps are used to join the beginning and end of a single card or multiple cards sequentially. There are excellent, free downloads now for pattern books including designs for all varieties of MK fabrics. It is possible to have the machine knit rows in double-length ‘automatically’, it is the only built-in possible alteration of the pattern. Masking or cello tape is a temporary solution to testing repeat variants or to repair errors (both sides of the card), otherwise re punching of the whole card is required for any changes
stitches: the maximum repeat width (stitches) is 24, 24 squares, one line on the card. On Brother KMs the repeat is centered with 12 stitches on either side of the center “0” marking (2). The needle position indicator is marked in thick and thin lines (1), each representing one whole design row repeated in width. If one wishes to shift motifs on the knit piece, invisibly join designs, etc., the only alternative is to determine the width and needle locations required and then to shift the knitting position on the bed by repeat or its segments.

motifs must fit together within the 24 stitch limit, so individually they must be factors of that number: 1,2,3,4,6,8,12,24 (height calculations must have a minimum of 36 rows punched, so different math is involved there as well)
anatomy of a card: all squares are punched top and bottom for 2 rows each. They are not part of the design and overlap the first and last pairs of rows respectively when snaps are in place. Hence, the design motif remains continuous.
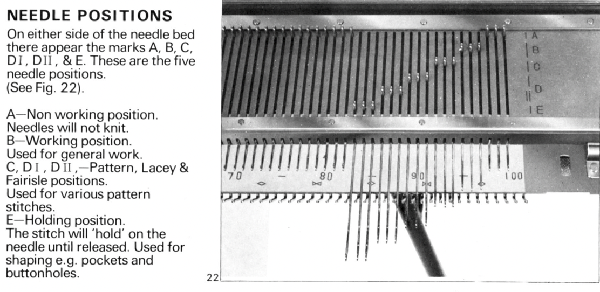
Any image will be reversed on the knit side, of note in planning lettering or motifs where direction matters. With the change knob set to KC or SM punched holes in the card will preselect needles to the D (Brother models skip C) position, unpunched holes will leave them in the B position. A 24-stitch repeat with needle selection for row 1 (card is from a set supplied by Brother with machine purchases).
Markings as they appear on the needle bed: 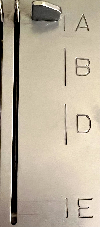 The extra markings on the needle tape in my machine are water-soluble ink marks from one of my projects to help track techniques.
End needle selection:  The card in place in the reader: line up the two pairs of holes at the right edge and clip those together with a card clip, do the same on the left.
The numbers on the right side of the card should be continuous. If there is a gap in the numbers, the back piece has been put in on top of the front one, and if fed in this manner the card may jam. Unsnap and join the card properly to knit patterns in a continuous loop.
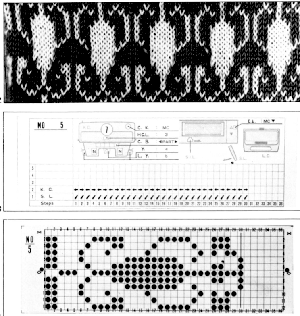
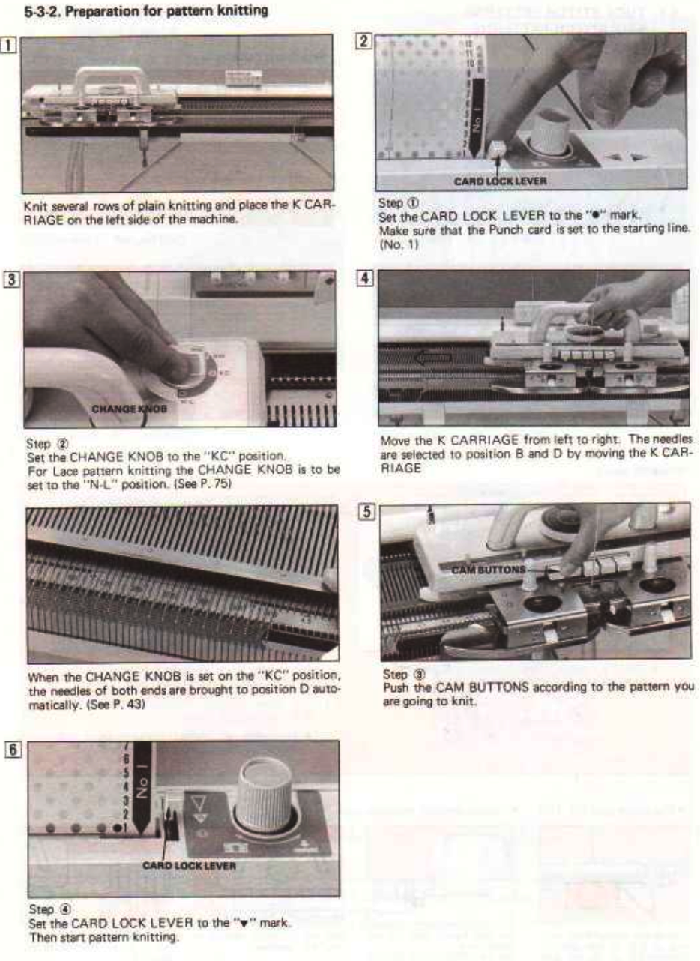
 Preparing for pattern knitting from a Brother manual:
  The elongated triangle is used to knit each punched row twice.
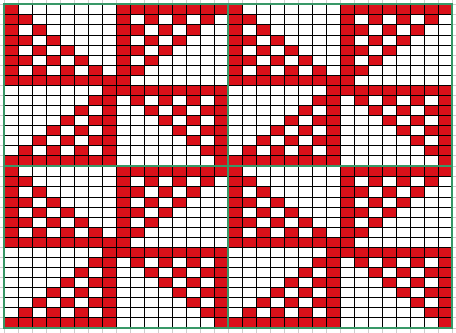
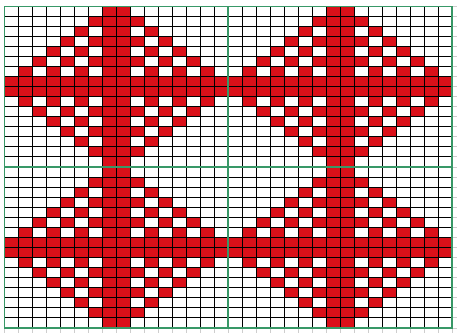
Working with motifs in networks with 24 stitch limit: checkerboard is formed with the isolated motif, originally measures 8 stitches by 16 rows; repeats in the charts below are outlined in green, and colored squares correspond to holes punched in the card
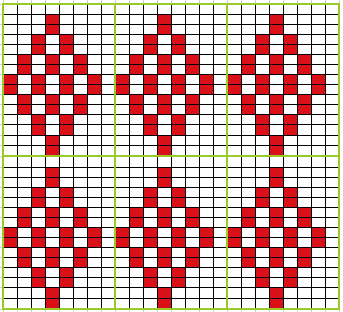 adding simple patterns
 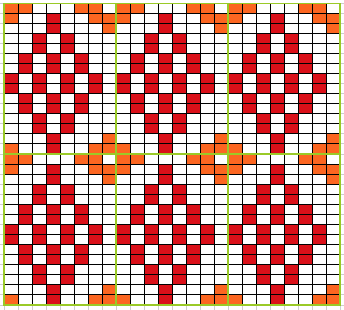 staggering horizontally for brick repeat (now too wide for the card)
 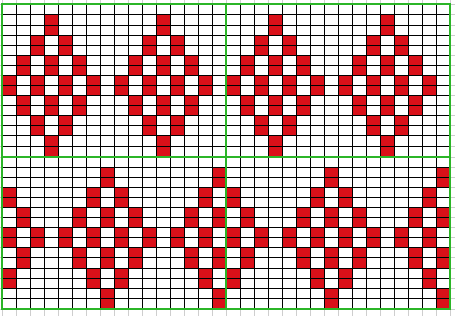 staggering vertically for half drop repeat, (row adjustment)
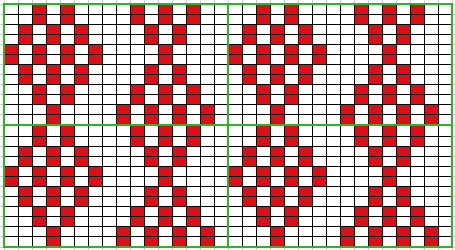 checkerboard begun with an 8 stitch repeat
 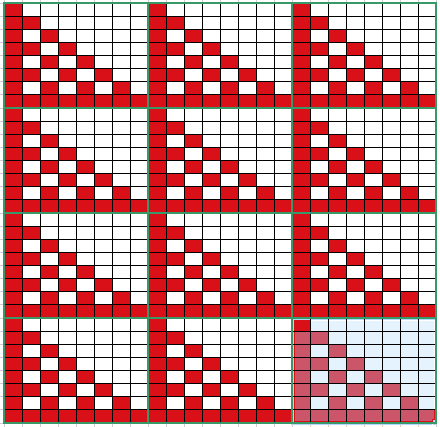 half drop: repeat begins to change in width
 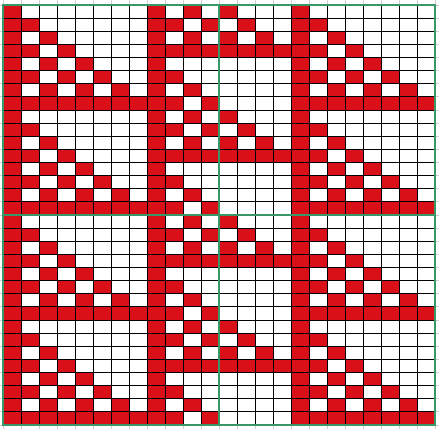 brick
brick 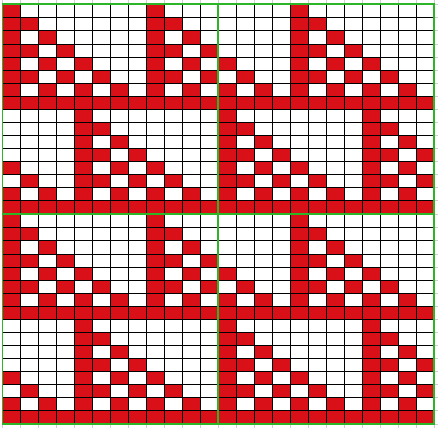 triangle
  added larger repeat variations
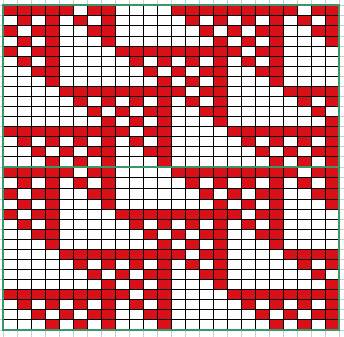
Electronic machines are able to use punchcard designs as well. Only one pattern repeat needs to be programmed. Factors of available maximum width in stitch repeats depending on machine brand:
24: 1, 2, 3, 4, 6, 8, 12 30: 1, 2, 3, 5, 6, 10, 15 40:1, 2, 4, 5, 8, 10, 20 60: 1, 2, 3, 4, 5, 6, 10, 12, 15, 20, 30
More to ponder: knit stitches are not square, they are rectangular, so representational knits, no matter the size, require some mathematical adjustments to retain their aspect ratio. An interesting illustration of this is seen in attempts to knit a circle.
Common ratios for knitting are 4:5, and 2:3 (height to width) with stitches usually wider than tall.
Gauge is the stitch-to-row ratio that allows one to calculate height and width for finished knit pieces, it is the basis for creating and shaping the items which in turn may then be assembled into garments or size-specific end products.
The Diophantine equation (referred to in knitting as the “magic formula”) may be used to calculate increases, decreases, and shaping. There are many excellent how-tos and calculators to aid in the process. The old Brother accessory calcuknit and its emulator took some of the “work” out of the process and were later replaced by similar functions in consoles or software.  Sometimes charting out the shapes based on such calculations was referred to as “ragu charting”.
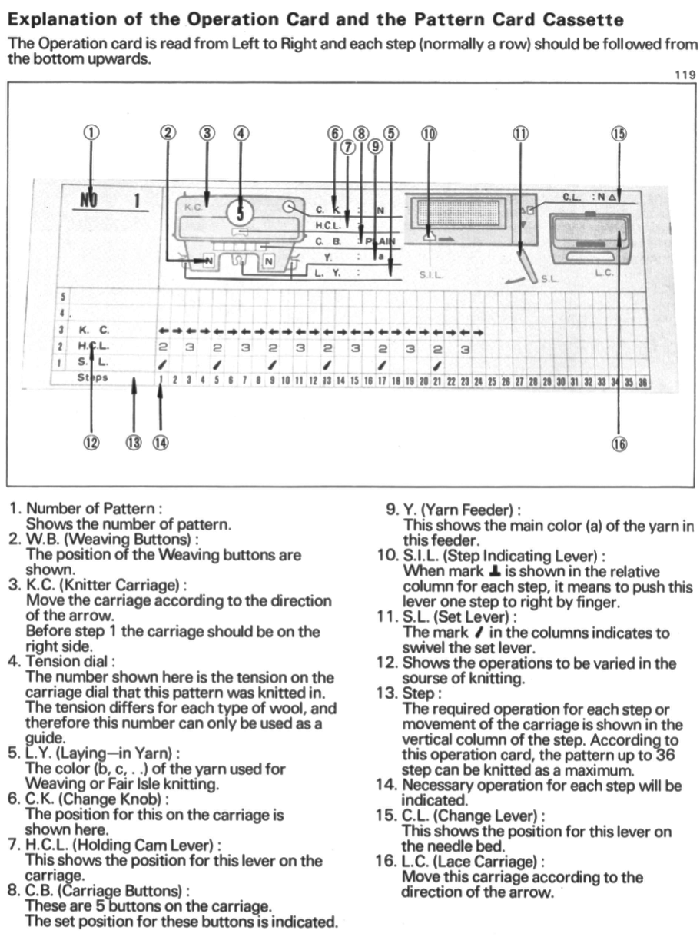 An illustration of one of its fair isle cards and accompanying instructions for the settings