WORK IN PROGRESS
Copyright can be a touchy, sometimes murky subject. In my teaching days at a design school, each instructor was responsible for accumulating what amounted to a “textbook” with any expected readings and required information for students attending the classes. There was an arrangement with a single copy center that actually paid a fee set by the government in order to be allowed to provide a service. Teachers supplied boxed material on a single-sided copy per page sheets, withdrew it at the end of the term. The copy center would make double-sided copies from each sheet in the original, bind them, making them available for purchase for only the cost of what it may have been to customers using copiers to make their own per sheet. My intro to knitting “book” evolved into 330 pages, costing students as far as I can recall about $30. An overall bibliography and often credit in sections were included. This all was happening pre-internet browser searches and easy downloads.
I have often not included a definition for some of the terms used in my posts. Also, I did not share information from manuals and company publications until they, in turn, became easily available online, long after the companies that published them went out of business.
A list of common abbreviations:  Test and gauge swatches
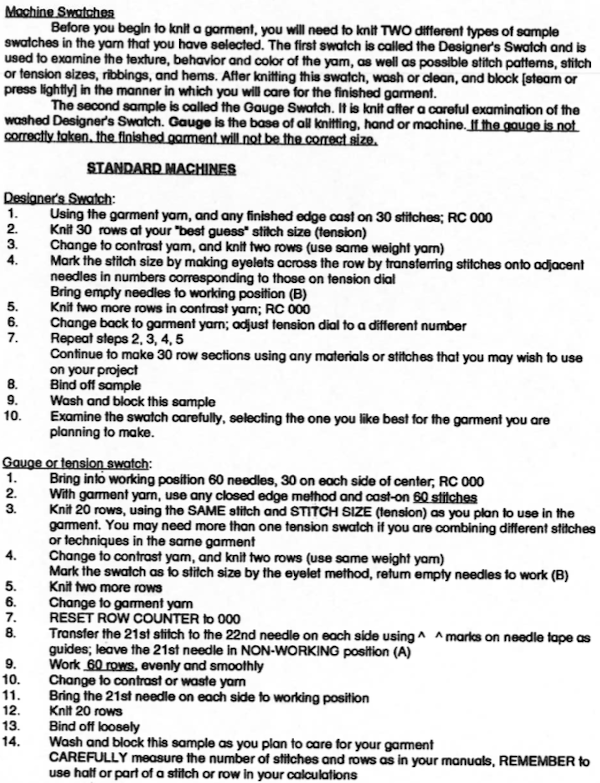
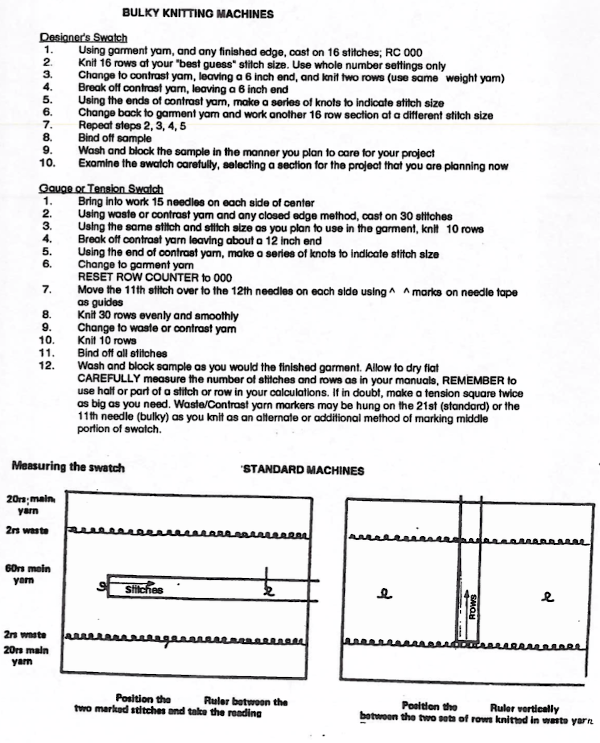 From the Brother Knitting Techniques Book
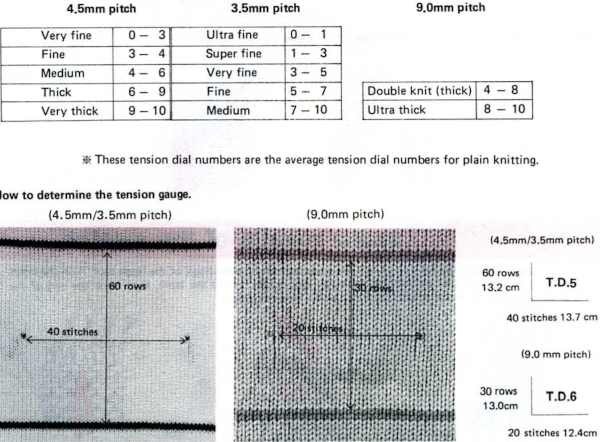
I personally prefer to measure gauge on the purl side, where to my eye the start and end of the color transitions appear clearer.
The Passap advice was quite different. This is from the Duomatic 80 manual 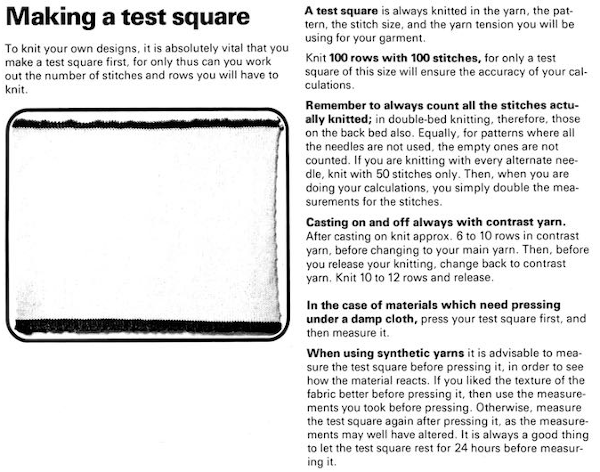
and it was followed by tables that helped with calculation conversions based on measurements. When using Japanese machines while executing some DBJ or highly textured stitches, a larger swatch should become the go-to when measuring gauge for garments by default. Using 100X100 combined with the use of metric measurements facilitates the maths and use of devices such as the knitleader, where measurements in millimeters are required.
A “long swatch” exploring a card from a “censored” selection from the factory-supplied punchcard packet in as many techniques as possible became a required assignment  In KM model manuals a list was sometimes provided suggesting what cam settings might be suitable for each card
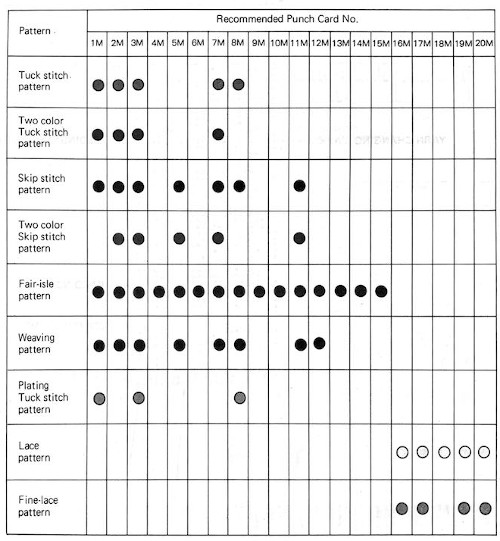
Factory supplied cards were usually marked with a number and letter as seen above, but oddly as model numbers changed, sometimes either or both of the latter would change as well. A table of my own after a quick review of my stash:
1S, 2R,3J/S, 3P, 4D, 5J, 6P, 7G, 8S/J, 9G, 10D, 13G, 101, 102, 103, 107, 108, 109