Gimp March 16, 2025 has many menu and command changes, making some reinterpretation necessary when following previously published blogposts, a quick tutorial
a caution: 4/26/24 Gimp repeatedly crashed at the step when I tried to copy the brush from the clipboard to bucket fill any images with the pattern. The same reoccurred after an iMac restart and after a Gimp reinstall. The problems appear to have been eliminated by uninstalling 2.10.36 and downloading and installing the previous, stable version 2.10.34.
11/24 The issue of frequent crashes was later identified as a bug.
The program was updated later this year, 2.10.38 (revision1), which appears to have eliminated the unexplained crashes.
Other posts have used the Layer> Transparency> Color to Alpha or Colors> Color to Alpha as part of other menu options, but in the last post and here the selection is the primary tool in developing transparencies.
This design was originally shared in the post: Gimp Update for Mac 3_more on color separations, where the goal had been to reproduce a published 12X18 chart. 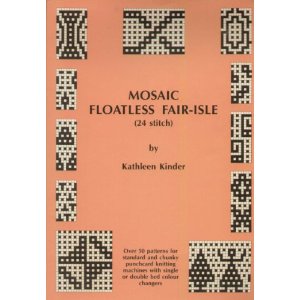
 The PNG matching the chart on the right may be used in several ways. On electronic machines, it would be ready for knitting using both the color reverse and the double length buttons if planning to use tuck or slip settings with color changes every 2 rows.
Punch card machine users must punch the color-reversed file and set their models for double length, 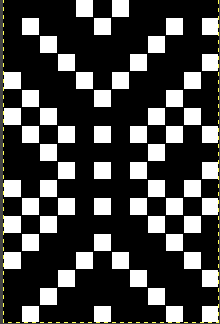 but punching out the lengthened version 36 rows in length provides enough for the card to advance properly in the drum and makes correcting errors easier.
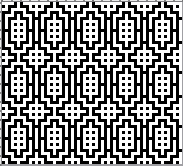
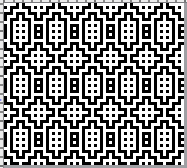
Revisiting the photograph of a swatch using the design using wire and chenille in half, and wool rayons in the other, I was bothered by the breaks at the midline of each repeat. 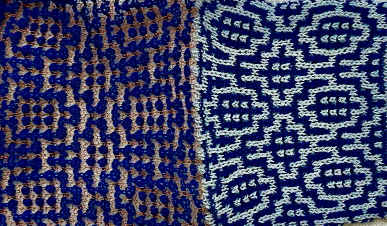 Tiling the first design provides evidence of the area at issue, led to adding/subtracting a few pixels at a time, seeking slight changes, and ending with two final variations:
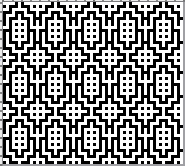
Variation 1 ![]()
Variation 2 ![]()
 The Gimp color to alpha process in RGB Mode for mosaic knitting:
  file 1 is opened. Several new files may be opened in sequence for altering, copying, and pasting onto each other, with steps performed as a continuous process or with saving results and returning to them in separate steps
 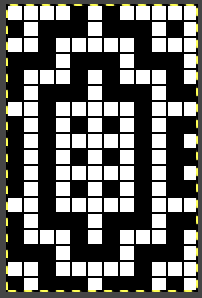 file 2: its color reverse
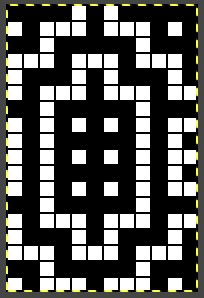 file 3: a 2-row brush with white color to alpha
 ![]() file 4: file 3 used to bucket fill 2 with pattern
file 4: file 3 used to bucket fill 2 with pattern 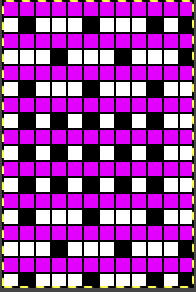 file 5: magenta color in 4 to alpha
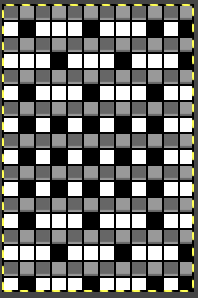
file 6: file 5 copied and pasted onto file 1.
Change Mode to BW Indexed
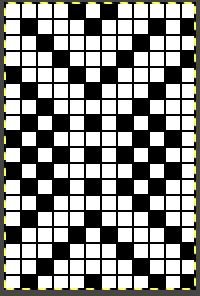 file 7: file 6 color-reversed for knitting with the tuck or slip setting,
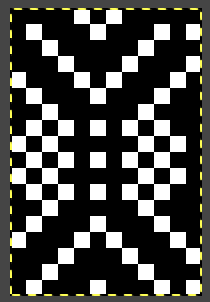
![]() will need to be doubled in height for color changes every 2 rows using the double height button or use the file rendered double height to 18X36 pixels using Image> Scale in Gimp
will need to be doubled in height for color changes every 2 rows using the double height button or use the file rendered double height to 18X36 pixels using Image> Scale in Gimp ![]() The proof of concept:
The proof of concept: 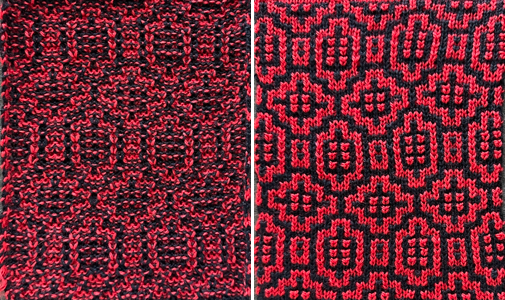 1: The StitchWorld #548, 24X40 pattern was also used in that post, it is suitable for punchcard machines as well
 ![]() Using bucket fill with pattern makes the process faster than using the pencil tool to fill in color manually before converting colors to alpha in separating it.
Using bucket fill with pattern makes the process faster than using the pencil tool to fill in color manually before converting colors to alpha in separating it.
While mosaics are processed in their original length, DBJ files are doubled in height.
2: the file is scaled to 24X80 ![]() 3: and color reversed
3: and color reversed ![]() 4: a 2-row brush with white color to alpha
4: a 2-row brush with white color to alpha ![]() 5: is copied to the clipboard and is used to bucket fill with pattern the color reversed image
5: is copied to the clipboard and is used to bucket fill with pattern the color reversed image ![]() 6: the cyan is rendered transparent by using color to alpha again,
6: the cyan is rendered transparent by using color to alpha again, ![]() 7: and 6 is copied and pasted on #2, the first 40X80 image,
7: and 6 is copied and pasted on #2, the first 40X80 image, ![]() 8: and doubled in length to 40X160, it is exported as a BW PNG for knitting as DBJ. The results with both methods match.
8: and doubled in length to 40X160, it is exported as a BW PNG for knitting as DBJ. The results with both methods match. ![]()
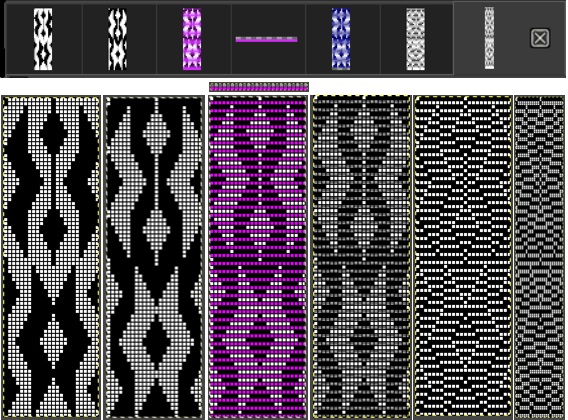 Each color in each design row will be knit twice.
The method for emulating the separation that is built-in in Japanese electronic models, where each color knits once reducing elongation is a bit more fiddly to perform.
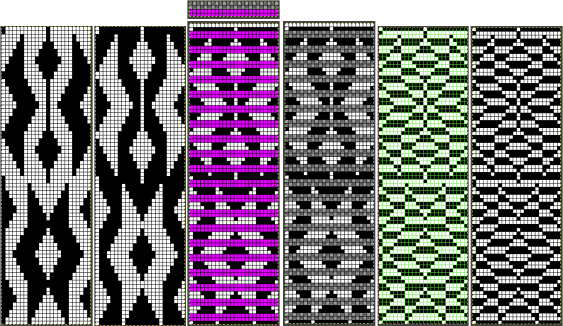
Charts from left to right:
1: the scaled 24X80
2: is color reversed
3: a new file, 1 row longer, 24X81 is opened, 2 is pasted onto it, leaving an all white pixel row at the top of the design
open a 24X4 row file, with two top white rows to alpha, use it as brush to bucket fill 3 with pattern
4: magenta color to alpha
5: crop that last blank row from the file, now 24X80 once more, copy and paste it onto 1.
The green grid is to differentiate this result from the one obtained in the other post, shown at its right
Change image mode to BW Indexed, export as png for knitting.
 The proof of concept
 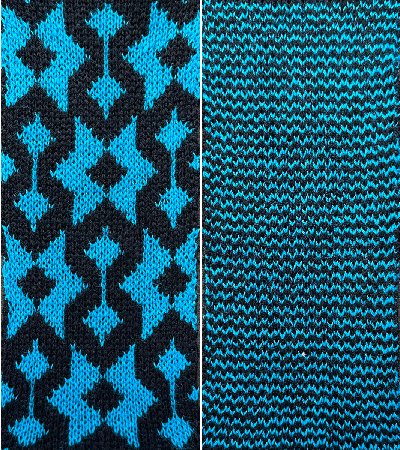 Returning to the repeat used to produce this punchcard the very low tech way
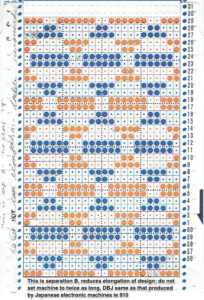 Repeating the steps used for the last design
 Working in RGB Mode the 24X6 starting repeat
 ![]() was lengthened X2 to 24X12,
was lengthened X2 to 24X12, ![]() and colors exchanged to black and white,
and colors exchanged to black and white, ![]() because using color invert in RGB mode introduces a different palette confusing the process.
because using color invert in RGB mode introduces a different palette confusing the process.
1: To produce the separation for a full punchcard, the image is tiled X3 in height to meet the 36 row minimum card length and ![]() 2: is copied and pasted on a new file of the same dimension, and color inverted
2: is copied and pasted on a new file of the same dimension, and color inverted ![]() 3: the color inverted file is copied onto a new 24X37 one with with an added blank row at the top
3: the color inverted file is copied onto a new 24X37 one with with an added blank row at the top ![]() 4: a new file 24X4 is opened, the bottom 2 white rows are rendered transparent using color to alpha, and saved to clipboard
4: a new file 24X4 is opened, the bottom 2 white rows are rendered transparent using color to alpha, and saved to clipboard ![]() 5: to be used to bucket fill in pattern the color inverted 24X37 image (3) with pattern
5: to be used to bucket fill in pattern the color inverted 24X37 image (3) with pattern ![]() 6: the pink color is now rendered transparent as well using color to alpha
6: the pink color is now rendered transparent as well using color to alpha ![]() crop the last blank row, the file will now be 24X36 again,
crop the last blank row, the file will now be 24X36 again,
7: copy and paste it on the first image for the final KRC emulating PNG, check the file mode, and save as indexed BW for use in electronic models.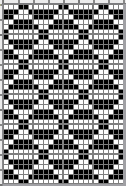
![]() When color-inverted
When color-inverted ![]() the repeat matches the punchcard separation.
the repeat matches the punchcard separation. 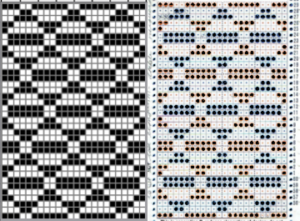 It is possible to magnify, screengrab, and scale the pngs to print templates for counting stitches or even tracing to mark cards before punching holes.