I have recently become obsessed with designs that fool the eye in any number of ways, and although knitting them in more than 2 colors is possible, I prefer the ease of only using 2.
Floats are likely to be too long in these knitting patterns for knitting them as single bed fair isle.
Software facilitates but is not necessary to develop repeats, the process may even be performed on graph pater with colored pencils if one so chooses.
Punchcard machine users are not always included in conversations, this post addresses some ways of developing full 24 stitch designs and performing the necessary color separations for knitting them as DBJ where each color in each design row knits only once.
Brother KMs: punchcards and their use reviews the basics including DIY development of simple motifs repeated in symmetrical tiled patterns.
The Manual for the Brother KR 830 offers this advice on DBJ knitting: 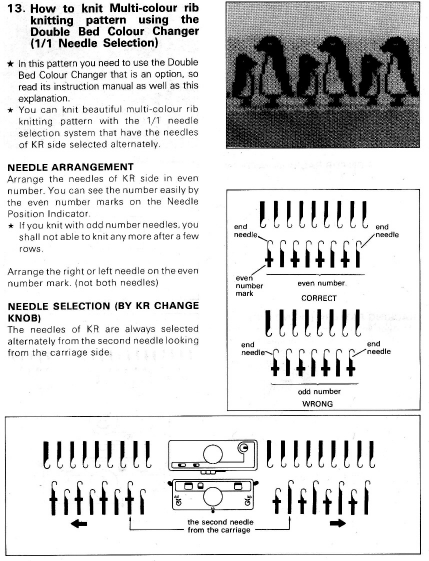
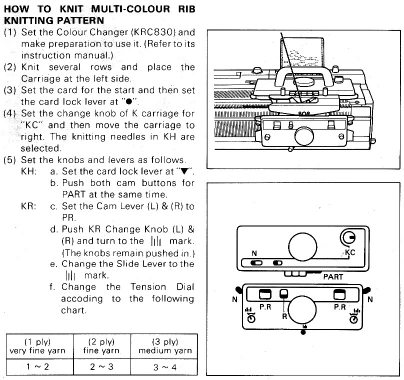 Using lili buttons along with the slip stitch setting in both directions on the ribber carriage reduces motif elongation and keeps the aspect ratio of the planned designs closer to that in the originals than when choosing other DBJ techniques.
Ribber needle tapes are marked with lines followed by spaces. If the start under the first ribber needle on the left is on a blank space on the needle tape, simply end on the right with a needle over a line marking, or the reverse.
I am often asked why in my own illustrations the slide lever on the ribber carriage, a Brother “thing”, is always in the center position.
Reducing variables exponentially reduces errors.
If the lever position is not changed after those first rows or accidentally changed during knitting, the knit gauge will change. An example: working on final projects, more than one student in my knit studio design classes realized only after completing front and back or the second sleeve that the rib with the alternate lever setting not changed resulted in a visibly different rib height in the second piece.
Necessary adjustments can be made in yarn mast and respective carriage tensions, along with yarn choices appropriate for the technique.
ArahPaint and/with/or Gimp with a sprinkle of Mac Numbers have become my preferred go-tos for developing knit designs.
Designing can begin with simple drawings which do not require complex software knowledge and help to build confidence, using the electronic equivalent of graph paper and colored pencils.
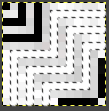
Beginning with ArahPaint, with the goal of developing a 24 stitch pattern: load a new square picture, with an odd number of cells, in this case 13X13
Choose from the default palette, or set the number of colors to 3 and adjust the the results to include white, black, and one other clearly contrasting color ![]()
![]() Draw some starting lines/shapes that can be outlined with single pixels pencils
Draw some starting lines/shapes that can be outlined with single pixels pencils ![]()
 Using the single pixel pencil tool, fill outlines in with color 3
 ![]()
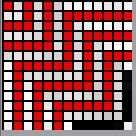 To eliminate double pixels, mirror the image using
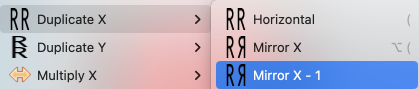
 the 25X13 png
![]() repeat mirroring using
repeat mirroring using 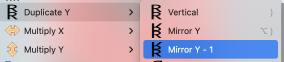 the 25X25 png
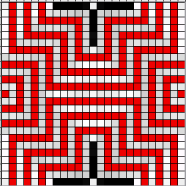
![]() Using the rectangle select tool, again to avoid double pixel lines, trim a row from the top and the right side of the design
Using the rectangle select tool, again to avoid double pixel lines, trim a row from the top and the right side of the design 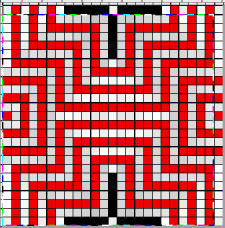 the 24X24 cropped result
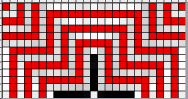
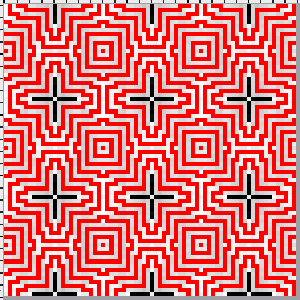
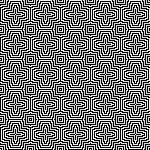
 ![]() tiled as is
tiled as is 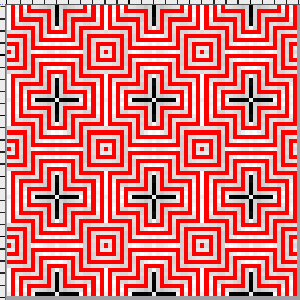 with with the palette reduced to black and white
 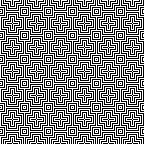 The question remains as to how best to knit similar designs on any machine.
The floats are too long for FI, the repeat is best suited for DBJ.
The easiest color separation for DBJ is the one where each color in each design row knits twice.
To have each color in each design row knit only once, electronic machines offer the KRC button. The same result can be obtained in punchcard knitting by custom color separating the design.
When knitting DBJ with these separations, the 2 most common causes of stripes on both sides of the fabric are beginning the preselection row on the right, rather than the left, or as in my swatch, forgetting to push in both slip buttons.
This separation process for me is a very quick one using Gimp, I have not yet sorted a similar one in ArahPaint.
Using color to alpha as described in previous posts, the required files:
24X24 BW ![]()
24X48 ![]()
24X48 color invert ![]()
24X4 with the top rows in a color picked from the program’s built in palette. Use Colors, white to alpha, to render the white see through. Copy the file to the clipboard, and use it to bucket fill with pattern ![]() a new 24X49 (col inv png 48+1 blank row at top) bucket filled with the clipboard pattern
a new 24X49 (col inv png 48+1 blank row at top) bucket filled with the clipboard pattern![]() the pink color to alpha, renders it see through, th last row is cropped, to 24X48,
the pink color to alpha, renders it see through, th last row is cropped, to 24X48, ![]() and is copied and pasted on the original 24X48 image
and is copied and pasted on the original 24X48 image![]()
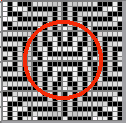
 The proof of concept swatch
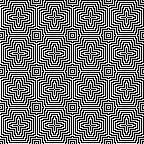
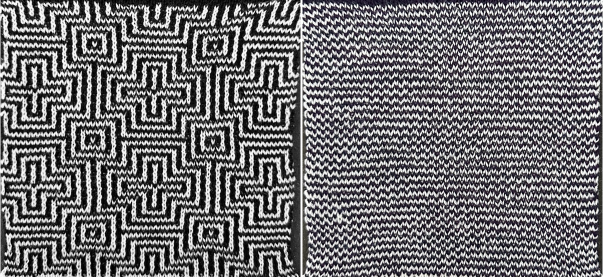 If you enjoy designing with pencils in paint programs, the same approach can be used to produce a larger repeat, which makes the illusion more noticeable, ie in this 36X36 design.
Open a new window with an odd number of cells, ie. 19. Copy and paste the upper left of the design on the new upper left corner, keep filling in lines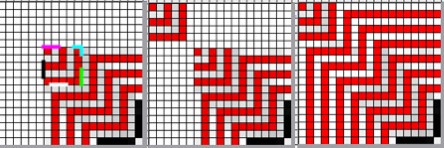 Repeating the steps described previously, the 19X19 png
 ![]() is mirrored -1 in both directions, and trimmed to a final 36X36 design
is mirrored -1 in both directions, and trimmed to a final 36X36 design ![]()
![]()
 Modifications resulting in added shapes beginning to appear can be small in developing variations while continuing with the 24 stitch constraint.
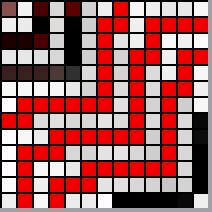
![]() Repeating the process, the files in sequence
Repeating the process, the files in sequence ![]()
![]()
![]()
![]()
![]()
![]()
![]()
 The proof of concept was knit using the color white for the first preselection row to the right and as the first knit color row to the left, the color inverted version of the original repeat.
 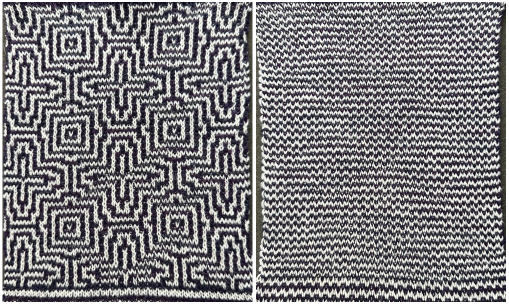 The KRC electronic separations are intended to begin with the white pixels in the designs, but the knitter can change that sequence based on their preferred placement of dark vs light colors.
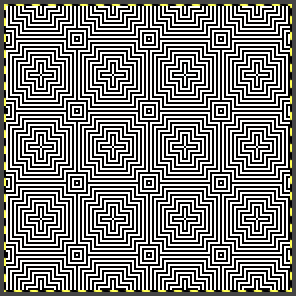
Visualizing the reverse color placement in a knit swatch using Gimp 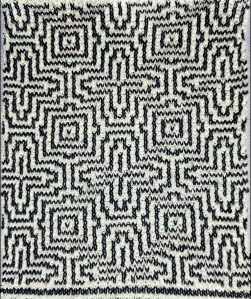 Mosaic and maze knitting, also known as floatless fair isle, has been discussed in many other posts.
The appropriate color separation shares much of the process with that for DBJ but the starting image is used as is, not rendered double length to start with.
The convention is the same as for fair isle, floats wider than 5 stitches are generally avoided.
In the 40 stitch design, there are spaces as wide as 15 cells with no contrasting color ones, which will be responsible for float formation.
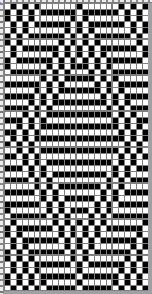
Answering the “what if” question if the 24 stitch design design was used as a possible maze design.
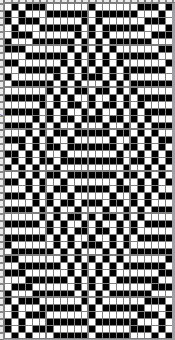
The Gimp process in shorthand  While the DDJ separation is used as is, this separation must be rendered double length in order for it to be executed single bed with the knit carriage set to slip in both directions, and color changes every 2 rows.
Using color invert on the final file, reduces the white cell, skip stitch float counts from a maximum of 15 to one of 6. 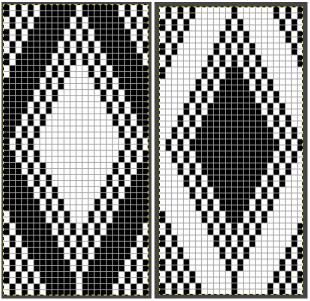 Tiling will check on repeat alignments but has no relationship to the final look of the knit, where the slipped stitches will be gather the knit ones near them.
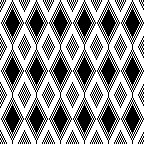
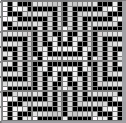
![]() The resulting swatch is highly textured, some of those extra long slipped stitches could be amended by making small changes in the design if it were to be developed further.
The resulting swatch is highly textured, some of those extra long slipped stitches could be amended by making small changes in the design if it were to be developed further. 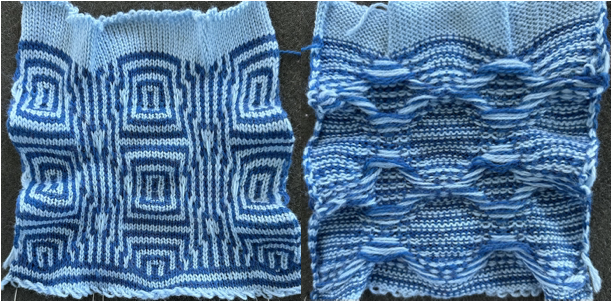
For electronic models, the second 24 stitch repeat extended to 30X30![]()
36X36 ![]()
ArahPaint in knit design 4 illustrates a way where following guidelines in Easily generate random weaves it is possible to quickly generate more random DIY designs for use in multiple techniques and stitch counts.