Some illustrations of this fabric may be found in my previous posts: forming long loops and stitches using cast on comb and weights or ruler, some long stitch swatches, a few more tips and ideas from the earliest post on the topic.
Here are some ideas on creating a basic 3 loops “broomstick” cross. Most of my teaching has been on 4.5 mm machines, so the above swatches were executed in thinner yarns. For this post, my swatch is knit in a random scrap yarn from my studio, on the 260 Brother Bulky machine.
The basis of this type of stitch is to create long loop stitches, and in turn, to re-hang them in various configurations. The look I prefer among others I have tested, results when loops are hung in on every other needle, whether singly or in groups, and the next row is simply knit. Here, as in any machine-knit fabric, if there are 2 or more empty needles side by side, any other than a single needle must be e wrapped, cast on, or have a loop lifted up from the row below (used in increases), or the result will be a ladder vs. knit stitch formation on that needle.
Begin with waste yarn and some rows of knitting. As long stitches are formed, some weight will be required to keep loops from jumping up, forward, and off the KM. Since you are asking the loops to stretch quite a bit on a fixed-width metal base, some testing is required to determine the best tool for forming the optimum loop length. Yarn thickness factors into this as well. I found knitting stitches back to A loops too short and using a cast on combs and paper clips or any of my rulers made them too long, so I opted for the plastic rod insert from one of my window shades.
I like to work my loops from left to right, so the last row is knit from right to left. They may certainly be formed in either direction. In this instance, COL needs to be returned to the right before resuming knitting. This can happen before or after forming long stitches, by any method you like. Consistency helps eliminate errors.
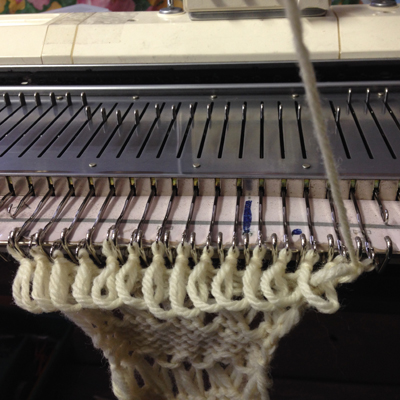
I bring needles out to hold/ E position, lining them up to form new stitches one at a time, the yarn is brought around to the end of the “ruler”
 guided under the needles yet to be wrapped, resting to the right of the next needle out to E on the left side

placed in the needle hook
and knit through, repeating the process across the row: the number of loops should match the original number of stitches
 the spacing tool is removed; the next 2 steps may be easier to perform if the needles are once again brought out to holding / E first
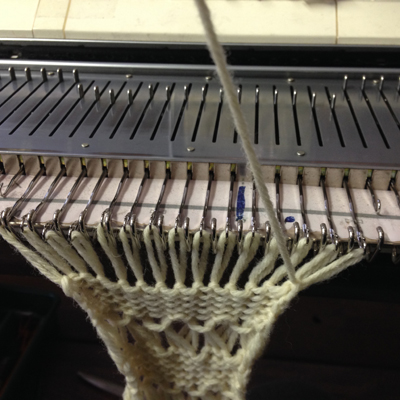
 pulling down on your knit will create the long stitches
 working in groups of 3: remove first 2 loops on right, transfer to needle 3 on left
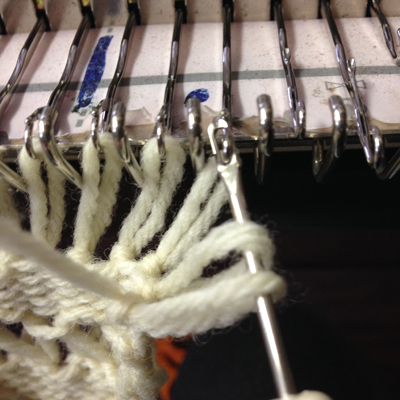
insert tool in the center of the group of 3, lift strands onto needle 1 on right

bring center needle (2 of 3) out and over multiple loops, all 3 to E position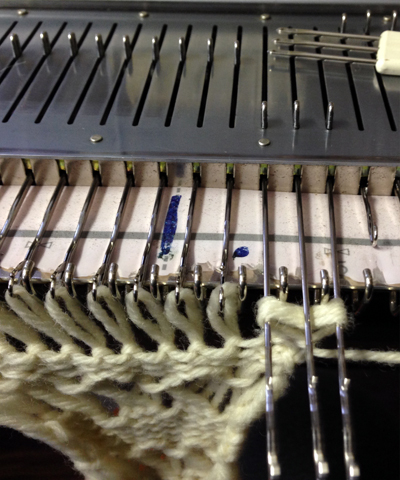
repeat across row  COR: knit 3 rows (or more, odd #), ending with COL, so the yarn tail will once again be on the left to begin the process of wrapping.
knit next row carefully, adjust stitch size and loop length if needed
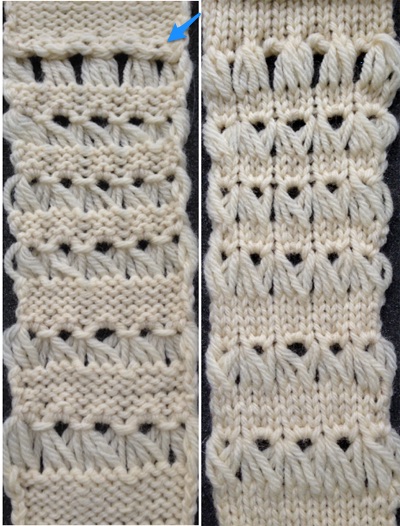
the top row in the photo shows all 3 loops transferred onto the center needle, with crochet cast on (indicated on purl side by the blue arrow) on all needles involved in the plain knit areas before the next row of knitting
Hairpin lace diagrams can be a source of design inspiration for designing loop configurations. The crochet cast on any empty needles could be used where chains occur in crochet diagrams, and it needs to be loose enough for the next knit row to be formed easily. In my swatch, I actually had to hand-knit the first/ next row, my carriage jammed in the areas where the triple loops were in needle hooks as well as my cast-on chain.
The number of knit rows between forming the long stitches may be odd or even, providing one gets comfortable with working in both directions. The carriage gets switched frequently from side to side. Sometimes the least likely to drop your work carriage “free pass” is simply to take it off the machine on one side, bring it to the opposite side, and engage it on the machine once again, with no need to change cam settings or worry about traveling with it across your knit piece.
October 24, 2019: for folks who prefer videos, I recently found a very good youtube series on the technique by Elena Luneva. Knitting takes place on a Studio Machine. The ribber cast-on comb is used to create the loops/ stitches (Studio did not have a single bed accessory for that supposed purpose), the videos add another interesting accessory to use for this purpose on any machine. It is also always fun to watch the way experienced knitters handle everyday tools.