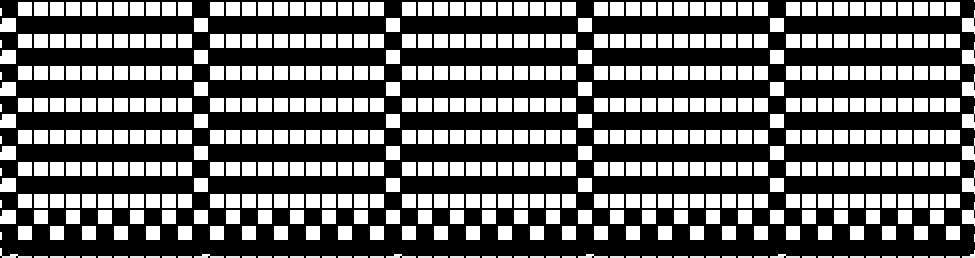
My last post reviewing the quilting on the machine topic so far. Ayab does not allow for the first preselection row to be made from right to left. In any fabric where preselection needs to occur from that direction, with pattern instructions written with that requirement, in order to match the fabric the solution lies in shifting the last row of the repeat down to the first. If you are working on an odd number of needles and set up matters, pay attention as to whether the program places the extra needle on the right or the left of 0 before you commit to placement on your needle bed, the software is not consistent in this. Here the odd # is placed on the left, in a later swatch on the right. From Adrienne Hunter the tip “I think you are expecting that the odd number will always be on the left. But that’s not it, the rule is that the larger number will be on the left, which may be even or odd. ”
Ayab settings:
 I began with this partial repeat from an older post
To avoid any confusion with which KC (Knit Carriage) slip buttons to push, simply push in both. The selected needles that should knit in slip stitch will knit, and the ones that should slip (not selected) will slip. Knitting starts COL, prep the interface, travel to right. With COR proceed to left. Machine can be set to knit those first 2 rows, or to slip both beds if you do not wish to have the extra 2 knit rows. Now with COL set main bed to slip <– –>, ribber to slip <–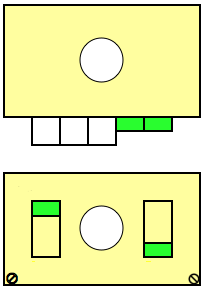

My first repeat for a “square” pocket was wrong. The total number of rows in height needs to be an even one. It takes 2 passes of the carriages to complete one circular row. The first repeat below is 17 rows high; so I got as far as one series of pockets followed by mis patterning that was the fault of the design, not the program. The software gives one the opportunity to easily check for stitch and row counts. Though I loaded images 60 stitches in width, my samples are knit 40 stitches wide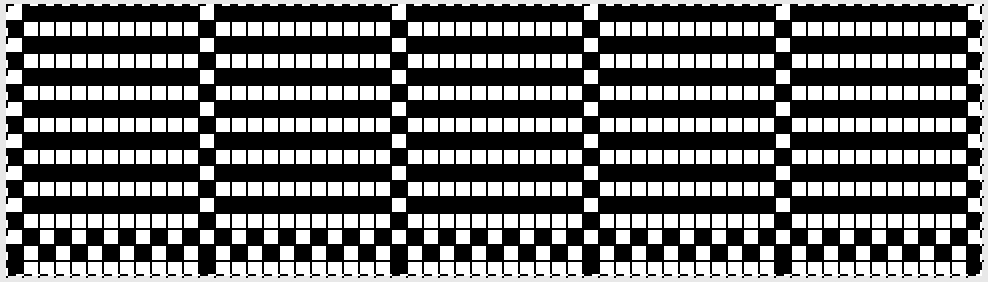 the amended repeat, now 16 rows in height
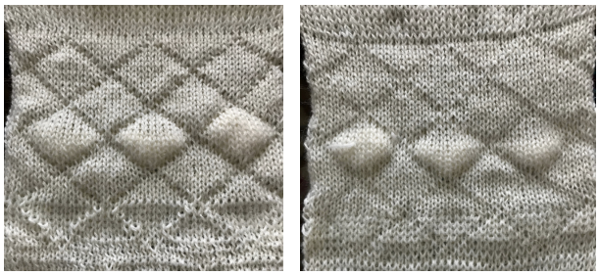
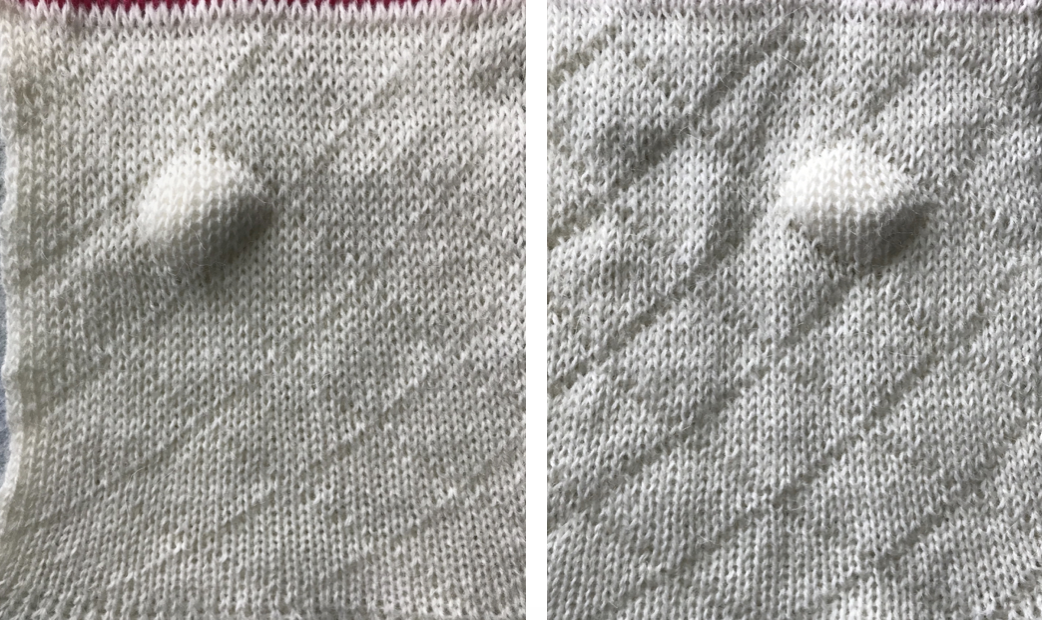
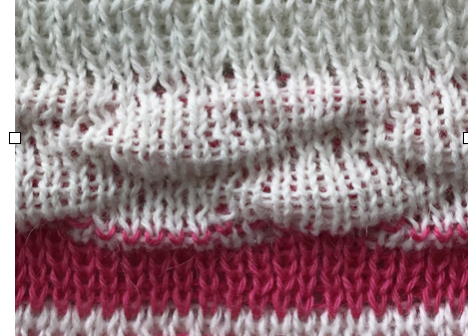
I had a problem when I first paused to stuff pockets with the software advancing a row even though I was outside the left mark, but no issues after I restarted the process and continued. Because the pockets are knitting stitches separately on each bed except for where shapes are joined, the resulting knit approaches stocking stitch qualities and tension settings. It lacks the stretch of every needle rib, where twice as many needles are in work. The joins on the knit side (L) nearly disappear unless the fabric is stretched, while joins on the purl side (R) are more visible. 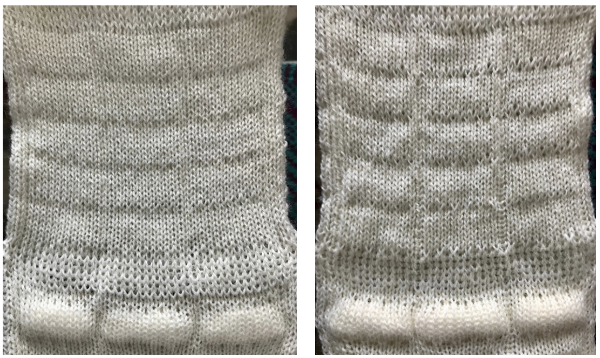
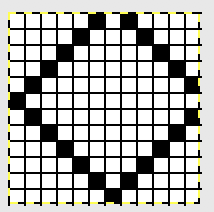
A “diamond” 12 stitch repeat as it would appear across the bottom of a punch card with the option for first preselection from either side, followed by appropriate cam settings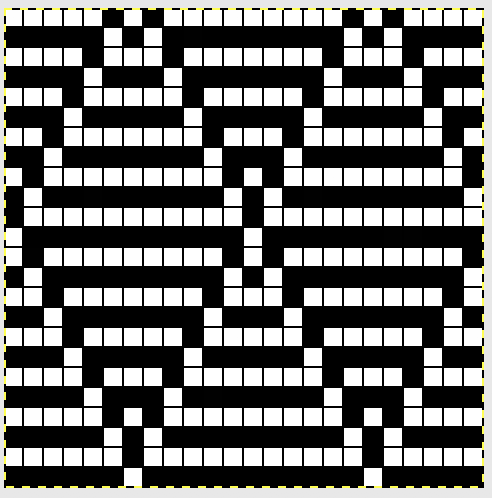 The repeat adjusted for preselection from left, illustrating row shift on right
 The repeat adjusted for knitting across an Ayab 60 stitch swatch
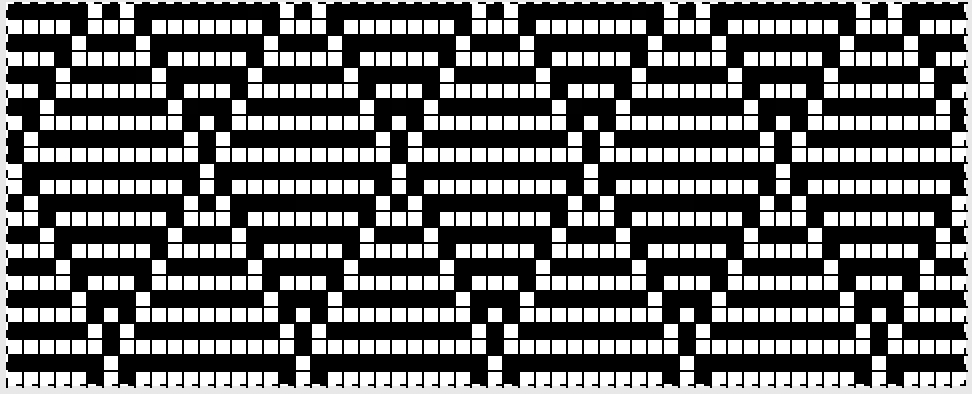 The bottom of swatch, with absent pockets, shows what happens if wrong slip/knit combinations are in use. Knit side is shown on left, purl side on right, with a bit of cotton ball “stuffing” poking through
 While trying to work with the circular and other settings I found an easier way to achieve one color quilting, still working with that “diamond” from my early post
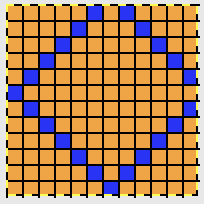
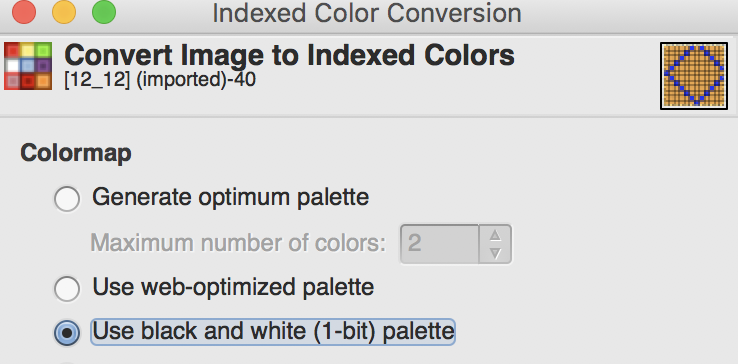
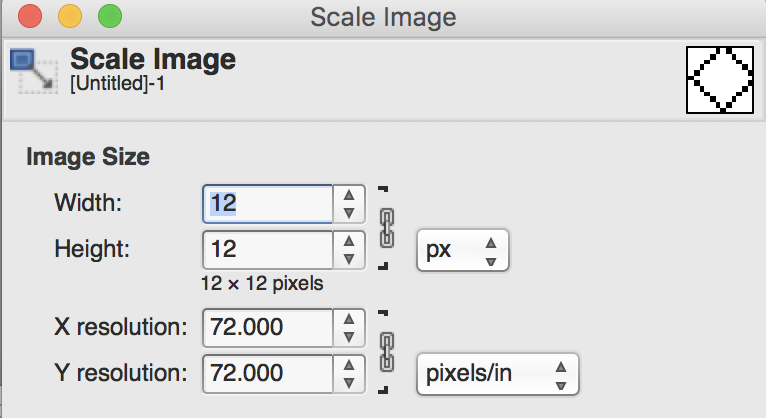
I use GIMP to create most of my images for download to either the Passap or now also the 910. In order for the elongation not to be muddy with an image outline in multiple colors, or to cleanly tile it, the image will need to be converted. To draw or paint, begin in RBG mode, then change image to BW palette for scaling or tiling
 make certain the number you wish to remain constant is highlighted
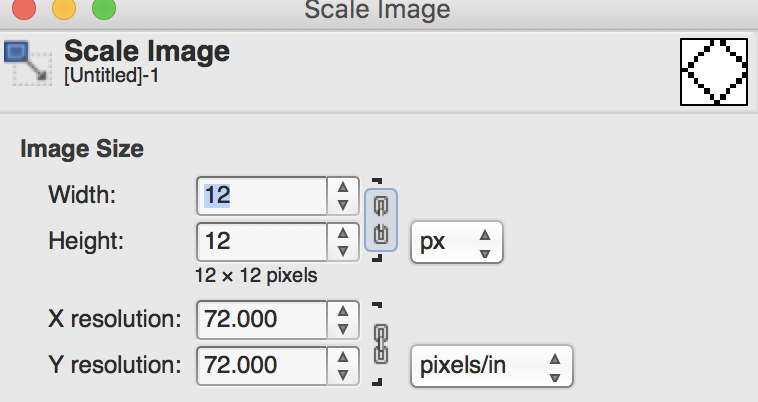
 click on “chain” to break aspect ratio
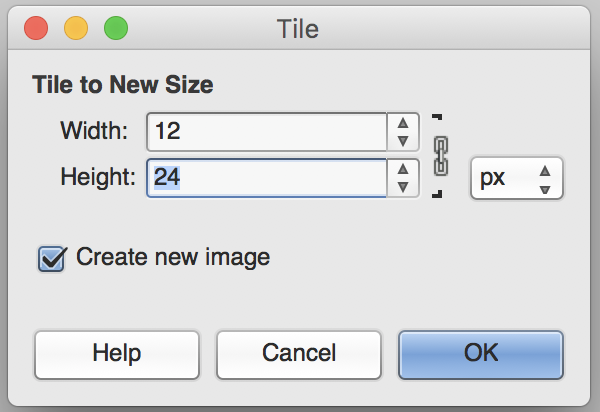
 change the second value to desired one
 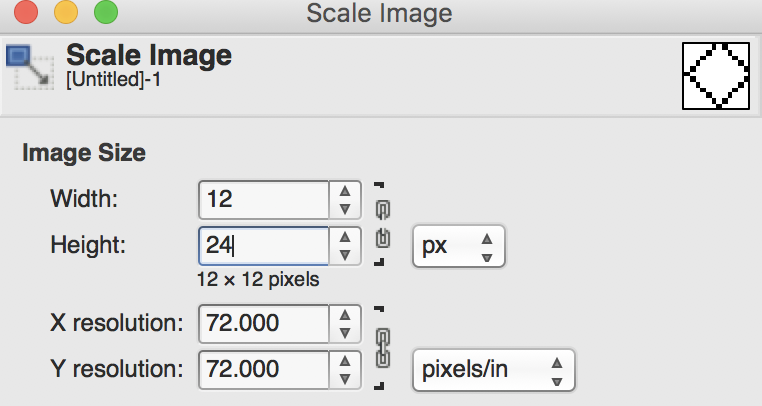 click on scale, here is the single repeat, without the necessary last row shift
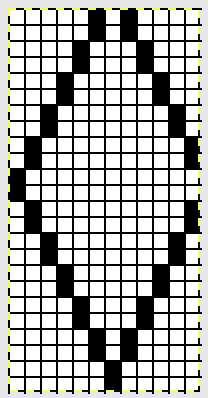 to tile the image across the width of your swatch make certain the value you want to remain constant is highlighted
 “break the chain”
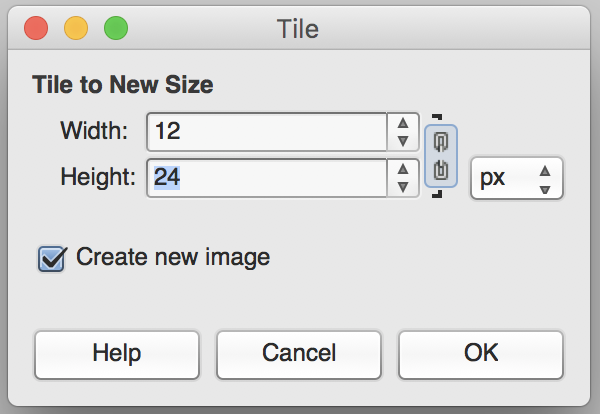 change width to stitch count of your swatch
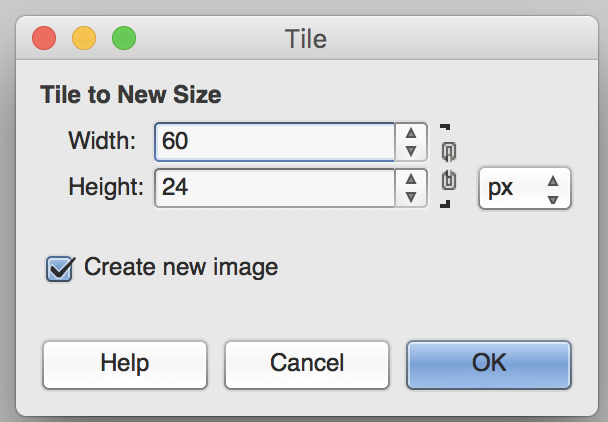
the tiled image will appear in a different part of your screen, it will be the repeat usable for the first preselect row from right to left. More on using GIMP.
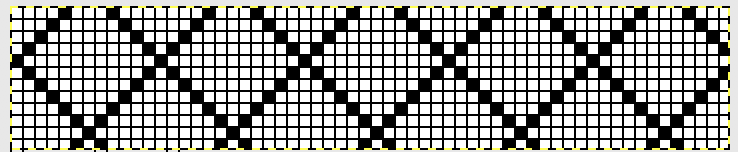
For use with ayab with a repeat that is already tiled but needs “correction”, using snap to grid, dot to dot, copy and paste all but last row onto a new image at the top of a new canvas with the same pixel width and height. Then copy and paste the last row from the above tiling to the first, blank row of the new image. You may also simply work on the original image if you are comfortable with moving the larger cropped image around, pasting it in place at the top, and then editing the first row by hand. Finish with “export as” in your preferred format for download 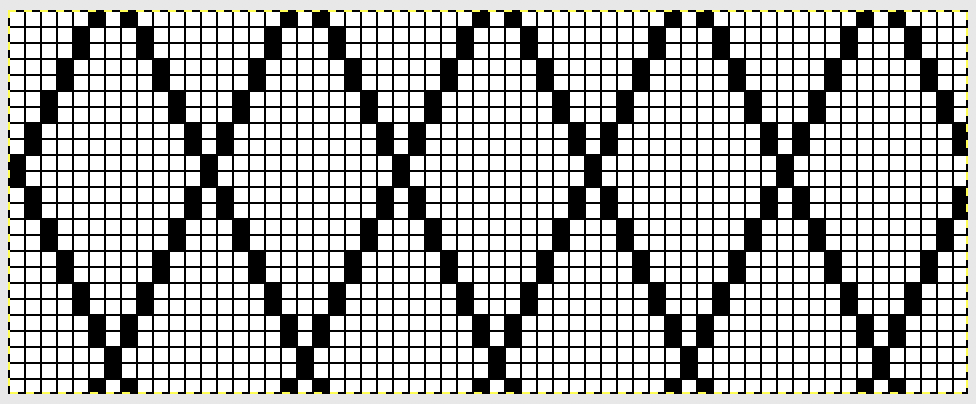 The smaller diamond would also be workable, but resulting shapes would be very small. The initial, unaltered tiling:
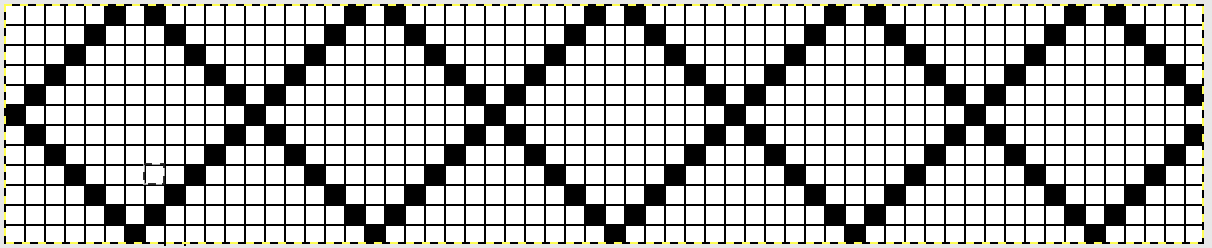 for use with Ayab:
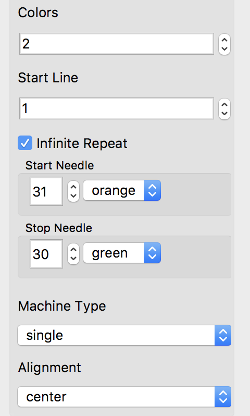
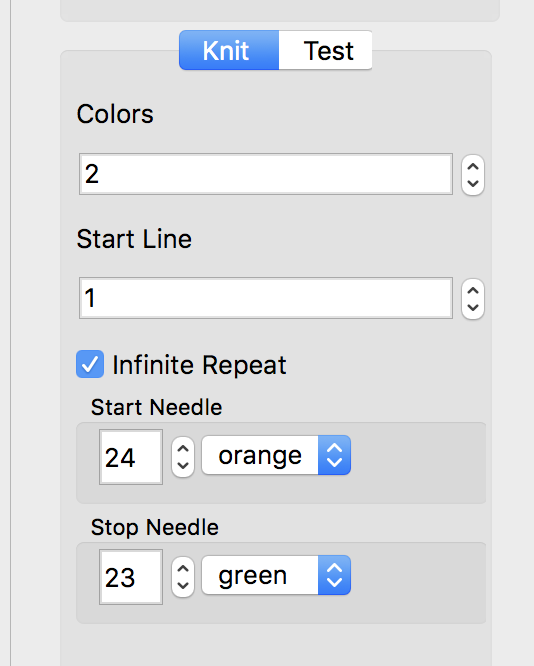
 Ayab setting is for “single machine type”. The carriage settings: opposite part buttons, right on KC, left on ribber, are set after the first 2 preselection passes, with COL
the resulting elongated diamond fabric, knit and purl sides respectively
Thickening the outlines of the “diamond” varies the joined outlines; solid geometric shapes may also be created and used as seen in other posts. I like to work with same or similar shapes to understand what the different settings do to their knit structure and scale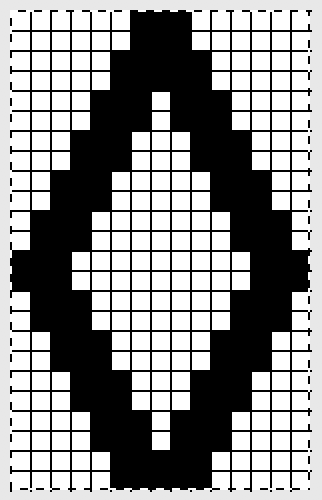
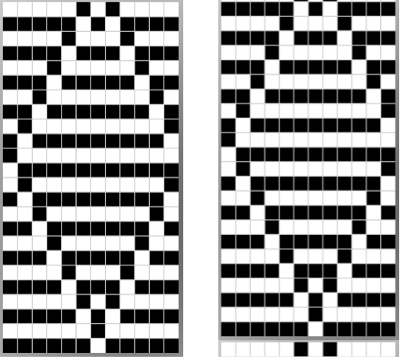
Working in more than one color: using the color separated repeat double height. The first chart below illustrates it as it would appear on the bottom of a punchcard. Here first preselection row would need to happen moving from right to left, toward the color changer, with subsequent color changes every 2 rows
 adjusted repeat/ top row shift to bottom for use with Ayab’s preselection from left
 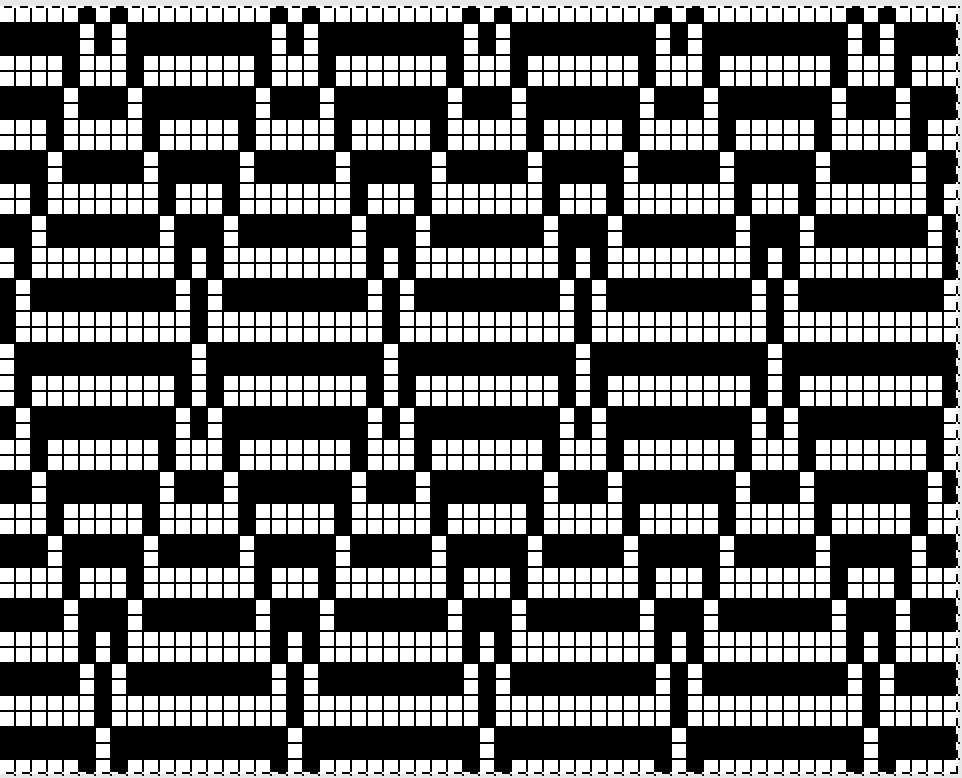 This fabric requires changing ribber settings manually every 2 rows, thus creating a solid color back. Set the ribber to slip /levers up when most needles are selected on the top bed, set ribber to knit / levers down in both directions when a few needles are selected on the top bed. The latter selection forms the “stitching” lines on “quilt”. The first color to knit after preselection toward the color changer knits the black squares on rows 2 and 3 in the chart above, so it will create the dominant color in front of the fabric, the second color change will knit the background / white squares on rows 4 and 5 above, and seal the edges of the diamond / black squares
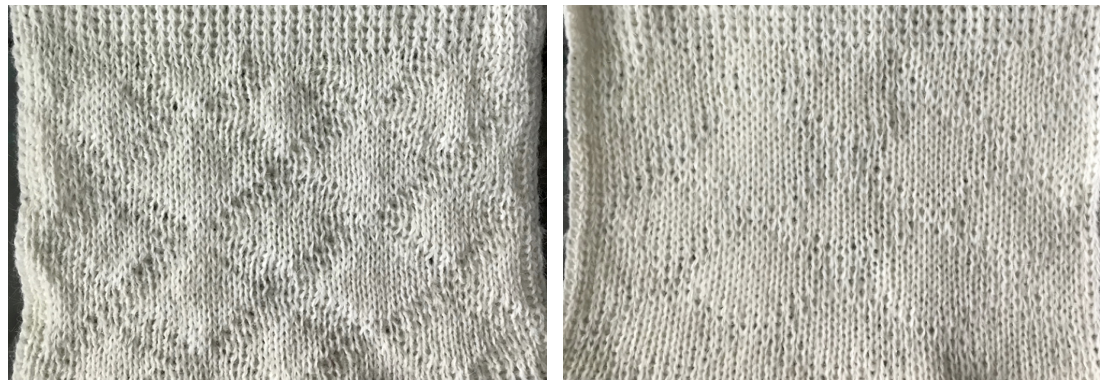
 Reminders: no matter what stitch type, if you forget to select proper cam buttons after N/N settings you will only get plain knitting (stripes at bottom of my swatch). If you are working on a Mac make certain to set your energy saving preferences to insure it stays “awake” for the duration of your knitting time. I happened to knit my samples with cam button set to KC II. KC I is the better setting, giving a slightly different seal along the edge away from the color changer.
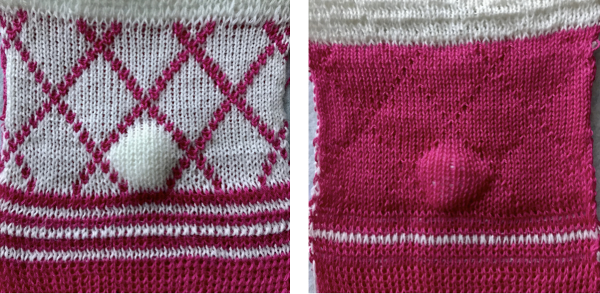
What of using the ayab circular setting and letting the software do some of the “work” for you? The setting was developed for tubular fair isle, so the main bed with slip stitch <– –> knits alternating colors. When the one color knits on the main bed, it skips and forms floats in front of needles not selected for that color. The process is repeated with each color change. There will be a pair of floats on the inside of the knit for each completed design row. For some how-tos to achieve color separations involved, and more info on tubular knits including Passap techniques please see previous post
The goal is to had been to use the ayab circular setting to produce quilted fabrics, joined at intervals rather than as an open tube with a different pattern on each €œside€. When attempting to utilize anything “off label” for a use other than intended, lots of trial and error can be involved. Ultimately the choice needs to be made as to whether the final technique is worth using simply because you can. I habitually double check my settings and fabrics at least once, a day or more after I knit my samples and post. The work in progress posts actually show some of the editing as it happens, with corrections and mistakes included. The heading goes away when I think I am done with the topic. A day after my pink and white adventure I tried to reproduce the fabric with absolutely no success. This was as close as I got, with different carriage cam settings, the knit side is shown. 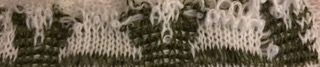
After quite some time and a collection of expletives in 2 languages it appears the solution to my inability to produce the fabric is because the ayab setting I used for knitting it was not the circular one. After a software patterning error and a program restart, I apparently selected ribber rather than circular machine type and proceeded happily to success. To produce the fabric in my re do: the ribber “machine type” setting was chosen 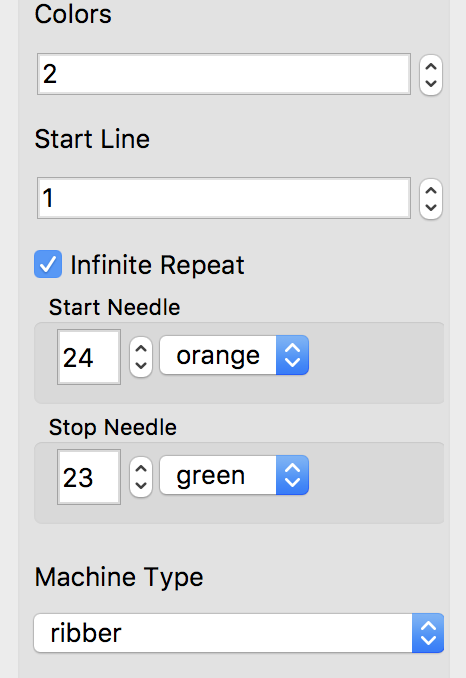
the green yarn is thinner than the pink, so the bleed through of the white on the reverse side is greater. The remaining information applies.  My first samples using a single stitch outline, length X 2 for the €œdiamond€ were a disaster in terms of stitches falling off, the fabric being a squishy, shortened mess.
Back to the drawing board: I thickened up the outline of the shapes, grading up and down in 2 rows in height sequences, needed for getting to and from the color changer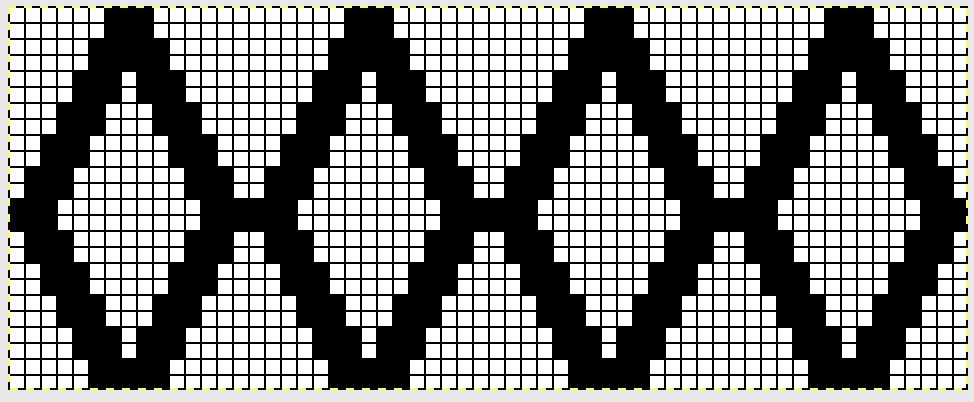 I chose to continue to test on a narrower repeat. An added consideration: in knitting fair isle, the first and last needle on each side is normally selected whether by using change knob on KC I in 910, or adjusting knit under carriage in punchcard machines. One can program black squares on either side of the full pattern repeat for the width of the fabric to insure that any number of edge stitches knit every row on each side. Working on a smaller repeat, now 47 X 24
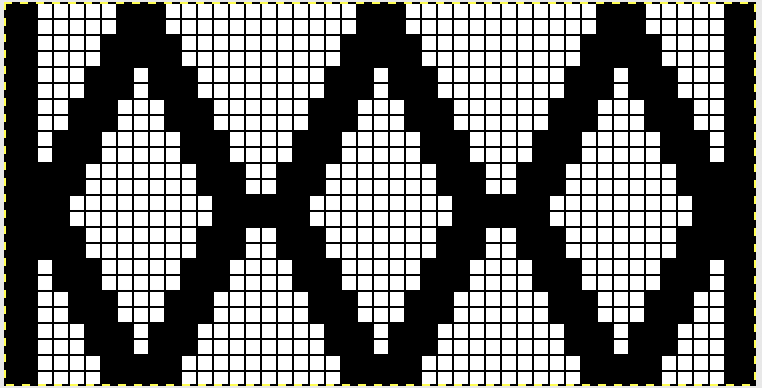 note: the odd # and even number needle positions for this new repeat are in reverse order from the one at the top of this post. Here the odd # is placed to the right of 0, not the left
 If for any reason you choose to work in color reverse, the black border on each side will be lost.
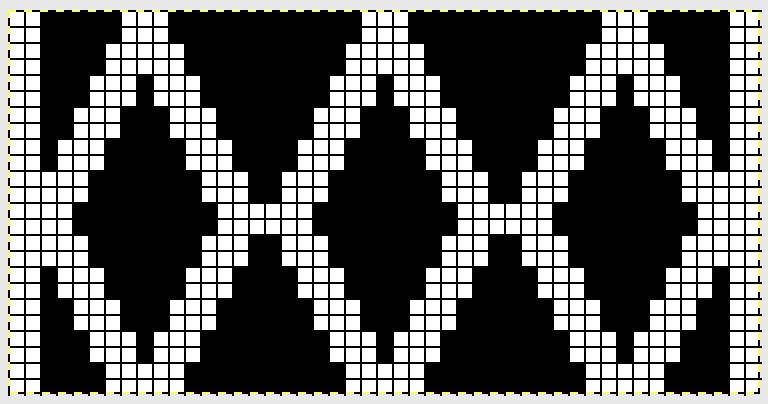 The amended repeat to keep that knit border (black squares/ pixels filled in; this was my working repeat
 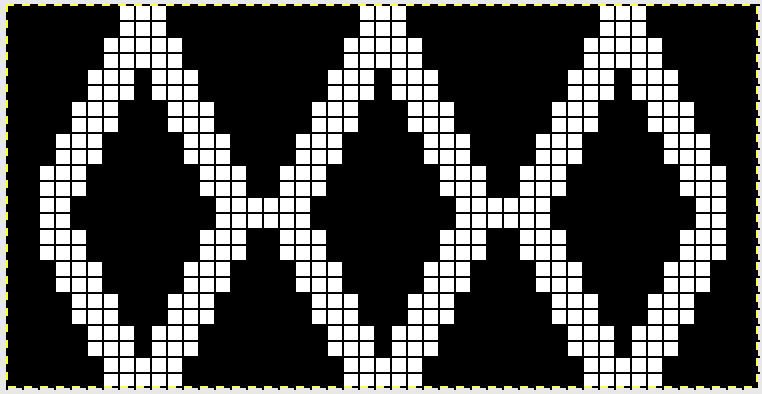 It takes a few tries to sort out what may work. These were my first effort switching ribber settings around until I reached creating pockets.
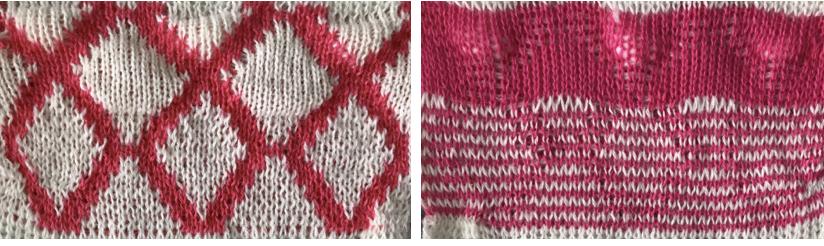 The color choice needs to be made re solid color for backing and sealed areas of the fabric; for me it was the pink. This is where things get a little fiddly. The fabric settings once the first design row is preselected: KC is set to slip in both directions throughout (remember to change main bed to slip if preselection row have been with KC set to knit). I began with pink for my “sealing” stitches/ solid backing color.
After return to left, change color (white), no stitches are knit on the ribber, only on main bed
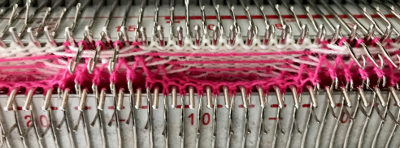
here the floats become increasingly apparent 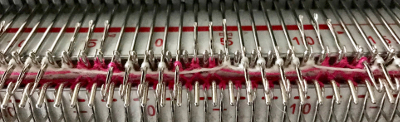 the ribber now dropped a notch on the right side
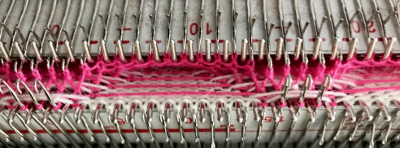
 stuffing pockets with cotton balls
  the ribber is returned to up position, knitting continues
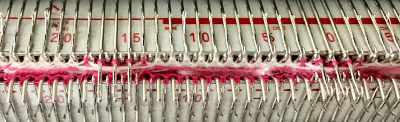
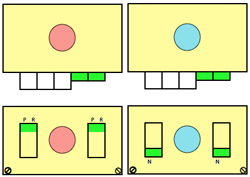
A: setting operator error creating solid color row. B: same, ribber not set to slip in both directions, resulting in white joining all selected needle. C: stuffed pockets, tending to make fabric wider and shorter 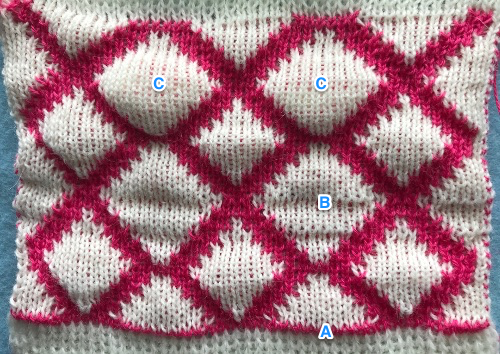 A, B: extra sealing rows (2 in white). C: stuffed pockets and a bit of peek through cotton. D: points to bleed through backing color of white floats on the inside of the pockets
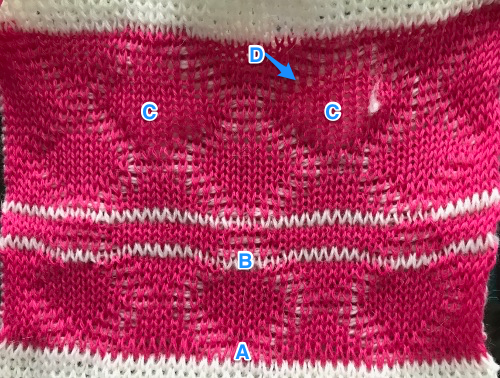 A helpful tune: pink down, white up in reference to right ribber slip lever.
The question now follows: which color separation does Ayab perform automatically for DBJ?