My recent revisiting of holding techniques led to my coming across handouts and notes from the late 1980s and early 90s, including the working notes below for an entrelac fabric. I sometimes read instructions I assembled long ago, and they seem to be in a foreign language at first. Entrelac was referred to as basketweave as well. On the knitting machine, it is usually executed removing part of shapes onto waste yarn. In these shared instructions it is knit completely on the machine. Blocks can be any size, knitting is started on a multiple of the stitches planned for each shape repeat. The number of colors used is limited by imagination and patience for weaving in yarn ends and dealing with issues at the start of each new shape, familiar to anyone who has tried intarsia. Weaving in those yarn ends may be performed during the knitting of larger “diamonds”. It is helpful to understand the basics of short rowing prior to attempting this technique.
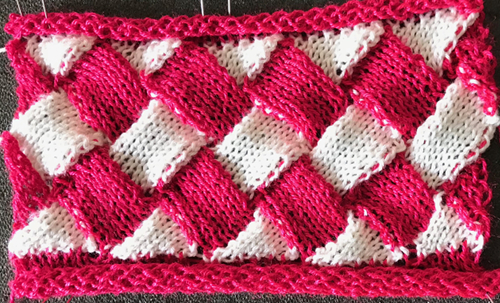
In a post in 2011, I shared a link to excellent directions found at howtoknitasweater.com , written by Cheryl Brunette. Here are 2 of my teaching samples, executed on 4.5 mm machine. In my teaching days, my demo yarns were in distinct colors, easily spotted, and not often preferred or even liked by students. They could be instantly recognized, so no one ever tried to use them in their class assignments, and colors were out of range for the comfort level of attendees at my workshops, so swatches tended to remain mine for the duration of those sessions and far beyond.
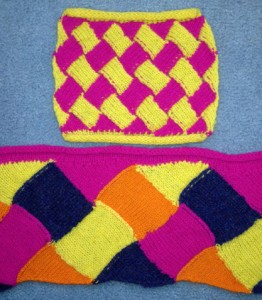 a rearview with ends woven in
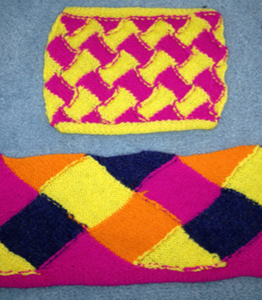
It is best to start with a few rows of waste yarn, and the choice can then be made as to whether to cast on and go immediately into pattern, or ribs, stocking stitch, or other beginnings and endings may be chosen.
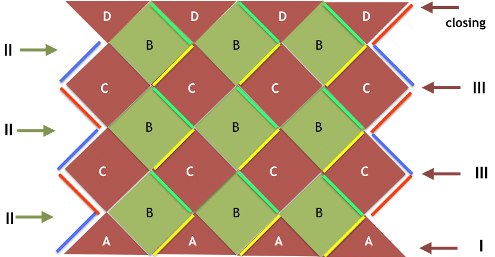
The blocks will appear square to rectangular depending on yarn choice and gauge, some writers refer to them as “diamonds”, they are joined together as you knit. My test swatches are all executed on Brother machines. My own working notes: 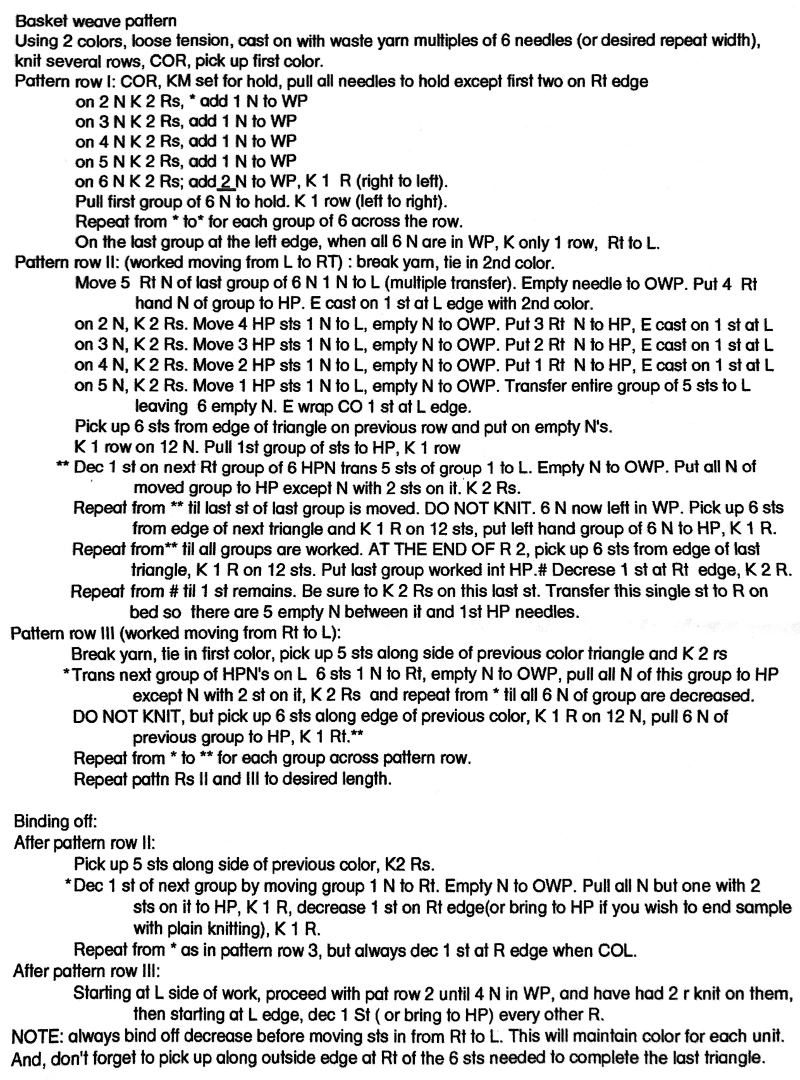 Visualization: here pattern rows II and III are shown in repeat, along with the direction of the carriage movement, and the lean in the shapes created with the purl side facing
 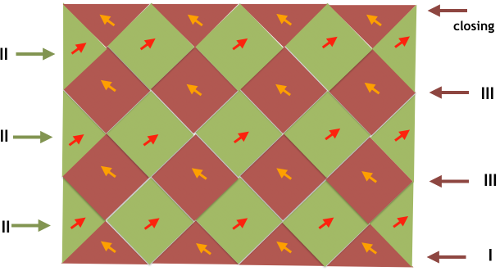 This attempts to identify the shapes by assigning numbers, in their order of knitting. As mentioned, the fabric may also end with added rows of knitting on top of the last row of shapes as they are formed
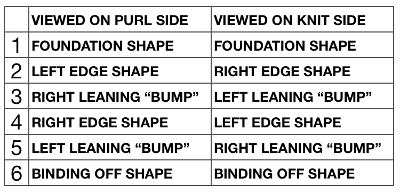
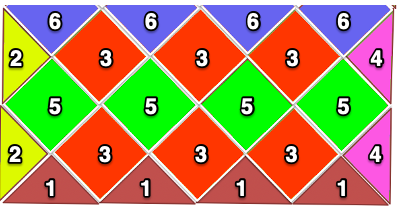
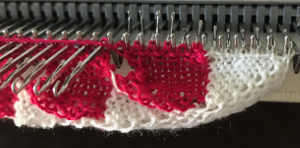
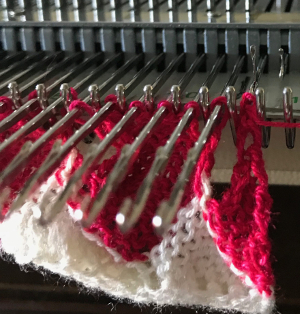
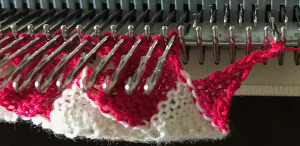
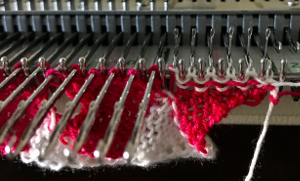
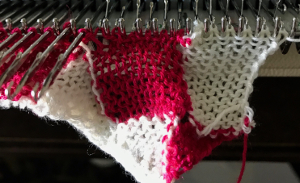
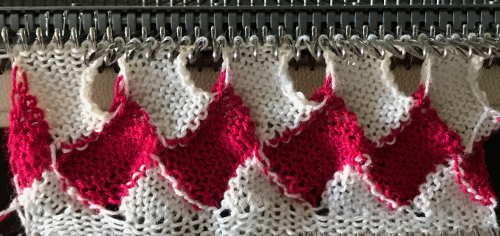
These photos do not document each step, are meant as an aid in parts that may be a bit tricky when starting to experiment with the technique
The set up for starting triangles: note the similarity to some of the surfaces created in the last post. When using short rows, part of the stitches in work will knit many more rows than others on the machine. Accessories such as the cast on comb will tend to ride up on one side and drop off  When the end of the first row that row is reached, as contrast color is added, stitches need to be cast on on the far left in order to keep the work on the bed a constant number of stitches. The usual method suggested is e wrapping, this is picking up from the row below. I found either method produced looser, longer stitches on the far edge
 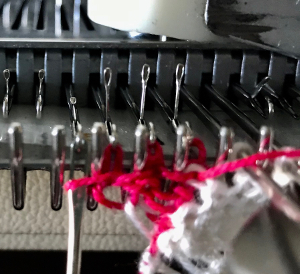 continuing across the row:
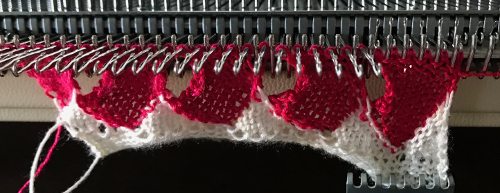 reaching the far right:

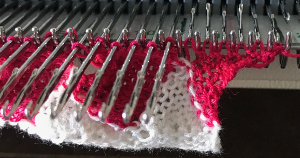
binding off across the row by transferring stitches when moving from right to left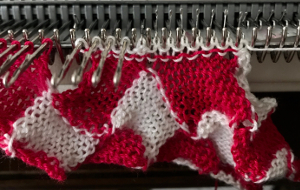
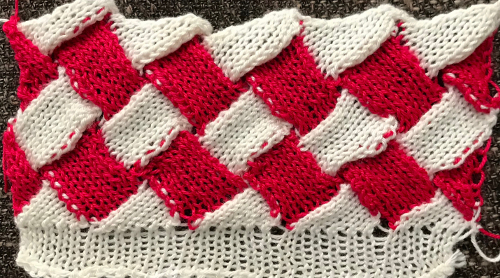
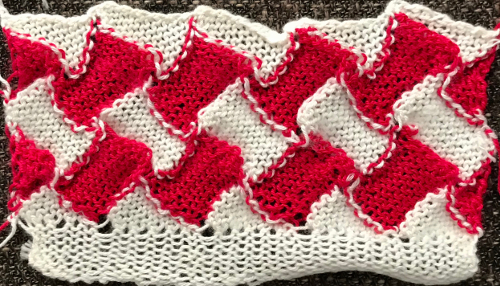
The colors were chosen for contrast, the yarns are slightly different thicknesses, the white is a 2/24. The latter is usually used double-stranded when knitting on the single bed unless intended as a “thin”. Bleedthrough at joins and some of the other features ie eyelets at corners might be reduced simply by making a better yarn choice. As for those “wisteria” eyelets, they could become part of an intentional pattern between bands of basket weave. Once the principle is understood many other variations become possible.
Many details in any technique wind up relying on personal preference for use of or added editing. Studying results on swatches can help one determine whether larger pieces are worth the effort, and what habits and their results may need to be changed. Contrasting colors help with evaluating edges in patterns such as these. This method relies on transferring groups of stitches by hand on the needle bed. The process could get far slower and impractical if the “diamonds” increase significantly in size. At the intersection of the shapes, there will appear an eyelet (1), also seen in hand knits, which disappears if the fabric is not stretched or pressed. How stitches are rehung in any part of the process can change the look of what is happening there as well. Picked up finished edges if tight will draw in the shape on that side (2), holding happens in 2-row sequences, and small eyelets happen there as well (3). Consistency matters. Though the shapes lean diagonally in the finished piece, they are picked up along straight edges, forming a square to a rectangular piece of knitting, with the usual grain, allowing for the addition of other techniques within the blocks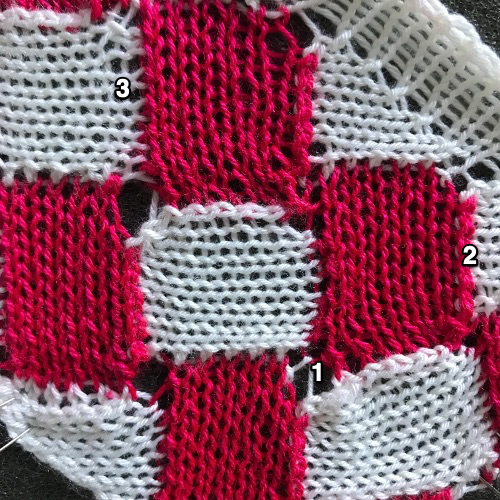
Trying to imagine where stitches may need transferring to waste yarn or “off label” tool?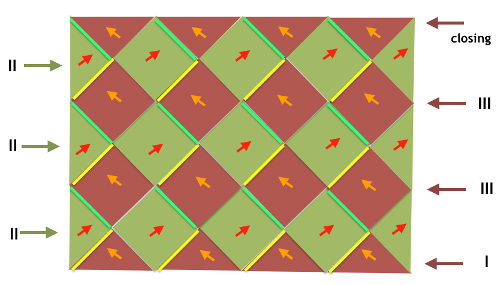 Alternative shapings at sides: what needs to be cast on or bound off?
Troubleshooting ideas: a small weight might be enough to elongate those shorter closed edges to make them easier to rehang and to be a bit longer. Claw weights usually available with machines may be far too heavy, then DIY ones come into play. A common suggestion at MK seminars used to be that of purchasing fishing weights, which commonly come in a variety of sizes often with openings or wire eyelets at their top, and using bent wire or even paper clips so one hooked end can be inserted into the hole on the weight, the other is used to hang it in turn onto the knitting. This is an example![]() Such weights are made of lead. That is a concern, there are products on the market that may be used to coat them. This one is easily found in home improvement stores and online
Such weights are made of lead. That is a concern, there are products on the market that may be used to coat them. This one is easily found in home improvement stores and online
This round sample in the absence of the paint was covered in heavy-duty duct tape. It weighs 2 ounces, just half of one of my factory-supplied claw weights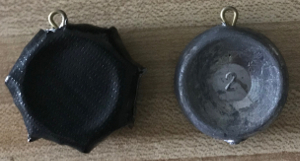 It does a good job of weighing down those straight edges along the bumps, making the stitches easier to pick up. When rehanging those stitches, uniformly hanging the loops, not the knots along the edges involved will give a smoother join. Here a paper clip is used as the “hanger”
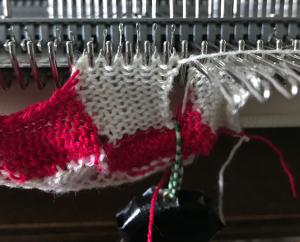 It is easy to get into a rhythm and think you “have it”. A reminder: the shapes at each side are triangles, not the full shape. Row II starts on the right, begins with decreases followed by rehanging, row III starts on the left, involves increases and working stitches in hold to its right. Losing track will produce the start of an extra shape, which may perhaps be a “design feature”, but not a good thing if the goal is a straight edge on both sides. Unraveling is easy if the problem is noticed soon, but is problematic if more rows of shapes have been completed.
 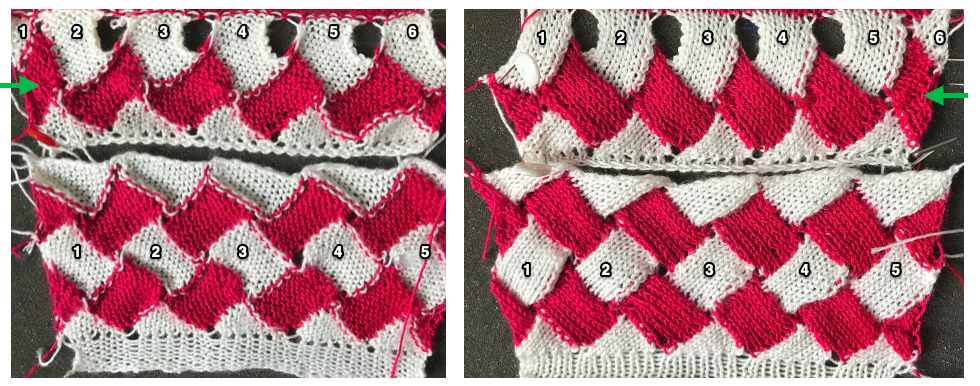 Lastly, a swatch ending in all knit rows. The only remaining issue is the fact that those side triangles are formed by stitches that are looser than across the rest of the piece. This yarn is thin and a poor choice, but fine for getting the technique down and beginning to understand what happens to stitches, how one needs to move from one side to the other, and what happens along the edges of each individual shape
  In switching to a thicker, space-dyed yarn, the effect is lost to a degree because of the length between color changes. This sample begins to address keeping some slits, but the repeat needs further sorting out
 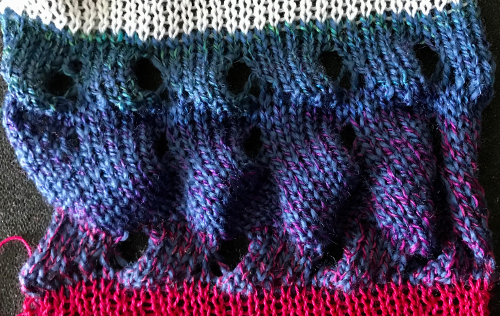 Following the same idea in visible colors: the yellow wool is another too thin wool (2/20), which makes the edge that will need picking up slow and tedious to deal with because of very small stitches. If I were to make a piece, I would work on the partial shapes in the magenta to make for a smoother color transition start. I used the foundation triangles and row II, with 2 rows of knitting when they were completed to help close the spaces at the top of the eyelets in the magenta. Some striping between repeats at the end of row II is worth considering in alternate colors, for more rows, or even in a thicker yarn.
It is possible to develop shapes,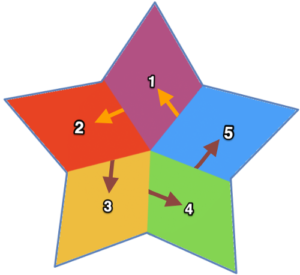 to consider the number of stitches required and whether the fact that other than garter stitch knit stitches are not square,
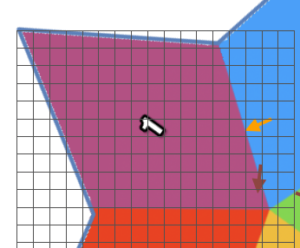 Then there is the world of making each section /shape as large or as small as desired, shaping them by increasing or decreasing stitches adding and subtracting them as needed by casting on and binding off, partially joining them, knitting and joining them when completed with seam as you knit techniques, changing color within each shape or at the end of every row/section of adjoining ones, working the piece in one color only or using a space dyed yarn for random color patterning. Quilting diagrams can be a boon for inspiration for seam as you knit.
I found this on Pinterest, it strikes me as masterful use of related techniques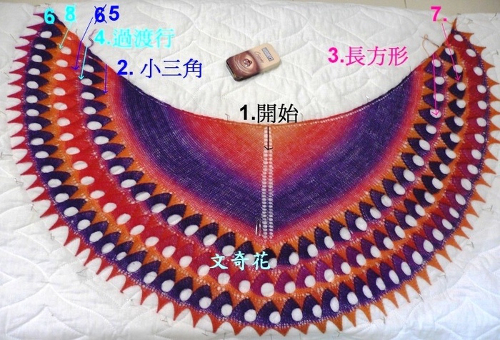
Lots of hand-knit inspiration and free patterns: https://intheloopknitting.com/entrelac-knitting-patterns/#freepatterns
This book explores the technique to the max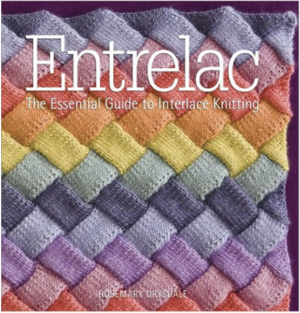 Some of its swatch images are shared in this review of it , there is also a sequel
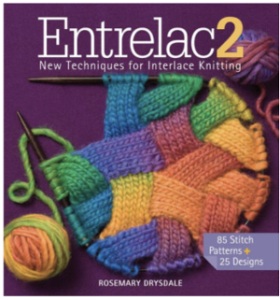
Three slip stitch entrelac pretenders using slip stitch patterning and holding