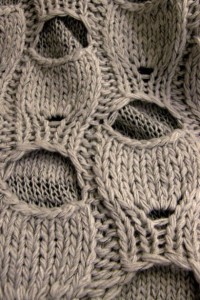
An image often found on Pinterest, with its source attributed to a Vero Moda garment and accompanied by a “how-to” request, led me to give “designing” it a shot. Here, I believe, 2 layers of a garment are pictured, resulting in the stocking stitch knit that appears behind the eyelets.  Analyzing the fabric: a wide, flat rib is created. The equivalent of “buttonholes” with a fewer cast on than bound off stitches is in use, creating the narrowing effect at the top of each slit, four stitches are “lost”. Making multiple stitches from one (4 in this case) restores the original stitch count and returns width to the fabric. To make 4: Knit 1, purl 1, knit 1, purl 1 into the same stitch, or in this case, the bar between the 2 center stitches. Executing this is not “practical” on the knitting machine. Below is one possible method that could be adapted for groupings with slits of varying sizes.
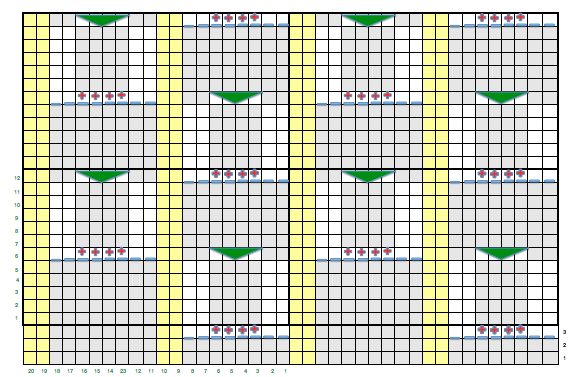
My chart, showing 4 repeats (black border) and 3 added starting rows. Green numbers on the bottom indicate the repeat’s width (20 stitches), and on the left its height (12 rows). Slits are created every 6th row, with the right side facing. Two more stitches would be added on the far right for each side to match in the finished piece. Side borders and top and bottom bands could be made wider and longer respectively, knit in garter stitch to keep edges flat. 
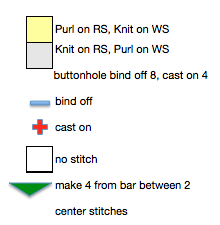
the symbols used
my unblocked sample, knit on 32 stitches in worsted weight acrylic, using #8 needles

