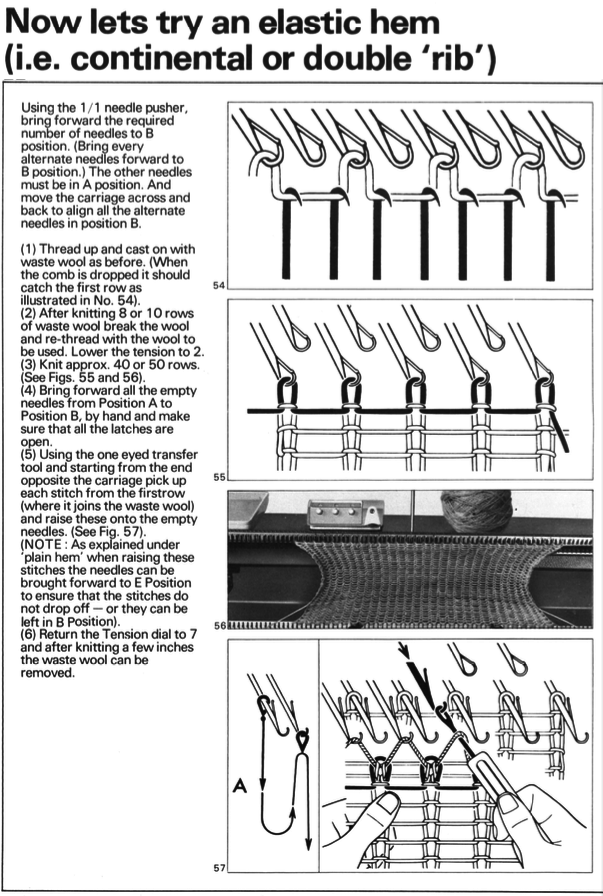
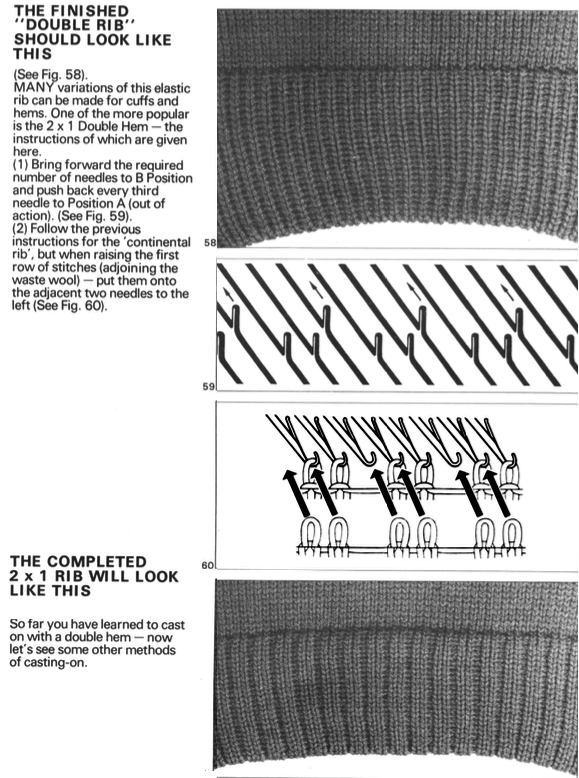
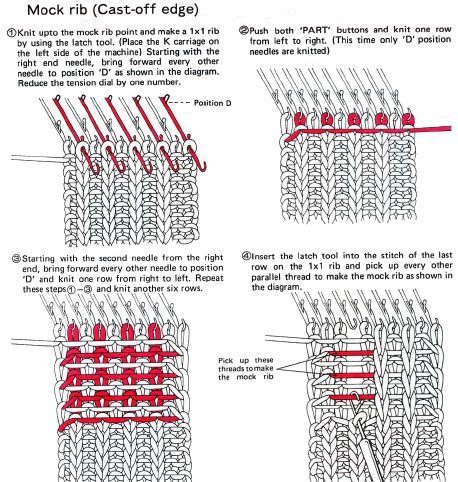
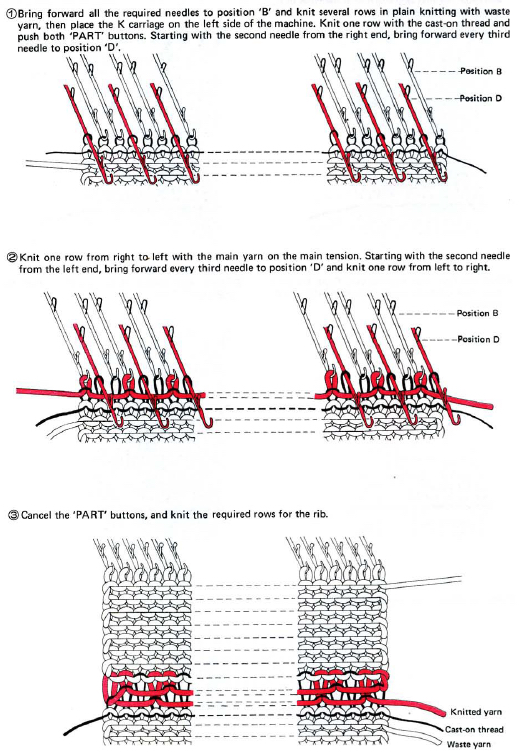
The Brother Knitting Techniques book has a series of illustrations on how to manage a mock rib in various configurations on pages 7-15. The manual is now available for free download online and is an excellent reference.
This technique requires a waste yarn start, followed by a row of ravel-cord. The resulting knit creates ladders or stitches that will, in turn, be dropped, then latched up and reformed into knit stitches on the purl ground. Reducing the knit tension by as much as 2-3 numbers is recommended after the ravel cord row.
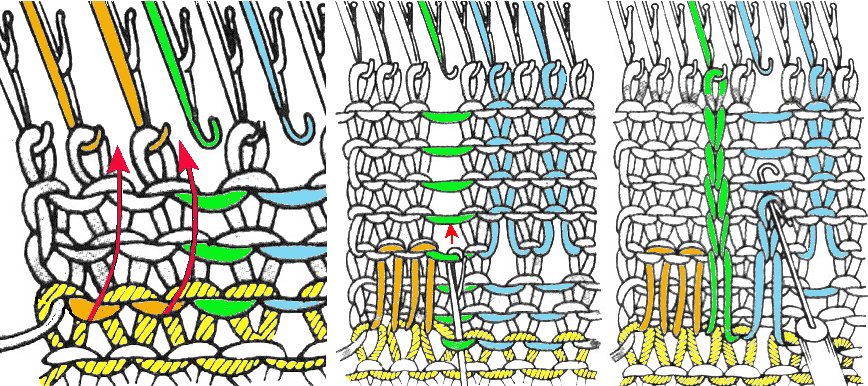
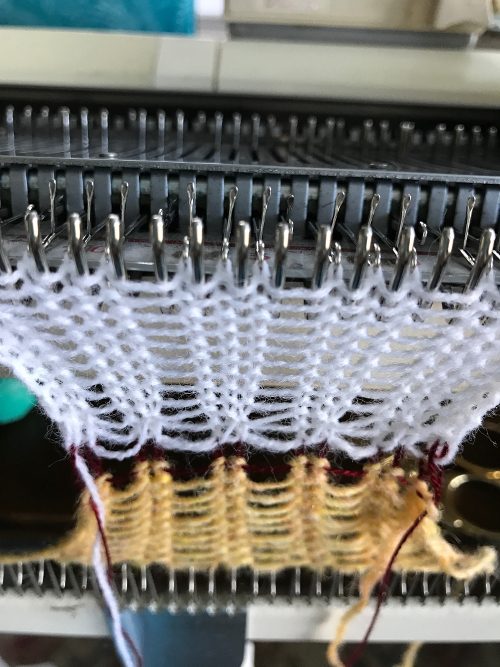
The needles marked in blue and green in the first image below are needles that are pulled back to the A position prior to starting the piece. After the waste yarn and ravel cord (hatched yellow) start, three rows are knit with the garment yarn. Using a transfer tool, pick up the sinker loops from the first row knit (orange), and hang them on the corresponding needles on the diagram (follow the red arrows).
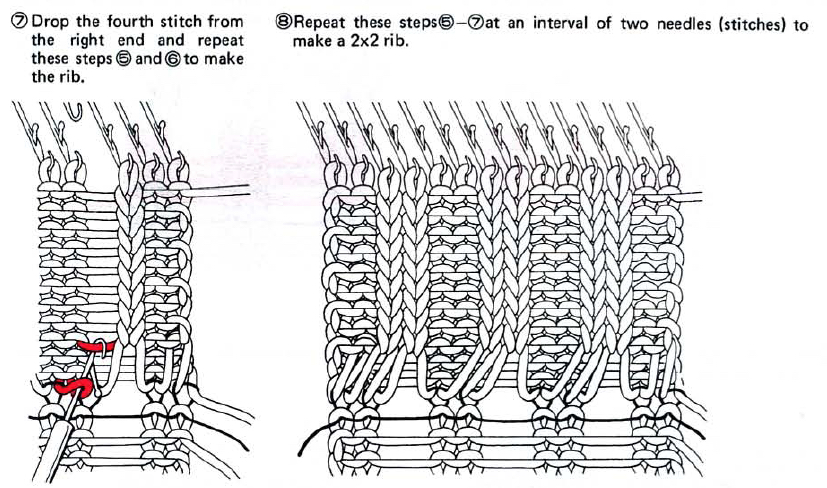
One may at this point continue with needles (green) left out of work, or return the needles (blue) to the work position. If needles are left OOW, ladders will continue to be created. If they are returned to work, a loop is created on the empty needle on the first knit pass, formed into a stitch on the second pass, resulting in an eyelet. Every needle treated in this manner will now be knitting. If stitches rather than ladders are formed for the height of the rib, then those stitches (blue) will need to be dropped, and in turn, latched up. In both instances, the latch tool goes under the first ladder created, and 2 rows are skipped, the latch tool then catches the third parallel row, and pulls it through the first to make the required knit stitch. The process continues up the height of the “rib”. In this illustration, the main yarn begins to knit with COL.
A 2X2 rib is possible. From the Techniques book: cast on with waste yarn and ravel cord (1, 2)
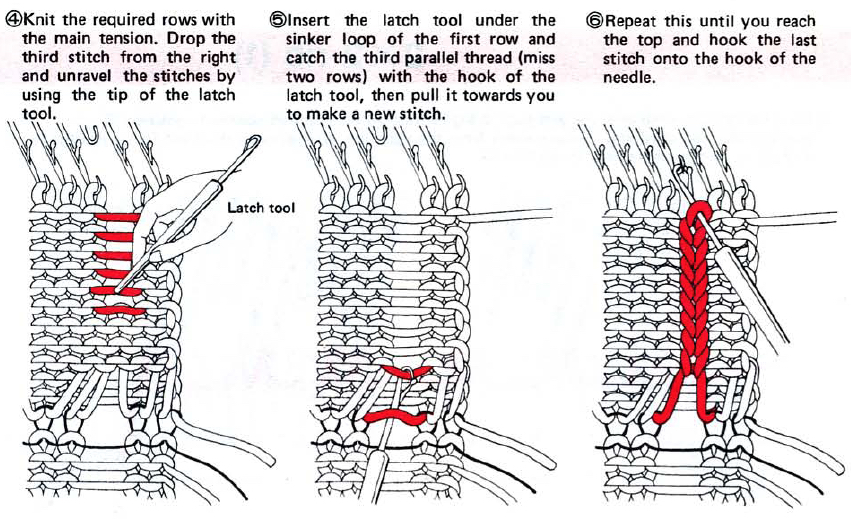
 an alternate: cast on with waste yarn and and ravel cord, knit 3 rows
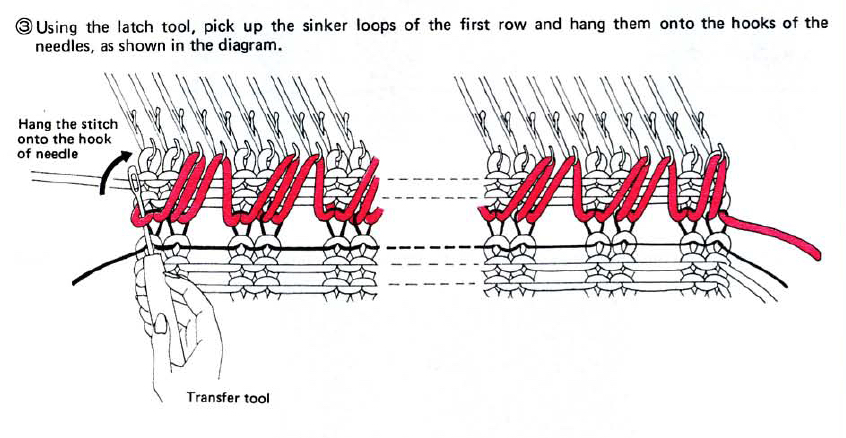
pick up the sinker loop from a knit stitch, hang on 1 of the 2 NOOW (R)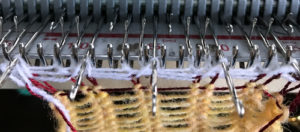
latch up the ladder as shown in drawings above
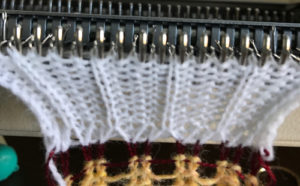
drop/ unravel the second stitch to be latched up (L)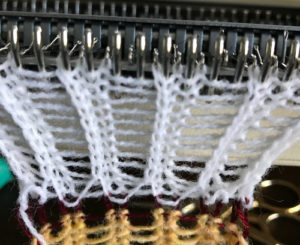
dropped stitches reformed for rib 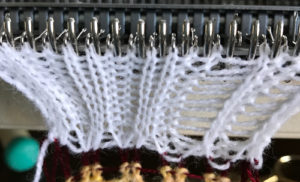
continue across the row, then proceed with the main body of the knit 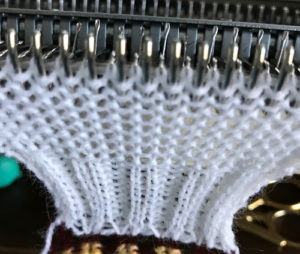
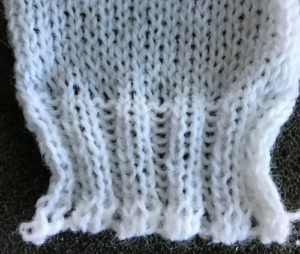
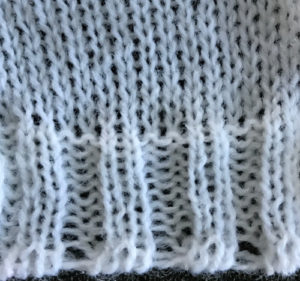
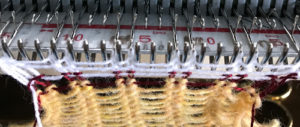
My sample was knit in a 2/15 acrylic, a bit thin for this technique, and if pressed, the fabric would be flattened permanently. If the intent is to have the rib retain its “spring and stretch” it is best to use a yarn with memory, such as wool. If slip stitches or FI are to be used for the body of the knit, they will create a much denser fabric. The yarn in the rib may in turn need to be doubled to produce enough substance. As always swatching is recommended before committing to a large piece in any technique.
From the Brother Techniques Book a few more to try: 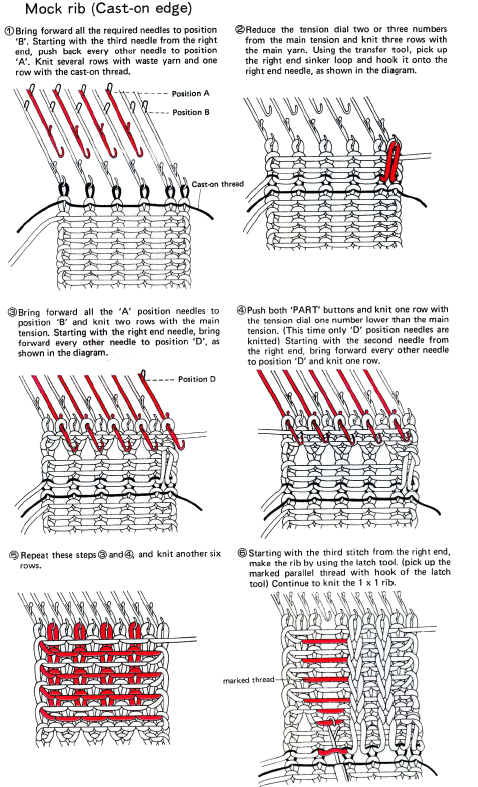
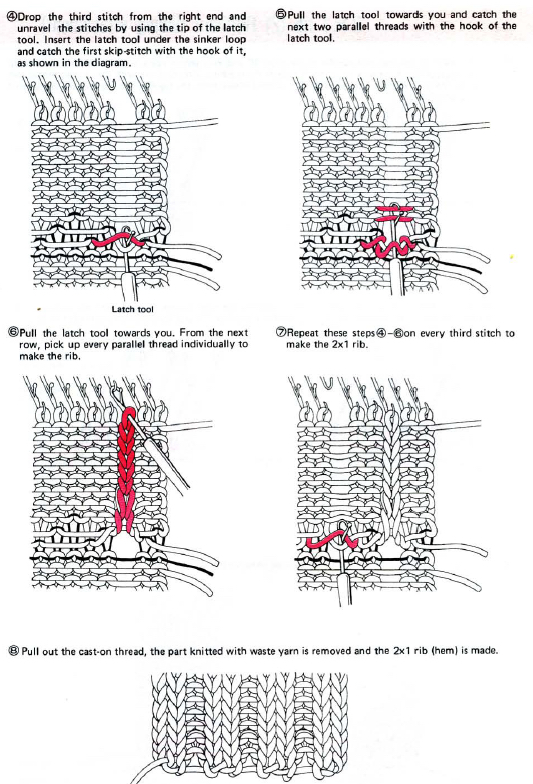 2 X 2 rib: working with Brother cast-on comb, full text
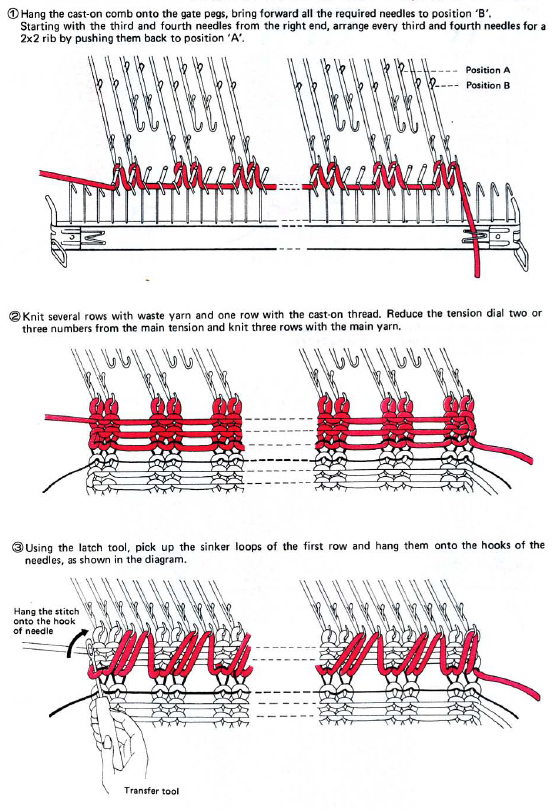
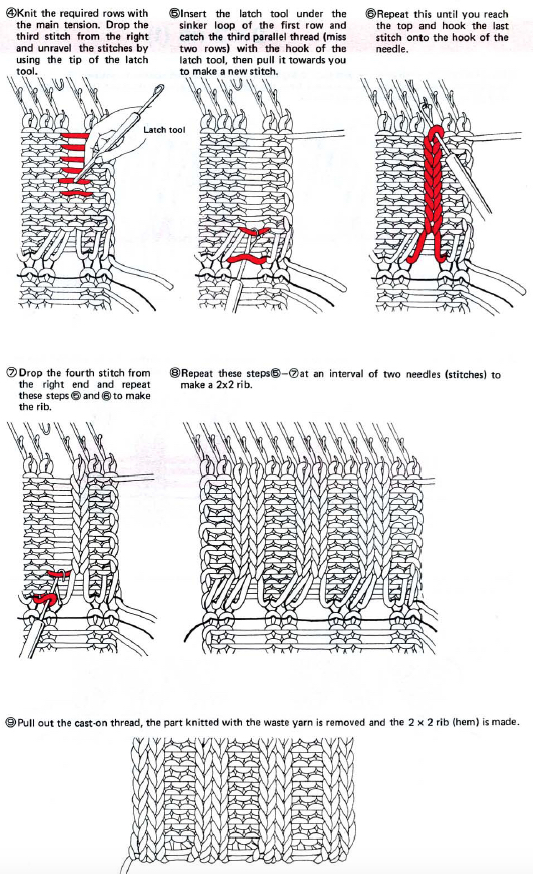 using waste yarn
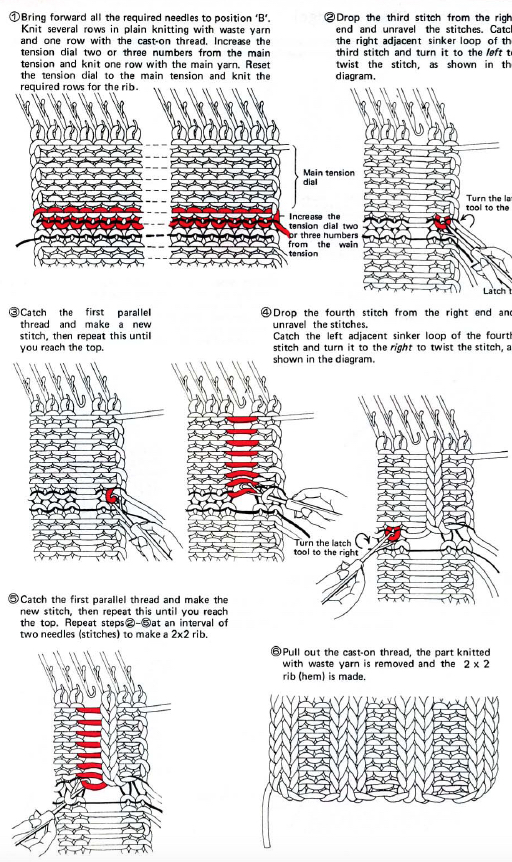
From the KH 800 manual, a double welt. Knitting the single joining row of hems at a looser tension will help the place where the two layers meet lie flatter 