I live in the northeast US, and the past few weeks have been taken up by a whole lot of time moving snow and not knitting or even thinking about knitting. A Raveler, however, recently asked about pile knitting which got me contemplating knit fabrics again. I thought I would start a thread here on some of the techniques and possibilities involved, editing, and adding further information as I can.
Pile knitting may be done on any machine. The quality of the fabric varies, depending on the method and yarns used. Loops are often created every other row, and “normally do not pull out”. They may be made either on the main bed or on the ribber. Some of the techniques result in a much looser fabric than others. In those instances, using a ground yarn that will felt, and slightly felting the finished knit will make the fabric much more stable. If it is to be used in garments, by default, it is best to make those pieces larger than required, and to plan to use them in cut and sew projects.
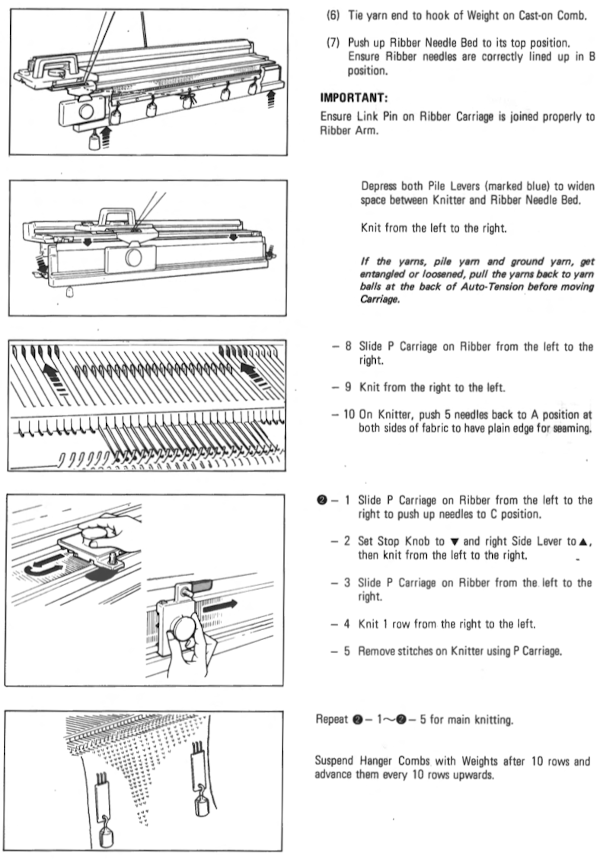
Beginning with the machine manuals and suggestions: in Studio/Singer knitting machines the ribber features specific options for such fabrics. These pages are from the Singer SRP-50 ribber manual and one of their punchcard books and share some principles while illustrating setting and card design. Food for thought on any adaptation for use on other brands 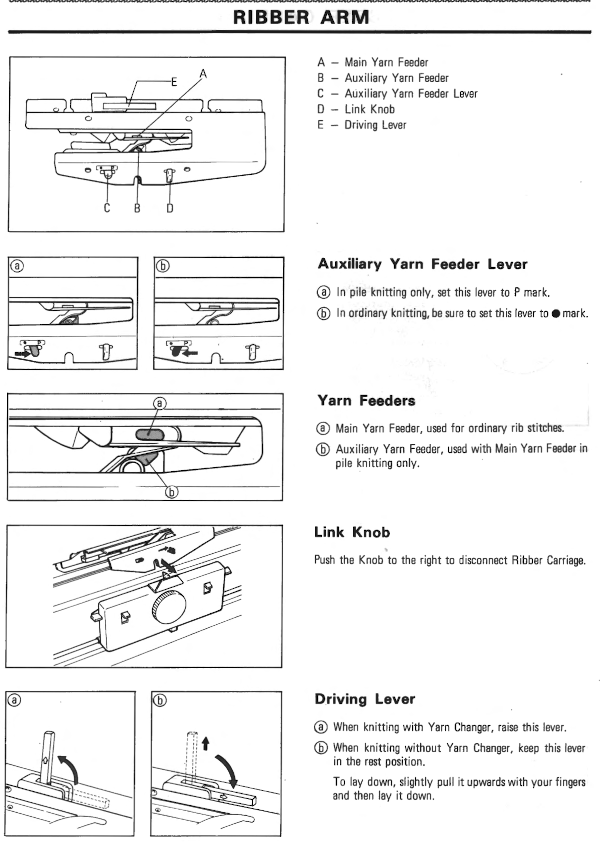
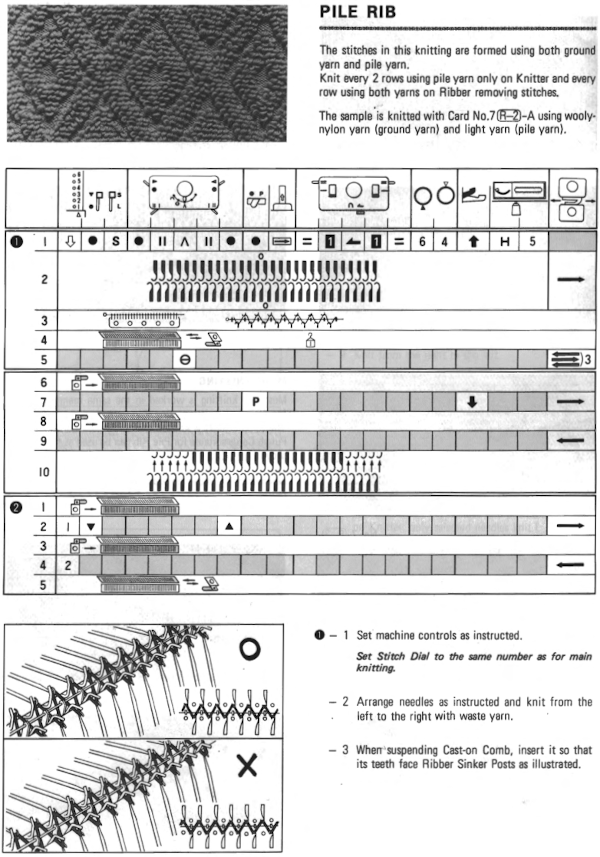
Two weights of yarn are used: a lightweight yarn for the pile, and a fine yarn for the background. The usual set up is for every needle rib, half-pitch. The finer yarn is threaded into the auxiliary feeder.
Studio machines use the P Carriage with the P pressor attached to drop the loops. If using a punchcard or mylar, the punched holes create the design, the unpunched holed knit the ground. The Singer P carriage information (from SRP60N ribber manual) singer_PCarriage
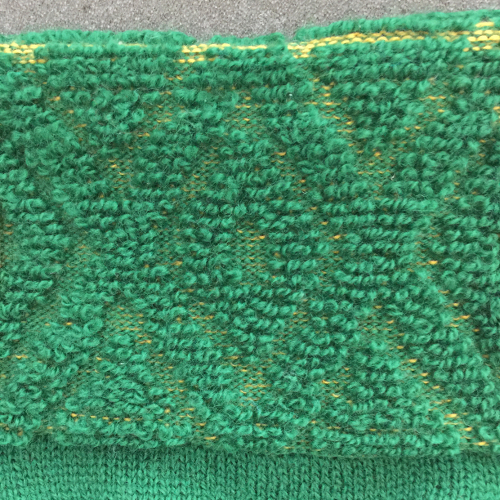
knit sample

Studio punchcard sets and Volume collections offer many designs and inspiration for DIY. A page from one of their collections 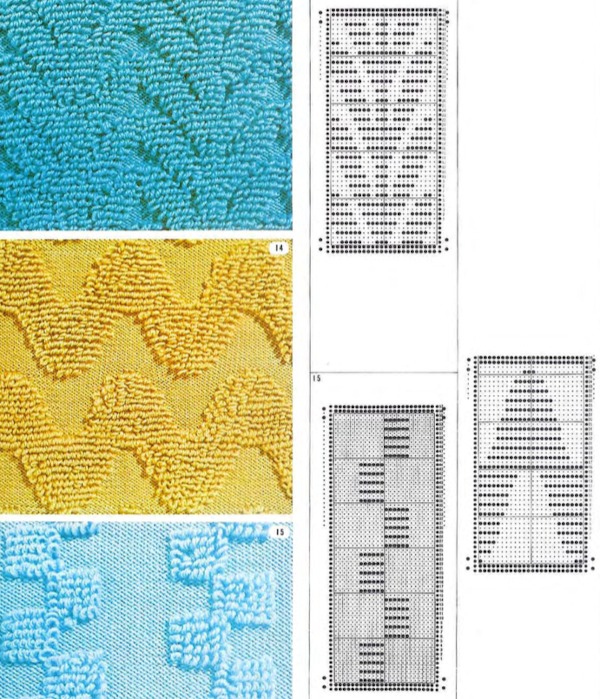
Toyota had a small accessory offered for knitting pile using the ribber and the simulknit setting. Both yarns knit on the main bed, the ribber only catches loops in the “S” yarn. Manual available for Toyota pile knitter
Kathleen Kinder was credited with first using FI designs for pile knitting, resulting in loops being created in every row rather than every other. In the method, loops are still required to be dropped after every row. Cards with bold areas of each color are most suitable. Since the fabric has a tendency to spread horizontally, doubling the length may become necessary if the goal is to retain more of the motif shape.
A natural follow up is to use double jacquard cards and color separations to achieve multiple color pile. A color changer is a must when using multiple colors. Loops will be formed every row here as well, may be dropped every row, or just before each time the color is changed.
Pre-selection of needles in Brother poses an interesting problem: patterning needs to be retained, dropping stitches disrupts it, and there is no accessory such as the P Carriage to make the process quicker.