The only sock(s) I have ever knit have been as demos in my classes. I actively dislike wearing them, and it winds up being a sheer necessity in our winters to actually break down and wear them. I have had an ongoing interest in 3D knitted, explored some pleating, have always been fond of holding techniques. This year has not allowed for as much time exploring and producing as I might have wanted, am hoping to increase both activities in the coming one.
Forums of late have buzzed with knit socks, here are some possible online resources: from machineknittingetc.com:
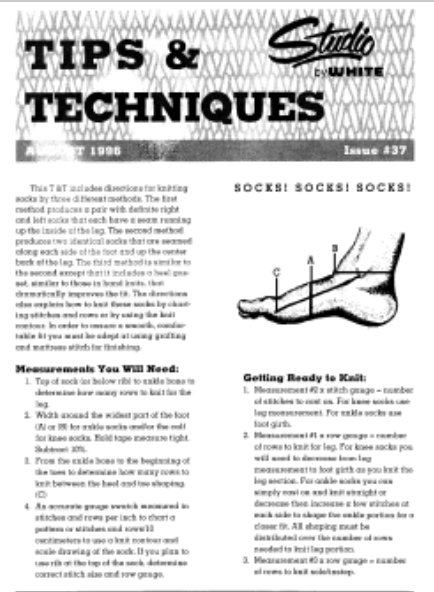
studio-tips-and-techniques-issue-37-charting-socks
 singer-sock-book-seamed-and-circular
 machine-knit-news-machine-knit-socks-supplement
 empisal-sock-patterns

From assorted sources: visualizing shaping sequences: aspect ratio was disregarded in order to combine several images into a large one, particularly noticeable in the middle image on the top row 😉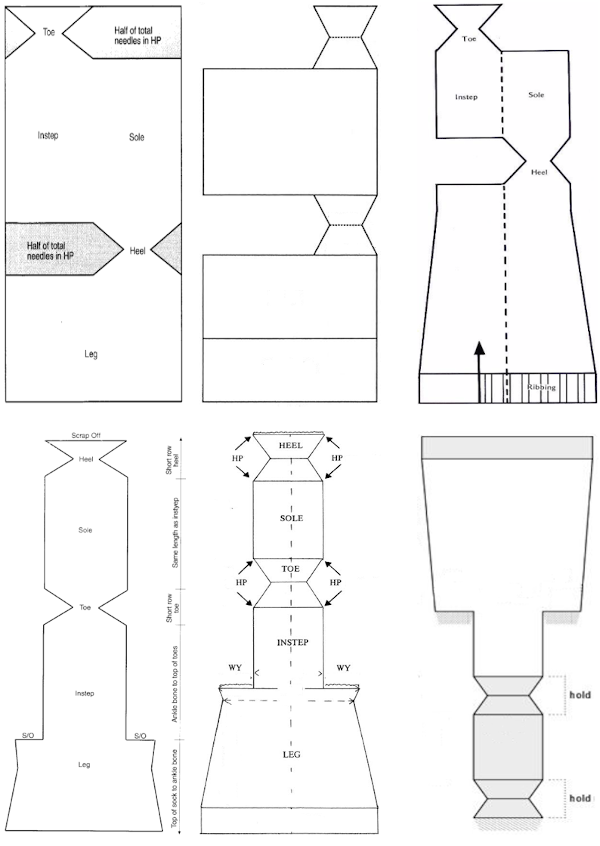 Patterns from manufacturers: Superba manual
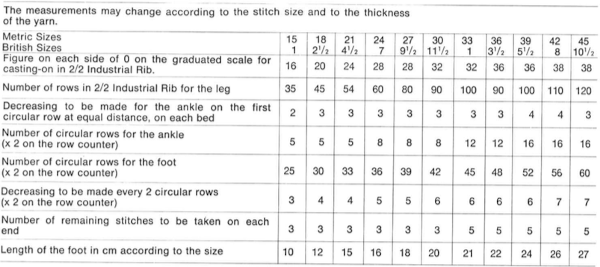
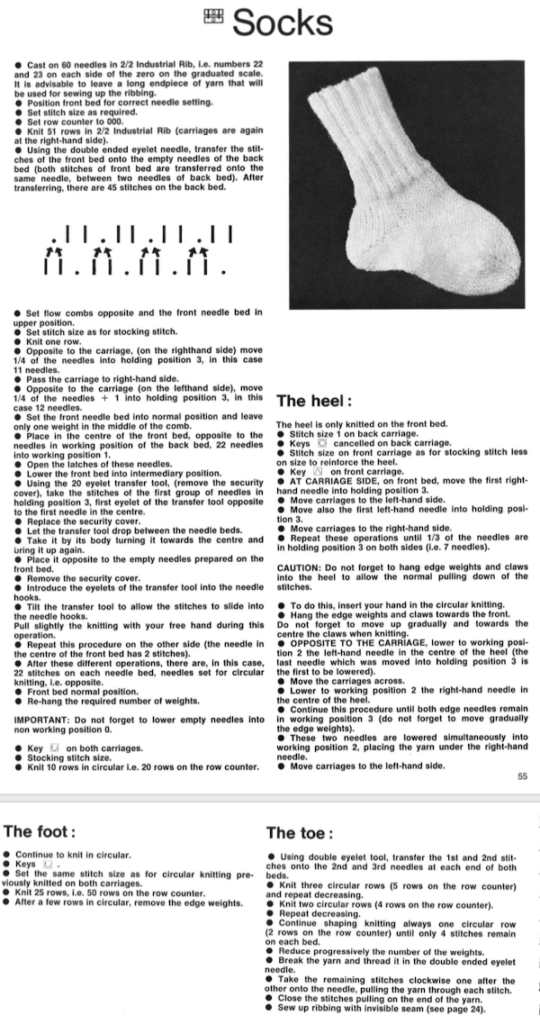 Passap Duo 80
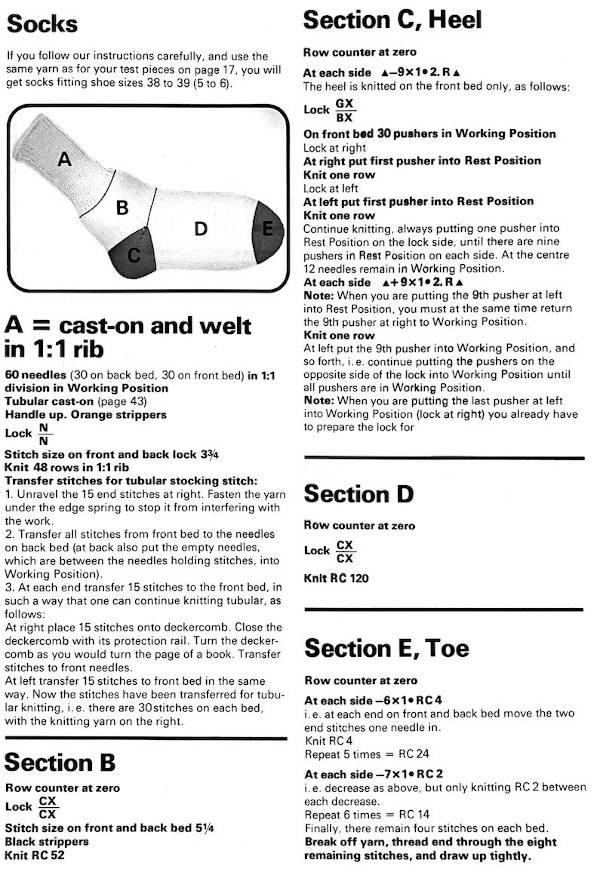 From a Brother pub. The original paper version actually came with knit leader patterns
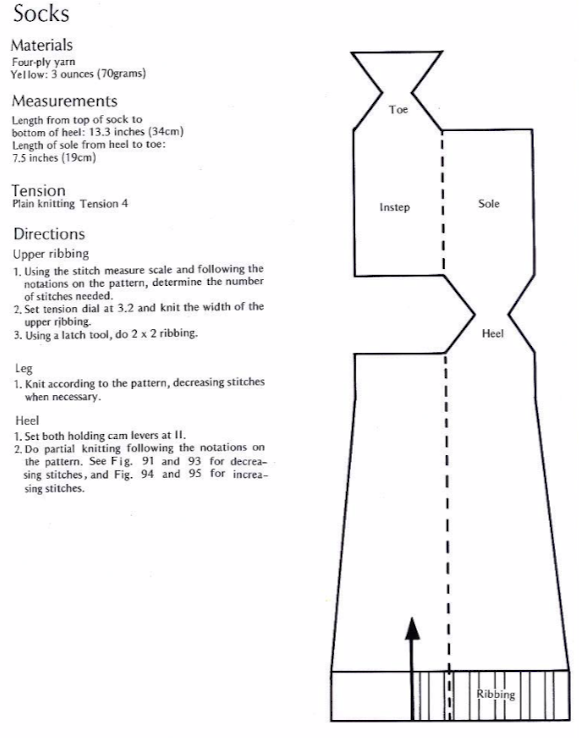
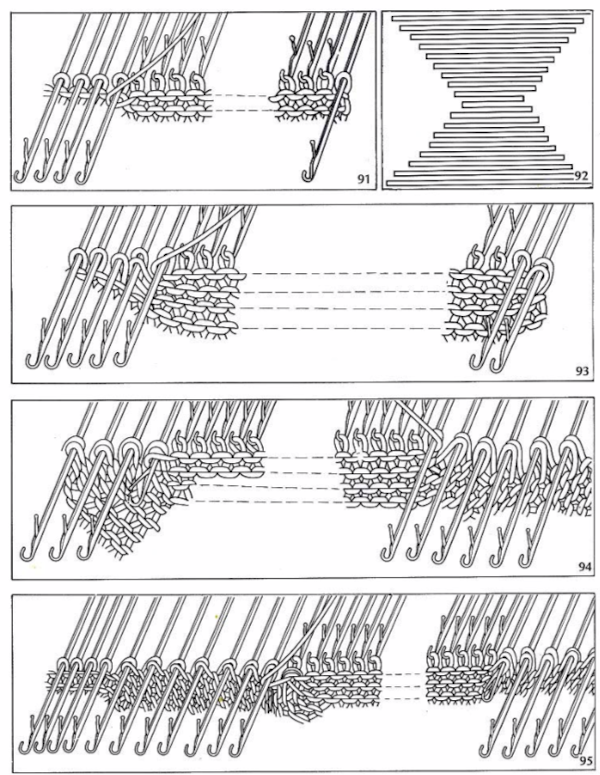
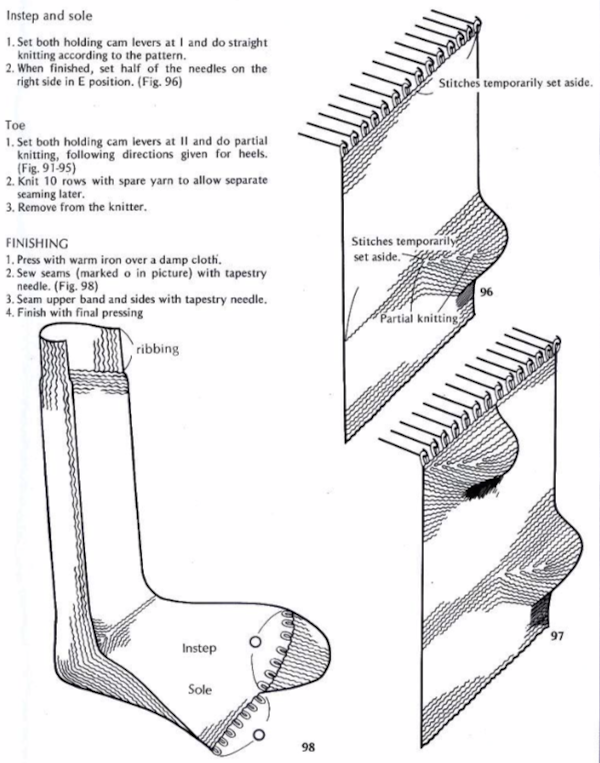
There are many ways to seam join such shapes. Seam-as-you-knit is another option. Diana Sullivan offers a video on the technique. Considering its limitations: the seaming needs to occur on equally shaped segments, this would eliminate any shaping to allow for widening parts of the leg as one moves up toward the knee, so the height of the sock would need to be shortened, planning for fit. If one desires a true rib at the top of the completed sock, IMO seams at least for the rib are unavoidable, and one must take measures to make certain cast ons and bind offs for ribbed bands match in look and width. The same issue with shaping occurs when knitting socks tubular. For a tube to grow or decrease in diameter retaining its circular form, the only way to achieve the result is to increase or decrease evenly across knitting bed(s) involved, far easier to achieve if one surrenders the seamless idea and allows for a seam in the design. Here A sections would be knit first, B sections would follow with seaming along the dotted lines. The toe is a 3D shape achieved by holding, with no seaming necessary.
If one is fond of holding intarsia techniques and cumulative joins, this book is available 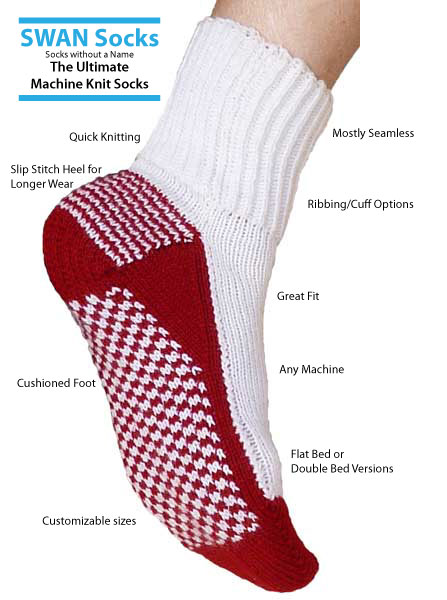 For advice and ideas on knitting the swan socks see https://knitterstoolchest.wordpress.com/category/circular-knitting/
a video link is included, as well as this schematic
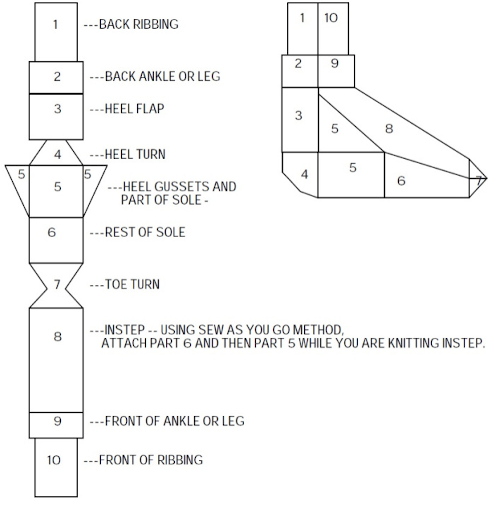 machine knit sock and slipper pattern resource
socks, heels, and more
eliminating short row holes
general instructions
penny socks
Sock calculators: http://roued.com/supersockcalculator.php https://www.goodknitkisses.com/sock-calculator/ https://www.storey.com/crochet-calculator/toe-up-sock.html
From Knitty, an online hand knitting magazine: universal sock article
A hand knitting resource on choosing your sock heels
From Drops design, HK, a spiral sock , and a side to side version, both food for thought in terms of adapting for machine knitting.
For folks who prefer videos, a search on youtube will offer lots of choices, and Roberta Rose Kelley offers 2 that provide a wealth of ideas and information, on tubular socks, the other on adding afterthought heels , using decker combs on Passap machines, transferring ribbed band stitches using a garter bar
Small scale experiments for larger ideas: the spiral sock
Mary Thomas’ book of knitting patterns was first published in 1943, my edition in 1972. This is the usual cover photo  on page 38 a repeat and instructions are offered for a spiral tube sock. The latter has no heel shaping, but traditional toe shaping can be added.
  The knit/purl design can easily be executed single bed by folks who own a G carriage. My mini sock was knit on 30 stitches +1 for sewing. The blocks can be varied in width depending on the required circumference of the finished tube. The extra pattern stitch in the chart is to allow for seaming a half stitch on each edge and maintaining the pattern. *After every 6 rows knit transfer the right-hand needle of every ribber group to the main bed, on the main bed transfer the right needle of every group down to the ribber**, repeat * to ** for the desired length. There are a number of ways to deal with the toe part of the stocking. I would opt for transferring stitches to the main bed and knitting one row, using holding remove half the width onto waste yarn then bringing half the stitches on the alternate side into work. The toes may then be worked using stocking stitch, scrapping off, and seaming or grafting the stitches held on scrap to each other. My working repeat, with a 12 stitch repeat usable on punchcard machines as well isolated by the added green border
 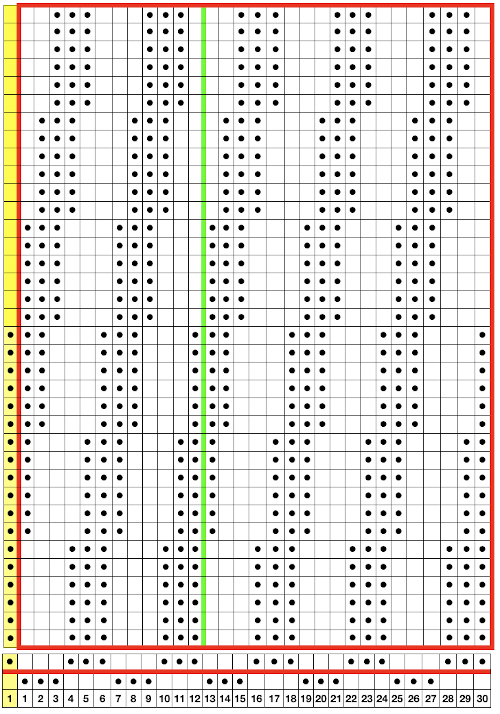 testing the tiling, making certain any programming would line up
  Cast on for a ribbed band at top of the sock in any preferred configuration. Be certain cast on stretches enough to accommodate the finished width of the tube as it stretches to fit the leg. Transfer stitches between beds in the desired knit/purl configuration. When the desired height is reached transfer all stitches to the top bed, drop the ribber, switch sinker plates, knit a row on all stitches, divide for toe shaping. Here one half away from yarn end and carriage is knit with waste yarn and dropped off when shaping is complete,
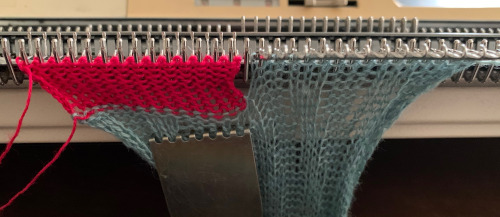
 After toe shaping is finished and waste yarn is added, the work is removed from the machine
 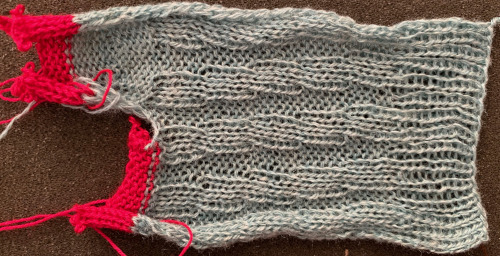 Because all transfers are made in one direction, as in any knit fabric where that happens, the fabric will bias
 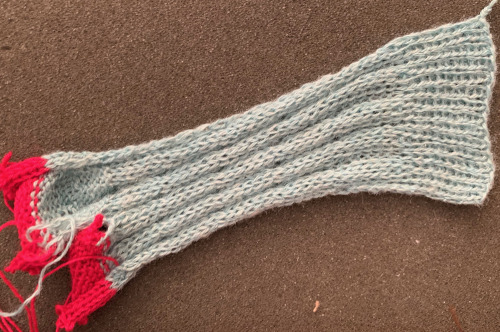 Here the toe shaping is seamed, the twist in the body of the sock begins to show
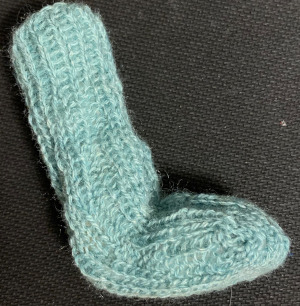
 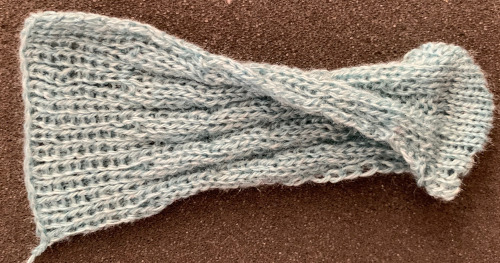 One side of my knitting was looser than the other, something to watch in any “real” piece. Thin yarn knit on tension 4 is probably also not the best suited for any socks in terms of wear. After seaming
  and worn by a few cotton balls 😉
 Lastly, it is possible to knit socks sideways (as well as gloves), usually in garter stitch and in hand knitting. This is a crochet illustration that points to the general construction method.
On the machine, the shaping would need to occur with increases and decreases rather than holding to create the heels, and toes could be shaped, probably best by full-fashioned increases and decreases. 
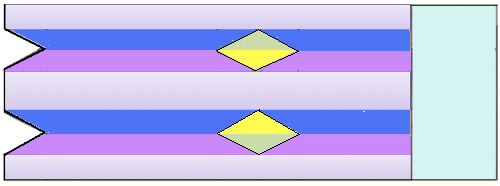 There would be at least one grafted seam the width of the sock, the cuff could be added with the side straight edge picked up and knit from there. To get shaping to match, in theory, one option would be to start with waste yarn, knit to half the above shape, scrap off. Rehang starting open stitches, reverse shaping, graft seam. Dotted lines represent open stitches, decreases and increases can be planned so that only the smaller group of stitches on one side are moved with a garter bar
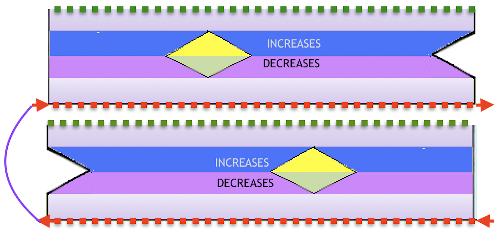
I have not personally tried sideways socks
I dislike ever wearing any socks, am unhappy when forced to because of dropping temps
The only “socks” I have ever knit have been during demos for holding techniques and at some point bed slippers for a friend.
Accurate gauge and math would matter significantly, the best stitch for a sideways sock is probably a garter stitch, which has as close as one can get to a square stitch production rather than the usual rectangular one
Have you ever tried a sideways sock, instead of cuff to toe?