I have written extensively on mosaics and mazes, color separations required for drawing their motifs, and visualizing the resulting patterns while planning slip stitch or tuck repeats. A recent exchange with a knitting friend, Tanya Cunningham, brought up her idea of using Gimp to investigate the potential of self-drawn tuck patterns becoming pleasing mazes or mosaic designs in color. Tanya has worked extensively with img2track and can be found in the FB group and Ravelry. It had not occurred to me to reverse engineer designs for this purpose. Tanya uses Gimp in a different way than I do, I am hoping she will share her process for this purpose when documented.
I have grown comfortable and fast with the combined use of Numbers and Gimp to achieve what I desire in terms of color separations. At the moment, on the assumption that estimating the overall shape is the goal, a black-and-white processed rendering may be a sufficient representation of the result.
Punchcard books are a great source of “safe” tuck designs. The best are those that have columns one stitch wide by 2 rows high. They are also more interesting if there are areas of solid black. Patterns from publications intended for use on electronics are often color reversed to start with in order to minimize drawing pixels or to make the design easier to read and will have lots of blank areas. Punchcard users would need to punch the ground as opposed to the design, electronic users can achieve the goal by the flick of a switch or a quick software command. For my first series of steps and methods, I am using the repeat that appeared as a knit using different settings in the post on mazes and mosaics from universal patterns.
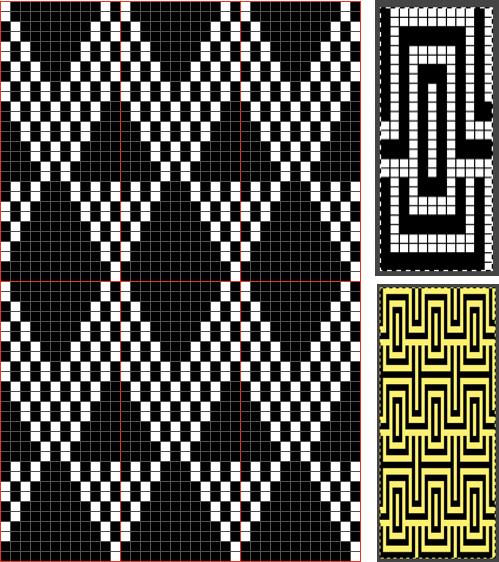
Presented on the left, the repeat would be suitable only for thread lace or FI with very long floats. Color reverse allows one to use it for tuck and slip stitch, whether in one color or with color changes every 2 rows. 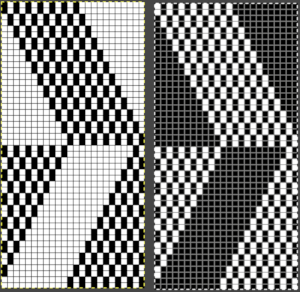 The color separation to approximate the result with color changes begins with the same process as that used for designing mosaics. Once the image is rendered as a correct B/W PNG with no apparent errors, it is copied and pasted on a larger canvas, and the mode is converted back to RGB. The red cells make it easier to keep track of rows that need to be color-inverted. Using the shift key and rectangle tool, multiple pairs of rows can be selected sequentially and color inverted. Beginning the selection with the very edge of the black squares on the left does not interfere with changing the color of the extra columns on the left side of the design. If pixels are added accidentally drawn in any of the 4 extra columns on the left, they can easily be removed when the completed conversion is cropped to selection for the final repeat.
 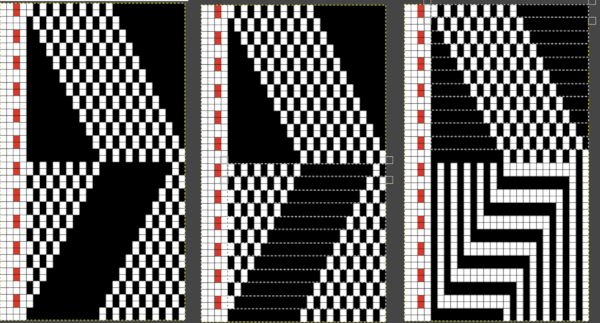 The completed color separation can then be filled to match imagined colors.
The repeats of the final knit pose the problem that results from working on a square grid and comparing the results, which usually form a rectangular one.
The representation of the linear patterns on the knit side of the piece cannot factor in some of the added distortions created by the stitch type used.
I process my images in Pages or Numbers, depending on which document contains my most recent work and happens to be open.
The final may be rescaled in Gimp.
Most knits approach a 4:3 ratio, with gauge variants in highly textured fabrics. To preserve a clean design, tile and save the original, screengrab the resulting image, load it in Gimp, and rescale to that ratio.
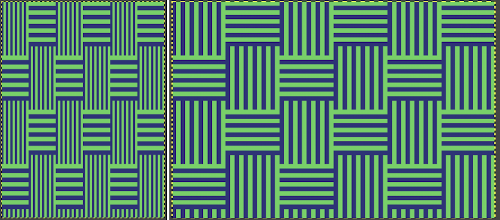
Repeat the motif for the same number in both height and width when tiling it. 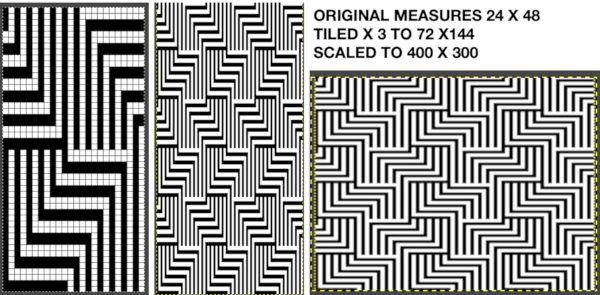 The colored versions before and after scaling, compared with the slip-stitch swatch.
  It is possible to produce a rectangular grid to start with on which to draw in Gimp, but the larger canvas size occupies a significantly larger space on the screen, complicating the process. For small designs, however, that may be an option to give one the sense of aspect ratio for the design in the final knit ie in representational FI. To resize the grid in uneven proportions, the chain-link below the spacing values needs to be broken
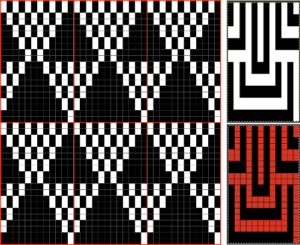
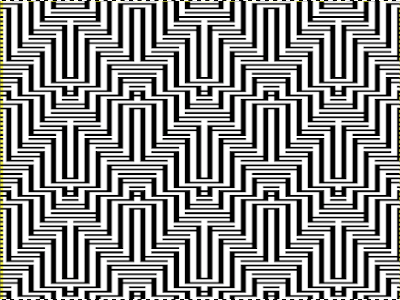
 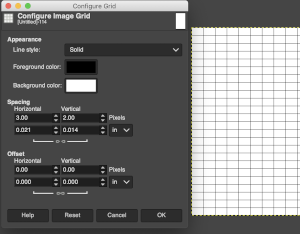 This repeat is designed for an electronic, and requires color-reverse.
Since it is 24 stitches wide it may also be modified and used on a card.
In this instance, the original marks for rows and stitches are single height.
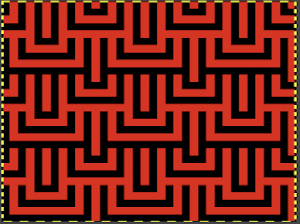
The image is processed, matching the original, rendered double-height, color reversed, and then alternate pairs of rows were color inverted to render the repeat used in the test swatch 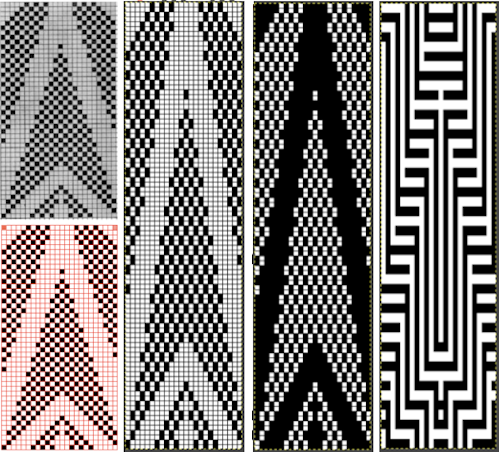 Once again, the possible change in scale is estimated. The repeat though only 24 stitches wide, is 92 rows high. On the left the repeat is shown as it appears on a square grid, to its right is the scaled 4:3 version, in a pixel count approximating the size of the swatch. It takes a bit of squinting to see the pattern more recognizable in the longer repeat in the larger tile
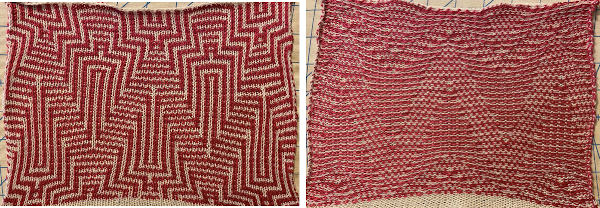
![]() The swatch was pressed, becoming wider than when first off the machine. It was knit using the slip stitch setting, which could also be executed in a tuck stitch, and would both widen and shorten the fabric and make the purl side more interesting.
The swatch was pressed, becoming wider than when first off the machine. It was knit using the slip stitch setting, which could also be executed in a tuck stitch, and would both widen and shorten the fabric and make the purl side more interesting.
The software can provide a preview of the result far more quickly than knitting samples, but again, the previews are only approximations of the scale, and cannot show distortions to lines as one adds more texture.
Repeating the process starting with a diamond shape that as given is only suitable for thread lace or FI with problematic floats, 
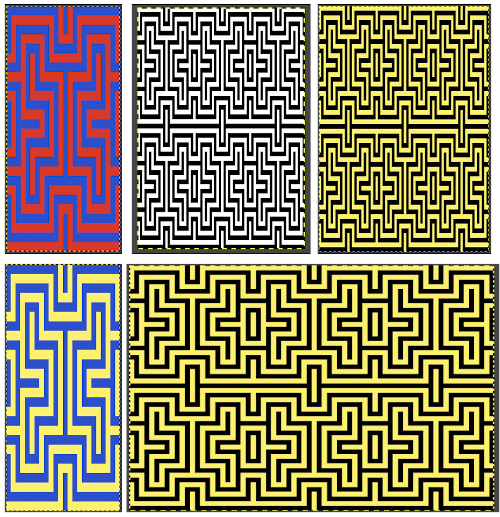
![]() and with a check tuck pattern that may change in aspect ratio considerably when knitted
and with a check tuck pattern that may change in aspect ratio considerably when knitted 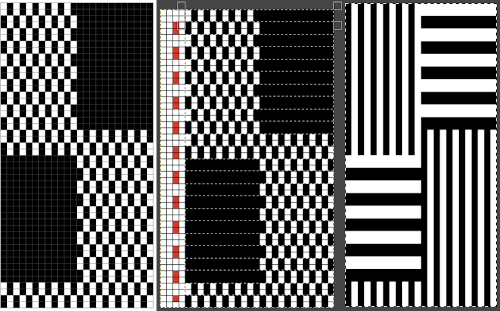
 The proof of concept swatch, knit in tuck stitch, begins to show the distortion by the stitch formations, textures vs plain knit, easily seen at the top edge. The bind-off is around 2 gate pegs in order to allow enough stretch.
 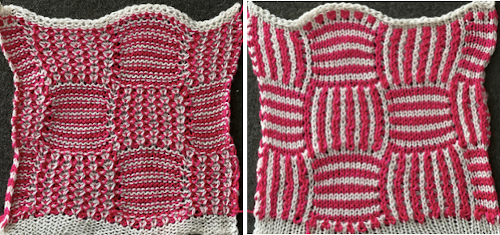 Anyone familiar with either or both programs may find this a very quick way to visualize the scaling and moving of motifs within DIY designs and their possible outcomes prior to test knitting