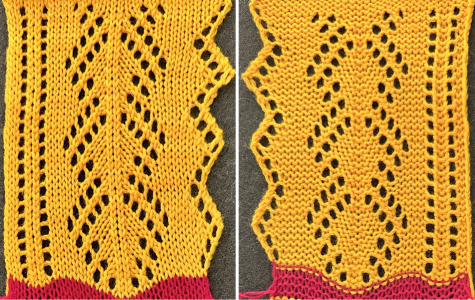
This website offers inspiration for hand-knitting 100 lace collars, edgings and insertions.
The charts may be used by machine knitters who enjoy portable hand-knit projects to complement their machine-knitting ones, or machine knitters whose only option is hand manipulation, can follow the charts provided considering whether they are presented with knit side or purl side facing.
The images alone can be a springboard to variations of edgings that have already been worked out and tested.
Previous related posts:
Lace edgings on Brother machines- automated with slip stitch 2
Lace edgings on Brother machines- automated with slip stitch .
A recent FB discussion suggested my edging repeats were “missing rows.”
The edgings shared up to this point were often shaped with transfers along the left edge, with the straight edge of the pieces on the right, and began with transfers to the right rather than to the left, with a fixed number of passes for both the LC and KC carriages throughout.
They were intentionally designed to minimize the number of LC passes.
As with many other knitting techniques, there are multiple ways to achieve similar goals.
The number of LC passes and whether the starting selections result in a start with transfers to the right or to the left vary depending on the project and the designer’s published source inspiration, if any, their preference, and end use.
There are no fixed rules.
The trims may be executed on any brand and gauge knitting machine, using hand needle selection and transfer techniques guided by specific charts.
They are not a new find or invention, were popular in the late 80s and 90s on punchcard models, shaped with hand transfers, and frequently taught at MK seminars.
If the edging is used as a border, the latter can be created horizontally rather than vertically, even adding the use of the ribber in some cases.
Automated versions make production practical in forming lengths to be joined onto projects ie shawls and blankets.
Lace can be temperamental to knit, and when experimenting one can begin with what has already been worked out.
In this first design, the shaped edge of the trim occurs on the right during knitting, and the straight edge on the left.
Assigning color values to the direction of the transfers facilitates decisions in determining starting points.
Beginning at the widest part of the design, the cyan cells represent transfers to the left, the magenta transfers to the right, and the black the all knit rows that will be formed with slip stitch.
End needle selection is turned on in both directions in the LC, canceled with the KC set on KCII.
The first preselection row is from the left with the KC set to knit.
When it reaches the right, the carriage is set to slip in both directions, makes 2 more passes, returning to rest on the right.
In the bottom of the design, at the decreasing angle, the LC starting from the left preselects but does not transfer any stitches on its way to the right, transfers to the left and preselects for all knit stitches as it returns to the left making only 2 passes to complete required transfers.
As the top of the design and the increasing angle are reached, four lace passes/rows in the design are required to make the necessary transfers to the right and allow the LC to return to its place on the left.
The charts are oriented this way to visualize how the direction of the transfers relates to the shaping. 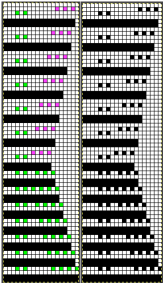 The 20X70 PNG may need mirroring depending on the KM model being used and/or the download program. When in doubt, the needle selections are easy to recognize and some air knitting helps ensure that the pngs are oriented properly on your needle bed.
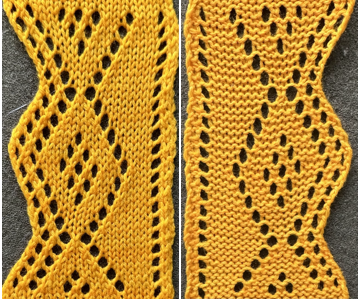
 ![]() The proof of concept swatch
The proof of concept swatch 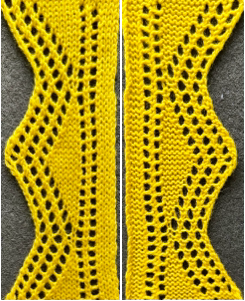 To begin at the narrow end of the trim with the LC making the first preselection row from the left, the repeat, provided here in a larger view, can be shifted as indicated by red markings and used after several rows of base knit
 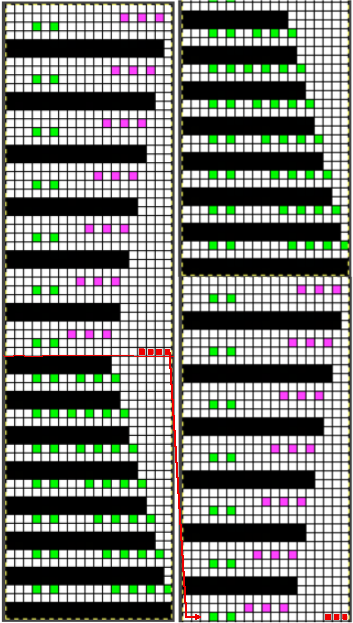 This 22X60 png, is charted with a start at the narrow for use with the LC preselecting the first row from the left for the increasing angle, then divided in for a start with the decreasing angle and the KC preselecting the first row, also from the left. The chart on the right shows the BW pixels programmed.
The LC makes 4 passes followed by 2 passes of the KC throughout the piece.
The shared version of the PNG did not require added mirroring on the 930, which was done automatically by the machine.
Shaping occurs on the right, with the straight edge on the left. 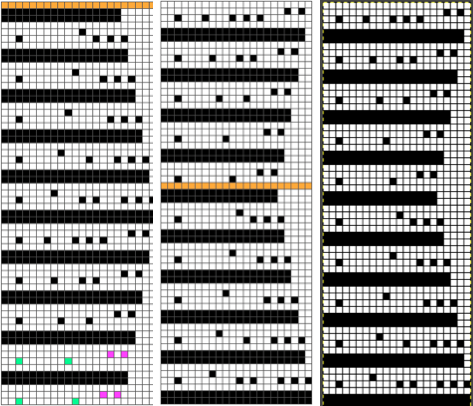
![]()
 When charting in spreadsheets, in addition to assigning a color to the direction of transfers made by the LC, arrows may be added to indicate the direction of the respective carriage movements.
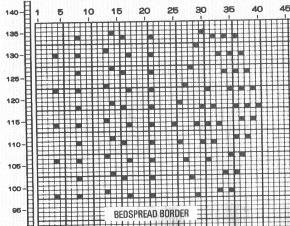
This design was published on a Brother Mylar sheet when the 910 was new to the market. It is wider than most such borders, intended for use in a blanket or afghan edge. The transfers were to be made by hand to attain the curved edge.
 Working in Numbers the image was mirrored and duplicated, planned for a shaped edge on the left. Arrows mark the direction of movements for each of the carriages
 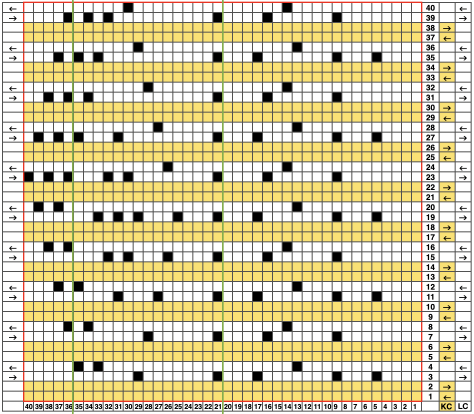 The repeat is adjusted for automated shaping
 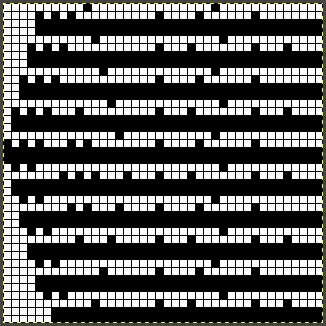 The 40X40 png required mirroring on my 930
 ![]() There is a non-selected needle on the left near the center of the design, it is not a selection error
There is a non-selected needle on the left near the center of the design, it is not a selection error  The proof of concept swatch
 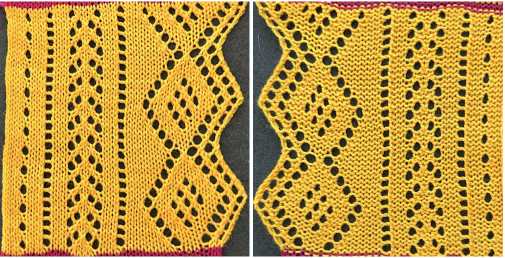 If the chosen design inspiration is from a punchcard pattern and the goal is to match the transfer sequences intended by the pub beginning with the fist row of transfers to the left, the approach is different.
Using randomly chosen Brother 636 from Punchcard volume #5, 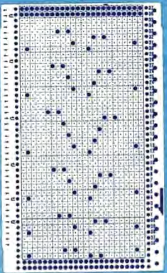 pairs of rows are added after each transfer segment, and in this case, a 42-row repeat becomes a 54-row one. In addition, pixels are shifted to form double eyelets along the straight edge on the right and added and subtracted for shaping with increases and decreases that form matching eyelets on the left.
 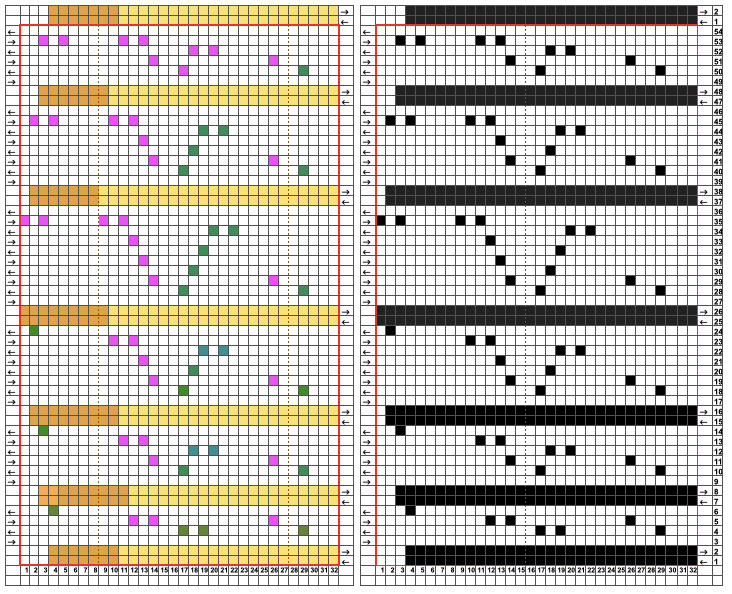 The png 32X54 png used mirrored on the 930
![]() and its proof-of-concept swatch
and its proof-of-concept swatch 