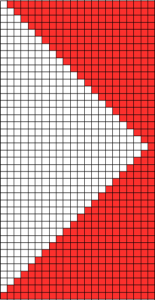
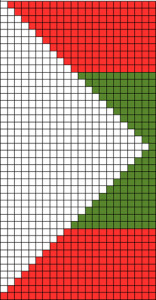
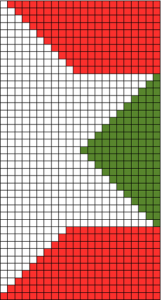
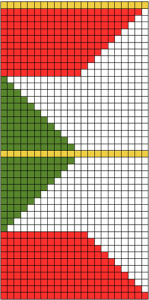
SPLITTING THINGS UP leads to a series of quite different fabrics, sometimes creating interesting secondary solid color shapes when striping is added to any of the forms; repeats will need editing to avoid extra rows to keep the designs balanced, or have them added across their width for extending shapes, such as in creating ruffled effects. I have worked on these charts using Numbers, image capture, and resizing and editing again in photoshop if needed. The images below are not intended as a “sit and knit” tutorial, but rather as a start for creating your own designs, on the desired number of stitches, I randomly picked 22
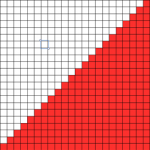
some possibilities on method: SPIRAL original shape
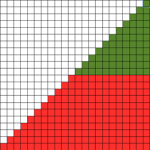
splitting in 2 parts
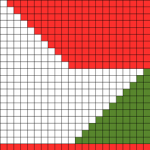
changing positions and stacking, all knit row edited to bottom of repeat
a mirrored segment
added to first repeat, center line double row edited out for knitting
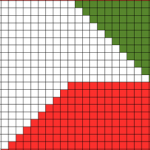
MITER: original repeat
split repeat
moving parts around
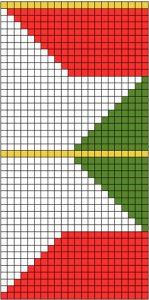
areas for adding plain knit rows in desired numbers across the knit (yellow), keeping in mind how this will affect color changing sequences if striping is used to create secondary patterns; repeat usable for machines with color changer on right
mirroring the whole repeat horizontally for use with color changer on left
Changing colors at regular intervals including every 2 rows will yield secondary, geometric patterns; all knit rows may be added to the right or left of the shapes maintaining color changes, for different effects; if these are planned in extended “white areas”, the holding sequence needs to be maintained every other row; slip stitch setting may be used to automate, with repeats reworked for use on 24 stitch punchcard machines. I find when exploring any of this initially, working repeats as hand techniques helps me understand necessary sequences and editing before committing to punching holes, filling mylar squares, or programming pixels. Swatches and notes, swatches, and notes…
