A review of links with associated hints and info:
Measuring gauge swatches, general information
Matching patterns across sweater bodies and sleeves
Float control
Scarf experiments
Design inspiration: binary alphabets
Adding hand techniques/ cables/ punchcard repeats
FI meets transfer lace on Brother machines
Adding the ribber, FI on main bed Tubular machine knit fabrics: fair isle, Brother/Passap
Altered patterning using bleach discharge on knits
These are random FI samples from my collection, most from my teaching days. None of them were ever intended for use in the finished product. They were knit to illustrate some of the possibilities for the different techniques using each of the cam button combinations. Some were knit during class demos. The colors made them easily identifiable as mine, knit using a personal yarn stash. The contrast helped identify how stitches were formed.
In this swatch, marking for measuring stitches per inch is done by leaving a needle out of work. The width between the resulting ladders should be checked at various points after the swatch is treated in the way you plan to treat (block) the finished fabric. Adding a third color per row would require altering the pattern to a color-separated slip stitch one, or one may add that color with duplicate stitching. The spots in this test are colored in with a permanent fabric marker. At the height of the art to wear movement one artist, in particular, was producing limited edition knitwear by knitting the same design in black and white, and in turn over-dyeing the white for different effects in each piece in the series. Eyelets at the bottom of the swatch are tension markings for the piece. The vertical line created by end needle selection (normally used in FI to avoid separation of colors et vertical edges) is interrupted in rows that are knit in only one color. 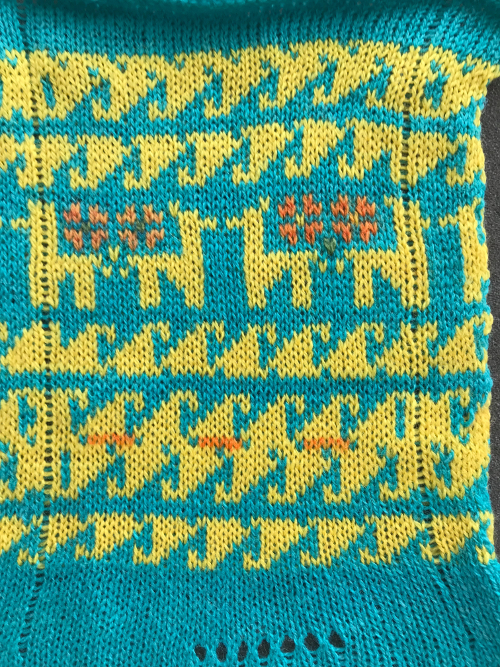 Recommended maximum width for floats is usually 5 stitches. How much the floats droop and cause potential “problems” on the purl side depend on fiber content. Sometimes such floats are intentionally created and worn on the outside of the garment as planned design features. The longer blue floats are seen below in the areas of the ladders where only the yellow is knitting, creating a wider span of the alternate color.
 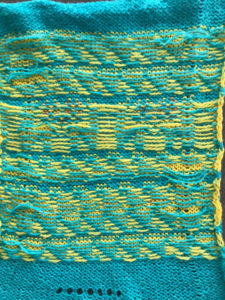 These repeats are very simple. They are commonly associated with card #1 and card #2 in basic factory packs supplied with knitting machines purchases. Card #2 is reproducible by using card #1 elongated X2. A reminder: if using either repeat in pieces of garments ie baby leggings, etc. take note of which yarn feeder each color is in. Even if the repeat is correct and placed properly, the surface of the knit will appear different to the eye if the color placement is reversed in alternate pieces. The repeats may be used as backgrounds for a variety of other more complex fabrics in DIY designing.
 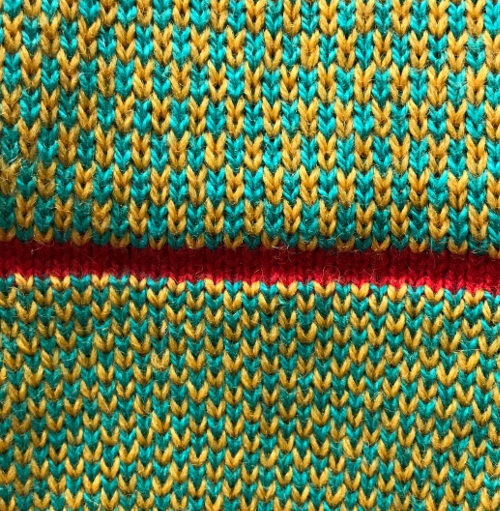 Here stainless 32 gauge wire is used as the second “color”, making the piece moldable and shape-retaining.
 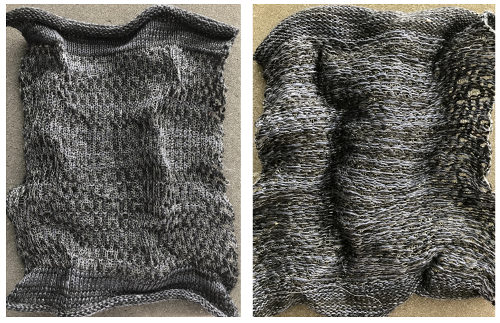 Color may be added or “taken away” as seen in the post on bleach discharge on knits
 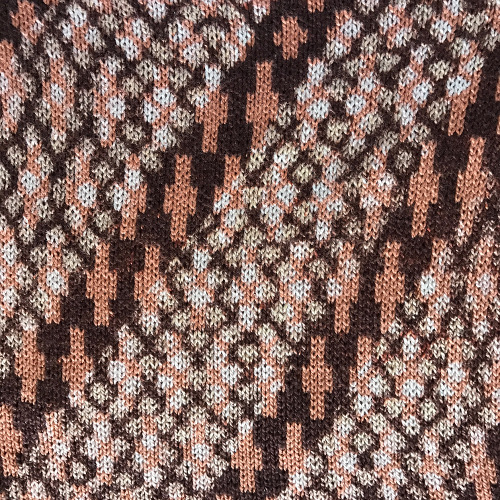 Another factory-supplied punchcard is used. Thinner yarns in lighter colors may have noticeable bleed-through of darker colors traveling behind them, as seen on the left, not an issue with the thicker wool on the right. Forgetting to set the card to advance can result in vertical lines, which may alternately be planned as a design feature.
 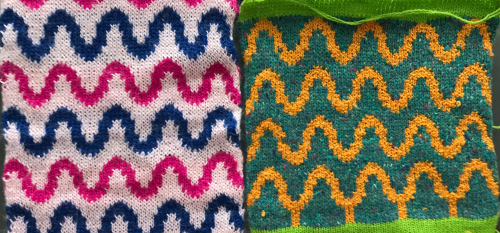 The longer floats seem manageable in these yarns, there is a bit of hooking up on the bottom right. The yarn traveling up the swatch on the right is an alternative way to mark for gauge measurements. A previous post provides some information on float control.
 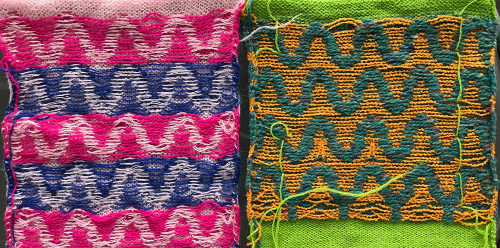 Varying the colors, fiber content, and considering complementary borders is worth exploring thoroughly at the swatch level, before committing to a larger piece. Truly contrasting yarn used at the bottom and top of the area to be measured for row gauge makes the process easier. As attractive and quick as single bed FI can be, keep in mind that long pieces knit in yarns with “memory” such as wool, will tend to roll to the purl side vertically even after blocking, and certainly with wearing of pieces such as scarves or shawls.
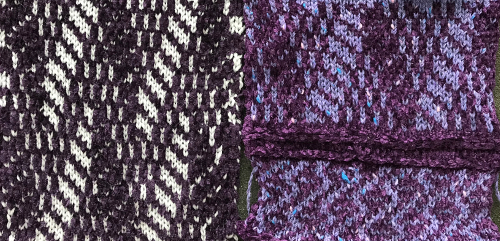
 Tone on tone chenille and all rayon, with “color reverse” by switching yarn positions in feeder
 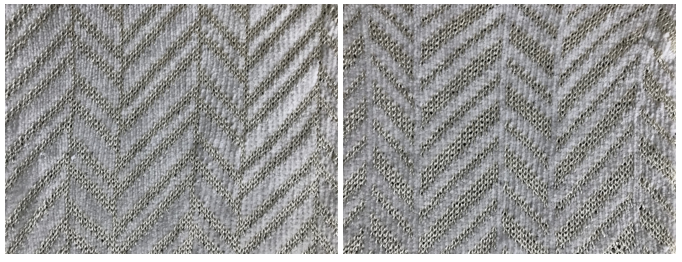 less effective with a flat yarn as the alternative to the chenille
 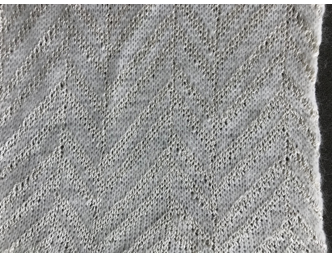 Using the same card: every needle, 4.5 mm electronic machine.
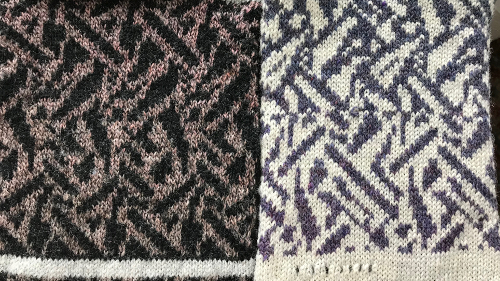
 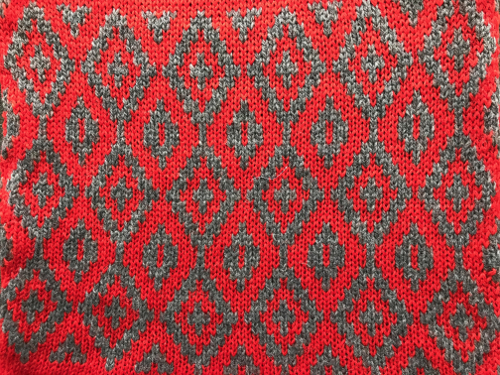 Transferring stitches to every other needle, odd needles in work on one side, even-numbered needles on other using worsted weight (2 needles in the center in work side by side.
 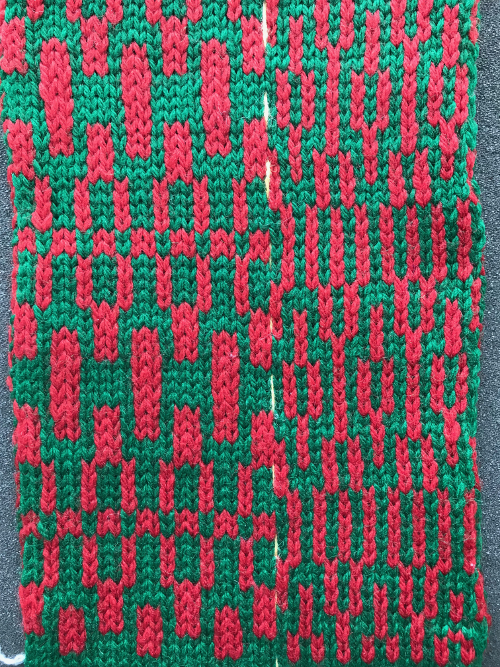 The motif is now used twice as wide with every other needle in use across the fabric width
 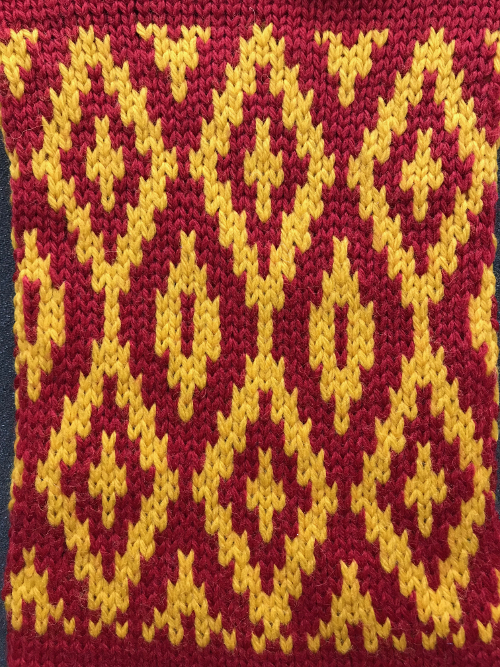 It is possible to vary designs by using the 3 functions of the card reader: locked, normal rotation, and elongation. Designs with long vertical features tend to separate at the edges where the 2 colors meet. Lining the fabric with a fusible makes the knit lose stretch, but it may be an option for stabilization, float control, and offers an opportunity for mock quilting by inserting some stuffing under floats before it is ironed on. High contrast colors are best for sorting out how stitches are formed. Embroidery alters the “step ladder” effect outlining the shapes.
 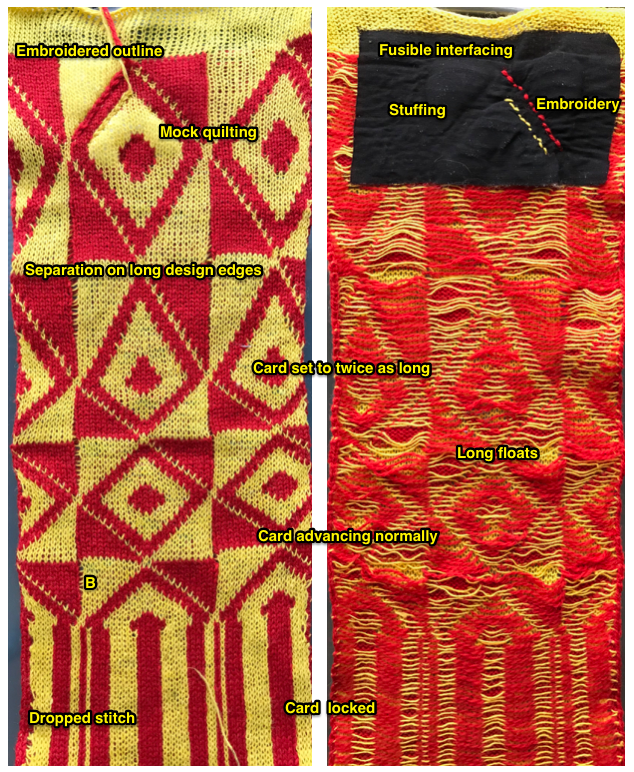 Hooked-up floats are not just for float control; note puckering on the knit side where they have been hung up in groups.
 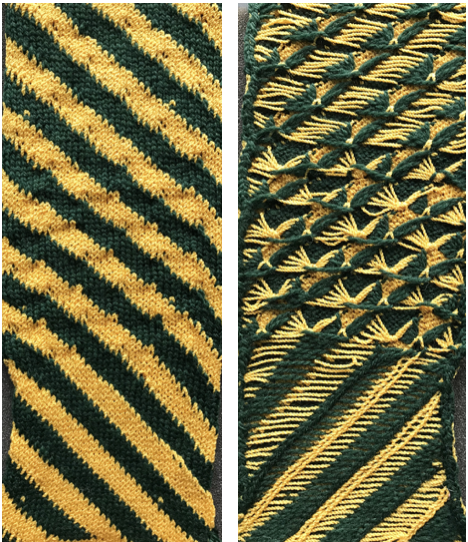 These swatches were worked from the bottom up, starting with positive/ negative comparison, sorting out the possible placement of the ladder with the intent of adding ladder lace details. Cancel end needle selection because of needles out of work, but bring needles into D or E position to avoid separation of colors and/ or dropped stitches at side edges.
 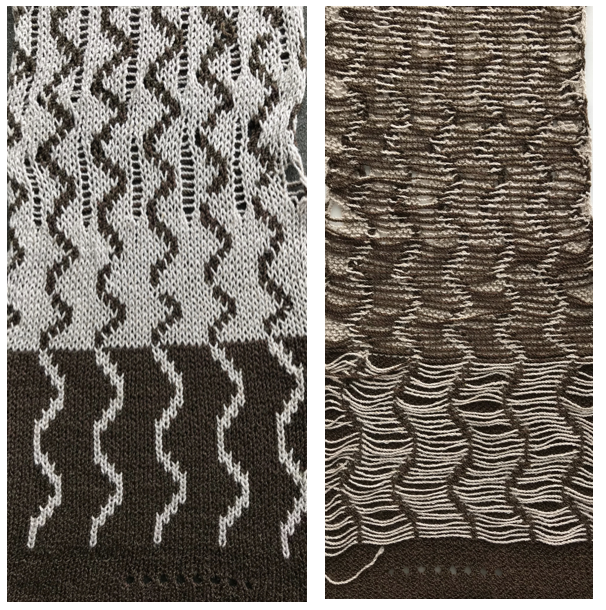 From the bottom up, transitioning from a ladder resulting from a single NOOW (needle out of work) to 2 NOOW, hooking up floats on opposite sides, ending in “lace” pattern alone
 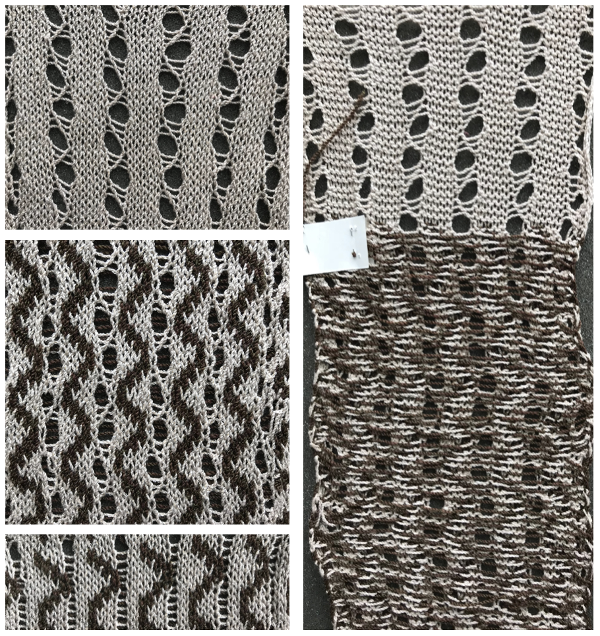 Combined with transfer lace Hand techniques (in this case cables) can be combined with FI. In Brother, it helps to be familiar with the pattern, as needle selection may have to be manually restored after the technique is performed to stay in the correct pattern.
With cables: some punchcard repeats
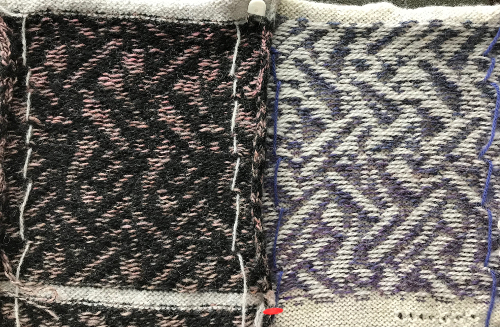
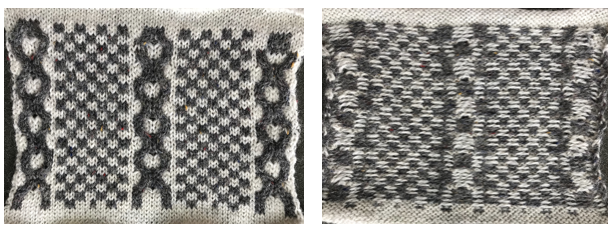 With using a sewing machine: there is a vertical, single stitch line due to end needle selection in the contrast color formed on either side of any needle(s) out of work which provides a visual guide for altering the fabric. This swatch was knit with wide NOOW spaces, then sewing machine stitching joined the contrasting vertical lines to form a 2 color “fringe” on the knit side (left) and purl side (right)
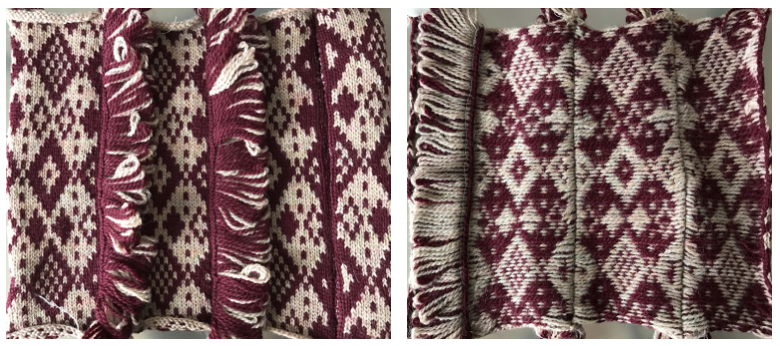 Variations with fibers for exploring surface textures: wool with raffia on the bottom, fishing line on top
 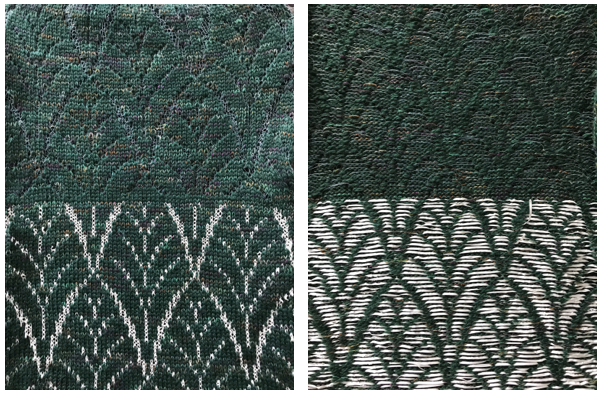 The same swatch continued on, using 3M elastic as the second color
 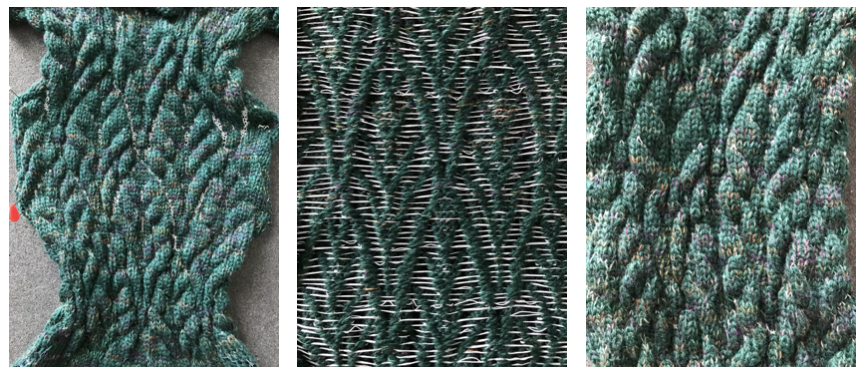 The same repeat in a rayon chainette and wool, followed by some felting. The rayon “bubbles” more visibly when the wool creates the wider floats
 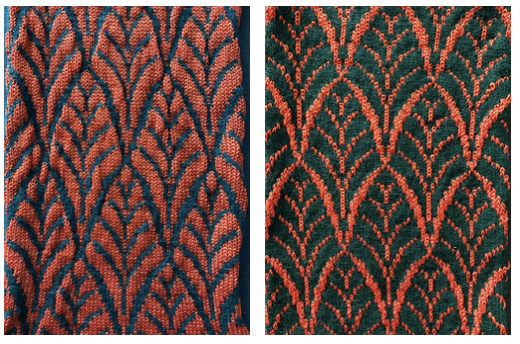 reversing color positions
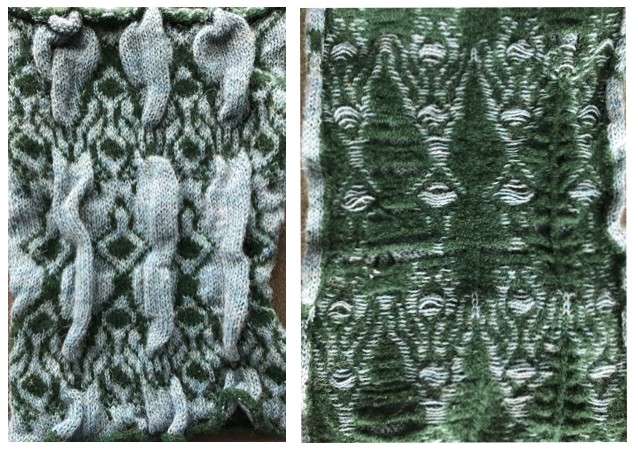
 The punchcard is limited to varying the vertical repeat automatically in 3 ways: locking the card, normal rotation, and double length. Repeat width is fixed. Felting can produce interesting surfaces if one yarn is capable of being felted (green), and the other not (blue). The stitches knit with the latter will create puckers/ blisters. Since the knit will shrink in both width and height, the repeats here were used at double length. Note the added drooping of the blue floats on the purl side.
 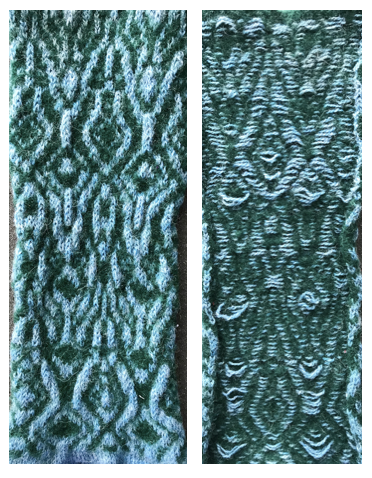 A punchcard can be further manipulated by masking areas with tape. It is not a good solution for production knitting, but adequate for testing out ideas before committing to punching a full, new card. The surface blisters here are much more dramatic. The green floats do not felt as much as in the previous swatch, and are considerably wider. On the right, far side you can see some of them were latched up, creating yet another design detail.
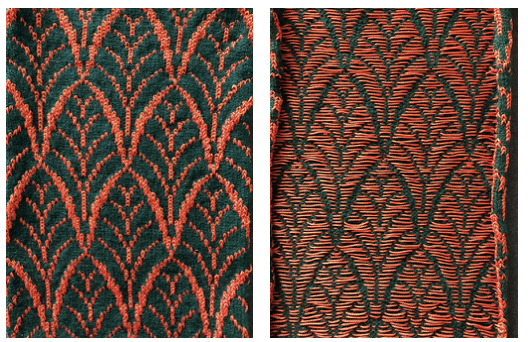
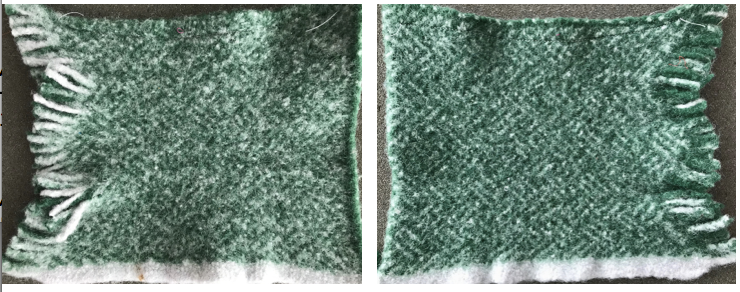
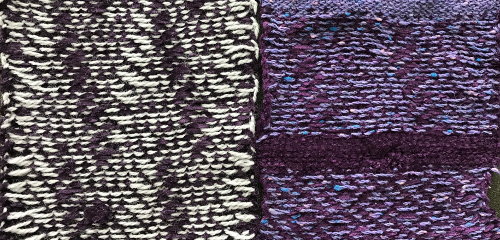
 The reverse of both swatches shows the resulting difference in relative width.
 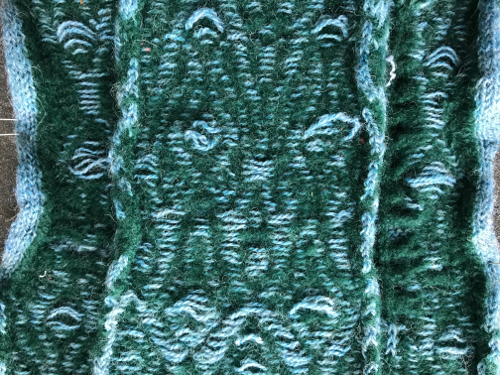 The contrast using a factory-supplied punchcard pattern with short floats, also felted. The fringe is created by ending on one side (in this case on the right) with a group of needles out of work and the outermost 2 needles in work, essentially producing a large “ladder”. Decreases and increases on needles close to the edge of the knit were brought in and out of work to create the “zig-zag”. The two edge stitches of the ladder may be trimmed before felting. The knit side is shown on the left, the purl side on the right, no clearly visible, separate floats, its surface is fairly flat.