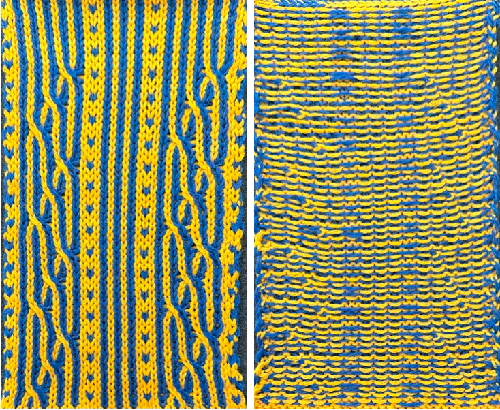
This sweater by Namesake, in the Fall 2024 collection, led to a FB query as to how to produce a cable version inspired by its color movement on home knitting machines. 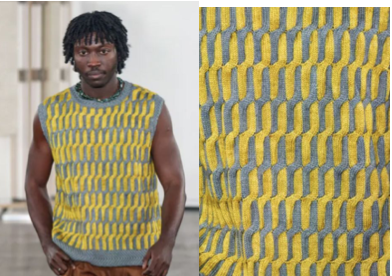 The discussion leads back to how to produce cables in 2 colors on home knitting machines best and accurately.
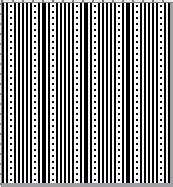
One way to achieve color movement is to begin with using and modifying vertical lines.
Due to the fixed width between machine needles, it is best to use a fiber with a bit of stretch such as wool, and often 2X2 crossings appear to be the limit for designs containing them in frequent, all-over patterns.
When working in single colors there are ways to obtain extra slack to make the crossings easier, but using the FI settings makes the knit tighter as in any slip stitch, limiting the use of such measures. In addition, returning the needles to the proper preselection position in pattern after the transfers needs to be performed manually.
A starting best-guess rule is to knit a minimum number of rows between crossings matching the number of stitches moved ie. for a 3X5 cable, knit at least 8 rows before repeating.
Tracking transfers can be achieved in several ways. The needle bed or tape can be marked with water-soluble ink, custom paper needle tapes may be printed to size, or paper strips simply marked and slid under needles in work.
In machines such as Brother, where needles are preselected, that fact can be used to advantage in establishing guides for the cable locations within the programmed design.
This swatch can be knit using a 1X1 locked needle selection.
While hand knitters have the advantage of seeing the color movement clearly on the knit side, machine knitters can find it harder to follow their locations with only the purl side facing them. 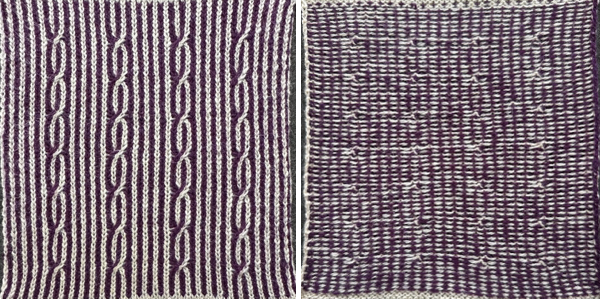 The vertical stripes can be interrupted at intervals by additional patterns or shifting cable locations.
My charts begin in a spreadsheet, Mac Numbers. The first trial effort: 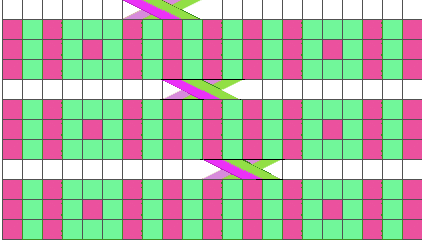 To begin with, the goal was to avoid the 2 by 3-pixel blocks that occur with tiling, which upon later consideration, might aid in avoiding placing cables in the wrong columns,
  resulting in a 20X18 design. Black pixels represent the dark color, or simply the color in the B feeder.
![]()
 The alternate repeat to yield those double-width blocks, 21X18
 ![]()
 When matching hand-knit designs such as in complex arans, the direction of the crossings matters and may need to be reversed throughout.
 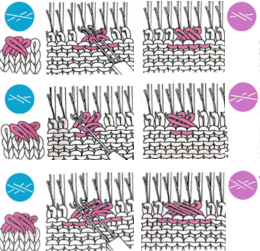 In these instances, it is enough to be consistent, and their direction can be a personal choice. I prefer cabling right over left.
 ![]()
![]() In the first test, using the 20-stitch repeat, I marked up a paper strip placed under needles in work and followed markings for Row Counts and needle GrouP shared in the table on the right.
In the first test, using the 20-stitch repeat, I marked up a paper strip placed under needles in work and followed markings for Row Counts and needle GrouP shared in the table on the right. 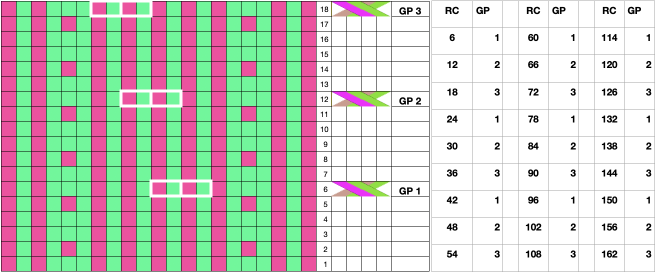 The result begs the question of how to avoid cables in the wrong columns and the possibility of repeating them more frequently than every six rows. Occasional stitches in the wrong color may be duplicate-stitched to mask them, but small cables in the wrong place or the wrong direction are problematic.
 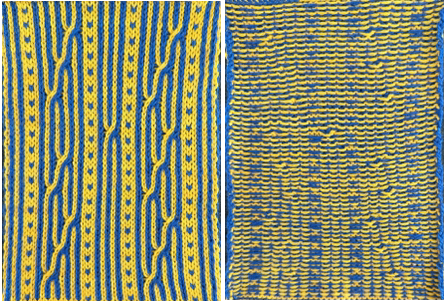 This repeat is 20X12 pixels, and it includes areas missing needle selection that will serve as visual cues on the needle bed for where stitches need to be crossed, now every 4 rows. Using the repeat on the 930 required mirroring horizontally to achieve the desired direction
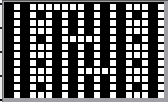
![]()
 Returning to the inspiration sweater, imagining a possible repeat keeping in mind cable crossings no wider than 2X2,
 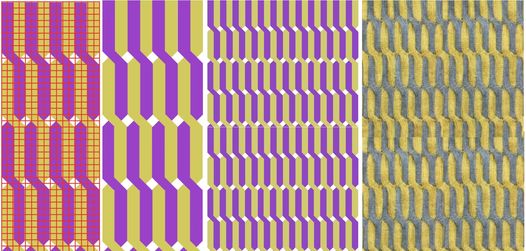 The knit tests were knit using 2/13 wools at T10+.
It proved impossible to use a tighter tension or to across more than 24 stitches along any single row without stitches dropping from becoming too small or the yarn breaking. The solution was to place the cabled details in a center panel. Using similar panels between undisturbed plain or patterned columns could become planned design features.
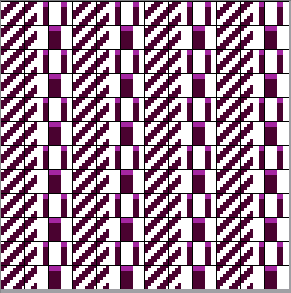
The full swatch repeat, 40X20 pixels, reversed on the 930. 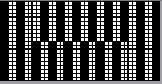
![]() The end needle selection is canceled, and cable crossings are all made in the same direction. The left pair moves under the right pair to the right, and the right pair moves to the front and behind them onto the two empty needles every 10 rows, immediately after the change in needle preselection and before the following knit carriage passes.
The end needle selection is canceled, and cable crossings are all made in the same direction. The left pair moves under the right pair to the right, and the right pair moves to the front and behind them onto the two empty needles every 10 rows, immediately after the change in needle preselection and before the following knit carriage passes.
A printed needle tape can help track their locations. 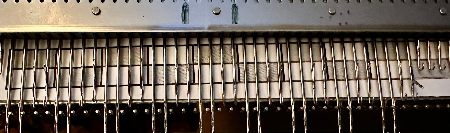 It is placed on the proper preselected needles, bring those needles out to the E position, check that transfers have been made properly, and knit the next 10 rows, repeating the process.
 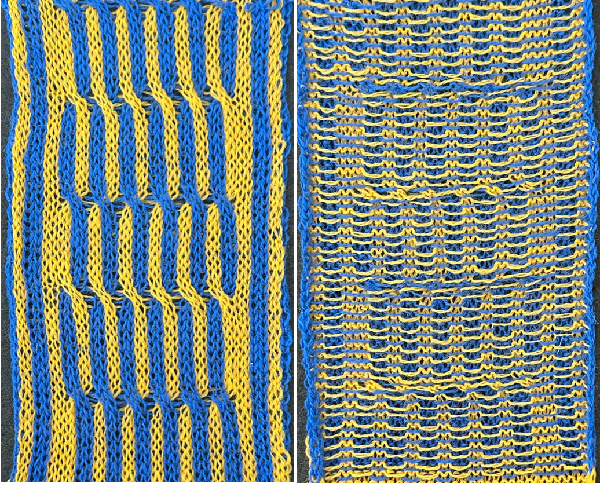 Maintaining diagonal details requires planning a repeat that works as an all over design, then choosing a panel to add to cable details. One such repeat, 12X12
 ![]() the smallest repeat, 6X6,
the smallest repeat, 6X6,  could be used for bucket filling parts of designs with pattern in Gimp
tiled alignment test: maintaining diagonals with cable crossing blocks,
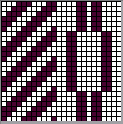


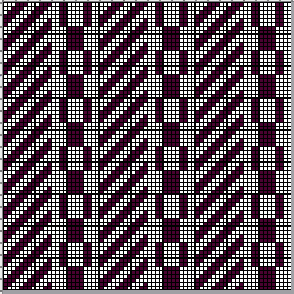 The proof of concept after testing yarn tolerance for crossings, using the 24 stitch repeat suitable for punchcard model machines as well:
 ![]()
 Fails are easily predicted in a paint or image processing program when rows are added keeping the repeat at 24 wide, the diagonal is not changed, but the spacing between cables is increased ie by 2 more rows:
 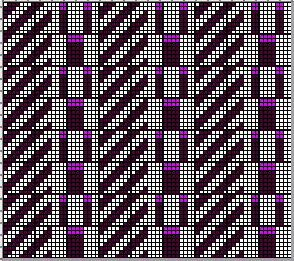 Making it work: 24X48 rows
 ![]()
More on developing DIY cable charts:
Visualizing knit cables 3_ using Numbers and Gimp
Visualizing knit cables in color 2_ using Numbers and Gimp , includes cumulative links
ArahPaint is often a part of the process now as well