Knit weaving 3 reviews some basics, and a list of associated blog post links is provided at the bottom of the page, including
Lace meets weaving on Brother Machines 2
Lace meets weaving on Brother Machines
Tuck stitch meets knit-weaving introduced the combined technique.
Many of these repeats are suitable for punchcard models as well. The caveat there is that there is no option for eliminating knit carriage cam button setting changes by using a second carriage to select and knit. They would need to be performed manually.
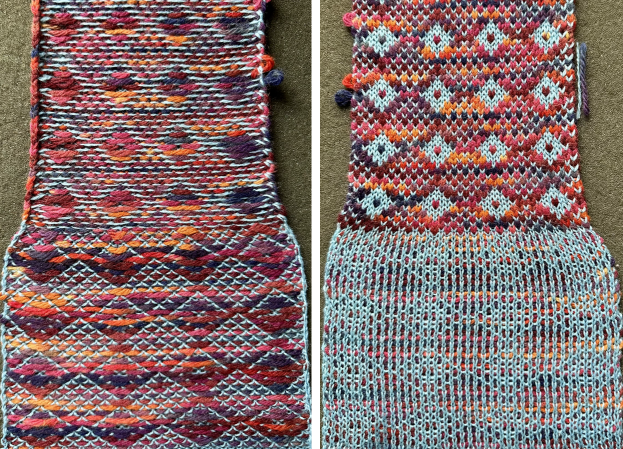
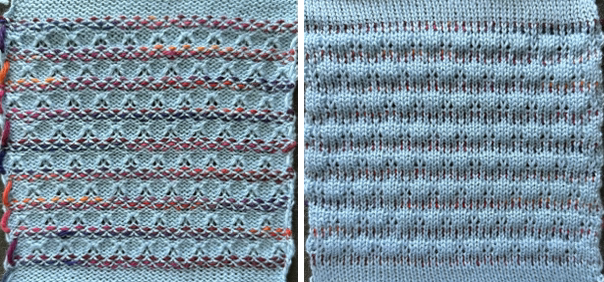
More on DIY combinations of tuck and knit weaving: if using a single carriage to execute these designs, then it is necessary to switch cam button settings from tuck in both directions to knit with needle selection for the knit woven rows frequently, as in this first swatch.
Actions: 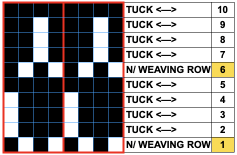
 Altering the repeat while planning on cam settings to be changed every even number of rows also brings the possibility of using 2 carriages in electronic models, with one set to tuck in both directions, the other to normal knit (no cam buttons) but with needle selection for weaving rows, KCII
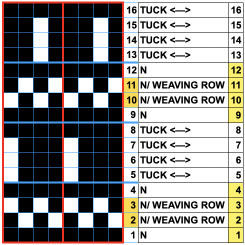
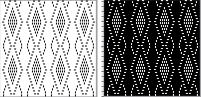
 Here tuck shapes are introduced, again planning for setting or carriage changes every even number of rows, in this case every 6,
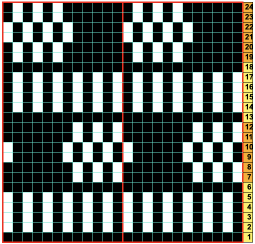
 The tuck diamond is surrounded by a vertically woven one. The original design repeat was color inverted observing tuck “rules”.
The 1X2 white pixels will tuck, and the 2X1 side-by-side ones will serve as guides to the placement of the vertical weaving yarn. They are placed on rows with no conflicting selections. 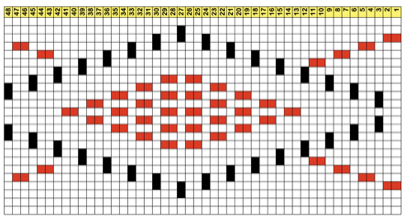
![]()
 When the side-by-side needles are not selected, they are manually pushed forward to E and needles are double-wrapped away from the center at the bottom of each shape, toward the center (row30) when the top of the shape is reached.
Start of the second shape in the swatch: 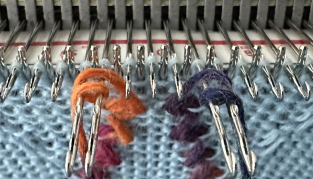
 While retaining the outer shape of the design, the inner content may altered to provide a guide for horizontal weaving. The 24X48 design
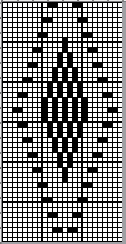
![]() The PNG was isolated in the center of 40 stitches.
The PNG was isolated in the center of 40 stitches.
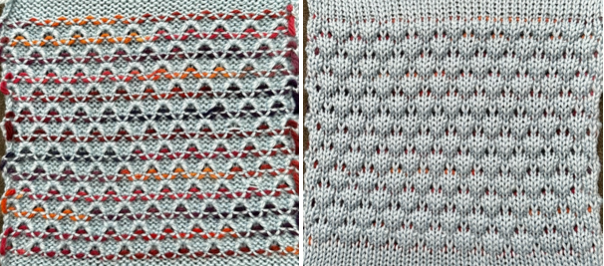
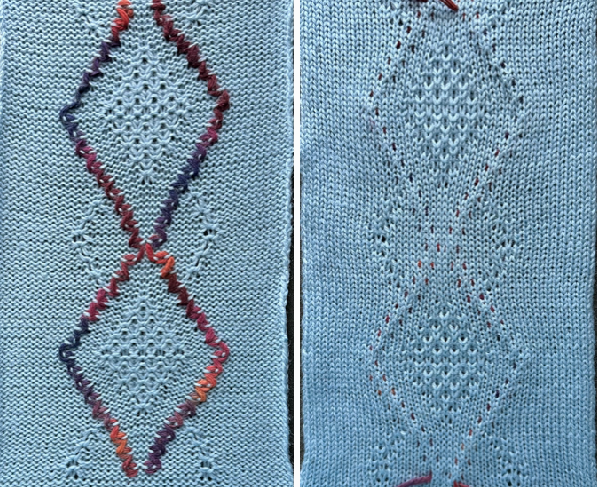
The surface woven floats may become visually lost when using space-dyed yarns with shades in similar families to the background, as seen in the bottom center diamond.
In the second center diamond, a different color-way yarn was also used double thickness without any change in tension. This resulted in the second thread not always getting caught properly, slowing speed and added caution improved the result.
The swatch was narrower than the sample knit using tuck stitch. The best way to weave in yarn ends would need working out. 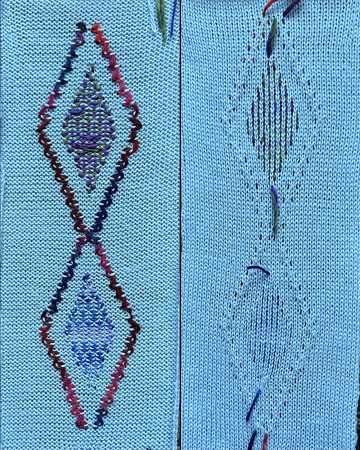 Combining weaving types with the intent to create a plaid effect:
the starting chart created in Mac Numbers 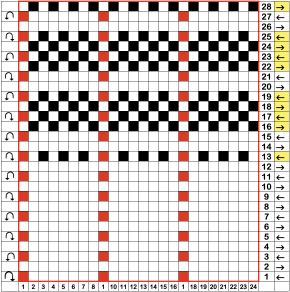 The 24X28 repeat
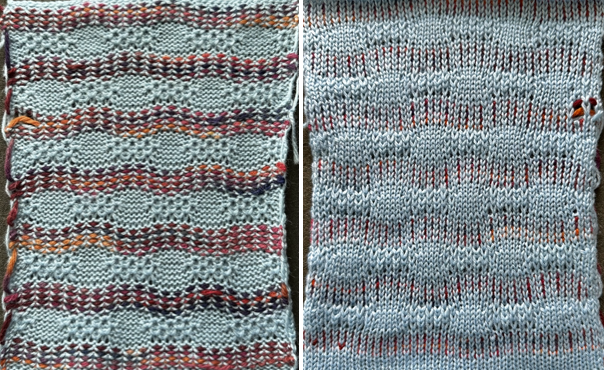
 ![]() The choice of the yarns may require tension or color choice adjustments, when the weaving yarn is not caught properly, the longer floats are formed.
The choice of the yarns may require tension or color choice adjustments, when the weaving yarn is not caught properly, the longer floats are formed. 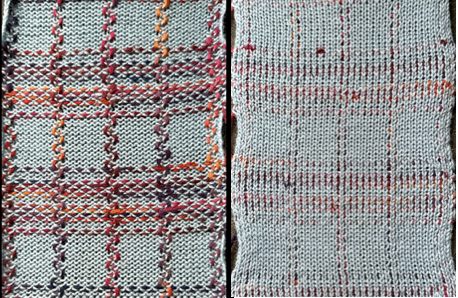 Here simple color striping is added. The background red yarn is a thin 2/10 wool, the horizontal weaving yarn a space-dyed sock one, and the vertical weaving one a varied fiber space dyed hand knitting yarn by Noro.
The image on the left shows the vertical weaving setup work on the machine, the ribber gate pegs and needle butts appeared to help to keep the yarn lengths from twisting around each other as the work progressed. 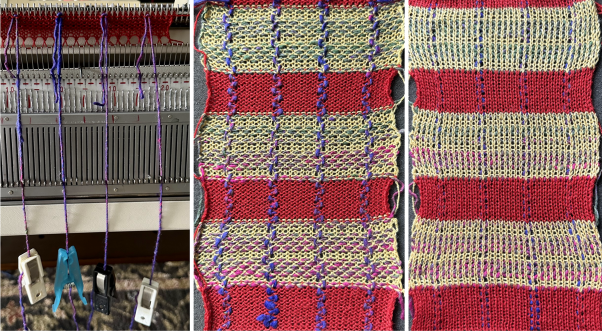 Adding needles out of work:
A common base for knit-weave published patterns is seen in the pattern configuration seen in what is known to many punchcard knitters as card #1 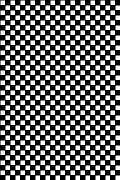 When there are needles out of work in combination with patterning, end needle selection must be canceled.
The set up row for adding ladder spaces is planned so that patterning in 3 stitch columns begins and ends on a pair of selected needle  In this sample with horizontally woven rows, the ground yarn is a 2/20 wool, the weaving yarn a space dyed sock yarn resulting in random color blocking. Relaxed the knit resembled shadow pleating, here it is shown after pressing and steaming
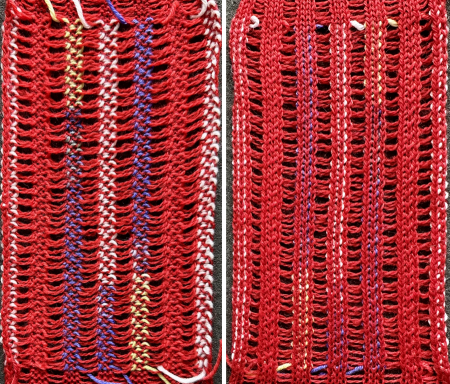
 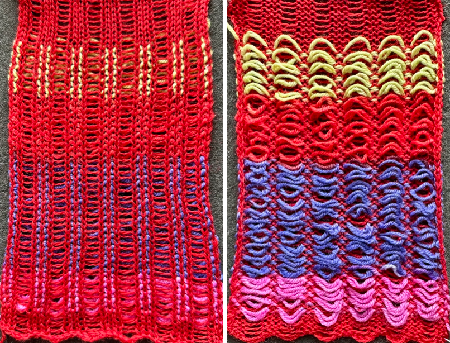 Using separate strands, vertical weaving may be performed along each 3 stitch vertical columns.
The work on the machine: the ribber gate pegs and needle butts helped keep the yarn lengths separate.
Yarn is always laid over needles with the continuing, long end away from the carriage. In this case, the it was lifted over single selected needles to the right, then over pairs of selected needles to the left. 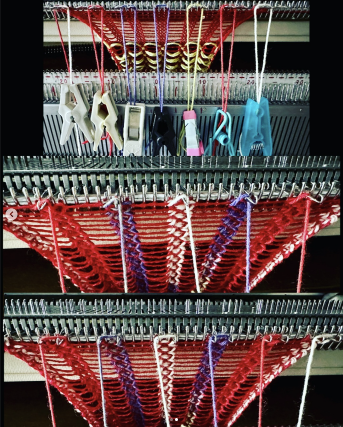
 Slip stitch is known for compressing the height of the knit and narrowing its width. This attempts to alternate knit woven stripes with slip-stitch ones utilizing a similar repeat. For the slip texture to be more visible, the related segment is rendered double height, and color reversed.
Here setting changes to occur in even-numbered blocks of rows. The design is shared repeating across a punchcard width, 24, X 24 rows in height. 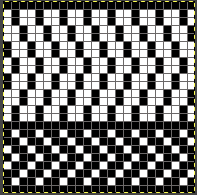
![]() Eight rows are knit with the carriage set to knit but selecting needles, and 16 rows with the carriage set to slip in both directions.
Eight rows are knit with the carriage set to knit but selecting needles, and 16 rows with the carriage set to slip in both directions. 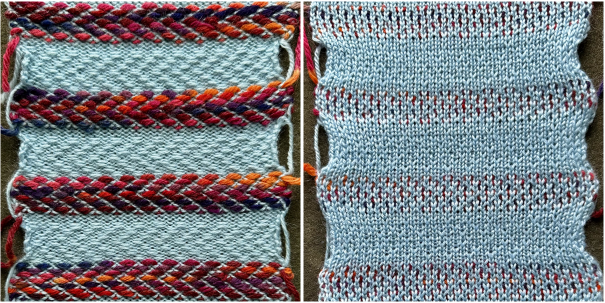 Comparable or the same yarns are used to evaluate the results when varying techniques and stitch types.
Here a 2/20 wool in a color similar to that used in the above sample forms the ground.
The woven section has some drape and stretch, the stitches are forced apart producing interesting bleed-through on the knit side and making the fabric reversible.
The same repeat and yarns are used in the top half of the swatch as a fair isle, without any change in tension. The knit is dense, stiff, and narrower with no stretch to speak of.
The 10X10 design 
![]()