Some of my previous posts on double bed fabrics with designs creating pockets in both one and two colors:
quilting-on-the-knitting-machine-1/
quilting-on-the-brother-km-2-solid-color-back-dbj/
revisiting machine knit quilting
quilting using ayab software
references-for-double-bed-single-color-references-for-double-bed-single-color-fabrics-with-pockets/
A review of some of the terms used in describing fabrics with raised designs in various patterns:
blistered fabrics: two rows of the main color are knit the same as in standard dbj, but more rows are added and knit with the blister color on only one of the two beds used to create textured pockets. Technically they can be executed in a single color as well as in two colors per row. The extra rows result in the blisters being raised or lifted up from the fabric surface, they are often also referred to as pintucks. These fabrics do not have the width and stretch of many other 2 color dbj fabrics.
When exploring this family of knits, use plain, fairly smooth and thin yarns. This is a fabric where pressing should be avoided so the texture is not lost or altered. For setting the pockets created sometimes slipping a wire or tool through the bubbles will do the trick as for any hems. Simple, bold patterns work the best. Spreading the texture evenly throughout the design will decrease distortions in width. Leaving needles out of work combined with racking can alter the basic technique considerably.
In the two-color version, a double thickness fabric with a crumpled face side and a single color backing is created. The blistered areas are knit in one bed only, the rest is full needle rib with floats from each blister enclosed in the fabric.
Begin with a repeat that is elongated X2, the jacquard separated pattern needs to be double marked. Needles are arranged as for DBJ. For 2 colors the main bed is set to slip in both directions throughout, but the ribber settings need to be changed and set to knit and slip alternately for 2 rows to produce the single color backing. Good needle condition is a must if occasional stitches are dropped on the ribber they can be repaired when the work is off the machine.
Ripples are created by setting one bed to slip and the other to knit for several rows, then setting both beds to knit simultaneously to join the tucks in repeats. They are selective pintucks, on every needle rib. The main bed is set to slip on both directions throughout, the ribber carriage is set to slip for 4 or more even numbers of rows, and then to knit for 2 rows (this number may also be varied depending on the specific pattern). This is a fabric that likes to be weighted evenly. Tight ribber tension will help increase the definition of ripples. As in any multicolor fabric, each set of ripple stitches may be knit using a different color yarn. Some designs tolerate having the main bed set to tuck rather than knit.
Brother machines often are limited to 4 rows knitting on the bed creating the ripple before closing the rib.
Transferring blister stitches to the main bed, with a shadow lace tool or a transfer carriage is referred to as “shadow lace”. Adding blank rows in your design makes it easier to have a transfer point to the opposite bed. Using a plaiting feeder will add color contrast.
“Nopps” which are essentially small bumps on tightly textured tuck stitch grounds require careful tension adjustments.
An image was shared in a machine knitting group on Facebook. It cropped up in Pinterest, could be traced back to some Russian knitting forums and a how-to knit query was made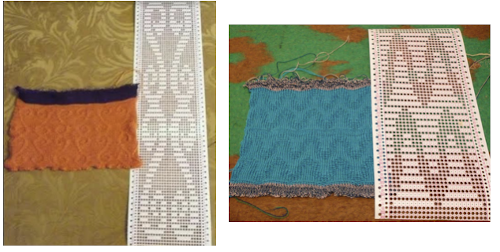
There is an Italian language youtube channel with a throve of machine knitting videos, one on jacquard groffato executed on punchcard machines, with a companion video on punching the card. Groffato means embossed.
Points to remember: the more needles on either bed knit alone to create the pockets, the more the tension used needs to approach the one for single bed knitting there with the same yarn. Large shapes are best used, represented by white squares /unpunched areas. Punchcards such as ones published with large unpunched areas for thread lace designs or tuck stitches with large punched areas color reversed can work once the principle is sorted out.
The setting used in the video is for tubular/ circular knitting.
The all punched rows in the video actually match rows that would be knit anyway because the main carriage is set to knit in one of the two directions, not slip. Two yarn ends are used, which could result in a fairly dense fabric with limited drape. Switching to a single yarn end can alter both considerably.
In designing your own patterns for testing it is best at the start to keep shapes simple and not worry about repeat variations. I am working on a 930 using img2track, but my repeat is 24 stitches wide and usable on a punchcard model, its source is another pin. To make the design twice as long, when planning an electronic download, the image can be stretched in the design software or by altering the stretch factor to 2 in img2track. Tiling the design prior to download can help one imagine the potential results in using it for an all-over pattern or what its appearance might be if the repeat is shifted into a brick configuration.
Use a familiar, smooth yarn in an easy-to-see color. Tension changes alone can change the dimension in the textured surface, so having a “normal” baseline for tensions and “feel” while knitting from previous uses of the yarn double bed gives one a good starting point.
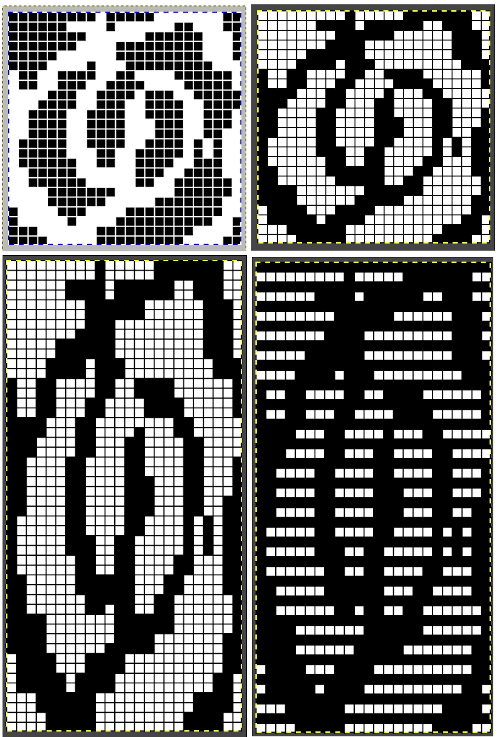
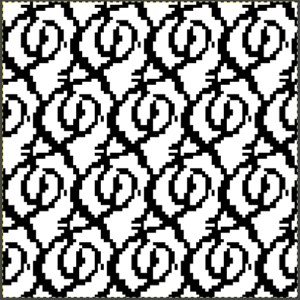
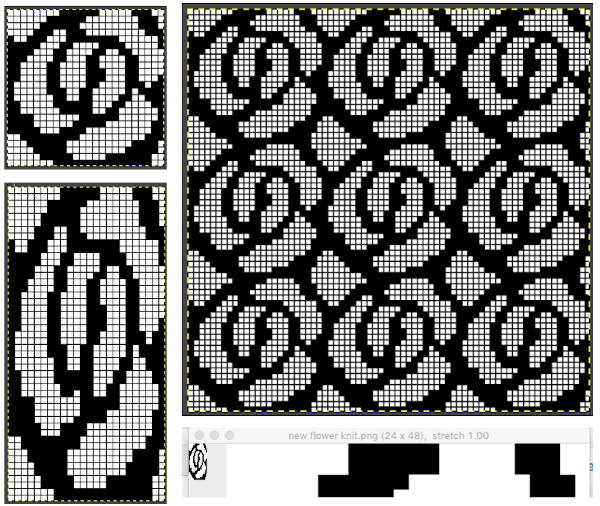
The “flower” image used in my tests is shown here in the original, and then is color reversed so its shape will blister, not the ground. Below it, on the left, the image was stretched within img2track, on the right within my design program which happens to be Gimp. In both instances, the original 24X24 design becomes 24X48 in actual knitting
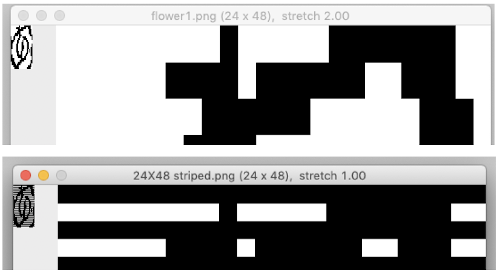
The tiled image for both a standard repeat and a brick configuration shifting by 12 stitches to the right are not thrilling me, but the goal is to explore the knit technique, modifications in the original or even abandoning it can happen later 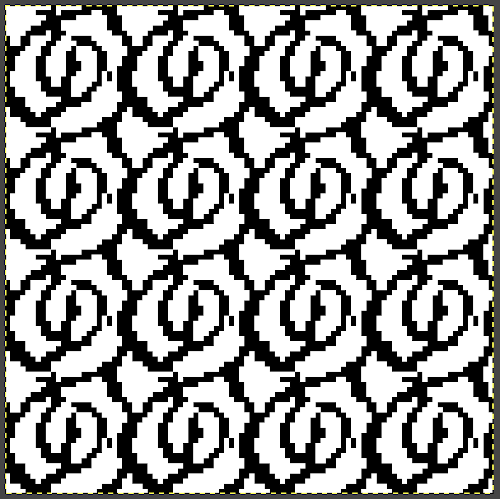
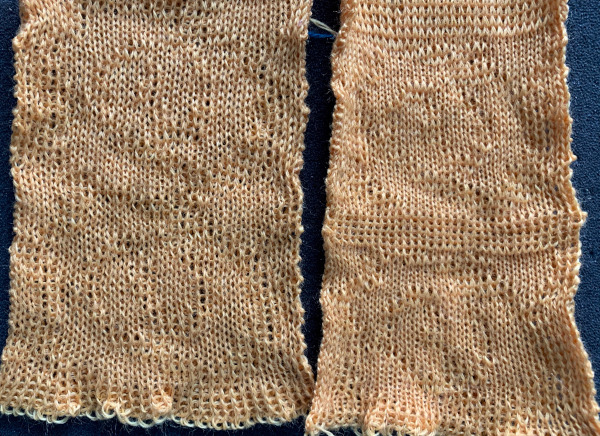
 My starting samples were knit on 32 stitches, not enough to get a sense of or a good view of the horizontal repeat of 24 stitches. At first, I used the design version with no horizontal black lines in the download. The difference between the every needle rib at the bottom of the pieces and the slip stitch blister fabric is easily seen. Slip stitches are short and thin whether single or double bed. On the left, I used the tensions of 4/4, as for the particular yarn in past experiments. On the right, the switch was made to 4/2. The tighter ribber tension made the blisters more pronounced. The non selected needles on the main bed create the pockets. Because functions repeat for pairs of rows in this design, the first preselection row can happen from either side and cam buttons may be reversed with similar results as seen in top vs bottom below. Opposite part buttons are used as in option A or B.
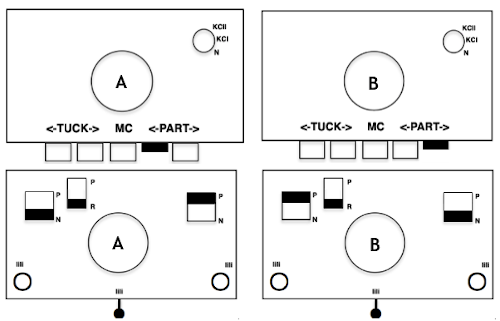 As I have explained in the past, I tend to leave the slide lever permanently in the center position. It becomes one less variable, forgetting to reset it can result in errors in gauge and more mishaps when knitting multiple pieces where gauge matters significantly or in reproducing previous work.


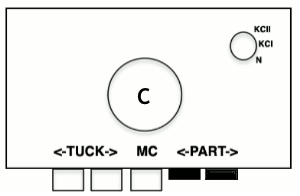
 The “striped” repeat produces essentially the same fabric. The knit carriage may be set to slip in both directions when using it since the row of all punched holes or black pixels will knit every stitch on every needle selected while in the previous samples the cam button set to knit in one direction performed that function regardless of any markings on the design repeat. The ribber is set to knit in one direction, slip in the other. Reversing sides for cam button settings produces the same fabric
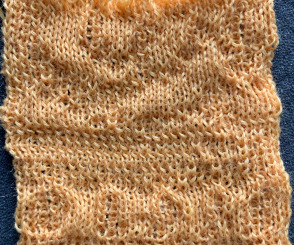
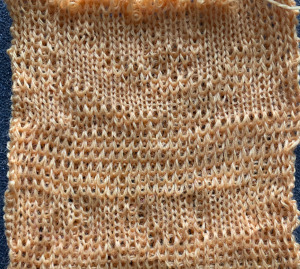 To my mind, the best shapes for this sort of surface design are clearly geometric ones. My eye sees them as more easily identified on the surface of the resulting knit. Sticking with the original “flower” however, here it is after a bit of editing of just a few pixels followed by a larger swatch
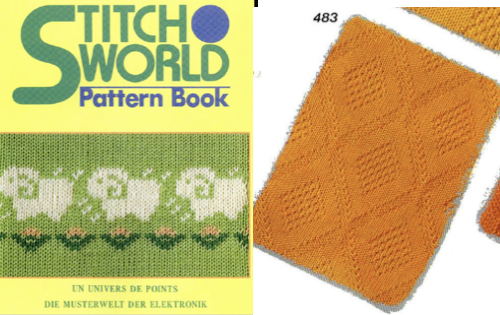
 The Stitchworld Pattern Book is another good source for predesigned repeats, many in units suitable for punchcards as well. I was attracted to the possible geometry in this particular pattern
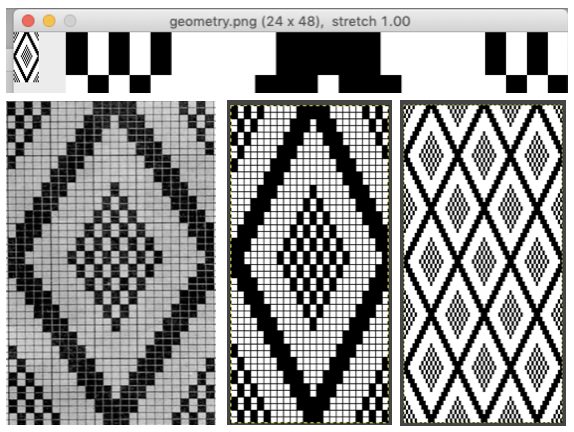
 The repeat I chose is designated as suitable for the Garter Carriage. It is 24 stitches wide by 48 rows high, shown below as provided, charted in Gimp as .png for download, and tiled to help visualize how continuous repeats might line up. The image .png was downloaded with img2track to my 930, with a stretch factor of 1.0, retaining the original repeat size
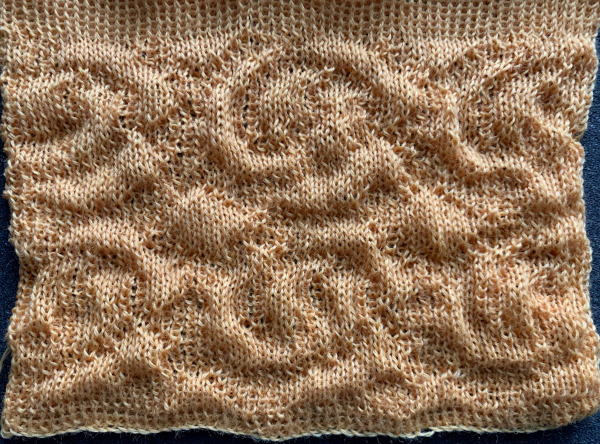
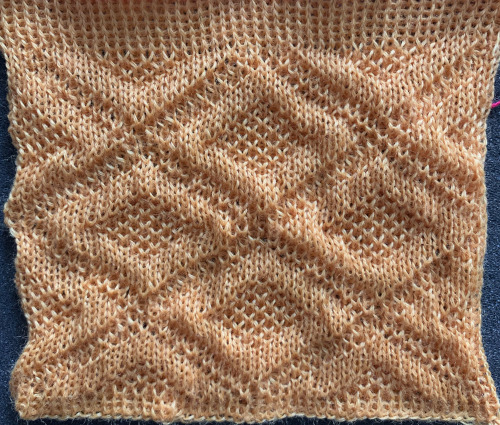
 The resulting knit is interesting on both its knit and the purl sides, clearly shows how the “image” is shortened in slip stitch techniques, elongation would be required to create more of the diamond shape
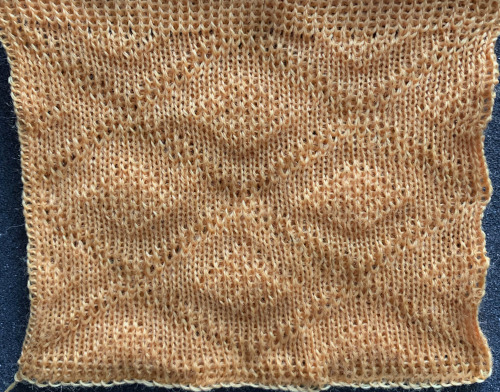 Final decisions are often best made after a period of rest for both the knit and for our eyes. It is only in the actual knitting that the shapes can be finally evaluated, worked on further, or abandoned. One of my own best selling felted items for more than a decade was born from an accidental effect on a large swatch that nearly landed in the trashcan after it became something different than what I had planned or expected.