Entrelac pretender 2

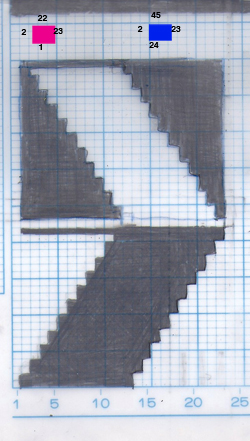
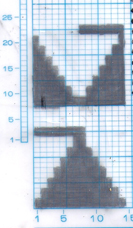
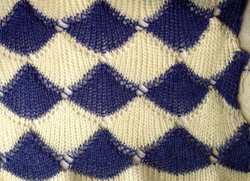
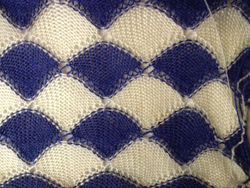
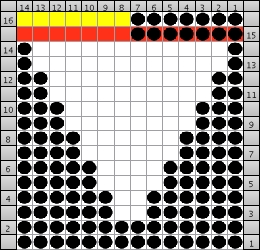
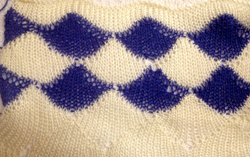
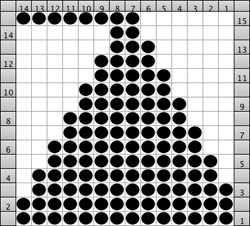
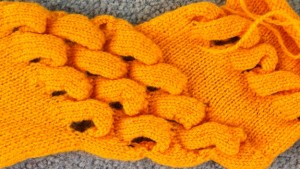
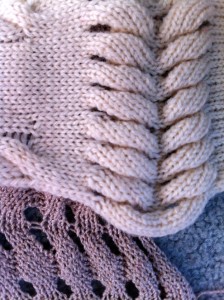
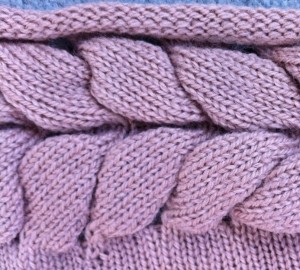
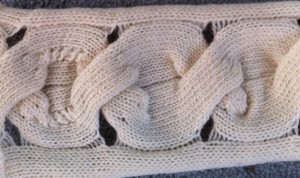
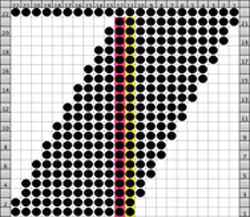
This is another fabric combining holding and slip stitch to create shapes. Below is my first working repeat, the colored lines indicate a dividing line that would give me a black square on either side for setting up the second, split repeat to reverse the direction of the knit stitches.
I am sharing not to provide a pattern or specific how-to, but to provide some ideas for technique experimentation by readers with some experience and familiarity with the combined use of patterning and holding.

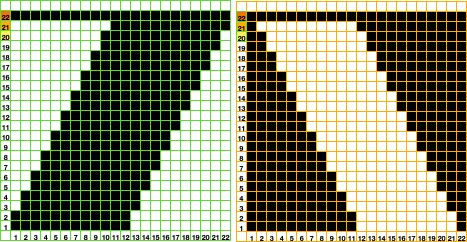
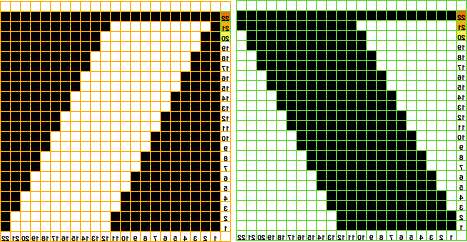
My mylar repeat as used on the 910 appears in the direction as drawn on the knit side, while punchcard models using suitable width repeats knit repeats in the direction as drawn on the purl side. Later electronics automatically mirror programmed repeats, true of my later model 930. Depending on the model in use this electronic repeat may require mirroring before or after downloading.  A newer chart of the design, with row numbers requiring actions highlighted on the left of each repeat.  Machines that automatically mirror would be selecting this  Air knitting is a good way to test pattern placement on the needle bed prior to any knitting.
When the slip stitch setting is used and segments are worked on only part of the needle bed or with needles out of work, end needle selection is usually canceled. On electronic machines, this is done using the KCII cam setting.
Each 22-row program is used across one full row of “entrelacs”.
The bottom repeat as given above preselects KCII <–,  knits left to right, and the top repeat preselects KCII->, knits right to left on the 910.
Each horizontal segment knits on groups of 22 stitches and ends on “half” a repeat.
The half repeats combined with the reversal of the knit direction result in a balanced fabric.
As the direction is reversed, the alternate repeat needs to be programmed. A bit on method:
COR for bottom mylar repeat KCII <- knit all stitches color A,
COL set the machine to slip <->, bring all but the first 22 sts on the left to hold, and knit 20 rows.
The resulting shape is being created from left to right when the top is reached the stitches at the left of the sequence will be in the B position, and the ones on the right will be in work.
COL: at this point push the next 22 sts into work, knit to the right.
COR: return first repeat 22 sts to hold position, and continue in pattern for 21 rows.
COL: bring the next group into work, and knit/move across the selected number of needles.
COR: bring the previous grouping of 22 out to hold. Repeat as needed for the desired width.
When the full row of shapes is completed and the last group of needles is preselected, COR: cancel holding and slip, knit one row on all stitches to the opposite side, and change color to B if desired.
COL: program subsequent repeat, KCII, select ->.
COR: set cam buttons to slip <->, KC to hold, bring all but the first 22 needles on right into work, and reverse the full sequence.
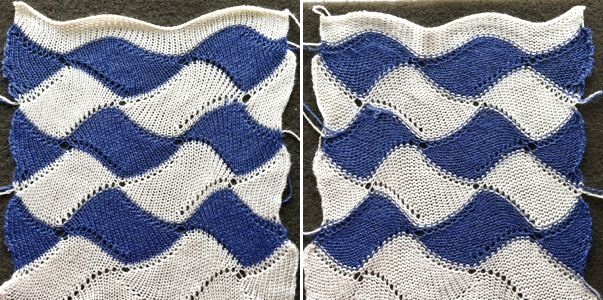
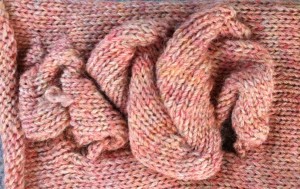
My swatch was worked on needles 34L to 21R and had an interesting 3D texture until I pressed it.
The differences in the size of the eyelets at the tops and bottoms of the shapes are due to the fact that when stitches are brought out to hold on the carriage side, an automatic wrap is created, reducing the size of the small slits usually formed in short row knitting.
I like to press the initial studies to have a clearer definition of the edges of the resulting shapes and the location of color changes so as not to disrupt the pattern.  There will be yarn ends to be dealt with where color changes occur, some could be knit in with the same color while making the piece. I can imagine that if the 2 rows of all knit stitches are eliminated between entrelac rows, even more variations could be done with added colors, but I personally am not “going there”.

“Automated” shell shapes

March 2020: in attempting to fill a request for a punchcard repeat, I am finding added ways of looking at the topic, will share in a later “revisit” post.

This technique combines holding with the slip stitch setting. When KC is set to slip it is the punched holes/black squares that result in needle selection and stitches knitting. Blank areas in cards or mylars are slipped/ skipped.

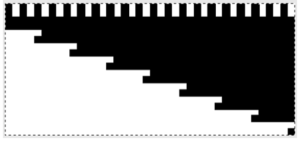
my mylar repeats for each segment

the swatch before pressing knit side

the purl side

the dimensional texture is flattened out  when pressed

the purl side, flipping the shell shape horizontally

using a yarn with memory and tighter tension would help retain the 3-dimensional quality if that was the  original intent

A bit on method: the repeat used for the hand technique in the previous post was changed to an even number of rows, with other adjustments.

The execution was in a brick configuration

all knitting begins on and moves right to left; needle bed may be marked to help track repeats

. for straight side edges program second mylar repeat first; I knit my sample on needles 22L – 34R

. some needles will need to remain OOW, cancel end needle selection = KC II

. COL: first selection row is done L to R with the yarn color used for the next shell sequence in A feeder

. COR: the machine is set to hold non-working repeat groups, and the KC is set to slip <->; in the half-repeat working the first half-shell takes place on the first 7 needles on right

. COL: when the top of the repeat is reached the orange row will be selected left to right

. COR: after needle selection of previously held stitches happens on that row, bring the total number of stitches for the next repeat on the left into work manually, knit one row across the 21 needles

. COL: stitches in the yellow area will be in B position; bring all stitches to their immediate right to hold, then the “yellow group” to work by hand, continue to knit in the same process across until the horizontal row of shells is completed

. COL: program machine for full, alternate pattern repeat (bottom of mylar) for a row of all whole shells

. COL: depending on personal preference, holding may be canceled for the first selection row, or stitches may be pushed back to D position and carriage kept set to slip <-> before knitting back to right and resuming working on each pattern unit

. COR: repeat process, working on groups of 14 stitches at a time from left to right

. COL: on completion of the row of full shells return to the first program, continue the process until the desired length is reached

To match casting on and binding off  I often start with waste yarn, make the decision as to how to end the piece in a way that I like based on my test swatches, then rehang the stitches from the first row and treat them as I did those in the last row of knitting.

Thinking of modules: a shell “diary”

This is the beginning of a thread on modular shapes on the KM. Much is published in the form of both how-tos and patterns for hand knit modules. One of the critical differences between HK and MK as in mosaics is that in HK garter rows may enrich the surface textures. Unless a G carriage is in use, frequent travel between opposing needle beds or turning the work over on the single bed is required on the KM to create the garter rows, which may be considered tedious and impractical rather than impossible. A question from a friend led to my beginning the topic by trying to sort out shell shapes. In the samples below two different weight yarns were used, first because they were conveniently the closest to my yarn mast, and second because contrasting colors are helpful in defining what is going on at the edges of the shapes. The irregularities in spots are operator error, the repeat pictured is sound. This is not a step by step “how-to” for those who have no experience with holding techniques, but rather a starting point for anyone who would like to play with a similar shape

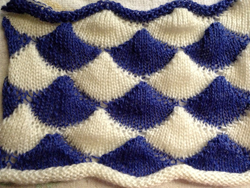
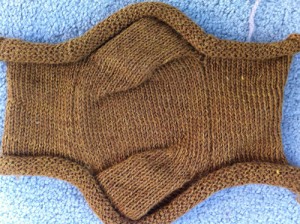
the swatch immediately off the machine has a bit of 3D going on

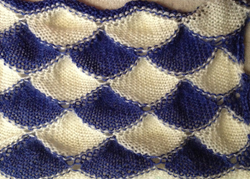
knit side after pressing

the purl side after pressing

the working repeat: dots represent stitches knitting, blank squares needles in hold for each individual segment

For forming a straight edge at the sides of the finished piece, the first horizontal row of shells must start and end with half a repeat. Set up is on a multiple of 14 stitches. I began working with COR. Stitches are brought into hold consistently on the side opposite to the carriage, when 1 remains at top of half repeat (2 for full repeat), the remaining six of the recently worked repeat and subsequent 14 for the following repeat are pushed into work (21/22 sts), one row is knit across all needles, COL, the 7/8 remaining stitches from the previous group are brought out to hold, the carriage travels back to the opposite side once again on the grouping of 14 stitches, COR, holding pattern resumes opposite carriage, and from right to left. The contrasting color in the second horizontal row of shells begins on left, working on a full 14 stitch repeat, reversing the shaping. I am considering automating the process with slip stitch. The latter would have to occur on an electronic if repeat is to be used as-is since on a punchcard the width would need to be adjusted. If a brick repeat such as above is desired, two different cards or programmed repeats would need working out for the alternate shapes to occur on the same location on the needle bed after completion of each horizontal shell sequence.

It can be helpful to mark up a needle tape or even the needle bed with water-soluble markers to keep track of the repeat’s locations. I used a separate color for each repeat set. A bit of denatured alcohol on a lint-free cloth piece easily removes them. Markings on needle tape pertain to some of my other projects.

Pleats: automating “pleating”, single bed

This post was originally written in 2013. I found myself reviewing it in 2018, and editing it with the intent to attempt a pleat sample using the Ayab interface. In those days I was using Intwined for some of my charts. The program has since been unsupported for Mac, without upgrades and a series of problems that led to my switching over to excel completely for my charts, and now to Numbers in the latest Mac OS.

I work primarily on multiple model Brother machines, in this instance the 910. Some of the information provided below may need tweaking for use in other brands KMs. “Automation” of some holding functions may be achieved using slip setting to knit required stitches. Below is the mylar sheet repeat used for my sample swatches. The setup is on working needles 21L, 19R, program for color reverse and twice the height; KCII (cancel end needle selection); first-row needle selection from left to right, and with carriage ending on the right the first set of needles selected will be those that knit, the remaining bed will slip. This is opposite to the configuration familiar in holding, where needles out to E are held, those in B or D will knit (Brother needle position jumped the letter C, they are  A, B, D, E). In this type of knitting, all needles in use on the bed should be cleared with each pass of the carriage.

I have gotten used to keeping programming numbers for  locations on mylar around a square to correspond to the lights surrounding the house icon on the 910 and worked with the following 2 options for my test swatches

In the samples below the first set of every other stitch/ black square in the increasing/decreasing angles were slipped on the non-selected needles to create/mark the inner purl fold, the second set in the area that does straight knitting tucked on non-selected needles to create/mark the knit outer fold. For the latter to occur, the cam buttons need to be switched to tuck <-> for 2 rows, and then back to slip <-> for the remaining knit repeat. Small holes are created at edges of slipped areas as miters are created, as would appear were the fabric created through holding.

A: the alternate fold areas as they appear on the machine during knitting

the fabric after some casual steaming shown on the knit side, the pleating just about doubling on itself

B: with the added knit rows, the swatch before steaming

here is the purl side after some steaming showing the change in overlap

its knit side

both fabrics allowed to “hang”

The look may be varied considerably by changing the sequencing of the number of knit stitches, and the number of plain knit rows between the EON slipped or tucked ones. Electronics facilitate that, and with machines capable of accepting programming of the whole needle bed, there is even greater freedom. The sample above was knit loosely in acrylic, the holes would be less apparent in a tighter knit. If bothersome, they may in theory be “avoided” by factoring in “wrapping” if every row of the repeat is drawn rather than every other. With only 60 squares available on the mylar it is possible to go twice as wide and produce fabric width that may suffice for a skirt’s length. With software that allows for programming the width of the needle bed, possibilities expand even more. When going double wide with a repeat such as the one above, some problems result not so much in the inner fold slipped rows, but in the outer fold of the tuck ones. As in nearly any knitting when needles have 2 side by side loops resting on them, these loops will create a float/ ladder, so the tuck rows will essentially behave like the slipped ones as the double loops are dropped rather than anchored on the subsequent pass of the carriage. In the configuration here if the double-wide button is used, one way to solve that issue would be to bring consistently the same of either of the 2 non selected needles out to D or E position (still faster than hand-selecting repeats by hand for holding), resulting in knit stitches and single tuck loops.

5/18/18  Working out the kinks: the same repeat is redrawn to factor in the reduction of the eyelets at edges of slipped areas: a partial graph showing “automatic wrap”. However, the “wrap” will fail with color reverse, and that first row would have only one stitch knitting. If double wide is used, then the wrap will happen around 2 needles, creating yet another “float”. 
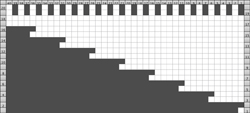
its color reverse 

Plain knit rows (blanks on mylar) may be added at the bottom or top of the repeat to change pleat depth. Here is an amended repeat, discarding the “automatic wrap” idea, first prior to color reverse, then after
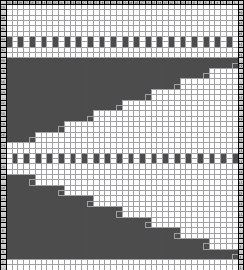
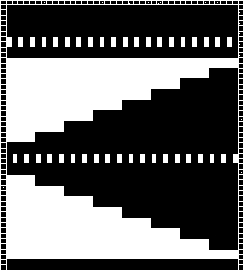
 
Those all blank rows would result in no stitches being knit, essentially a 2 row “free” carriage pass, and are removed. The repeat is  now also capable of being knit twice as wide if desired, adding the hand technique on tuck folds
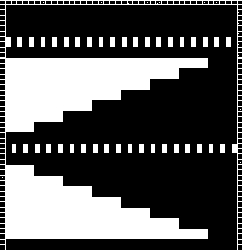
Below the edited repeat begins design using one pixel per stitch and per row. “Automatic” wrap happens as one row is knit, while the next preselects an extra needle. The yarn travels under the extra needle prior to its being knit on the next pass from the opposite side. There will still be an eyelet, a bit larger than hand wrapping, but smaller than without any wrap at all. The EON pixels in the center of the shape are tucked. For that to happen the knit carriage needs to have the cam buttons switched from slip to tuck, and back to slip after the 2-row sequence. The fabric folds out to the knit side. The EON (every other needle) set at the top of the shape is knit in the slip stitch setting, resulting in the fabric folding into the purl side. The process could be reversed to have each fold to the opposite side of the knit.

The carriage needs to be on the opposite side of increases in the number of stitches worked. Here the first preselection row should be from left to right, with carriage traveling to and from the right for the subsequent pairs of rows. 
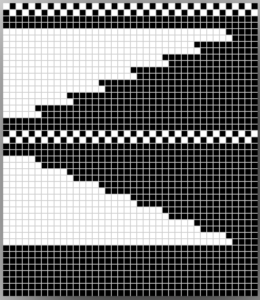
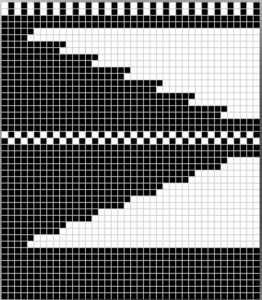
More variations: the slip stitch configuration below is changed to the same EON selection for 2 rows. The same could be done for the tuck fold. For this repeat, the first preselection row should be from right to the left, making that the side the knit carriage returns to after each pair of rows knit. The sample was knit in a too thin acrylic. Both eyelets and their “wraps are visible, as well as the direction of folds.
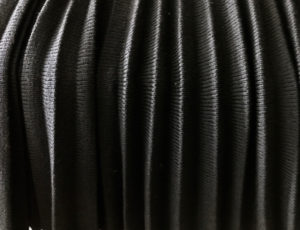
These are pleats in a skirt made eons ago, that have retained the fold over the course of many a year 
An added alternative for fold lines: create outside crease transferring EON to make a row of eyelets, create inside crease by knitting the desired row double row with 2 strands of garment yarn. “Automatic” repeat must be adjusted accordingly, whether by redrawing or punching, or using cam settings for the correct stitch formation.

Seaming should be planned on the inner fold of the fabric, depending on whether the purl or knit side is used as the “public” side, the least visible join being one that is grafted ie with Kitchener stitch.

The same principles may be applied to punchcard knitting but because the repeat size is 24 stitches the resulting fabric is one suitable for portions of garments/ accessories, in details such as ruffles and edgings. Punched holes would match the black squares in the color reversed repeats.  “Air” knitting helps determine the exact needle location required, and to decide which side the first row must be selected prior to actual knitting. The image below shows the start of only one possible partial repeat based on the last one above
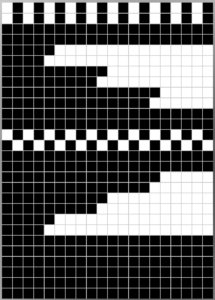
I usually sample my repeats by using hand selection and holding before committing to drawing on mylar or punching holes. An even number of rows is required in this technique.
It’s all math

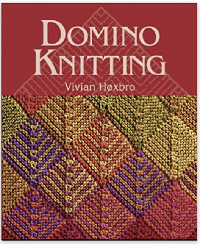
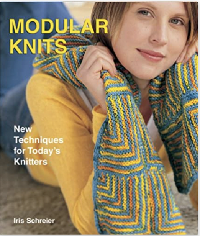
Modular knits get lots of attention of late. Most hand knitters are familiar with “domino knitting”. Many have written extensively, below are a single random sample covers from a few authors
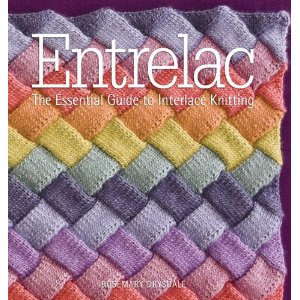
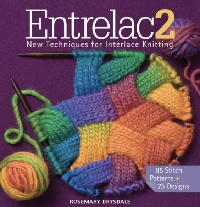
Horst Schultz Vivian Hoxbro Iris Schreier A pair of pubs by Rosemary Drysdale dedicated solely to entrelacs are shown below An excellent article on how to knit entrelac on the machine by Cheryl Brunette is archived here.
Complicated stitch patterns often are more easily managed in simple forms. Laying out shapes in scrumbled knits or ones that emulate quilting blocks get back to math and breaking down larger shapes into smaller ones which makes me think of origami.

“Wisteria” 2

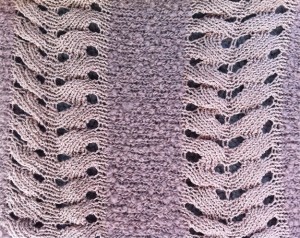
A follow-up to the previous post on the “horizontal cable“: it has a relative that produces a flat or textured “lacey”  fabric depending on the number of rows knit in each segment.
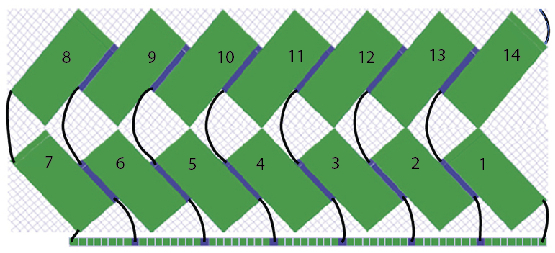
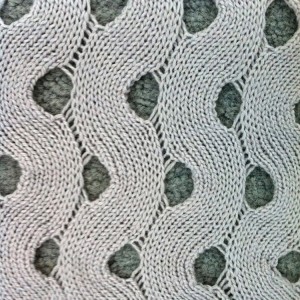
The relative: after some initial rows of knitting (whether waste yarn or edge of actual piece or swatch), beginning with knit carriage on the right-hand side, moving right to left, the knit is created by knitting on a multiple of chosen # of stitches plus needles out of work (OOW, A position). In the instance below a multiple of 9 + 8 is cast on, with an OOW needle (represented by blue) between repeats. The ladders created where needles are in A also make it easier to visually identify stitch groups that need to be moved in/out of work

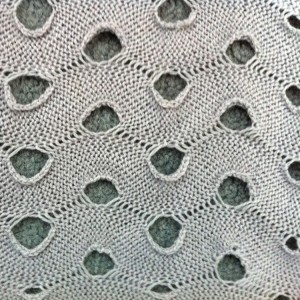
an attempt at a graphic representation of the corresponding knit the swatch knit side, orientation as knit    the swatch purl side, rotated 90 degrees as it would appear in a sideways knit the knit tends to curl along edges to purl side as seen above, could be embellished with stitching for more contrast and color
To knit:
first pattern row:
the numbers in parentheses reflect markings on the last colored image
COR: knit 8 rows on the first group of stitches on the right (1)
push the second group (2) into work and knit 8 rows
push the third group (3) into work and knit one row
push group (1) on its right out to hold, knit 7 rows across the remaining  16 stitches
bring a new group on the left into work, knit one row
bring the group to its right out of work, repeat the process across the  row
when the second to last 2 groups on the left (6 and 7) are reached, knit  8 rows on both,
push the second to the last group out to hold (6)
COL knit 8 rows on the last group on the left (7)
second pattern row:
COL: reverse the process from left to right for the second pattern row, begin by knitting 8 rows once more on the first group on the left (9), that first group will now have been worked for 16 rows
The row that picks up the adjacent group of stitches helps create a joined fabric, with movement resulting from the direction in which each “pattern row” is knit.
Varying the ladder space and the number of rows knit will change the overall look of the fabric.
Turning the fabric sideways after varying the size of the holes across the now horizontal rows could also affect the overall shaping ie narrowing and widening of segments.
Going from larger holes on one side to narrower in the opposite will make the knit “ruffle” on the edge with larger holes, etc.
If one knits vertical segments that are 8-16 rows in turn, cutting the yarn at the end of each sequence, then there will be straight slits/ strips that may, in turn, be left as such when knitting is resumed, twisted in a variety of sequences with alternate groups as one would a cable, rotated on their axis once for 180 exposing some of the back/opposite surfaces of the knit single or multiple times as desired.
A strip of slits may, in turn, be “latched up” in a chain, stitched, or otherwise altered after the knitting is completed.
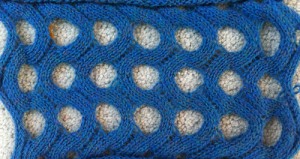
A sample with wider ladder spacing and a slightly different sequence. Note that the first row of holes is smaller than those achieved when shaping begins to be reversed. Ending the pattern can be planned to match its start.

Horizontal “cable”

I live in the East Coast of the United States.

In the 80s there used to be a yearly machine knitting seminar that was fairly well attended. There were droves of machine knitting publications. Susan Lazear, the founder of Cochenille, was just beginning to develop her knit design software ideas on the Amiga Computers, and a fellow Californian, who happened to be Japanese, used to travel here with the Pandora box of foreign knit magazines. At the time translating knits from one language to another amounted to guesswork and some leaflets. Subsequently, there were fliers, then articles, and even books on translating from Japanese to English and multiple language translations for knits and crochet.

One year there was a “Guess how this was done and you get a prize contest” for a technique appearing on a sweater with only Japanese instructions. The design was dubbed wisteria by some, has been reincarnated as a trim, insertion, bandings on sleeves and cardigans, and is beginning to reappear in magazines now again.

Here is one method for this “horizontal cable” created by short rowing across the width of the fabric.  Brother machine needle positions are A, B, D, and E, and a lever sets KH for holding in both directions Studio needle positions follow the alphabet, and Russel levers on each side must be set for holding.  The directions below are for Brother.

Reminder: when the machine is set for holding the needles in B or D position knit, needles pushed out to E will not knit. Weight is used as needed, watch for dropped stitches particularly along the edges of the sections as the rows of knitting are built up.

1.cast on the desired number of stitches knit several rows at garment tension, end COR (Carriage on Right)

2.COR, set the carriage not to knit needles in HP (hold position)

3.leave 6 needles at the right of knitting in WP (work position), push the remaining needles out to HP (hold position)

4.knit  10 rows over the 6 stitches, ending COR

5.push back 3 needles to D position at the LEFT of the 6 needles now in WP

6.knit one row from right to left (9 needles in WP) end COL (carriage on left). Push the needles now in WP on the far right to HP; 6 needles will remain in WP

7.knit 9 rows on these 6 needles,  end COR

8.repeat steps 5 through 7 across the fabric row until the last 6 needles remain. Knit 10 rows over  these last 6 needles, end COL

9.set the machine to knit needles in hold (holding lever to N), knit 2  or the desired number of rows across all the needles

10.holding lever on H. Repeat the procedure from left to right, reversing the sequence.

If the sequence is not reversed a bias fabric will be created. For maximum texture use a yarn with memory ie. wool. Anything that can be “killed” by pressure or ironing will flatten considerably and yield a very different fabric.

My demo samples were made out of colors that would make them easy to find, and unlikely to get “permanently borrowed”, so none of these were studies for actual finished garments

this swatch combines a boucle and a rayon; the latter has become flattened over time

this is a wool rayon, knitting is not reversed, resulting in biasing

these samples show the same technique, applied to much larger groups of stitches

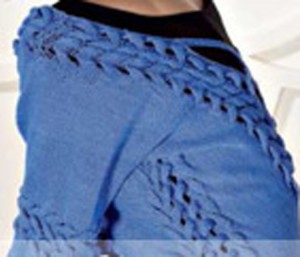
a segment of a magazine recent garment photo, no origin given as to source, appears to use the above technique

online source for patterns using this technique

more cable like/structures/textures

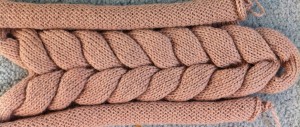
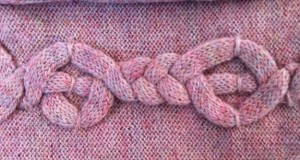
Pretend/ mock cables 1: i-cords, holding

I have literally hundreds of machine-knit swatches from the days I taught in a design school program. I periodically revisit them and since cables and their look-alike relatives have recently caught my attention I thought I would share photos of some of the samples in the next few posts.
They are not necessarily resolved fabrics, some of them are the result of random demo efforts/ stitch play.
In any discipline over decades, one cannot help but become aware of how materials and styles cycle, and this is oh so true in fashion and certainly in knitting. For a while more than a decade ago knit i_cord yardage/ tubular yarn was marketed by several manufacturers, and it is now making its reappearance.
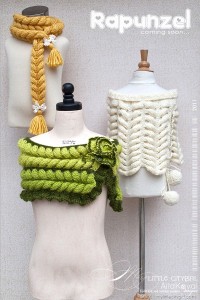
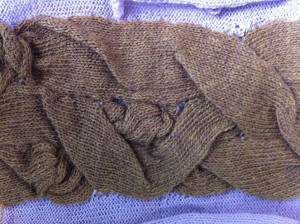
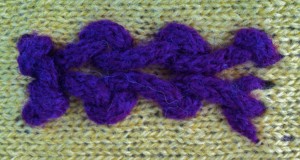
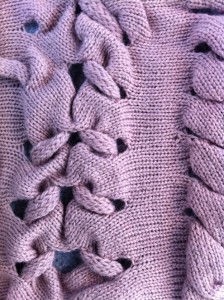
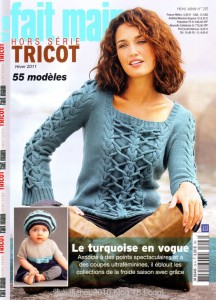
One way to create pretend cables in varied color combinations is to apply purchased yarn, or machine knit cording/ tubular knit to the purl facing the knitter side as the piece progresses. The application may be done in an organized manner, using a punch card to select needles on which the yarn will be hung, or more random, even with wide knit strips in contrasting colors.With tubular knit cord in addition to hooking up, anchoring may require some stitching, “seaming as you knit” at planned intervals would make the joins “invisible ” Strips using holding techniques or stitches hooked onto the knit to create texture, in turn, joined in the “seam as you knit method”Cording may also be inserted into single stitch lace “holes”or larger holes created through holding techniquesKnit i-cords, ribbon, twisted cording, etc. may also be threaded/woven through holes created at cable crossing as a way to add color and dimension to standard cables, mimicking their movement on the fabric. A recent foreign magazine cover including a variant of the above technique
Holding and “cables”

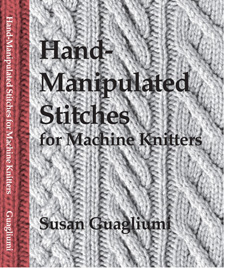
Susan Guagliumi has written 3 books on hand techniques on the knitting machine

her first classic

her previously most recent

published November 2014

Unknown

On her website, some of her articles and Studio KM publications are available for free download. Included are ones discussing a horizontal cable, two-color electronic cable. 11/12/15 Please note: the site now requires subscription and login, links, as posted here as they are, will fail to connect.

In creating large-scale cables in the past tension changes, supplemental threads, and other ways to compensate for moving a larger number of stitches on a metal bed (things start to get hairy when crosses become larger than 4X4) have been discussed. An interesting, clear, possible solution to produce textures or macro cables such as in this piece

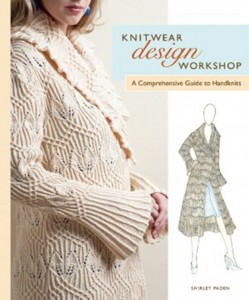
may be found in her books and may be viewed in her youtube video. Handknit interpretations that also add lace to the mix may be found in Shirley Paden‘s portfolio photos of garments, she is the author of


A baktus tale

A Baktus is a very simple triangular scarf/shawl. I have many oddball skeins of sock yarn, it is possible to knit a small baktus with a single one. An online search will yield many free patterns, most for hand knitting, easily adapted for the KM. Many patterns are free, including some in the latest catalog at Garn Studio.

Such scarves may be worn in hoodie and bib styles, or as neck/ shoulder wraps.

I am not personally fond of triangles with no shaping, so I thought I would try a KM version, rounding the bottom point of the triangle.

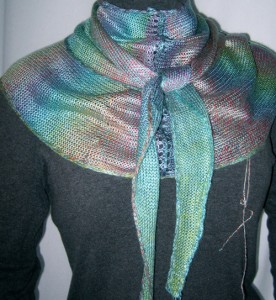
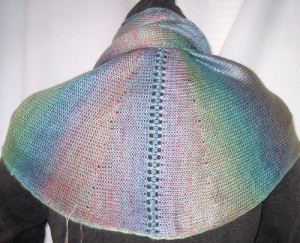
Here are the results, with yarn tails still attached.

front view

back view

I began with casting on 5 stitches, and increasing one stitch every 4 rows on one side up to the required length, then adding a short row “spiral” section, and removing that piece on waste yarn from the KM. A second identical piece was knit, and the 2 halves in turn joined on the KM. Part of the goal was to evaluate alternate joins for future lace shawl triangular pieces.

Finished measurements after blocking were: 36 in in length on straight edge for each half, 12.5 in @ widest point.

The width is in the common range for handknit versions, the length of 72 total longer than the common 55-63, but suitable for a loose tying of scarf.

This piece will be in my “consider qualities” pile for a while. Personal taste and preference do not necessarily match that of others, or those receiving item as a gift or purchasing it.