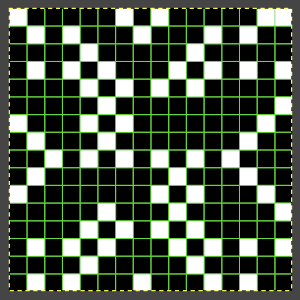
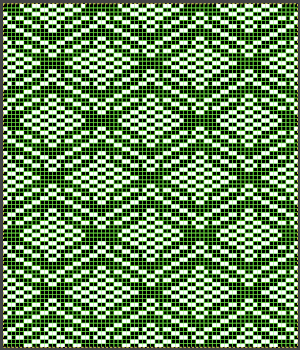
 It is always a good idea after isolating the repeat to tile it in order to get a sense of how multiples line up
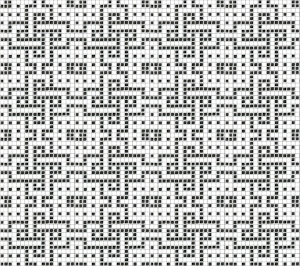 I was lazy about doing that with the first version of the colored repeat in Numbers and got the result in this swatch due to a missing black cell
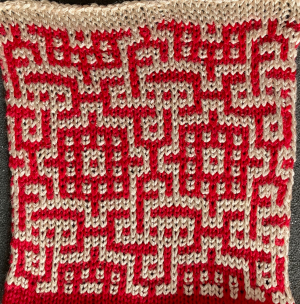
 The second try, see edit below to amend another missing cell
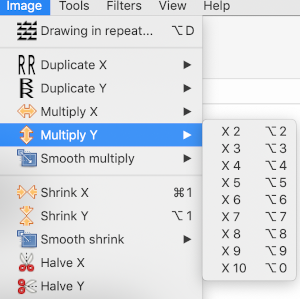
 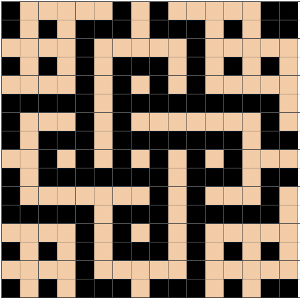 Beginning with the long method to create the design repeat in the color separation suitable for elongated dbj: the built-in color separation in most Japanese machines for DBJ (179 and color reverse in Passap) will knit each color in each design row only once, as happens on the single bed in knitting fair isle, which in turn is far quicker to knit in that setting than by using slip stitch with color changes every 2 rows. The first preselection row is from the left to the right, the first color knits once before colors are changed every 2 rows.
The dbj color separation that knits in each color for each design row twice begins with preselection from the right and continues with color-changing every 2 rows. The produced image will be twice as long as the original design, not desirable for keeping the aspect ratio as close to the original as possible, but a necessity in creating some alternative types of fabrics.
To start, create a table, making certain that cells are square and equal in size, height, and width. I prefer 20 X20 or more when working with small repeats.
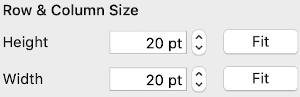 The zoom factor can be adjusted, increased for more visibility, and reduced prior to screen grabs that are planned to be further processed in Gimp. At less than 75% while creating charts, adding numbers or text, and sometimes changing the qualities of individual cells is harder to achieve. Large-size images may be scrolled through during the formatting process
 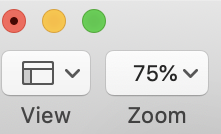 The working design repeat is 16X16. Create a new table that is 16 cells wide, twice its height, 32. While holding down the command key, select all the odd-numbered rows planned for the final chart repeat, any errors can be corrected by clicking again on the same spot, still holding the key down. The process may be done in steps, releasing the key in between selecting groups
 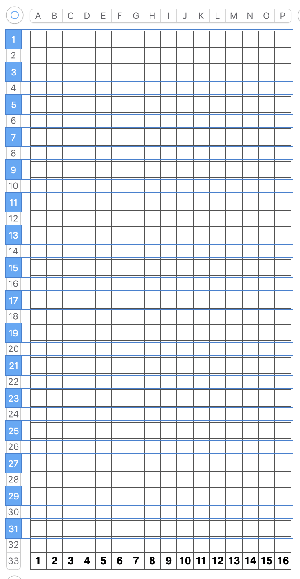 Choose the hide rows option, hiding 16 rows,
 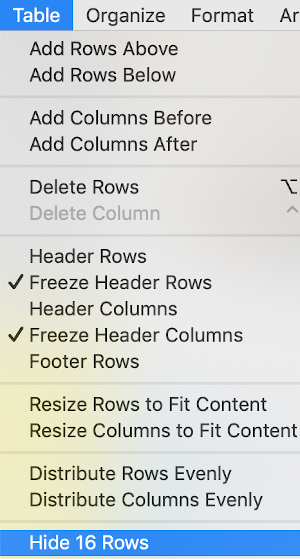 Add a column to the table. It will be colored, select the column and choose the no color fill option for it, then resize far wider by clicking and dragging the symbol
  at the upper table right to allow for copying and pasting the full repeat more than once.
 To produce the .bmp file: copy and paste only the BW portion of the above table once more. Using the cell format option, remove all interior borders,
 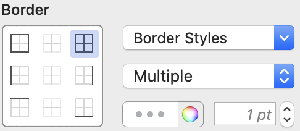 and if you prefer an outside guide, add an exterior border
 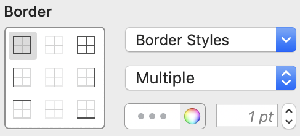 try zooming at 75% zoom, screengrab the table content, with an added blank border surrounding it, and import the result into Gimp. Choose crop to content, which will eliminate the extra white space around the image
 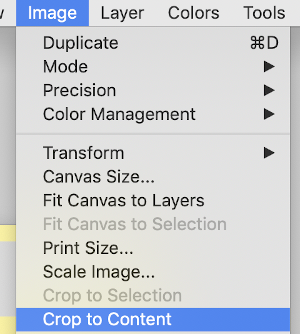 The final image needs to be double-height, so using the scale option choose image scale to 16 by 64 using the broken chain link prior to entering your numbers. These were my steps in scaling, I always check one more time for image size prior to saving. That is reflected in the last pair of numbers, with the now intact chain link symbol
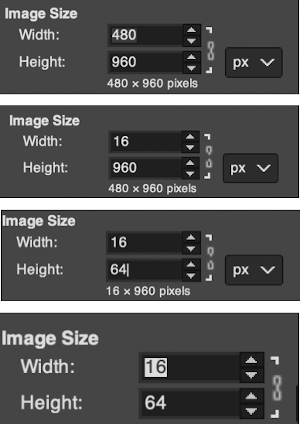
When I first used Gimp I devised and explained this method for mosaic color separations in prior posts. 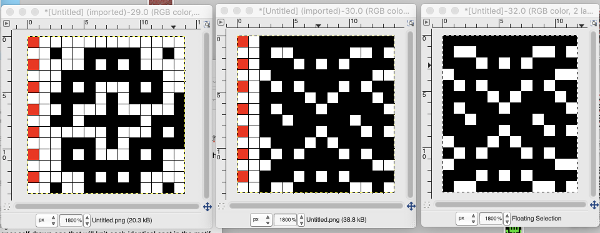 The expectation in working with such repeats is that on any rows there will be no more than 2 white squares marked side by side. On odd-numbered rows in the separation, the contrasting color squares slip, while on even-numbered rows the black squares slip. On odd-numbered rows, the main color (black squares) knits, on even-numbered rows the contrast color knits.
I think of row one/ odd rows as needing to knit black squares, row 2, and even rows having to knit white squares rather than marking in the traditional manner for slipped stitches on each row. I now have found a far quicker alternative to color separation for mosaic knitting using only Gimp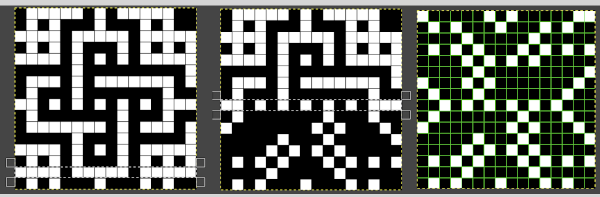 Working on the black and white indexed repeat, using a magnification of at least 1800X.
 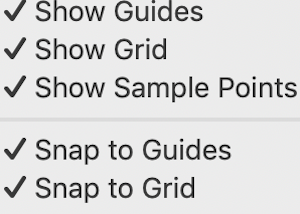 Using the rectangle select tool choose every other row beginning with the second one in the chart. That row will be highlighted by a white dotted line. Choosing
 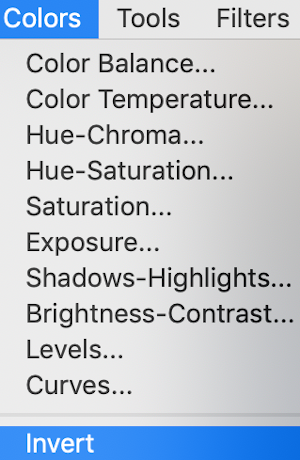 will swap black and white cells in that row. Continue the process on every other row. It is not necessary to select the tool each time, as you advance and select the next row, the one just left remains briefly outlined in white dashes, making it easier to advance correctly in the design.
Import the black and white table, process as described, scaling for my final image to 16X32: 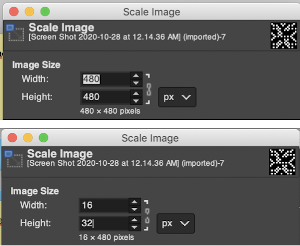
 This repeat posed by a quandary. The file may be used as-is and doubled in length after download. For doubling the height in Numbers, prior to importing the final screengrab into gimp, please see post: 2021/01/27/mosaics-and-mazes-charting-meet-numbers-gimp-3/
Because of my personal preference for not using elongation when knitting pieces in these techniques, I tested doubling height in Gimp with no success at all. However, I was successful in doing so using 2 paint programs, both available for free download for Mac. The first has an amazing range of features, including the illustrated resizing options https://www.arahne.si/products/arahpaint/
 and https://paintbrush.sourceforge.io/downloads/, which allows for scaling by percentages or pixels
  Comparing the results for the elongated repeat, errors in the first are obvious, there should be no white squares anywhere repeating for more than 2 rows
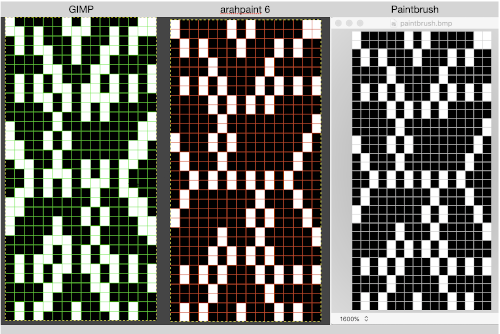
![]() Proof of concept
Proof of concept  December 2022: knitting the above again intending to share the result in Instagram, I noticed that 3 stitch/ row color block, which did not bother me at the time, but with the float showing behind the wire, I went about inserting that center cell. The red pixel in the image on the left marks the trouble spot. The remaining images illustrate using my latest Gimp separation method to rework the original png:
 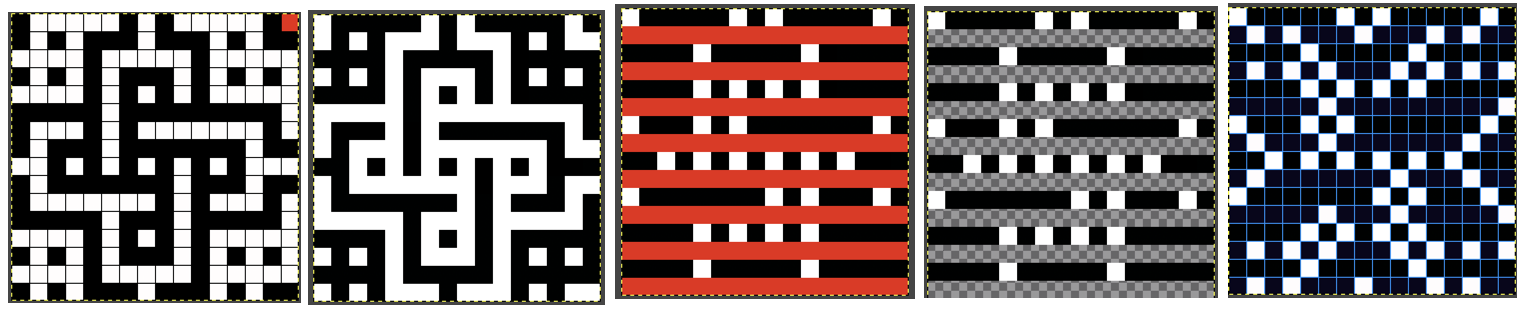 comparing the final result to the one in this post:
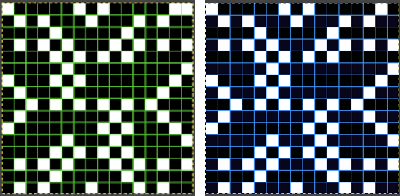 The new file prior to lengthening X2,
 ![]() double length
double length![]() Returning to 2020:
Returning to 2020:
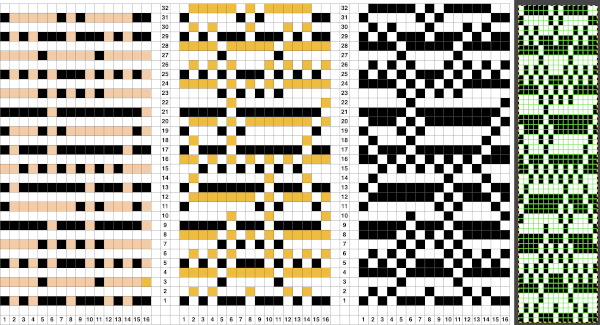
A review of a design from 2012/10/15/mosaics-and-mazes-from-design-to-pattern/, separated this new way 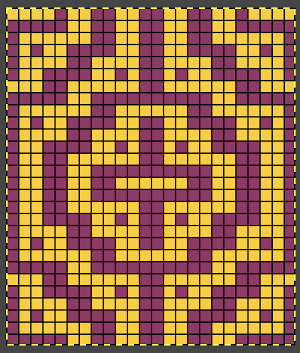 the repeat charted in Numbers
  tiling for viewing the repeat alignment revealed errors
 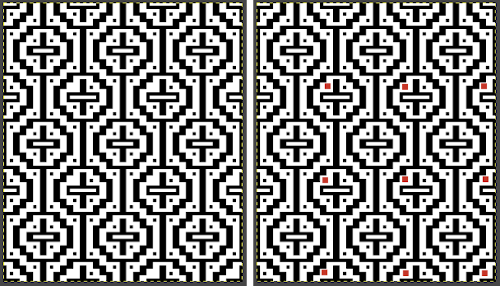 that will result in missing colored squares in the final fabric, which may not be noticed until after eyeballs have had a rest.
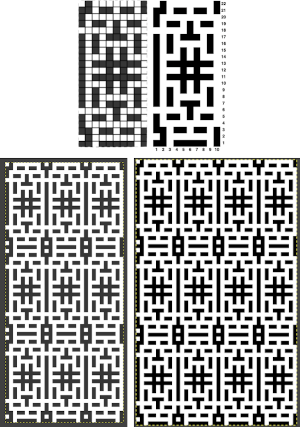
 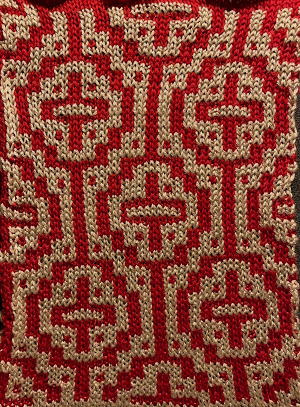 The amended repeat was color-separated working in indexed black and white and shown compared with the punchcard
 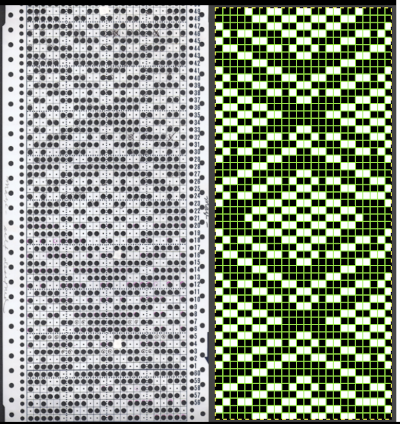 Here the final .bmp repeat is also compared with the color image in the previous post. It will need to be doubled in length for use with the color changer, the first preselection row is from right to left. End needle selection will ensure that each color knits the first and last needle on each side of the piece.
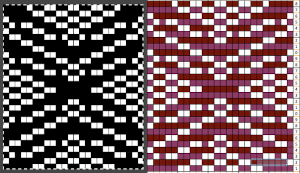
![]()
 The double-length repeat, 24X56
![]() Another very quickly separated repeat copied from 2015/10/03/working-with-generated-mazes-charting-1/
Another very quickly separated repeat copied from 2015/10/03/working-with-generated-mazes-charting-1/
 adapted for maze knitting, eliminating long floats, to be lengthened to double-height
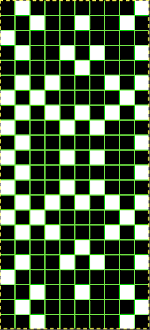
![]() drawn double-height via a paint program
drawn double-height via a paint program 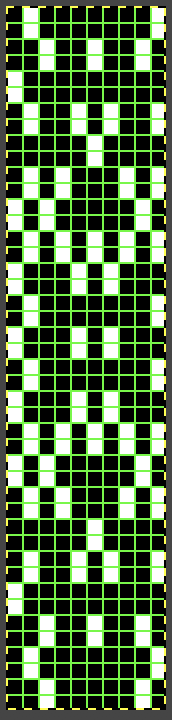
![]() Because there are no more than 2 white squares on top of each other, and no two side by side, I tested the pattern in tuck stitch, which produced some added texture. I had a major aargh moment with yarn where dropped stitches are seen at the top of the swatch
Because there are no more than 2 white squares on top of each other, and no two side by side, I tested the pattern in tuck stitch, which produced some added texture. I had a major aargh moment with yarn where dropped stitches are seen at the top of the swatch 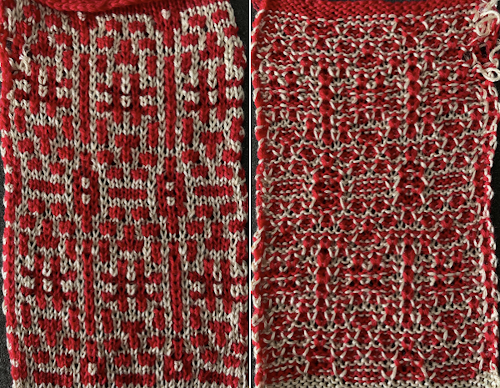 Using the maze generator by Laura Kogler, the larger BMP newly created with the program was imported into Gimp, explored in two renditions, eliminating double lines in the one on the right
 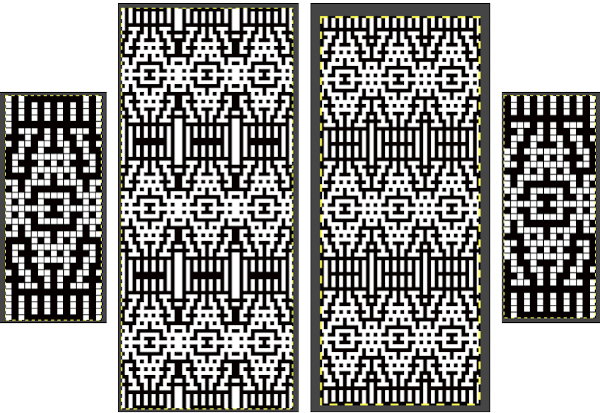 The proof of concept swatch for the version on the right, knit in tuck stitch
 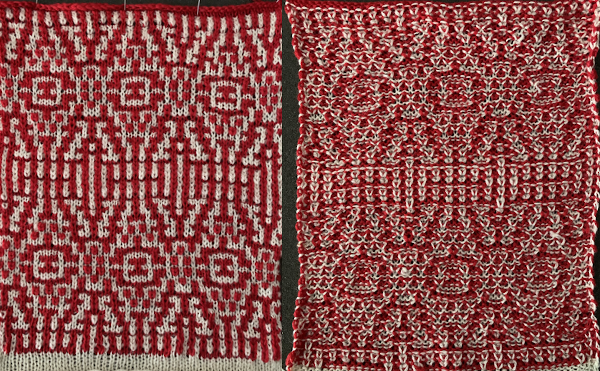 the double-length BMP ready for knitting, 14X68
![]()
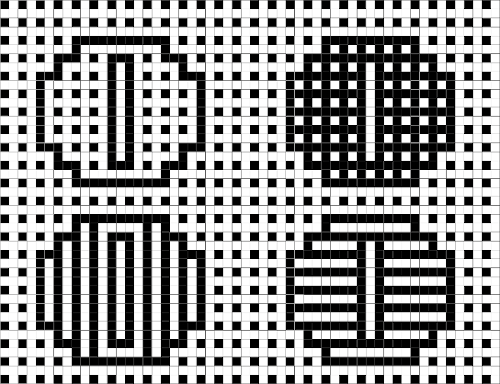
Designing your own motifs in expanded graphs: start with a template for either of the 2 grids shown below, and fill cells in or remove them. Remember these charts, unless knitted as a machine or software-separated dbj, will require a careful color separation. Beginning ideas for motifs, borders, and alphabets 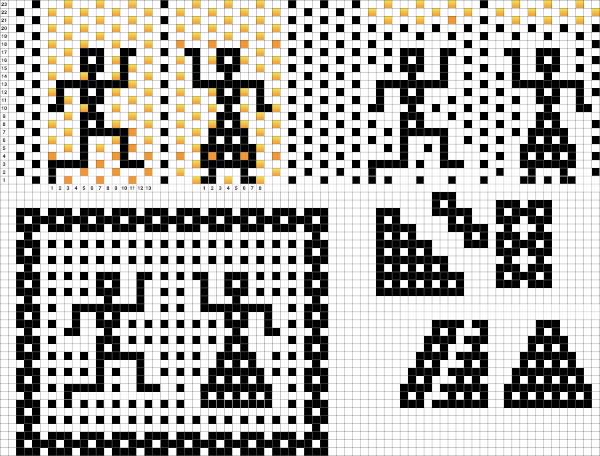
A collection of previous posts on this topic in reverse chronological order
2019/06/29/mosaics-and-maze…numbers-and-gimp/
2015/10/21/working-with-gen…-gimp-charting-2/
2015/10/03/working-with-gen…mazes-charting-1/
2012/10/15/mosaics-and-maze…design-to-pattern/
2013/05/06/mosaics-and-mazes-drawing-motifs/
2012/10/15/mosaics-and-maze…design-to-pattern/
2012/09/22/mosaic-and-maze-…-on-the-machines/