A collection of embossed patterns created by isolated groups of stitches being brought in and or out of work on the ribber
2021/05/09/double-bed-embossed-patterns/
2021/02/25/brother-shadow-lace-rib-transfer-carriage/
2021/03/11/slip-stitch-patterns-with-hand-transferred-stitches-double-bed/
2020/08/13/ribber-fabrics-with-stitch-transfers-between-beds-1
2017/12/20/combining-kc-patterning-with-racking/
The inspiration fabric in the 2020 post and one of the resulting swatches 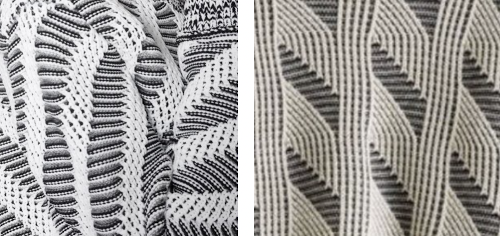 The inspiration fabric recently found online, source not known
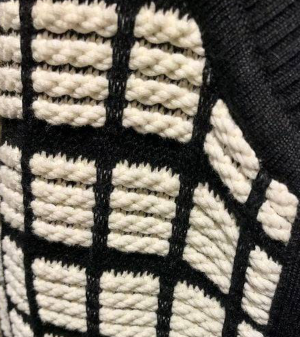 Analyzing the structure: it appears the fabric is knit with slip stitch textured patterning on the top bed, and occasional needles in work on the ribber creating elongated stitches that float on top of the light-colored rows.
Slip stitch textures narrow the fabric width considerably, so the single-color areas would need to be knit in slip stitch as well, here a 1X1 repeat is chosen.
Needles brought up to work on the ribber are planned to interact at intervals with stitches on the top bed. The starting concept working in Numbers 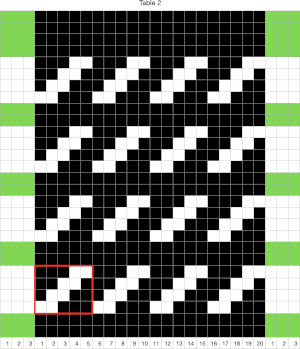 In slip stitch patterning the white pixels slip, the black pixels knit. This repeat is 20 stitches wide, so not usable for a punchcard machine. The first draft is 20 stitches wide by 32 rows high
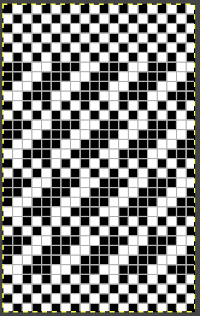
![]() The test swatch:
The test swatch:  Any adjustments in the dark color stripe between will need to be made within the repeat itself, the floats in the light color will be wider by using a simple color reverse. The color reversed, modified repeat is now 20 stitches wide by 28 rows
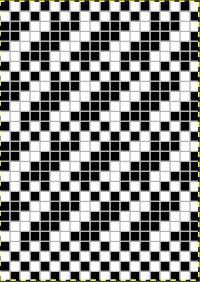
![]() The test swatch was executed using the same red/yellow yarn combination, then in black and white using different yarn thickness and tensions.
The test swatch was executed using the same red/yellow yarn combination, then in black and white using different yarn thickness and tensions.
The width of the spaces between stitches on ribber can be varied, creating shifting size “window panes” resulting in a knit fabric with a very different aesthetic.
The reverse surface is not particularly exciting. 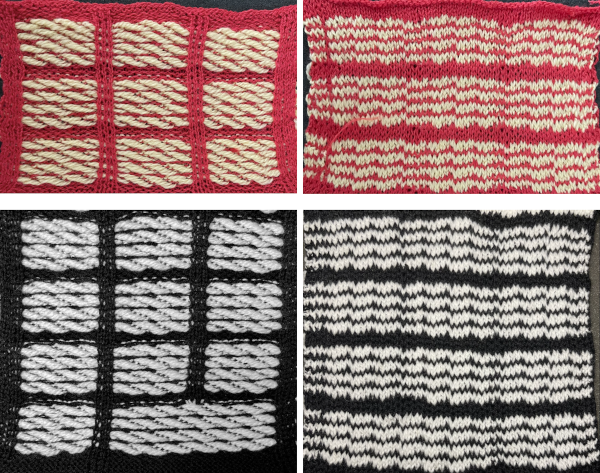 A comparison to the mirrored original inspiration, likely knit in thicker yarns
 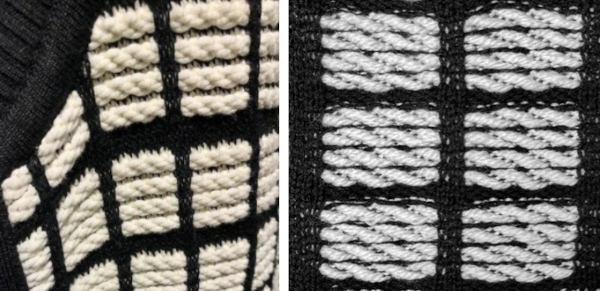 The knitting process: with any textured or very lacy knits casting on and binding off require special consideration.
In test-swatching, knit the pattern single bed first to sort necessary tensions and visual appearance, follow with plain knit rows using the dark color,
use the ribber cast on comb to poke through the knit, hang ribber weights, bring needles into work on the ribber, stitches will be formed on it with the next pass. The ribber stitches need to be knit as loosely as possible, test the rib pattern and tensions.
If using only the coupled knit and ribber carriages, the first preselection row is made toward the color changer from right to left, the dark color knits first.
Needle pre-selection changes serve as guides to both color changes and to carriage setting changes on the ribber.
After every other needle preselection, the dark color knits with the ribber set to knit.
When the needle preselection changes to the alternate patterning, the color is changed, the ribber is set to slip in both directions. The main bed only will knit, in this instance, for 4 rows each time.
After every other needle has been preselected again, the color is changed to dark, the ribber carriage is set to knit in both directions, the process is repeated throughout.
I used a modified KC sinker plate and a second knit carriage selecting needles as shown in the 2018 post
A possible alternative for casting on a finished piece:
cast on every other needle rib from right to left
knit 2 circular rows, followed by an all knit row, the carriage will be on the left side once more
transfer all ribber stitches up to the main bed, bring up the desired needles on the ribber to pick up loops for new stitches before the next pass, with the first and last needles in work on the ribber.  Read the first row of the pattern, cam set to KC1 to ensure end stitches are knit when patterning occurs only on the top bed.
Knit to the left.
The first stitch on the left may need to be filled picking up a ridge from the stitch above it to form properly.
The knit carriage is now set to slip in both directions and knitting continues as described previously.
Once a pattern is set up, the same design can be explored in different ways.
Here the swatch was knit in a single color with the ribber set to knit in both directions on every row.
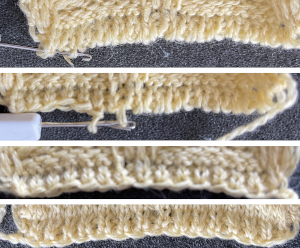
Because there are many more rows on the ribber knitting than on the main bed, the vertical line created by its stitches is not smooth and is forced up at the top of the piece, creating a wavy edge. 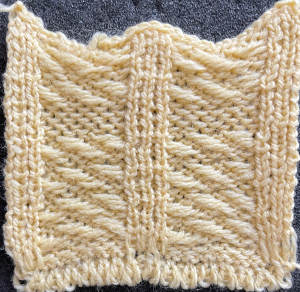 The cast on was deliberately loose. To tighten it up at the edge of the body of a narrower knit, every other loop can be picked up with a latch tool or crochet hook moving toward the yarn end at the cast on edge and is pulled through the previous one, producing a chain stitch. When the end of the row is reached, the yarn is pulled through the last chain and secured.