I usually try to leave opinions out of my shares, but this post includes some along with “don’t do what I did” tips.
This was a pattern available for sale decades ago, sold directly to customers. At frequent intervals over time questions come up in forums as to possible DIY techniques and methods of design and execution to create the knit, or similar, followed by speculation.
The images from the ads online are small. 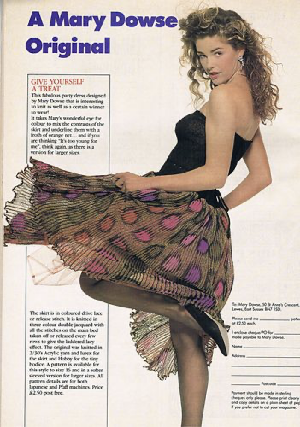 Trying for a bit more detail, there is a see/peek-through quality.
 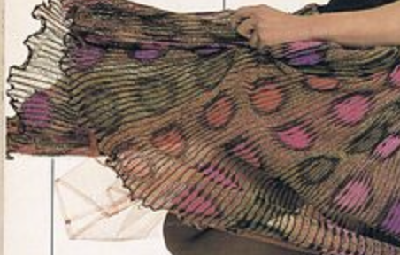 At first, I thought it might be a version of the stitch using 3 colors, but later, looking again, I came to believe it to be a 2 color drop stitch fabric with a dark constant motif color creating the donut-shaped designs with changes to three different colors in the background.
I am planning to execute the fabric as a modified end release, releasing stitches at intervals based on needle selection.
First flub: I was thinking of this as an addition to a prior post, and I got happy cleaning up and deleting stuff. Getting here I realized some of that stuff had to do with the original repeat used and the gimp layer images illustrating the steps used to obtain my repeat.
It is possible when that happens to reverse construct the images. That brought me back to this image, 20X16, drawn as less of a circle since the fabric technique will lengthen the design. ![]() It is scaled double length to 20X32 for processing in layers.
It is scaled double length to 20X32 for processing in layers. ![]() Though the image is far too small to help define the quality of the stripes between the circles, the goal here is to include areas of solid stripes in drop stitch in the alternating colors between the shapes. All white pixel rows will not create long stitches on the top bed, only all knit rows only on the ribber, not the intended fabric.
Though the image is far too small to help define the quality of the stripes between the circles, the goal here is to include areas of solid stripes in drop stitch in the alternating colors between the shapes. All white pixel rows will not create long stitches on the top bed, only all knit rows only on the ribber, not the intended fabric. 
![]() The tiled repeat:
The tiled repeat:  I wanted to add solid color drop-stitch stripes, the solution being to add all black rows. Every needle will select every row in those areas, colors are changed every two rows, creating the desired effect when the corresponding stitches are dropped.
On any row where every needle is preselected, all needles can be pushed forward to E position dropping the whole row of stitches, and needles are pushed forward to E again after the release so that the second row of loops composing the stripe will be created on the top bed on the next pass to the opposite side.
My final png planned as a single motif test on the 930 is modified to 46 stitches by 72 rows. ![]() Imagining the 2 colorwork in repeat, estimating if the pattern and ground fall in the proper place
Imagining the 2 colorwork in repeat, estimating if the pattern and ground fall in the proper place  A visual summary with an added color change column and row numbers with rows on which dropping all loops can occur marked with different color numbers. In this case, the ground is in the dark color, the shape in the lighter one.
 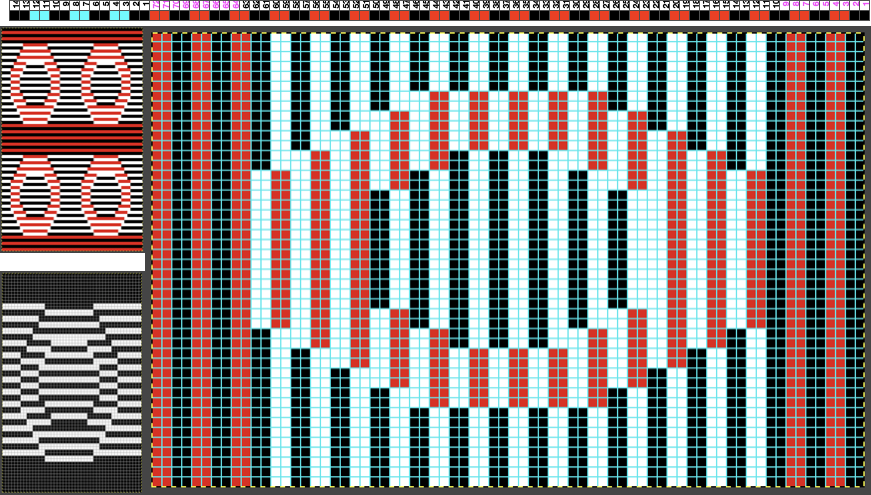 Determining whether the shape or the ground stripes knit the dark color is simply done by beginning the first all knit rows with the dark color or the light.
Getting to the knitting: the yarn I am using, knit at tension 4/5, is significantly thicker than that recommended in the ad for the pattern.
When every needle knits every stitch on either bed, adjustments need to be made in tensions used approaching that used for the yarn when knitting stocking stitch single bed. Brother ribbers also tend to knit tighter than the top bed.
When working every needle rib with sporadic needle selection on the top bed, it takes a bit of testing to find the ideal tension so that stitches are formed and knit off properly on either/both beds.
When lots of needles are being knit on the top bed, the carriages are likely to become harder to push.
A far thinner yarn would change the scale of the overall design even if using the same repeat.
The first swatch encountered aargh moments.
A: the color changer was frequently trying to share 2 colors at once. When I attempted to change the design color, the yarn got caught around a gate peg at the start of the row, and the knitting dropped to the floor.
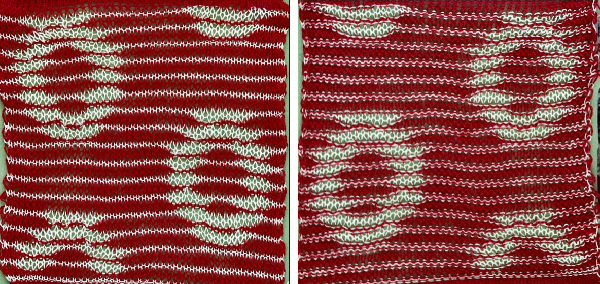
B: testing reversing the colors. When the dark color was switched to red, C, the contrast and definition of the newly forming “circle” was not enough to my taste. 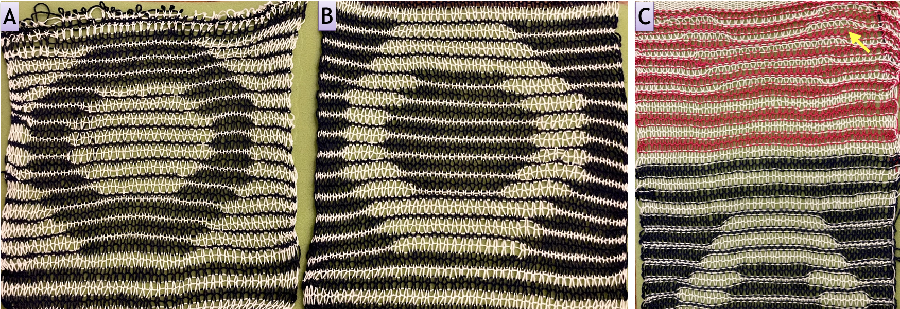 Giving it another go, the theory worked, the details in the fabric underneath the swatch can be seen peeking through,
 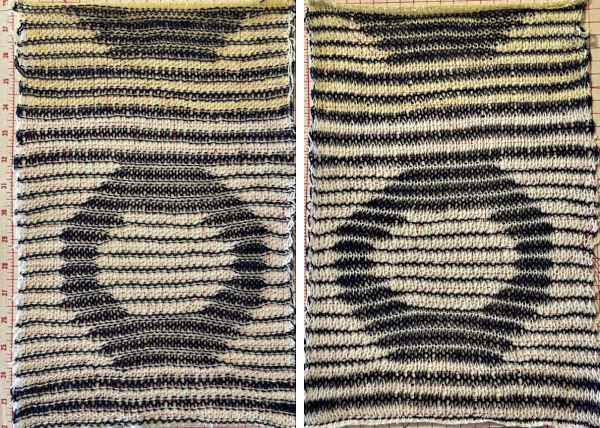 but I would like to have stripes in the solid lighter colors as opposed to 2,
  and more space between the shapes. A new, untested draft is now 50X76
  but those rows for the solid colors need to be rendered again with black pixels.
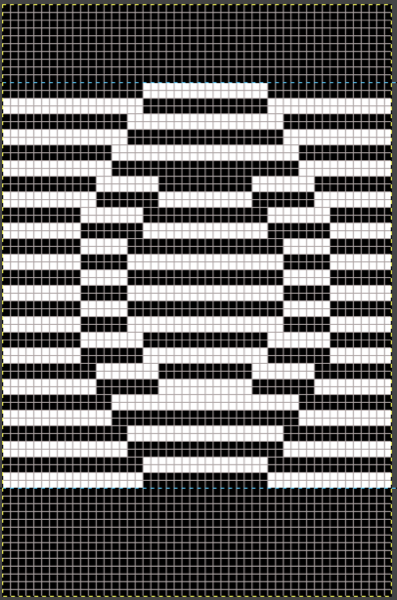
 Here some of the peek-through quality of the fabric is shown again. When any fabric is gathered sideways, it is likely the repeat will appear narrower and longer.
 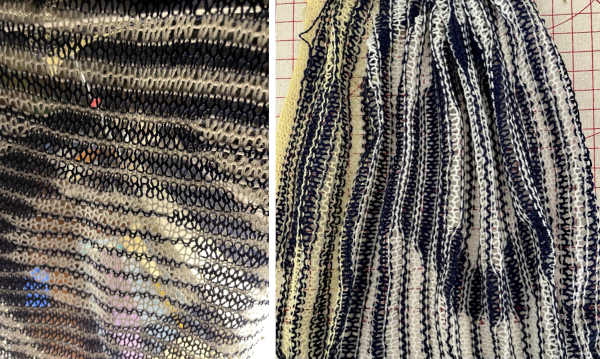 Using a 16/2 cotton at nearly the same tension produces a fabric that is even sheerer.
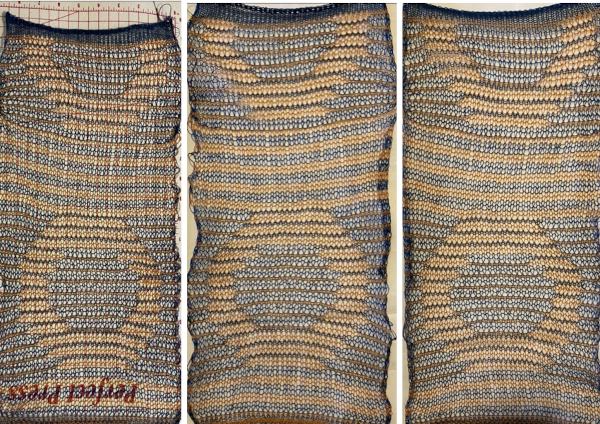
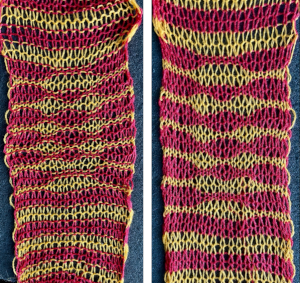
 And now those solid stripes in 2 rows knit are really bothering me, thinking they should be switched to only one row of loops, making the original repeat without those added black rows the better repeat?
 ![]() Only one of the two colors would pick up loops, with the second knitting 2 rows on the ribber only. Aaargh! So what of this?
Only one of the two colors would pick up loops, with the second knitting 2 rows on the ribber only. Aaargh! So what of this? ![]() Different day, yarns used before, same tensions, a very different result. The colors look different because the sun is finally out and this photo is taken in natural light as opposed to weird artificial lighting. The navy color is slightly thicker than the white, the single dropped row is not immediately visible. Stitches were dropped on any rows after all needles flatlined, and they were returned to B position prior to the next carriage pass.
Different day, yarns used before, same tensions, a very different result. The colors look different because the sun is finally out and this photo is taken in natural light as opposed to weird artificial lighting. The navy color is slightly thicker than the white, the single dropped row is not immediately visible. Stitches were dropped on any rows after all needles flatlined, and they were returned to B position prior to the next carriage pass.
Lo and behold the joyful experience of having yarn break when the stitches are pulled in order to drop them! 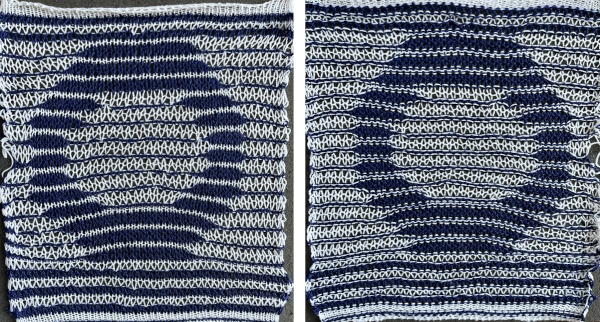 A potential use is for the thinner knit is for it to be used as a layer over a different pattern or the same design as seen here, in the thicker yarn
 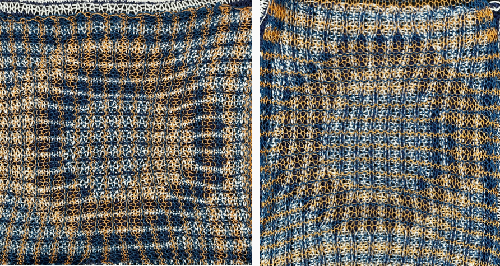 I have never been a fan of this fabric, and for a while.
To my eye, all over geometrics rather than floating forms on solid ground are more attractive, one such sample: 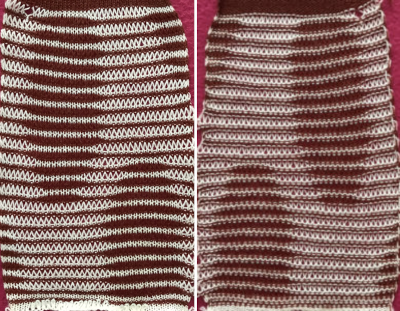 seeking a rounder, smaller donut shape:
 ![]()
 The red is a thicker yarn than the pale yellow, the fabric had an interesting slight curl evocative of shadow pleats. Other possible changes include the elimination of the top and bottom row in the original design.
 What seems a possible easy fix is not. The above repeat knit creates an elliptical shape rather than a circular one
 ![]()
 A more stable fabric with areas of stitches dropped for a single row in each of the alternating colors.
 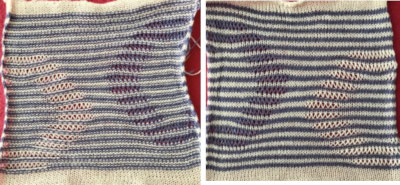 How to for both are found in the post.
I need a break from long stitches for a while, though this is yodeling. Never say never. ![]() It takes time and effort to develop any fabric to the point where it is considered a satisfactory one, let alone to write and publish accurate patterns using the technique. People who do both deserve to be paid for their time and effort, and are due respect, so no sharing if the pattern is copyrighted or is an original one available for sale presently online is proper.
It takes time and effort to develop any fabric to the point where it is considered a satisfactory one, let alone to write and publish accurate patterns using the technique. People who do both deserve to be paid for their time and effort, and are due respect, so no sharing if the pattern is copyrighted or is an original one available for sale presently online is proper.
That said, techniques or merely repeats are not subject to the same “restrictions” and certainly may be adapted for use in different, more personal, or new ways. If an item like a scarf is made using a particular needle arrangement and texture and someone else makes a dress using the same stitch type but shaping pieces, adding details, pattern instructions, the scarf maker, IMO, cannot really claim their work has been copied.
To my mind, credits when sharing anything if available are a matter of courtesy.
Another garment illustrated in the FB comments on the last search query for the Dowse pattern or similar fabric was created with FI shadow pleats. Shadow pleats rely on the contrast between thick and thin yarns to create folds. The double density in the traditional FI segments and the subsequent shift to using thinner yarn for the second color still have floats on the purl side of the knit and are unlikely to produce a sheer knit.