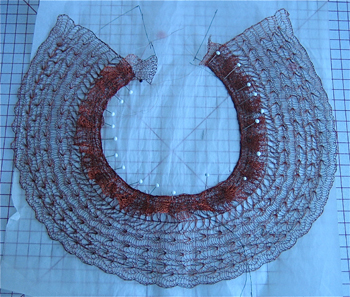
This post was written originally in 2011, in one of my lace “phases”, with test swatches knit on a 910 using a mylar sheet or on my 892E Andare Brother punchcard machine. Early on many of the posts were used to record what I had made, sometimes providing the repeats, but not usually step by step instructions. The shares were intended for anyone with previous experience who might want to create their own version of such fabrics. Now in 2020, my swatches are usually knit with download cables img2track on a 930 or less frequently on a 910 using ayab, via an iMac. In revisiting those early posts I sometimes find myself wondering about the content and how their fabrics were achieved. At the time, as now, I tried to respect copyrights. Since then many machine knitting publications are now downloadable for free online and I began to include information from them, and when possible, links to the source.
There is an excellent online resource for the Bond Machine. Techniques are applicable to other KM models for those who enjoy hand techniques. The round lace tablecloth series provides a number of “doily” charts.
The slip setting in both directions is used on the KH for automatic shaping, end needle selection is canceled. It is critical that carriages be off the machine and on the lace extension rails while the alternate carriage is in use as they both engage the timing belt. The latter can be broken if pulled in opposing directions at the same time.
Comparing a pattern on 2 machines: one of the critical differences when using 2 carriages to select patterns, is that on electronic machines such as the 910 or later models, with each carriage pass the design repeat advances one row. With Brother punchcards, the first pass of the second carriage does not advance the card as it makes its first “trip” from the opposite side, the previous preselection and function are repeated.
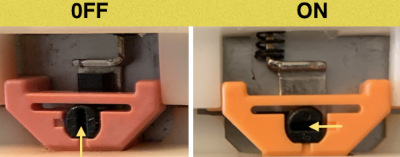
When operating the lace carriage on a punchcard machine, one of the critical differences is that the preselection row from left to right made with the lace carriage is performed with the punchcard not locked as usual, but rather, set to advance normally. From: 
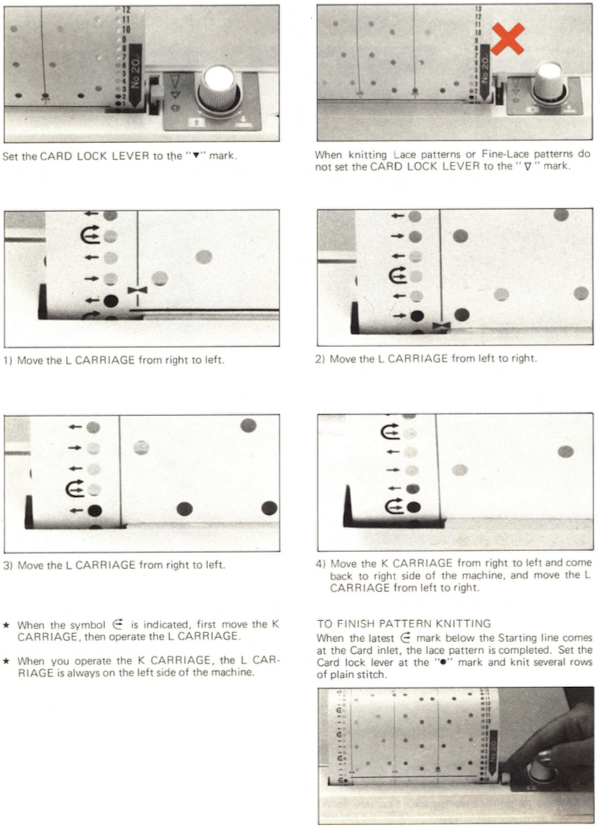 Any circular knit that is shaped with sideways holding segments will need to be seamed when completed. Taking that into account, at least one row is knit with “doily” yarn from left to right after several rows are knit in waste-yarn before the transfers to create open stitches are begun. It is a personal choice and preference whether upon completion of the required number of segments to join by rehanging open stitches and binding off on the machine or grafting (the method I prefer) with the work off the machine after several rows of waste yarn and dropping the work off the KM.
When 2 carriages are selecting needles from opposite sides, the “rule” as provided in the manual is broken, the card starts in the locked position on one side, is released when it reaches the opposite one, as is standard in knitting other stitch types. In this chart, patterning begins with the locked reader and the LC used for the initial preselection row 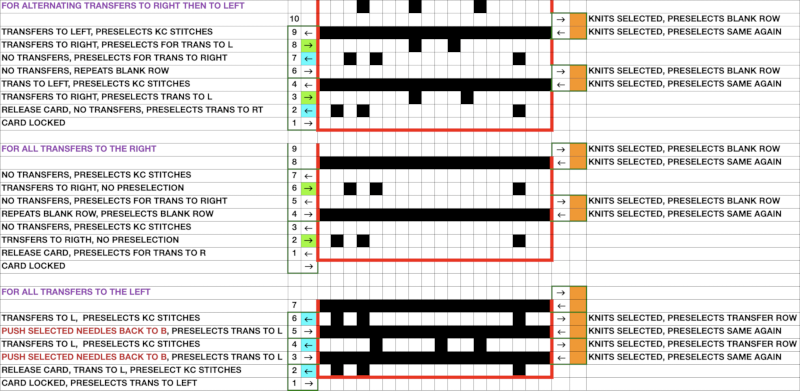 Beginmomg with the LC on the left, the end needle selection is canceled. The two positions in LCs for both punchcard and electronic KMs
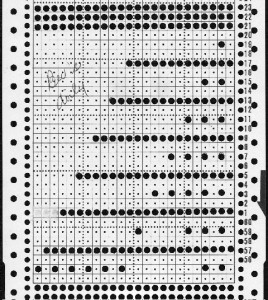
 Back in 2002 exchanges with a fellow member of an Australian Yahoo Group, OzMKers, led to her final edit of this half punchcard repeat for the test doily. All transfers are in the same direction, to the right
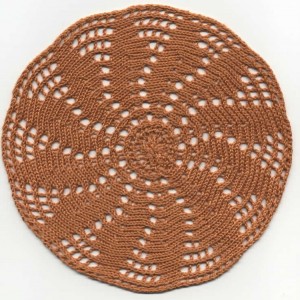
 A 24 stitch sample, knit in cotton yarn. The center of the circle needs to be managed as opposed to simply gathering it in order to keep the finished shape flat.
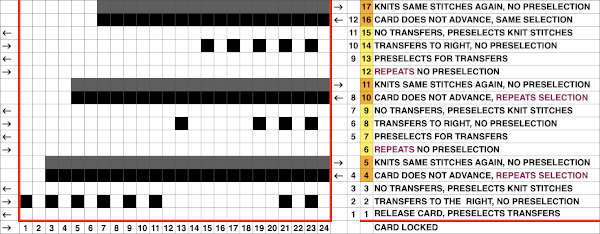
  It is possible for the lace carriage to transfer while at the same time preselecting every needle to be knit by the next pass of the knit carriage from the opposite side. An expanded view of part of the repeat:
  In order to get the repeat working properly, I found I needed to edit out one of the punched holes at the start of each repeat, revised card
 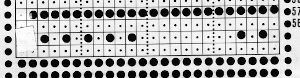 The original and the amended start of each segment are shown below, I skipped the extra knit rows numbered 21-23 on the original punchcard with the intention of eliminating extra knit rows at the very center, making the circumference at the closure of the doily smaller. I prefer to start with knit rows, in which case the first preselection row would take place from the right. Note that lace transfer marks are directly on top of the solid lines representing knit stitches
 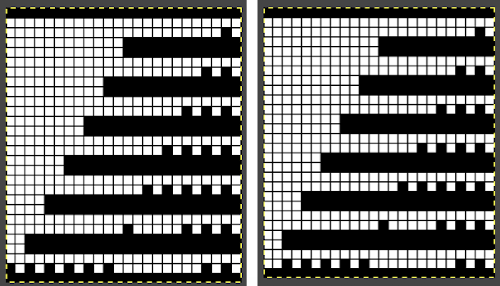 If drawing on the back of mylar for use on the 910, either image may be drawn as is, with the number 1 pattern case “A” selector reverse lever to up position.
Repeat design principles are shared in creating edgings, ruffles, and more.
The amended 24 stitch repeat with all transfers to the right knit on the 930 after a few rows misstart. The download is automatically mirrored. The end needle cancellation setting on the 910 LC for the pattern to work properly with the carriage in use. 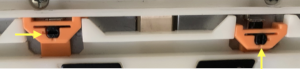
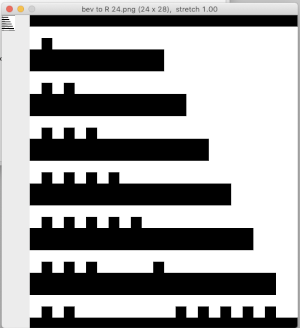
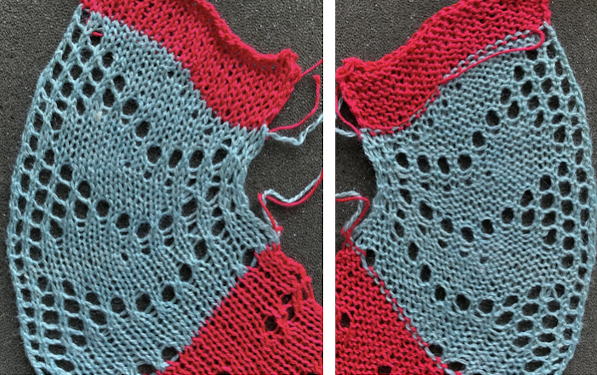 In turn, this repeat as given was used in 2020 for a pattern test on my 930 for all transfers to the left. Note: here the knit stitch black pixels are followed by a blank row, and the transfer marks occur on design row 3, directly below the next series of all black pixels
 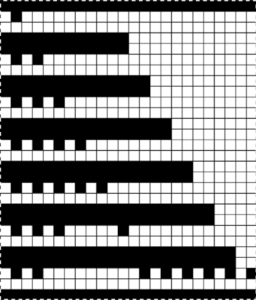 Depending on the machine model, the .png for the repeat may, in turn, need to be mirrored horizontally.
The preselection row for my test swatch is from right to left, using the knit carriage (KC). All black pixels will preselect needles. When the left side is reached, the KC is set to slip in both directions and will knit all preselected needles on its way back to the right. Subsequently, the slip setting will be performing the function of bringing stitches in and out of hold opposite the carriage. Each carriage pass advances the repeat one row. The lace carriage preselects for transfers from left to right, transfers to left, and preselects for the next knit row as it returns to the left and onto its rail. 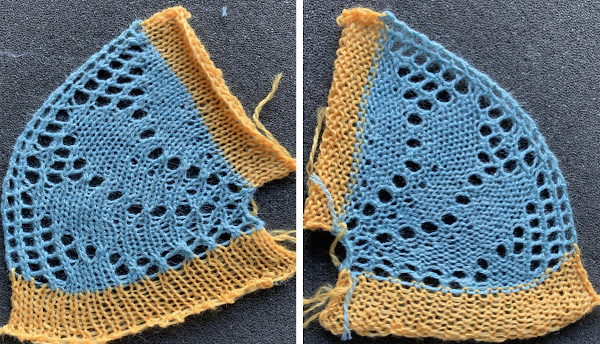 A 40-stitch adaptation from the Bond site to try
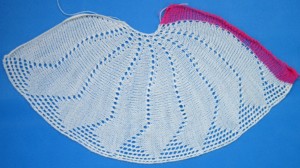
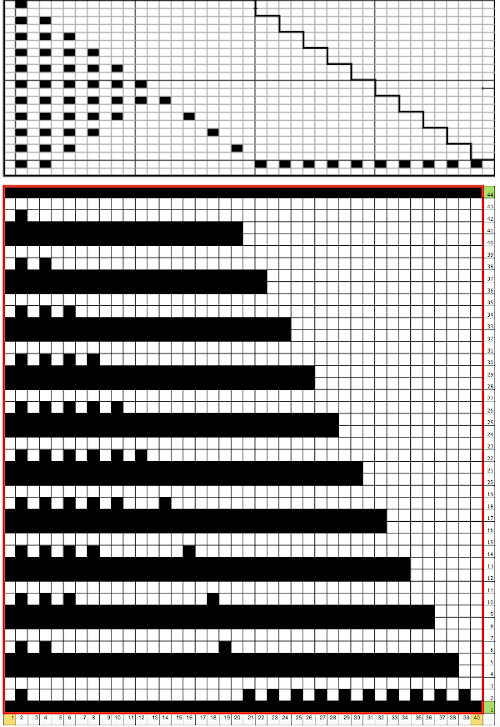 A 60-stitch repeat also inspired by the Bond post knit on the 910 using a mylar. Gauge still matters, more than the recommended 16 sections to form a full circle would be required using this particular yarn
  The electronic repeat as drawn on the mylar,
 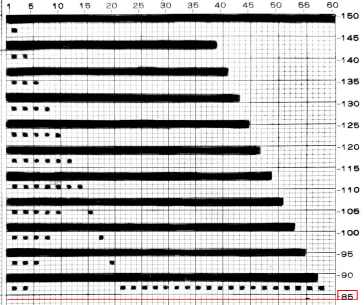 the 60X66 png
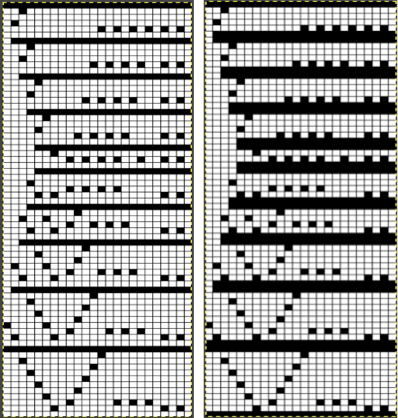
  In the post on lace edgings automated with slip stitch on Brother machines written in 2020, I shared a modified version of a punchcard published by Susanna Lewis in “A Machine Knitter’s Guide to Creating Fabrics” (1981), the ultimate resource for punchcard knitting for knitters with any amount of experience. The chart on p 223 was modified by me since I like to start my lace edgings on the widest number of stitches in the pattern. The punchcard repeat on the left below is shown after being reorganized to start with a knit row on the full 24-stitch width. On the right, rows of black pixels are added, for a version of the full repeat to be used on electronic machines. The slip stitches are substitutes for manual holding techniques, used to knit rows that are in turn form increases and decreases to alter the outside edge of the trim. The lace pattern resulting from the transfers changes along with their direction as the outside edge does. This image is for the desired effect on the purl side of the fabric. Again, depending on the electronic model or the download program, it may in turn need to be mirrored.
  Subsequent posts on knit edgings:
Lace edgings on Brother machines- automated with slip stitch
Lace edgings on Brother machines- automated with slip stitch 2
From automated lace edging patterns to doilies and ruffles