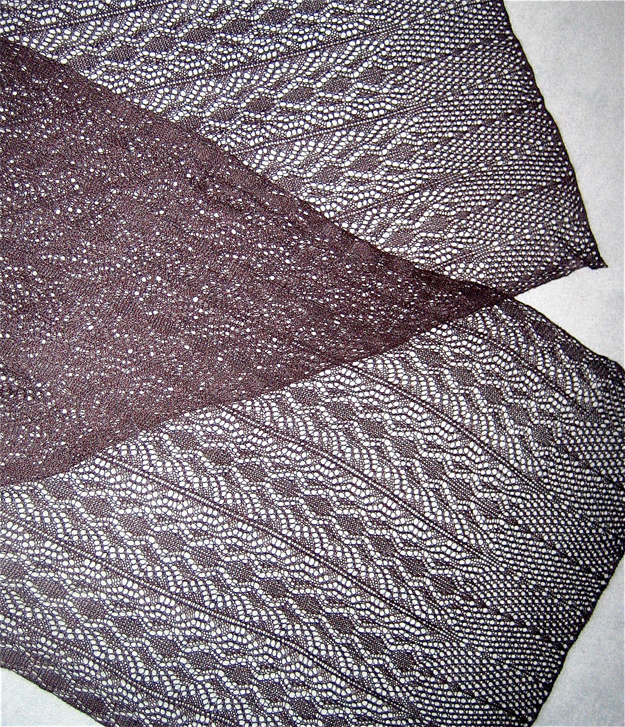
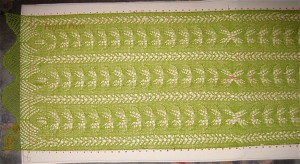
Back to leaf lace, add rib, and take it to the Passap

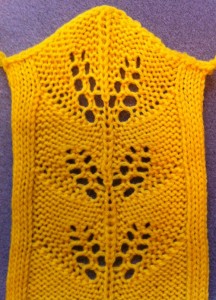
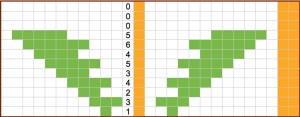
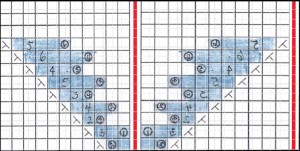
The chart below represents the working repeat for a twin leaf that incorporates ribs in fabric. Golden color represents needles in work on ribber or Passap back bed, the numbers in the center of the graph the number of needles moved away from the center column, toward the wider rib on each side of the repeat. All colored areas within the red border represent black squares on mylar, or single palette color in SP, wincrea, or your means of downloading. The addition of electronics allows for a wider repeat. Air knitting on any machine will help make the selection needed for transfers to the opposing bed. On the Passap use Tech 129 and color reverse. This results in pushers corresponding to each colored square being selected to their up position: they then in turn may be pushed up slightly to help track the needles that need to be moved. The wider ribs on the sides make it easier to identify repeat center: again, transfers are made away from the single needle, toward the larger group. The front lock stays on N throughout. Pushers corresponding to needles on the back bed, not in the twin leaf pattern areas, need to be completely out of work. The back lock also knits throughout.

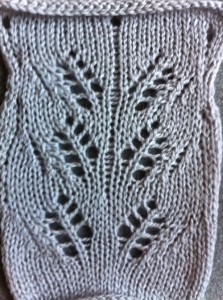
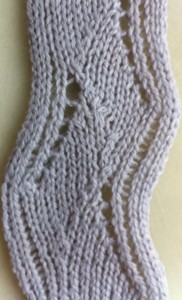
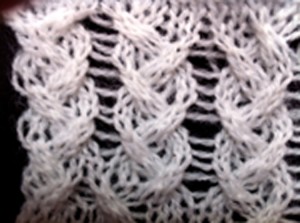
the resulting repeat: knit side

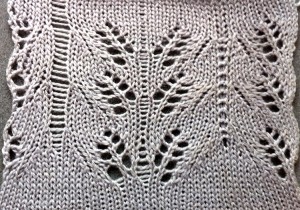
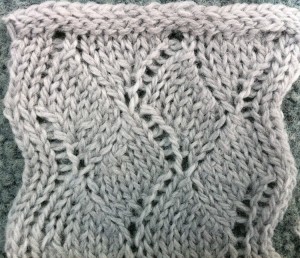
the repeat’s purl side

Having only 3 needles at each end of the chosen number of repeats knitting on the ribber or back bed will create a small rolled edge on each side of the knit, using the irritating property stocking stitch has of curling to purl side to create an “edging”. I have multiple stitch transfer tools for Passap but found I did much better avoiding dropped stitches doing larger transfers in two moves of fewer needles.

The graph may be modified for use in other electronics. Here the gold represents needles out of work that create ladders. The two stitch ladder helps with definition and with tracking direction of transfers. With ribbers in use cursed dropped stitches and holes may not be noticed until it’s too late for “repairs”. Again the center numbers reflect the number of stitches requiring movement on that particular row. All colored squares are used for “drawing” the repeat in the design program or on the mylar.

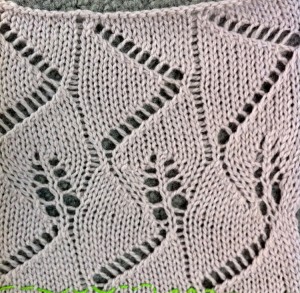
There are many designs available for machine knit leaves that align in a regular, vertical manner. The more varied shapes require a large number of transfer rows for each row knit. One such variant is this:

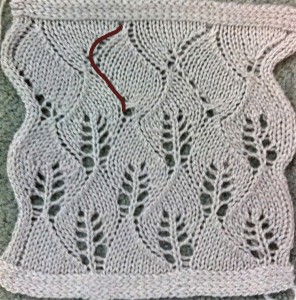
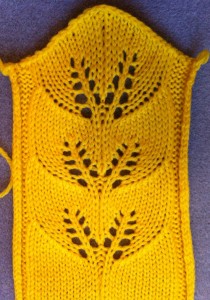
a second effort with more ladder experimentation

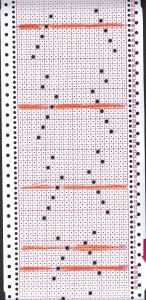
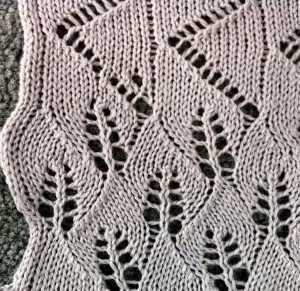
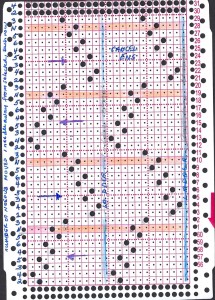
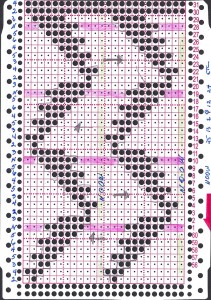
The result is definitely not a twin, but rather a distant relative of the twin leaves, more akin to wheat or fern lace. The design works within the punchcard 24 stitch repeat limit. A central ladder again helps definition. Latching up the ladder on the purl side made it disappear. Playing with ladder spaces between full repeats can vary the fabric considerably. This is the self-drawn card used for the swatch, the horizontal heavy lines indicate where the 2 rows of knitting occur. The card uses up the whole 60 rows, all punched holes are identifiable with corresponding row numbers, the card was a touch too long for my scanner.

Patience is a requirement, and yarn color that allows one to see what is actually happening to stitches is a recommendation.
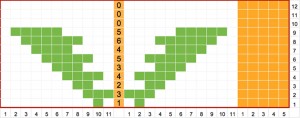
Filling empty needles after transfers

Trying to get a movement in the fabric for an upper and lower border, echoing that of the leaves, I came up with the solution below. The first set of graphics represents how to fill in an empty needle, the pink again is the view as it may be on the KM, and the empty needle is filled in by picking up the purl ridge of the adjacent stitch.

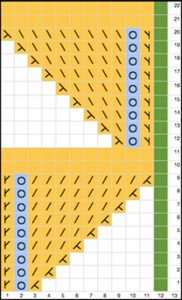
Working with the 12 stitch repeat used in the previous samples: the green here represents the out of work needle, the golden color the stitches involved in the transfers, with the addition of 2 all knit rows at the top. Moving stitches on these last 2 rows is optional. The circles on blue represent the needles that are temporarily emptied with each move, then in turn filled as illustrated above. A single row of knitting remains along the ladder edge, keeping the ladder space smoother and free of uneven holes.

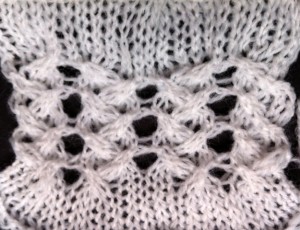
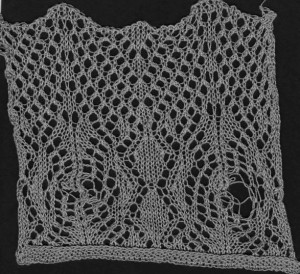
Those lace holes may be kept to create a very different fabric, as seen in the sample below, which includes some operator error. Transfers take place every 2 rows to allow formation of stitches on the emptied needles.

Other variations ie. repeating transfers from same side in reverse order atop each repeat, etc., vary the look and slant of the swatch. Understanding how the lace carriage works will help explain why some types of transfers do better in the realm of hand techniques.

More on those slanting lace leaves

What follows is not a formal pattern, rather an illustration of the process I sometimes use to solve needs in my own knitting.

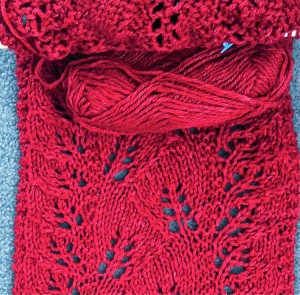
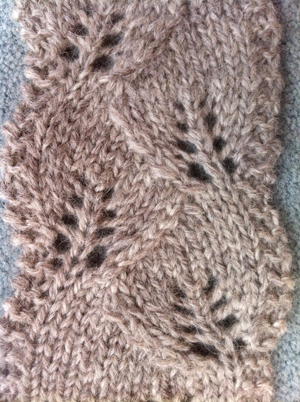
On 2 needles and growing my version of the HK slanting leaves scarf: knit on US #8 needles, yarn is 60%silk and 40% wool

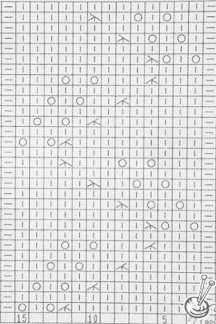
hand knit graph to download

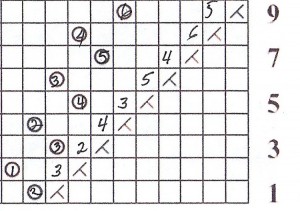
Translating this pattern for use with lace carriage is impractical for a range of reasons.  A beginning analysis of the pattern for possible hand transfer or for development of a “cheating” punchcard  for use with hand techniques is seen below. Numbered circles = stitch placement in repeat where the lace hole needs to occur, the second number illustrates the number of stitches that need to be moved over on the needle bed and the direction of the move

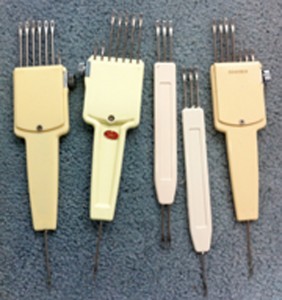
Bunches of these help, the multiple transfer 7 prong tools were made and marketed for Brother, Studio, Empisal (4.5mm), and even Passap at one point (needle space on Passap is different, they also had a wider range of transfer tools than those for Japanese KMs)

tools of the trade in required transfer configurations

sample knit from looking at a graph

first punchcard to help with needle selection:

Numbers on left show how many stitches need to be moved to create the hole in the place where the needle is selected; they do not reflect design rows directly, since the card is read seven rows below eye level; large arrows indicate direction for moving stitch groups, with the horizontal colored stripe showing the beginning of each new transfer sequence; vertical blue rows show placement for needles out of work, and the resulting ladder. The garter stitches in the hand knit have been eliminated.

The above card worked, but if one has a bulky, limited prongs on transfer tools, or short attention span an even easier approach might be to have all needles placements required for move on each row selected

the second punchcard

Now come attempts at a possible border trying to “match” top and bottom of knit: would prefer not to have  to deal with issues of mirroring in center  vertical and  horizontal axis of scarf to get top and bottom to “match” . There is enough else to track.

not liking the size of the ladders

The swatch below is a bit closer to “like” and to eliminating the ridge at the center of the “triangles” that is formed if transfers occur in the usual manner and “hole” is then filled in with a purl ridge to eliminate it. The “ladder line” below is marked, showing results from different attempts to fill in the empty needles resulting from moving the stitches. Top and bottom edgings are created by chaining as one would do a chain stitch cast on, behind the knitting on the needle bed, in front of the knit side of the fabric. If knit on the bulky a garter edging could be hand knit first, placed on the KM, the piece knit in turn, then taken off onto HK needles again for adding garter stitch rows at the other end.

Getting closer to goal: ladder space more uniform, “linked” border rather than chained one above, still need to sort out how many repeats without the leaf lace “veins” to work at top and bottom of “scarf

HK and MK variants of leaves may be found in a variety of sources. Some HK samples include a twin leaf verion. A very quick sketch of a possible adaptation for use with punchcard development as described above, using the 24 stitch repeat limitation, red = NOOW follows

one trouble spot: Row2, where 2 holes line up one on each side of the “ladder”

Back to lace

Recently I came across a photo in a magazine with what I thought of at the time as an unusual knit leaf. One of my first instincts upon viewing such patters is often to explore whether I might be able to reproduce the knit on the machine more quickly and whether in addition there may be a way to “automate the design” by coming up with a repeat that would work with the use of the lace carriage. I will share some of the many ways to explore such transitions in a series of posts. As written they will specifically apply to knitting on Brother/Knitking/Taitexma brand knitting machines.

The original “culprit” pattern:

One way to interpret those triple stitches leaning to the right and left in HK is to knit three together for right-leaning, and slip, knit two together, PSSO for left-leaning on RS (“right” /knit side). The same steps on the KM would involve moving around those triple stitches to achieve the correct lean of the leaf edge on the knit side of the fabric. The number of rows for transfers to achieve a similar look makes the fabric impractical to knit using a lace carriage on the KM, so back to hand knitting.

In yet another instance of “it’s a small world” since I first came upon the repeat and began looking for interpretations, I did find several hand-knit patterns on Ravelry and some magazines using the same or similar motif.

The pattern repeat in my first hand-knit sample in a 4.5/inch gauge wool

In turn, this led to my developing my own repeat design, which is now on 2 needles, becoming a scarf for my granddaughter, which can be shared in the future.

I work predominantly on a Mac, OS Lion. Last year finally got turned on to using excel for knit design after finding excellent online tutorials such as those by Marnie MacLean and Fleegle’s blog. Over the past week I finally got around to playing with iWork, using Numbers instead of excel, and in conjunction with Pages have come up with final images such as the ones below. Am pretty much flying by the seat of my pants in this, so I can’t really share a step-by-step method but have been pleased with the instinctive qualities of the Apple programs and the results.

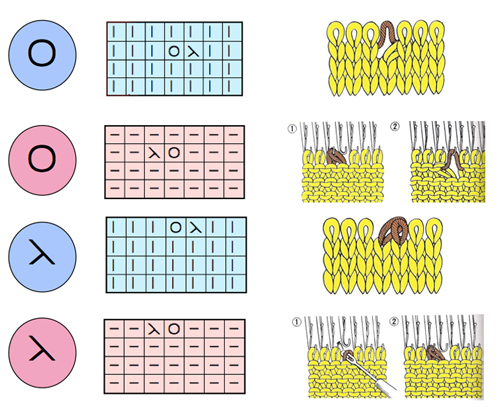
In subsequent graphs: blue represents knit as it appears and may be worked on the knit side, while pink represents how the knit appears and may be worked on the purl side, and as such on the KM to achieve the same design

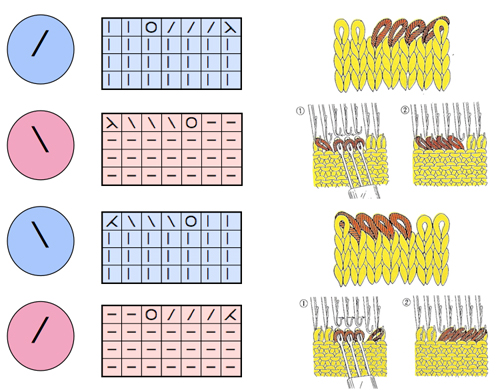
Common Lace transfers and symbols

moving multiple stitches

now: starting to play with a hand-knit repeat with the intent of translating it for use on the KM: triple stitches in one location in any single row are eliminated, as well as sets of double lace holes in any single row while retaining the diagonally slanting leaf motif

garter stitch will be eliminated by adding a needle out of work in its place, creating a ladder space between repeats; repeat will be adjusted to work within restraints of punchcard limitations in terms of stitch width and row height requirements, more on next post.

_____

A confession

I have to admit I can and do hand knit but now operate in life is short mode, and have decreased patience for projects that require a huge time commitment (relatively speaking) to complete. At a knitting seminar in the early 90s a demonstrator (who happened to be male) used to tour with a sweater he had “completed on the machine”  that had more than 3,000 (yes, thousand) cables in it: complex twists inside larger diamonds in turn formed by cables. IMO such a garment would be faster done by hand. One of the advantages in hand knitting is that errors are more easily seen since one has the opportunity to observe what happens on the knit side closer to the event. The fixed spacing on the machines that twists must travel can be a challenge in forming fabrics, particularly in all over patterns.

One possible solution is to combine machine and hand knit panels. Hand knit center arans may be joined to plain side and sleeves knit in stocking stitch on the KM (also a solution when larger sizes are required), and stitch patterns may be used in isolated areas or selectively rather than all over the garment. Patterning shifts in the knit/purl ground in garter stitch patterns may produce knit and purl “illusions” of shapes otherwise created by moving stitches in cables.

I have recently been playing with this crossing idea. The original intent was to try it out in an all over pattern in a brick repeat, and only one row of knit in between transfer rows. With yarn at maximum tension, after the first round of transfers the second round of them became impossible to perform. Am still at the drawing board, but the idea may well simply end with a 2 inch patch as opposed to anything larger. Wonder if Barbie is in the market for a lapghan?

Follow up: the new working repeat with 2 rows of knit between cable crossings

a test on standard KM: the ladders were a “surprise”, a by product of the distance the stitches were moved

the same fabric with ladder “floats” being hung on adjacent needles to diminish ladders and produce holes

the stocking stitch fabric top and bottom of this last swatch is considerably wider than its cabled portion, a possible consideration for trims or insertions based on this idea; “you can’t always get what you want” but sometimes one can still quite work with what one gets.

Holding and “cables”

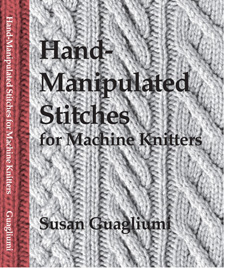
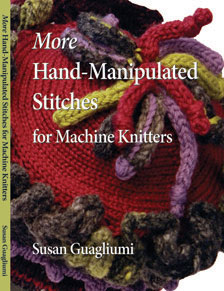
Susan Guagliumi has written 3 books on hand techniques on the knitting machine

her first classic

her previously most recent

published November 2014

Unknown

On her website, some of her articles and Studio KM publications are available for free download. Included are ones discussing a horizontal cable, two-color electronic cable. 11/12/15 Please note: the site now requires subscription and login, links, as posted here as they are, will fail to connect.

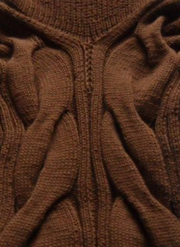
In creating large-scale cables in the past tension changes, supplemental threads, and other ways to compensate for moving a larger number of stitches on a metal bed (things start to get hairy when crosses become larger than 4X4) have been discussed. An interesting, clear, possible solution to produce textures or macro cables such as in this piece

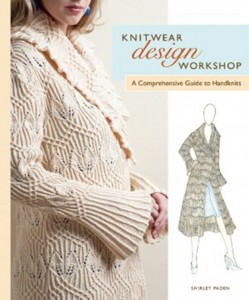
may be found in her books and may be viewed in her youtube video. Handknit interpretations that also add lace to the mix may be found in Shirley Paden‘s portfolio photos of garments, she is the author of


More low tech

I am continuing to sort out issues that might help make lace shawls, scarves, and garments that require a finite length of time in their actual knitting. Punchcard machines are friendlier than electronic ones in terms of picking up the pattern after interruptions, and visual cues when correcting mistakes are easier to track and see. I design knits in a way similar to the way I cook. With several sources and ideas in front of me, I pick, choose, and “go for it.”

My most recent blank punchcard purchase revealed that Taitexma (Brother clone company)  is now producing pre-numbered cards for machines printed in RED! Does not affect function, but is distracting to me visually. In the past, it used to be the color red vs blue card blanks was another distinguishing factor between machine companies. Studio cards are traditionally marked in red, Brother in blue (with pre-punched lace cards being their exception).

The cost of cards has increased, and punching lace repeats at least for me are prone to errors. In a previous post, I discussed my way of marking up cards to make the process easier. Now, however, I was searching for a way of working out repeats on something equal in size to the punchcards that would allow for tracing holes, shifting pattern centers, be easily edited, and provide a size-specific visual template when the final design is reached, thus avoiding lots of taped over holes and mistakes on the actual punchcards. This brought me back to the drawing board, literally.

While drafting a new post revisiting graph papers and more on 4/21/18 I created a new document, saved as pdf, that presently prints to scale for me scale card extra2

My latest shawl

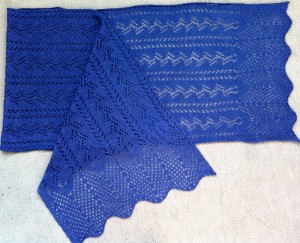
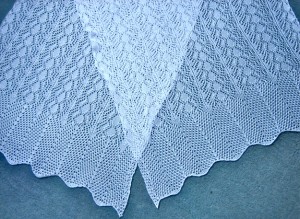
Still working on lace pieces, sorting out the differences and issues in this knit fabric type. My shawls are one-of-a-kind or limited edition items. The fiber content and finished sizes vary.

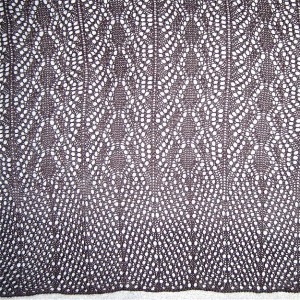
This is the repeat as it may appear in a hand-knit lace graph. Not enough symbols in Knitbird, the design was achieved by using the Aire River knitting font, and applying appropriate symbols to an excel grid

border transition detail shot

the shawl

So many ways to add to my grey hair

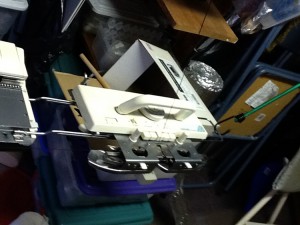
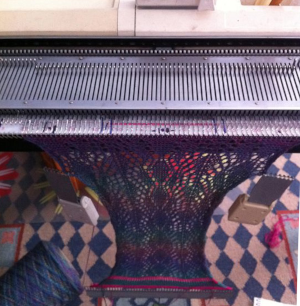
I am trying to knit a shawl in the latest lace scarf pattern repeat. Using most of the needle bed is making it necessary to take KH far off the end of the KM, ergo the bungee cord (which may keep the extension rail from going out the window with the KM if I reach the appropriate frustration level).

Knitting in black is great on aging eyeballs! My studio is my attic space, and as can be seen, this punchcard machine is nestled at the moment in a very “neat” corner of it. I own 2 lace carriages for Bro punchcard machines, one is appropriate for this KM, the other for a later model. The usual mantra is not to exchange carriages between models without cautious evaluation, it is sometimes simply not workable. For lace, I found the “correct” carriage drops stitches easily, the “incorrect” one is harder to push, but drops far less often.

I mark the punchcard rows on which the arrow markings occur/ need to be placed by drawing across that row with a colored pencil; in addition to serving as a reminder for when the knit rows with the opposing carriage need to happen, this gives me reference points for the beginning of each transfer sequence for correcting mistakes when unraveling back to last knit row. Because this lace is much more labor-intensive than that used in the previous shawls the plan is to knit in a border at its top rather than on rehung open stitches, one at a time, sideways (this can take several hours and a lot of patience).

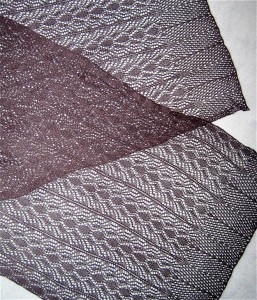
More lace thoughts: lace repeats don’t necessarily have to begin on row 1 of any repeat.  Here I chose to begin on RC 33 of my card so as to “go” for complete diamond shapes centered on the bottom and top. If the first knit row of the scarf/shawl is rehung at half of the desired finished length, a vertical mirror pivot for the lace pattern is created. When this is the plan, a contrasting thread may be placed where the 0 marking is on the needle tape, between the 2 needle ones (one of the brother oddities is the 2 needle one positions, R and L of 0) on the first row knit after the waste knitting; marking the needle tape with water-soluble markers along easily identified repeat points can also assure proper placement on the needle bed. When the knit is rehung for mirroring, the loop where the marker sits is placed on needle 1L, rehanging away from the center, every needle will be “filled”. Those needle tape markings may spare the grief of missing any stitches after rehanging, before removing waste yarn. On the standard KM single-width may max out at 18-20 inches. Steaming the edge that will be rehung helps make stitches more stable and visible prior to doing so. This is an image of a small border test with dropped stitches along with the mirror point, and a 2 gate peg bind off

With half the shawl completed, the snugly around 2 gate pegs bind off ran completely away from me (slippery rayon and black = o goody!) and it took a couple of hours to rescue the piece and get back in the pattern. The wavy border idea is now ditched in favor of not having a repeat of the above experience. My shawl will now have a far straighter top and bottom edge as a design feature.
The second half of the shawl is planned over the next couple of days. “Grecian formula” where are you?
…..
The final join was nearly invisible Part of half a scarf on the machine, there are added temporary markings on the needle tape for needles with specific vertical areas in pattern repeat,
while in this case, the pattern forms a secondary, mirrored single design at the center of the shawl
11/2021 Revisiting the approach to designing the scarves in the above method: begin with waste yarn and ravel cord, choose a pattern and an intersection for mirroring based on locations of all knit rows
Knit 2 or 3 rows, and place a yarn marker between the 2 number one needles at the very start of the piece. If 3 rows are knit, one is unraveled after the piece is rehung, being aware that the yarn end will have formed a knot that needs to be eased open before doing so
Knit the first half with LC operating from the left, add a border at the top of the planned pattern length if desired, bind off loosely
Rehang the open stitches using the marker as a guide to place the stitches back on the bed from the center marked spot out, the knit rows will be followed by transfers in the reverse direction. When stitches are rehung, a stitch is lost, so add one on the side on which that happens.
Turn the card over with the starting point for the pattern intersection clearly marked. For the first row of transfers to be made to the left, lock the card, make the first preselection row with the LC from left to right. It will continue to operate from and to the right for the top half of the piece while the KC will operate from and back to the left for knit rows between lace transfer segments.
Release the card. Knit in pattern to match the length of the previous half piece, add the border if planned, bind off loosely. Lace fabrics stretch in width when blocked.
This is not a true lace repeat, the design is only for illustration purposes