Mosaics and Mazes: knitting on the machines

Two great books on the subjects by Kathleen Kinder:

another article/printable PDF resource by Susan Guagliumi (this link no longer works, subscription and login are presently required on her site for access to her free pubs)

Susanna Lewis:  “A machine knitter’s guide to creating fabrics” pp. 71-78, 1986. “Designing your mosaics” and “Figurative designs in machine knitting” were published in To and Fro Magazine, and presented at Passap University app. 1992

Denise Musk: “The technique of Slipstitch” pp. 36-46 1989

Barbara Walker 
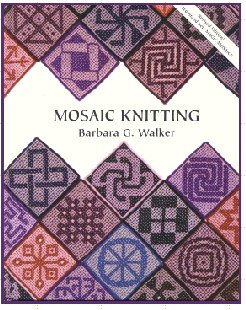
Mosaic knitting companion CD by Morgan Hicks 381 motifs “charted and converted for your electronic knitting machine or crochet, .pat or .pcx format”.

A DVD stitch compendium salute to Barbara and an interview with her. Most reviews online describe as it being most suitable for beginning knitters. For a treasure of her treasury patterns including some cable stitches, one may visit The Walker Treasury Project. The group’s photostream may be found on Flickr.


Large scale mesh, breaking rules

The goal is to produce a large-scale mesh without hand techniques or extra steps.
In both slip and tuck, every punched hole, black square in mylar, or pixel in electronic downloads that bring a needle out to D position (for some unfathomable reason Brother needle positions go A, B, D, E, poor C got skipped) will result in a knit stitch. In the slip setting the non selected needles get skipped creating floats, while in the tuck setting, the non selected needles will hold a loop in the needle hook until that needle is returned to the D position. Side-by-side loops are troublesome in any stitch type. That said, tuck can be employed to sequentially lay down loops in some patterns where the lace carriage moves to produce side by side empty needles as part of the planned design.

The usual caution with such fabrics: extension rails must be used since both carriages engage the belt. The yarn needs to be “friendly” enough to not break easily. Since stitches travel across a wider gap than in single eyelet lace, the tension needs to be looser as well. Small changes can make a big difference, and so can patience. If end stitches are selected prior to the lace carriage making the next row of transfers, push them back to B manually so as not to produce decreases or dropped stitches.
Working the punchcard on a punchcard machine:

The lace carriage is set for normal lace, preselects the first row of knitting with the punchcard not locked on its first pass to the right. The KH carriage is set on KC I with both tuck buttons depressed. Each carriage works in sequences of 4 passes throughout.
Actions performed by the carriages as they make their next pass to the opposite side:
Lace carriage 

COL: moves to the right with no preselection
COR: no transfers, preselects for transfers to the right
COL: transfers to the right, preselects transfers to the left
COR: transfers to the left, preselects for the first tuck row. There will be 3 single needles with 3 stitches on each of them and two empty needles on each side
Knit carriage:
COR: knits first tuck row, makes the same preselection
COL: knits second tuck row, preselect the next tuck row, on a different needle position
COR: knits third tuck row, in the alternate location, preselects for all knit row
COL: knits all stitches, preselects blank row

Some observations: the top bind off as seen in the swatch below, was tight for the fabric. To maximize its width, the bind-off should be around at least 2 gate pegs, even 3 if needed. This allows for completing the task on the machine without adding more work and adding hand techniques. Tuck stitch produces a knit that tends to be short and wide, lace wants to open up with blocking as well, so this fabric definitely will want to spread. The top approximate 1/3 of the swatch below was kit using the same white yarn but in standard single needle mesh, making the size difference in “holes” created with the tuck method easy to see. The white is a 2/8 wool, the other a 16/2 mystery fiber I usually use as waste yarn.

For me this experiment will probably fall in the “now that I’ve done it, broken several rules, and have a good result I am over it” category.


To block or not to block

Pattern repeats are sorted out, out of work needles correct positions critical, many false starts, then onto yarn crankiness. Two “shawls” are now knit, approximately 16 inches by 64 inches, one in off-white cashmere, the other in over spun wool. They are large enough to drape around shoulders, lightweight enough to wrap for warmth as scarves. Both required washing to remove sizing, are now very different in body and touch. My favorite way to “block” laundered items is air drying on a wool rug after a couple of spin cycles in the washer. I use pressing/steaming if appropriate to fiber, do have blocking wires,  but they have only ever seen daylight as substitutes if I “lose” ribber cast on comb wires. Next in this family will be a shot at knitting this item with a thin ribbon. Here is the completed drying twosome with their purl side public face. The Knit side is interesting as well, duplicating the hand technique swatch exactly. Yarn weights used are pushing boundaries for KM, knitting is extremely slow after design/yarn problems are all sorted out. Though this online post follows camera documentation that began yesterday, the actual process has occurred over the past 2 weeks.

A shawl tale

I have always been interested in mock crochet stitches executed on the knitting machine, have done a bit of experimenting in the past. The ones that are the most interesting to my eye are usually knit on the double bed, often making them reversible, which in turn may require hand manipulations. Browsing through old knitting magazines I came across this baby sweater and became determined to produce a similar fabric, in a manner that might be more manageable for production. In this instance the back locks are changed in sequences of 3, 1, with button changes, the yarn is fine. The first sample I produced was following the pattern stitch instructions.

The fabric as a hand technique, dropped stitches included

The challenge: creating a downloadable stitch pattern that will automatically select appropriate needles and duplicate this texture. Yarn used will be varied and have different weights. Pusher/needle set up both beds critical, then there must be an edging…more to follow.

Trying to coax a rectangle into a square.

Blocking is one of those topics open to endless debate both as to method and necessity. In most of the items I produce using conventional yarns, I restrict it pretty much to washing/pressing/ironing as needed, thus avoiding all those blocking wires, pins, etc. In this instance, however, the wire item is in need of some help in changing into and retaining the desired shape: my partial solution is seen in the photo above.

For the curious: Magnet wire or enameled copper wire is a copper or aluminum wire covered with thin insulation. It is used in the construction of transformers, inductors, motors, headphones, loudspeakers, hard drive head positioners, potentiometers, and electromagnets, among other applications. However, it is not usually magnetic itself. Magnet wire insulating films used (in order of increasing temperature range) include polyurethane, polyamide, polyester, polyester-polyimide, polyamide-polyimide (or amide-imide), and polyimide. Kynar wire is an instance of a color-coated member of these families and is used in my “colored” jewelry items. For knitting on a loom, I prefer 32 gauge or thinner (higher numbers), which can be plied successfully for more drape but are nearly invisible singly; 30 gauge or less(lower numbers) moves into the hand crochet/knit coil domain for me.

I enjoy using materials designed for uses other than those for which they were designed, the inherent challenge, surprises, and problem-solving.