WORK IN PROGRESS
This document is created using Mac Pages and Numbers, stitch illustrations have been borrowed from magazines and manuals long out of print and edited, the symbols and charts are self-drawn. Using shapes in Numbers now makes the process of creating DIY symbols in the spreadsheet significantly easier than in my early Excel days.
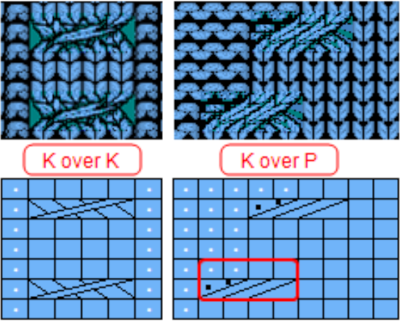
The transfers are illustrated as they would occur if hand-knit or tooled as opposed to created by automated machine functions, blue dots are associated with knit side facing, pink with purl side facing. This series observes single bed work
Cable crossings:  To visualize cable crossing in the opposite direction, images can simply be mirrored horizontally
  More cable crossings including working double bed
Crossing stitches by pulling one through another, 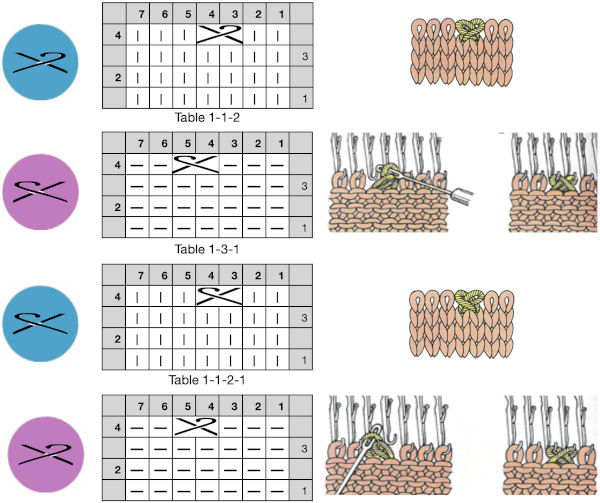 an alternative symbol for the same technique.
 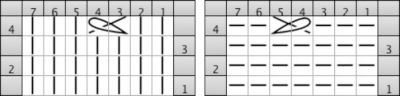 The techniques may be used in variations, using 3 or 4 stitches. Yarn and tension are significant factors when any number of stitches are moved across a fixed span on a metal bed machine.
Slip stitch creates a short float where a needle is not worked and an elongated loop on the knit side of the fabric. There are patterns where the elongated stitch is removed and brought behind the float, to the purl side of the fabric 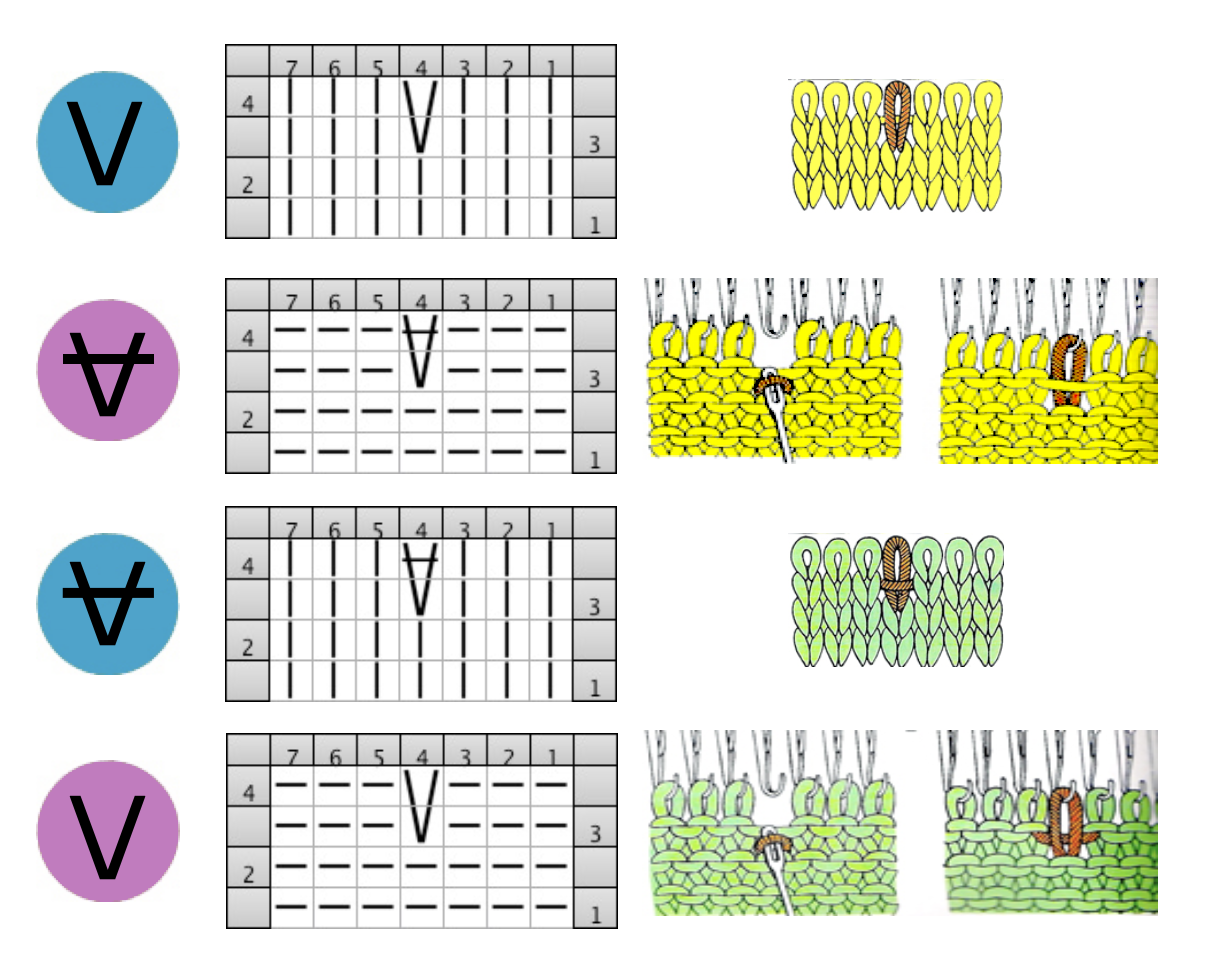 Tuck stitch groups of stitches are gathered in needle hooks, commonly with knit stitches on either side of the gathers.
 Tuck stitch with a twisted elongated stitch. The effect will depend on the yarn being used.
 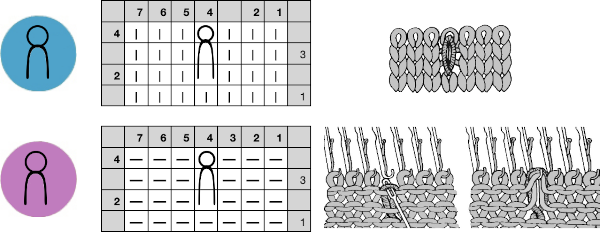 More on tuck and slip stitch /2020/09/13/single-bed-tuck-and-slip-stitch-fabrics-1/
When combining techniques symbol placement in charts is often up to the creator. In the top sample, 1, a three-row pattern, the first stitch is pulled up, gathers it and the stitch right above it on the shank of the needle, in turn latching the third stitch through the first two, creating a purl stitch on the knit side at the top of the gather, and a knit stitch on the purl.
The next pair of images, 2, illustrates a simple picking up a stitch, stretching it, and hanging it on a knit stitch several rows above. This is also called ruching which may be done over any number of rows, not necessarily in vertical alignment, and may result in episodic pleated effects on the knit side. Because no “tuck” loops are being combined in needle hooks in addition to the stretched stitch, multiple side-by-side stitches may be hooked up this way. Very short elongated loops ie for one or two rows as marked 3, are not as visible on the purl side and do not create very visible gathers on the knit side.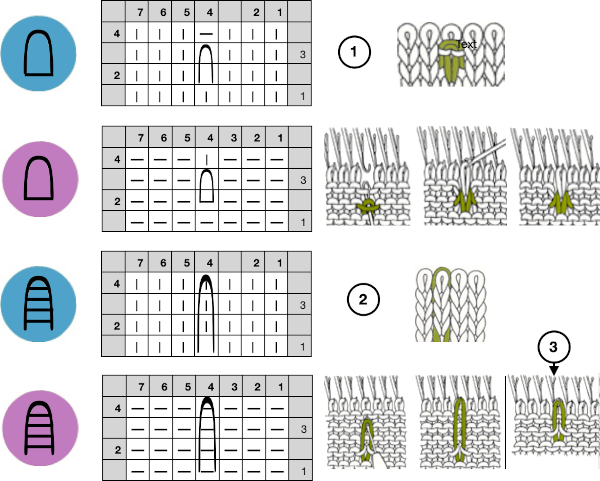
A single fully fashioned increase is illustrated in the charts. The same technique may be used in the body of the knit, moving stitches in any one row, leaving single needles out of work at regular intervals, and picking up from rows below as pictured on the right to “fill in” empty needles. 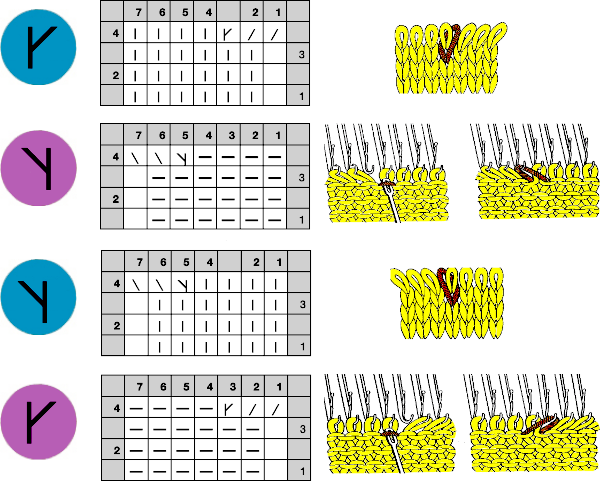 Stitches may be twisted in the body of a knit on the machine by inserting a tool front to back through the stitch, twisting it to the right or left, rehanging the stitch in the same location.
 This technique may be used with multiple stitches to create mock cables, and patterning, whether electronic or punchcard may be used in machines with needle or pusher preselection to track the placement of the twists. E wraps may also be used to cast stitches on side edges of the knitting, whether the result is satisfactory is determined by the knitter’s preference.
When vertical spaces are created between knit stitches, the term often used to describe the floats that are created is ladders. One can drop a worked stitch at the end of the knitting, or in machine knitting, a needle may be left out of work and as it is skipped, the ladder is created. Dropped, previously worked stitches create wider ladders than those with skipped needles When a ladder needs to be eliminated, there are several ways to deal with returning any empty needles to work. If an empty needle is brought back into work, the first pass to the opposite side will create a loop on the empty needle, the second pass will complete the stitch on that needle, and an eyelet is created. If one wishes to minimize the eyelet, one method is to pick up the purl ridge from the row below on either the right or the left of the empty needle, as illustrated in the fully fashioned increase chart, another is to twist the last ladder and rehang the twisted loop. If multiple needles are out of work, then an e wrap cast on by twisting stitches on every other needle is needed unless needles are brought back into work one at a time, creating secondary eyelet patterns.
Blog posts related to or using symbols, in historical order:
Machine or hand-knit symbols, DIY charts with copy and paste in Gimp, 12/21
Symbols in knitting charts, 11/21
Revisiting lace repeats, symbols, and charting, 10/21
Punch cards to electronics: book symbols and samples, 12/17
More on charting, foreign symbols, and cables, 12/14
Machine or hand-knit symbols, DIY charts with copy and paste in Gimp, 7/14
Machine knitting symbols, 8/13
Hand to machine symbols 5: lace, 12/21
Hand to machine, symbols 4: cables, 2/13
Hand to machine, symbols 3, 2/13
Hand to machine, symbols 2, 1/13
Hand to machine knitting symbols 1, 1/13
Knit terms: translations 2/12
DAK is a program that allows for designing with illustrations created both as symbols, or unique to programs for in-home use, representing the intended fabrics as knit stitches, seen here for a lace repeat. The availability of the symbols does not necessarily translate to knittable fabrics 1, 2, more lace info  Cable illustration as from the DAK manual, with single bed and knit and purl stitches represented
 Many cables that can be created in hand knitting are not executable on the knitting machine because of the fact that the yarn needs to move across fixed widths on a metal bed and the moved stitches need to be large enough to allow the knit carriage to form new stitches properly as it travels back to the opposite side on the following pass. There are techniques that can help to make wider cables possible, it is best to test crossing tolerance before planning or following full repeats whether published or self-drawn.
The same symbols may be used for hand-knit charts, taking into consideration whether working on 2 needles, in the round, with the knit or purl side as the public one, or the fabric is intended as having reversible surfaces.