Ribber trims 2 presented a series of ideas for edgings I meant to return to. Rather than adding more to that post presently, I am expanding on the topic here.
Scalloped trims are popular in single-bed knits. Preventing any needles from knitting for any number of rows will form a wave. If automatic needle selection is used, they may be formed using both the tuck and slip stitch settings.
This version from the Brother Ribber Techniques, with knitting directions included in Ribber trims and edgings 1 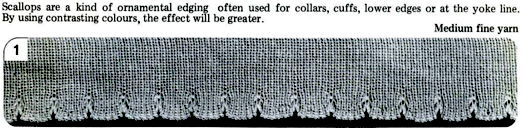 If there is a problem in double bed versions using loops formed by holding stitches or tuck patterning, try completing a tubular cast-on before starting either sequence.
Using tuck stitch rows created manually way can work as a cast-on method:
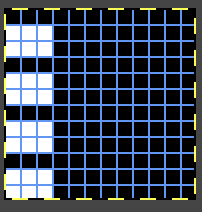
Begin with a familiar yarn and tensions to form the usual zig-zag row from right to left
Set the ribber to slip in both directions
Bring every 6th needle on the top bed out to hold, and set the knit carriage to knit. 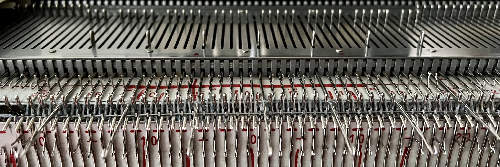 At that point the yarn will be knitting solely on the top bed, so tension needs to be adjusted closer to what may be normally used in knitting it in stocking stitch.
Set the ribber to slip in both directions.
Make at least 4 passes on the main bed, 6 will yield more of an effect but may be hard to manage on Japanese machines while in Passap, the strippers facilitate the process.
My first swatches were knit using 2/8 wool, which pushes the limits for smooth knitting in every needle rib on the 4.5mm machine. After knitting 5 rows the top bed stitches began riding up. 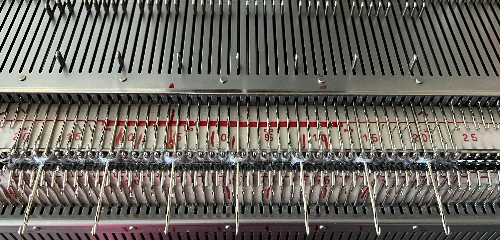 The next row needs to be knit across both beds, sealing the scallop.
Bringing the top bed needles all the way forward can help with that, but to ensure gathered loops will knit off properly, a bit of fiddling may be required, any tool can be used to push down lightly on alternating sides of the loops to keep the stitches to their side from unraveling. 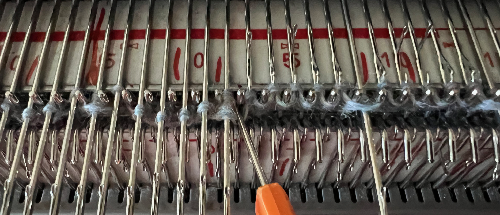 Release the hold lever on the top bed, set the ribber to knit in both directions, and continue in every needle rib to the desired length
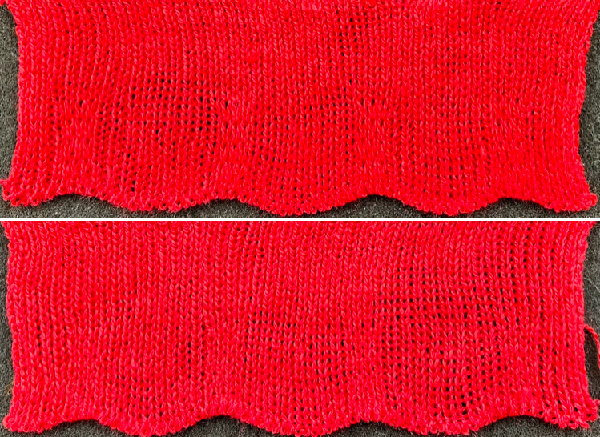
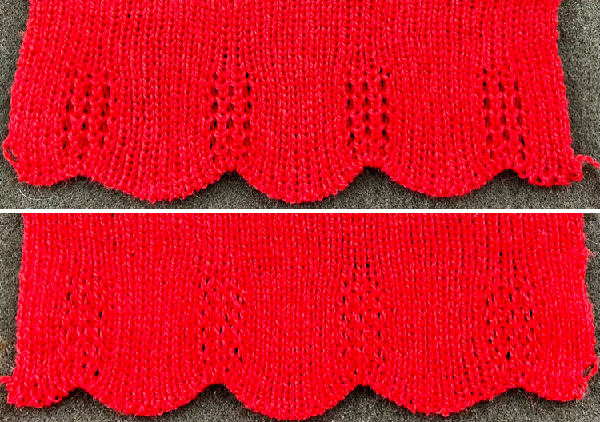
The top images show the result of forgetting to set the ribber to knit, so there are 2 extra all-knit rows on the top bed, the bottom images were knit with the proper setting transition 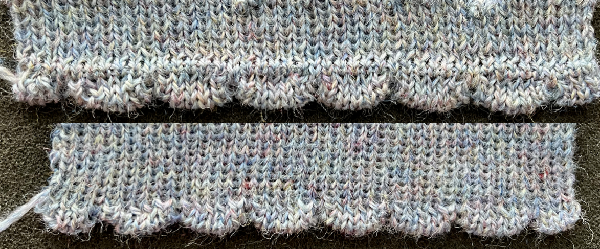 Since the top bed only knits for several rows, the ribber stitches can be seen elongated on this side of the knit
 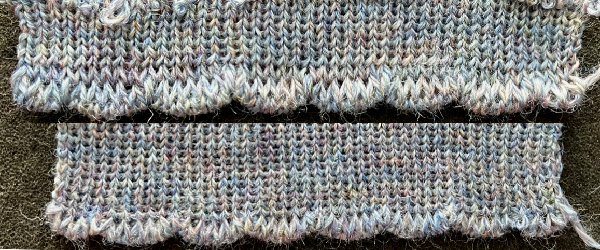 Switching to a 2/20 wool, the same needle spacing, and holding stitches for 6 rows:
 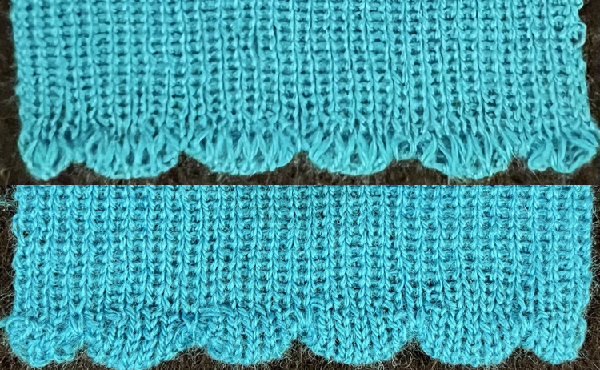 One last fiber switch, a different 2/20 wool shade.
Here the detail is used at the bottom of the stocking stitch swatch rather than a ribbed one.
Watch for loops hung up on gatepegs, seen below in the top swatch.
The scallop shape wanted to turn toward the knit side but did set with some steaming.
Upon completing the holding sequence, transfer all ribber stitches to the top bed.
The tension in the swatch remained the same throughout, but in the bottom views, a loose joining row (perhaps too loose) was knit after transferring all ribber stitches to the top bed, as is often done for smoother transitions in single-bed hems. After the single loosely knit row, the tension is adjusted set to a number appropriate for the specific yarn in single-bed work. 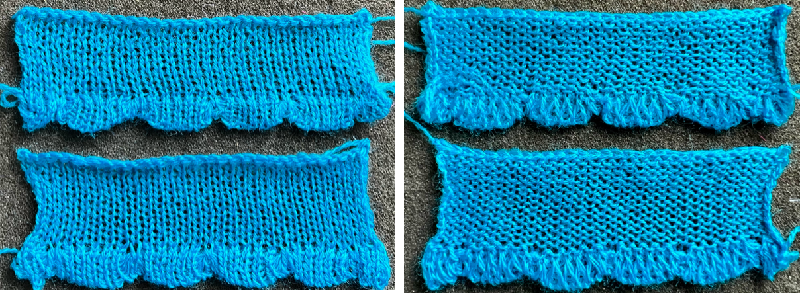 This information and pngs expand on the knit charts in the 2019 post. If the pngs are copied, check that mode has not been altered to RGB automatically, and index back to BW mode prior to downloading them to machines for knitting.
Though, in general, starting side does not often matter, when testing techniques consistently beginning on the same side and leaving a yarn end will help identify which surface is knit facing or purl facing and whether that is of implications in the specific design.
Designing the repeat tiled for the width of the bed when working on electronic machines allows one the opportunity to add all knit borders in specific widths and to program the result as single motifs without concerns about needle placements on the knit bed or how to influence edges.
Punchcard knitters are faced with fixed 24-stitch locations on the needle bed, all knit borders would require manually bringing the needles involved out to E before each carriage pass.
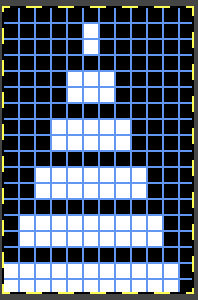
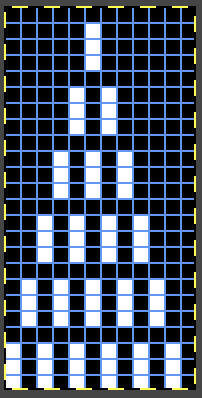
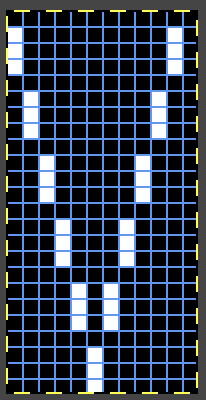
As always, white pixels/unpunched areas tuck, and black pixels/ punched holes knit.
These repeats can make for interesting all-over fabrics as well as serve for edgings that flair and form bottoms that are wavy to different degrees.
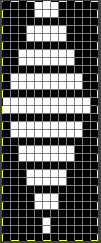
12X18![]()
 Knit using a superfine 2/18 merino: the tension on either or both beds may need to be adjusted repeatedly for stitches to form and knit off properly, reflected in stitch size variations here.
 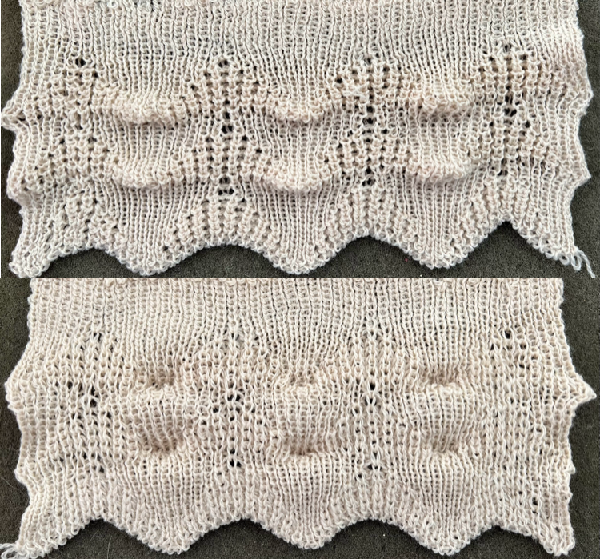 What happens when one is so engrossed with watching stitch formation that the fact that the cone has just run out of yarn is completely missed
 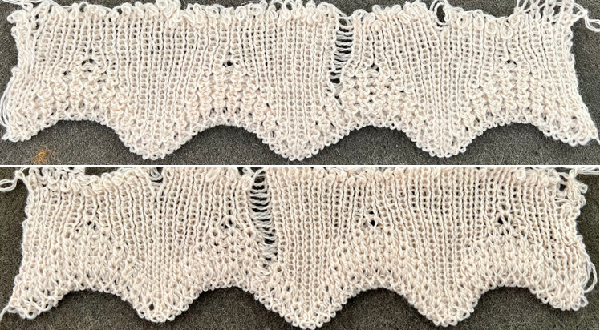 12X24
12X24 ![]()
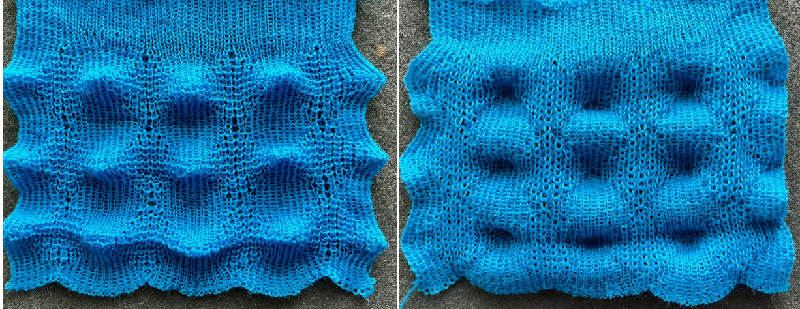
 Switching yarn to 2/18 silk wool at the same tension produces knit with a very different density and drape. Light bounces off this yarn interestingly, making it harder to photograph in sharper focus.
 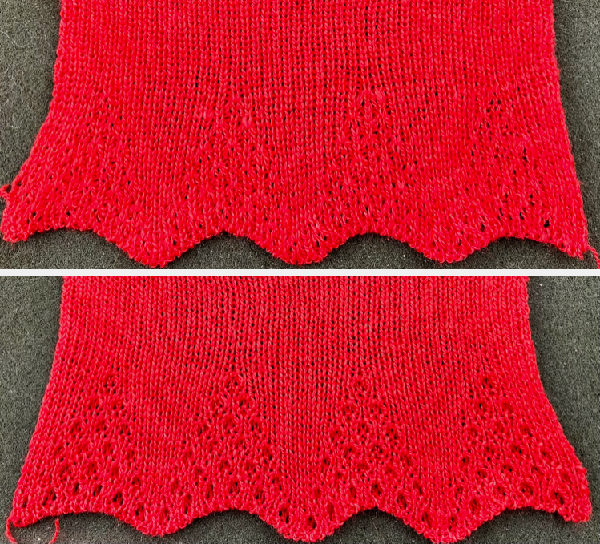 Here the same brand and weight yarn, steamed and pressed lightly, resulting in some flattening of the tuck texture’s 3D effect. Different colors or even different dye-lots of the same color in any yarn can behave differently with all else being equal. The relaxed and stretched view
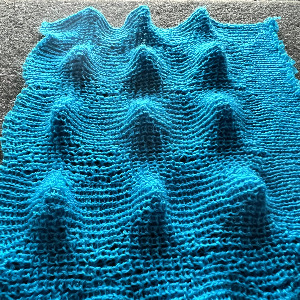
  and an attempt at showing its ruffling effect.
 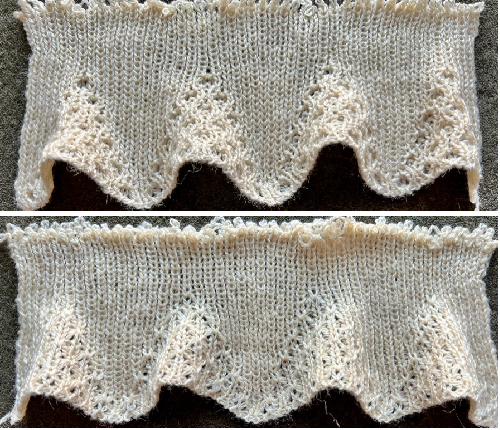 A very interesting surprise: a few years ago during one of my temporary obsessions I developed racked scale-like 3D patterns, this series reflects some of my first attempts
 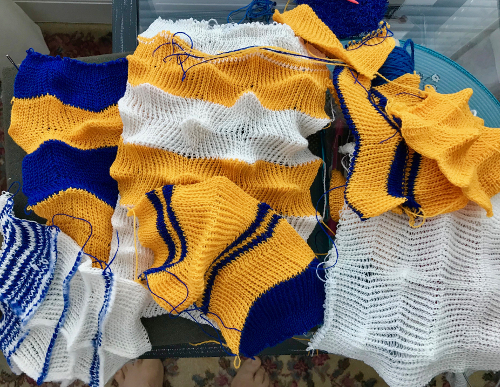 One of several illustrated repeats designed for assistance from needle patterning preselections
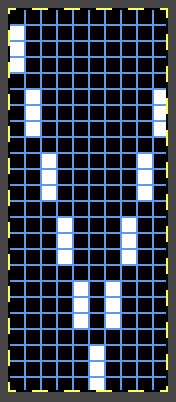
 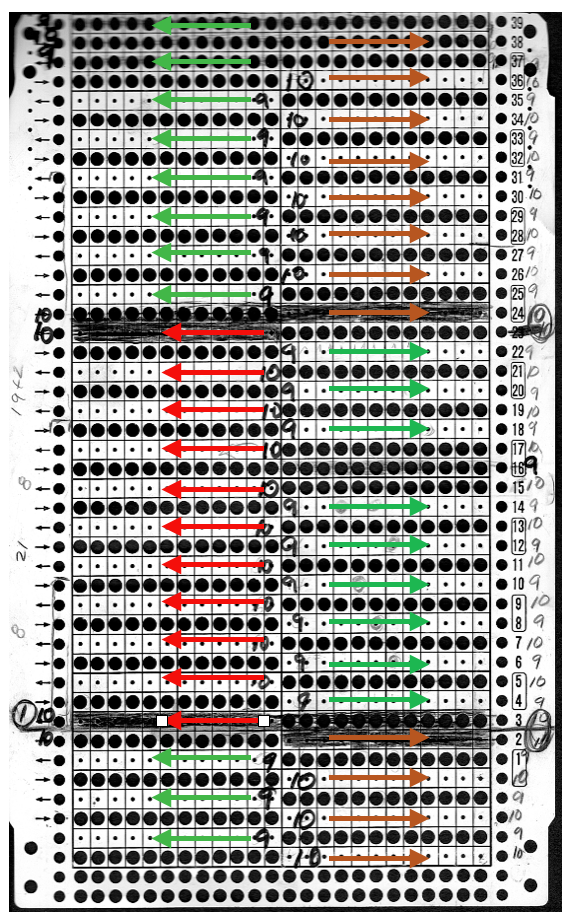 I wondered whether the triangular repeat for the trim above modified to a diamond shape might produce similar results. The proof of concept swatch was far easier to knit, with no racking, and no critical tracking of all-knit row locations than the every needle rib version.
![]()
 12X24, rendered suitable for punchcard use
 ![]()
 The tiled repeat for a sense of resulting pattern movement
 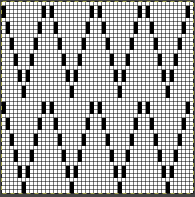 10X24 is missing the single all-knit vertical column seen above
 ![]()
 also tiled for visualizing the pattern’s movement
 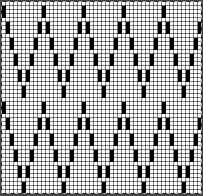 12X12 knit using the tuck setting,
 ![]()
 or the slip stitch setting, making for more subtle results