More slip stitch experiments

Slip-stitch fabrics are capable of creating interesting textures. When blocks of stitches are slipped, the floats that may appear on the purl side are considered problematic by some knitters. One solution is to work using mosaic and maze “floatless FI” designs. This was addressed in previous posts, including color separation methods for planning them, and a variety of knit swatches.
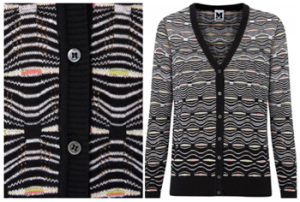
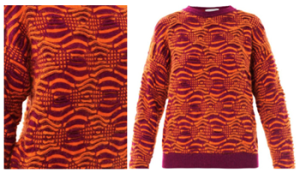
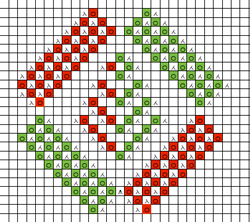
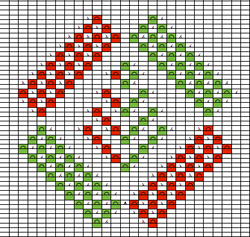
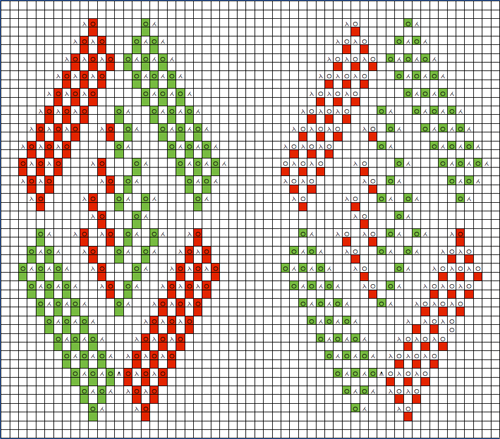
The images below have often appeared in knitting boards on Pinterest, I am returning to the slipstitch design thread.

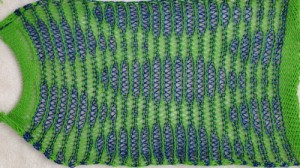
A Missoni  knit  missoni comboSportmax Armida sweater   lyst combo

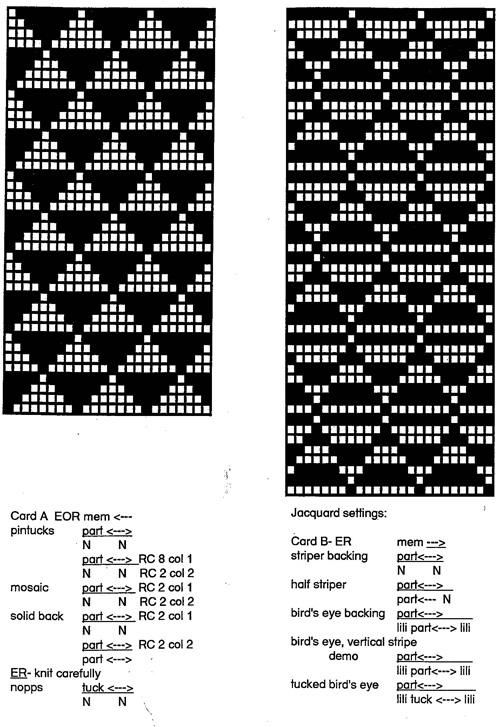
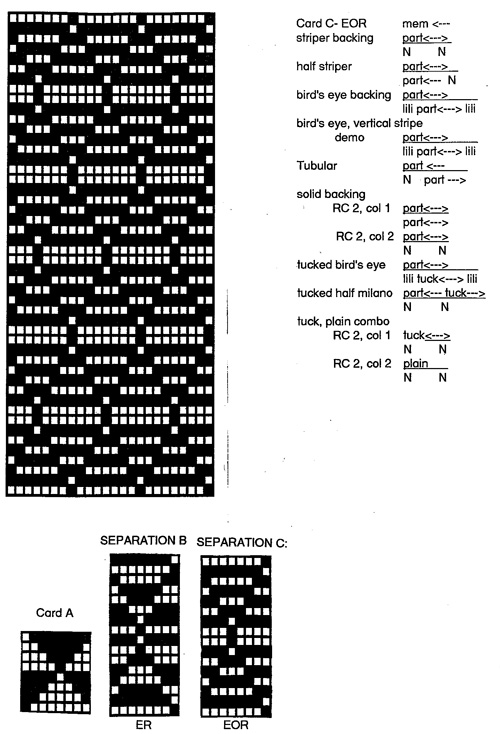
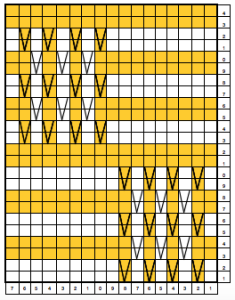
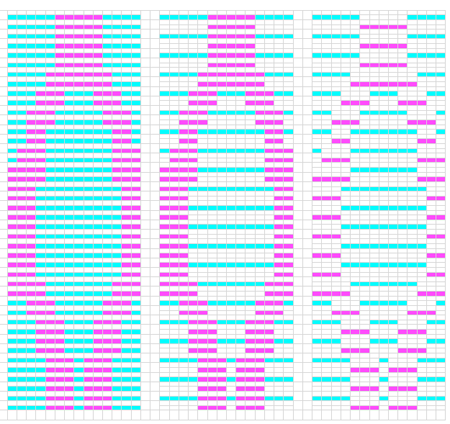
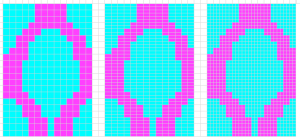
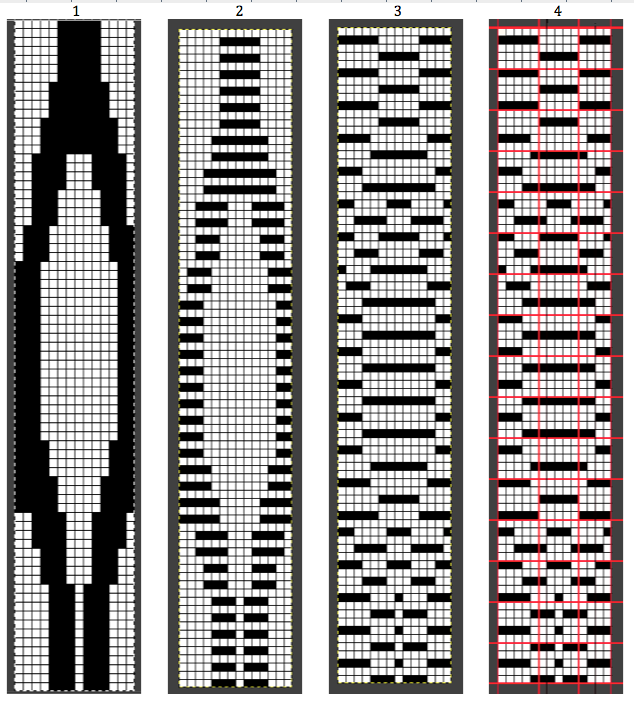
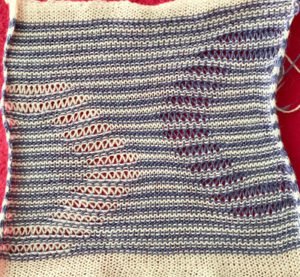
I decided to plan a “square/block” shape to sort out the technique; it could easily be adapted to a diamond one. By necessity, larger repeats need to be executed on an electronic machine whether via mylar or download program. The plan is to change colors by any means available, usually, every 2 or every 4 rows, requiring a motif repeat that totals an even number of rows. In hand-knitting garter stitches can become part of the resulting texture, but they are impractical here. Often commercial knits are produced on machines that can automate many more functions and surfaces per row. The Missoni sweater is a fine knit, and on a detailed examination, reveals lace eyelets in some of the stripes in addition to plain knit and slipped stitches. Not impossible to do on a standard KM “home” electronic, but the simplest way to add lace eyelets would be via hand transfers.

my starting chart

repeat start

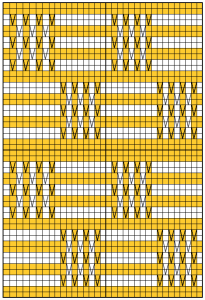
 checking that that repeats line up

multiple repeats

possible mylar repeats

mylar repeats

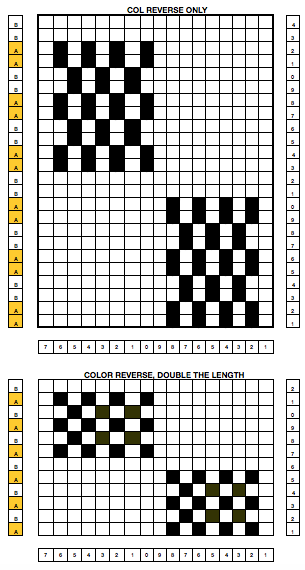
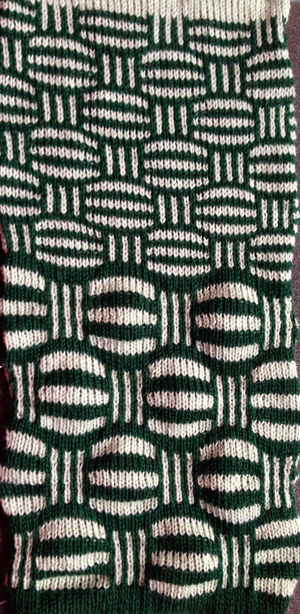
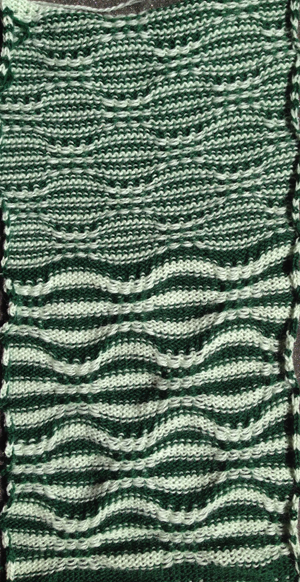
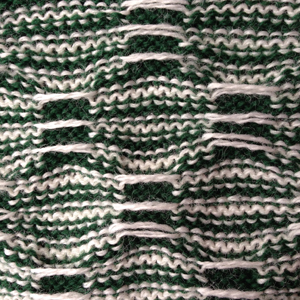
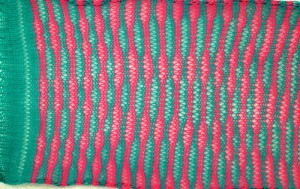
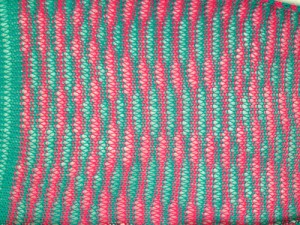
I drew the top repeat above onto mylar for use on a 910. The sample swatch was knit using 2 carriages (and lace extension rails). I selected R 1 from right to left, with the carriage that was to remain on that side, and began knitting with the second carriage, placed on the right, holding the alternate color. There are a few ways to achieve the pre-selection row, depending on the choice of start to the fabric, and whether a color changer as opposed to a second carriage is in use.  Contrasting colors help us see and understand stitch formation. For the bottom of the swatch I used double length as well as color reverse, with color (carriage) changes every 4 rows. The top of the swatch is knit with color changes every 2 rows. Slip-stitch is short and thin. Since there are more stitches slipped on the bottom of the swatch, the fabric is pulled in in those areas, making the knit on either side “bubble” in a way that the top of the swatch, do not, and resulting shapes no longer appear as straight lines horizontally.

striped slip ksidepurl side

striped slip p side

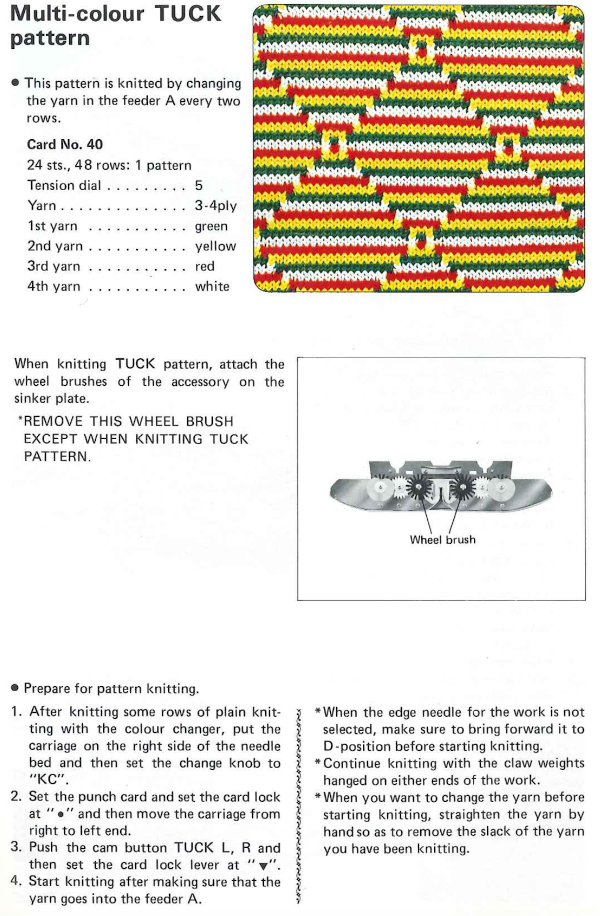
The single-width blocks that form the stitch pattern are usable for tuck knitting as well. Whether the motif may be elongated on standard machines depends on the yarn thickness used. Tuck-stitch fabric tends to be short and wide so that the finished knit piece will be wider than the slip-stitch version.

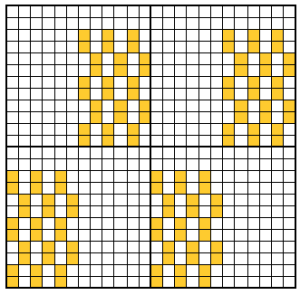
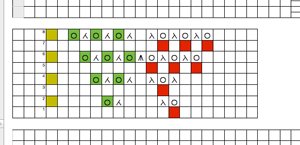
Taking this shape to a punchcard requires editing, and the results are quite different. One sample idea, moving stitch groups around to fit a 24-stitch repeat:

punchcard repeatAll the white squares would need to be punched to form knit stitches, the yellow left unpunched, to form the slipped ones, the look of the fabric would be very different.

Previous blog posts on related topics: tuck and slip color striping, block stitch color separations, where the term block stitch is used based on publications that refer to floating, staggered designs rather than to square shapes.

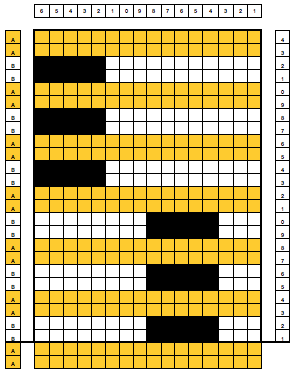
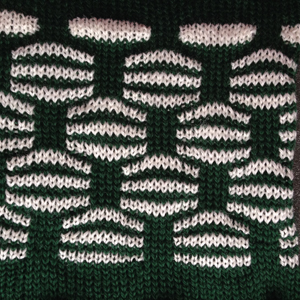
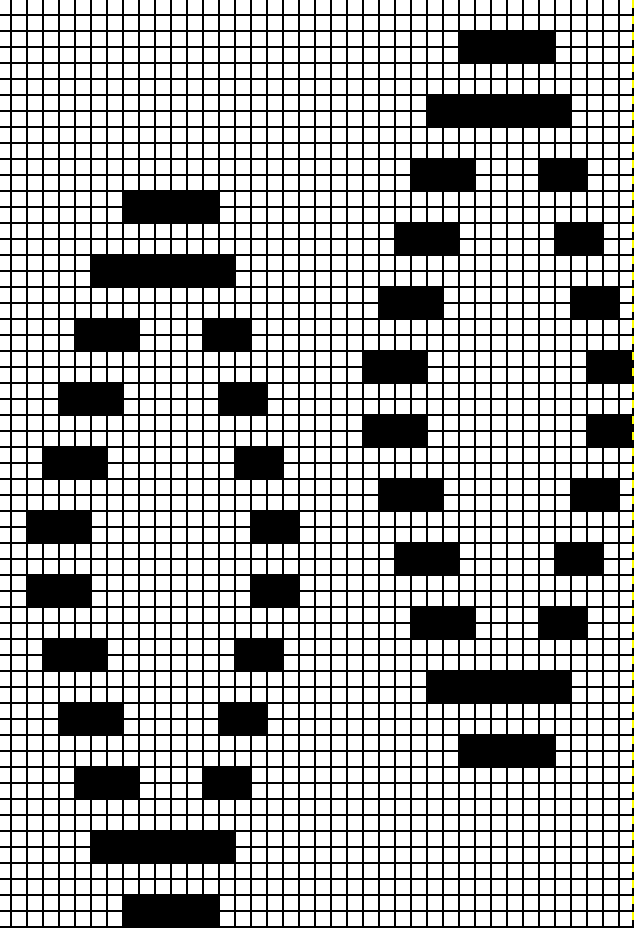
As for creating “solid” block shapes: an initial repeat is charted below, 16 W X 24 H. Black blocks are drawn on mylar or downloaded, is used color reversed with no elongation. Knitting starts with base rows knit in the color that will form the “block” on the knit side of the finished fabric

block shape

the knit side

block_front

and the purl, note floats as wide as the “block”

block_back

Some notes on machine knitting color changers

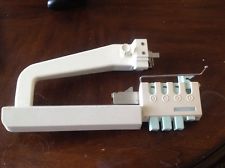
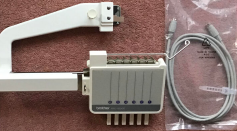
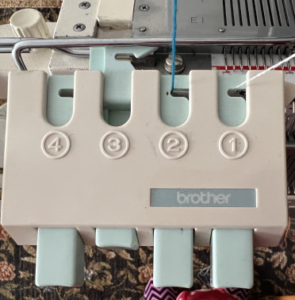
One double-bed example, the Brother 900 E DB changer for use on both standard and bulky

The Studio/singer YC6 may be used either on the single or double bed simply by repositioning one piece. It includes a 4 color tension unit, a special sinker plate,  and a set of cards that are for use only for DBJ.  It has a 4-button yarn changer, which can be set for automatic 2-color changing.
Brother/Knitking comes with a supplementary two-color yarn mast, a special sinker plate, and a four-button changer. A button must be pressed manually for each color change.
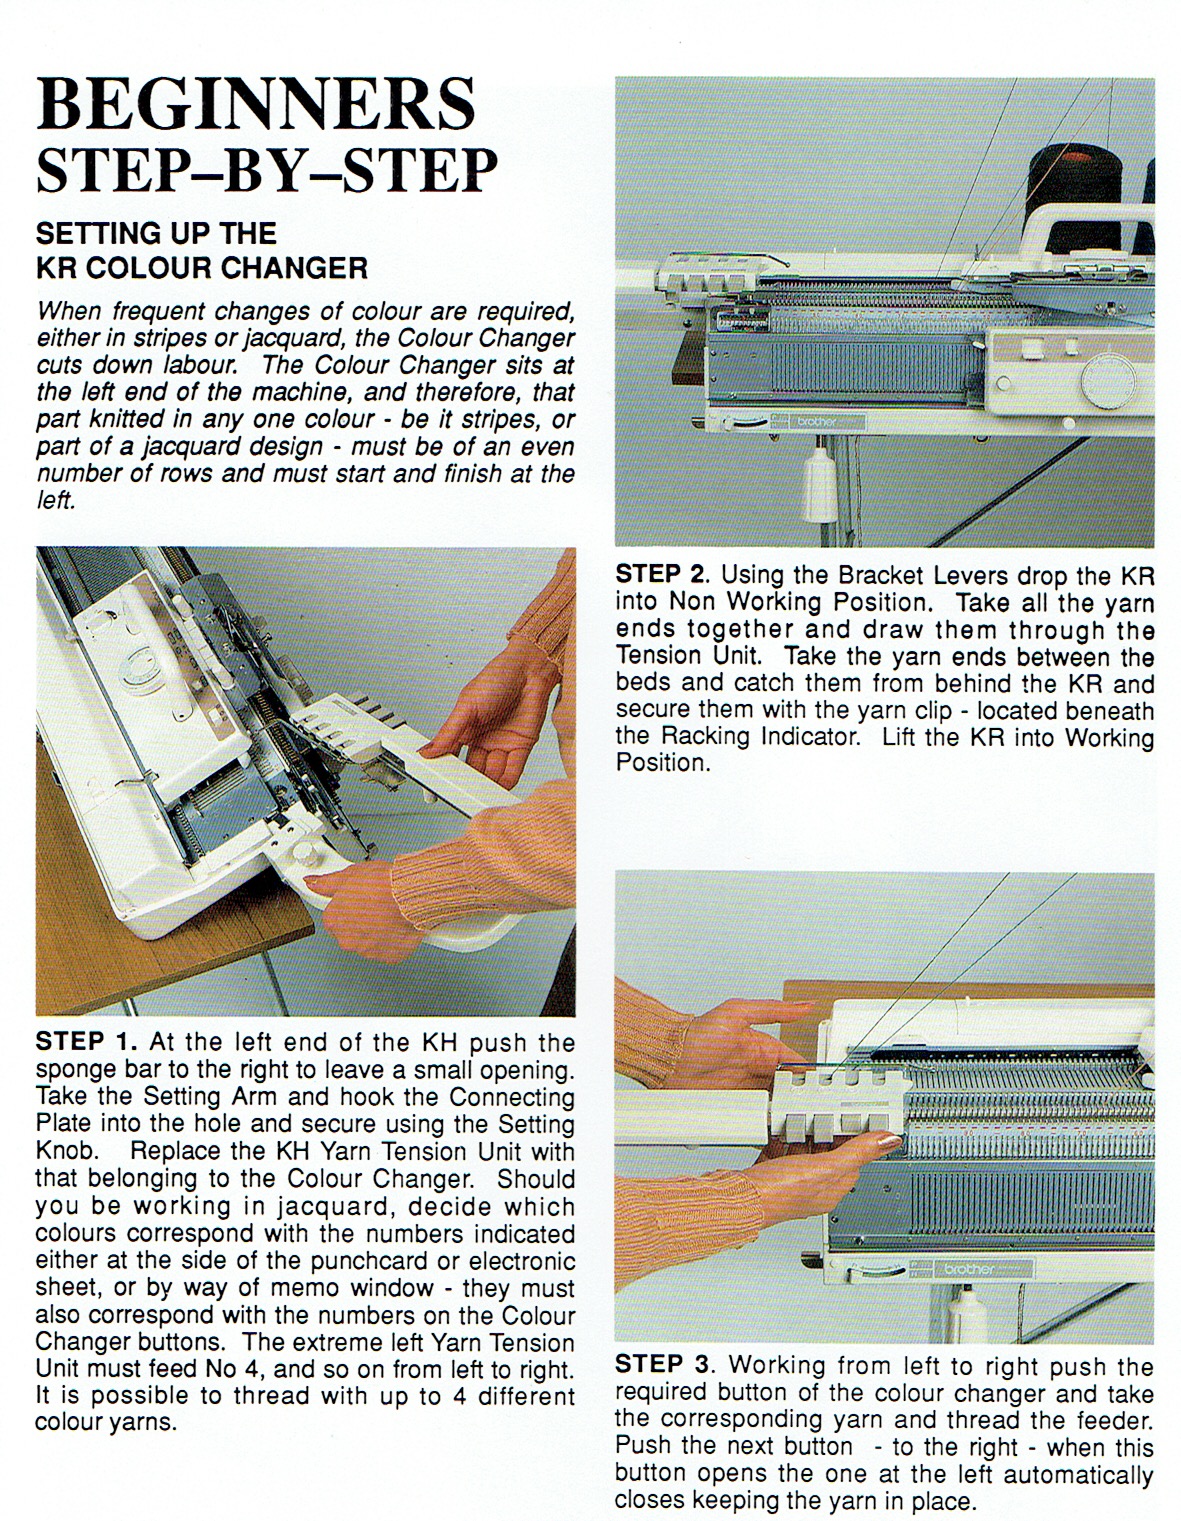
To color change on Studio, the next color button is pushed/selected when the KC is on the right, in Brother machines, the button for the next color selection is pushed after the KC is in the yarn changing area after the audible “click” is produced when the carriage has traveled far enough.

The wires and tension units exert more tension on the yarn than standard tension units, which affects gauge so if one is knitting garments, the units should not be changed while working on the same piece, nor should calculations for gauge be used if they were produced in the same yarn, but using the alternate tension unit. Tension may have to be raised by at least one number or more to prevent dropped stitches and obtain the desired feel/drape.

If a carriage jam occurs, the sinker plate needs to be removed before using the release lever for KC.

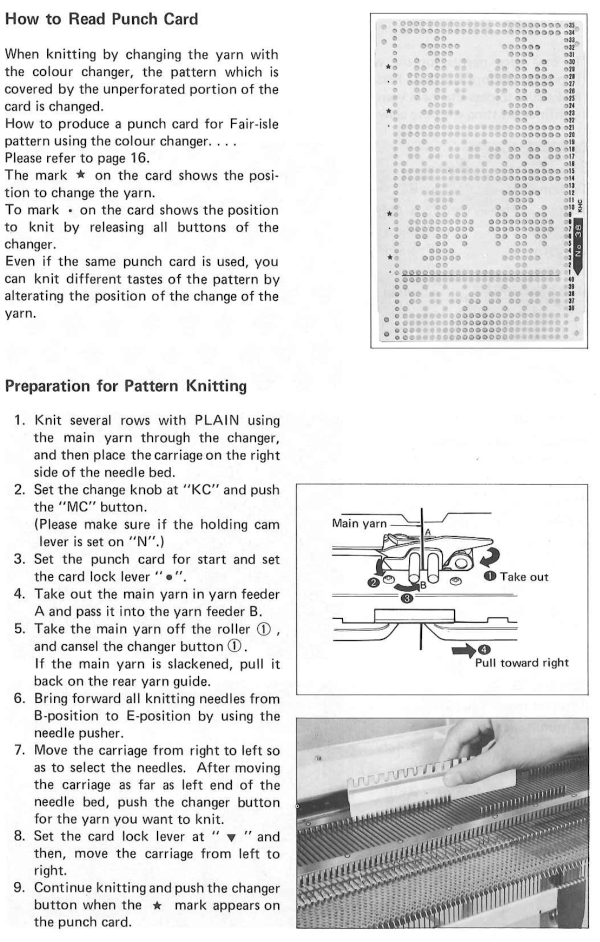
If using changers for fair isle: in cards punched for FI knitting single bed,  normally the contrast color, corresponding to punchcard holes (black squares on mylar, or pixels, depending on machine and programming) is placed in the B sinker plate feeder, and background yarn in the A.
When using the color changer, the manuals will state that the main color is normally in B while the contrast color is in A, where it can be changed automatically. However, that depends on which part of the design is to include the color striping.  If it is to occur in the motif, the card needs to be modified by being punched in reverse. If the striping is to occur in the background, a standard card and position may be used. If one wishes to alternate, both ground and motif may need to be punched separately as for use in 2 color slip stitch.

More than 2 colors per row require color separations of the original design for knitting with slip stitch setting, carrying one color at a time, in 2-row sequences.

The double bed color changer is used often for DBJ with color-separated cards though other fabric options are possible. It may also be used for single bed work, but the ribber must remain raised and the ribber connecting plate is used. This means that single-bed fair isle knitting is not possible, because there is only one feeder in the ribber connecting plate.
Using the changer is a viable option for knitting striped patterns on bulky machines. There are no brushes to help anchor the knitting like the ones in the single bed sinker plate, so even though the fabrics may be worked only on the top bed, careful choosing of repeat and adequate weighting is required ie in color tuck/slip mosaics, etc, knit with color changes every 2 rows.
I have read that Toyota did not have a color changer due to its built-in simulknit/automatic DBJ, with only 2 colors knit in any one row.

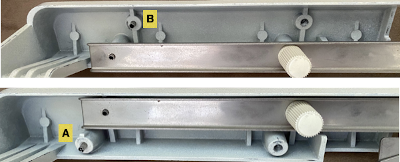
Sometimes metal parts/wires get bent in storage or handling even on ribber sinker plate, and may need a bit of bending and tweaking if colors are not getting properly picked up. Some Brother color changers have small adjustment screws under the arm that may loosen, and change their alignment to the needle bed, which is easily solved by adjusting/tightening the screw. Sinker plates should be cleaned and may be adjusted if required, just like the standard ones.

Some references: Studio YC6, Brother manuals

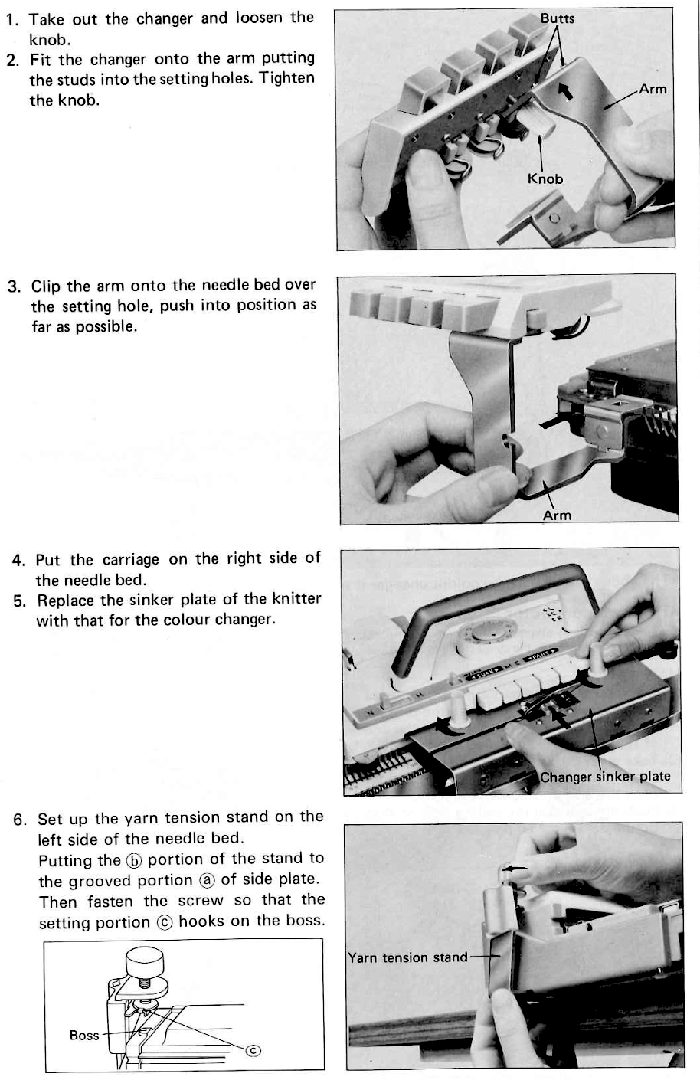
The set up as described in an early Brother Fashion magazine 

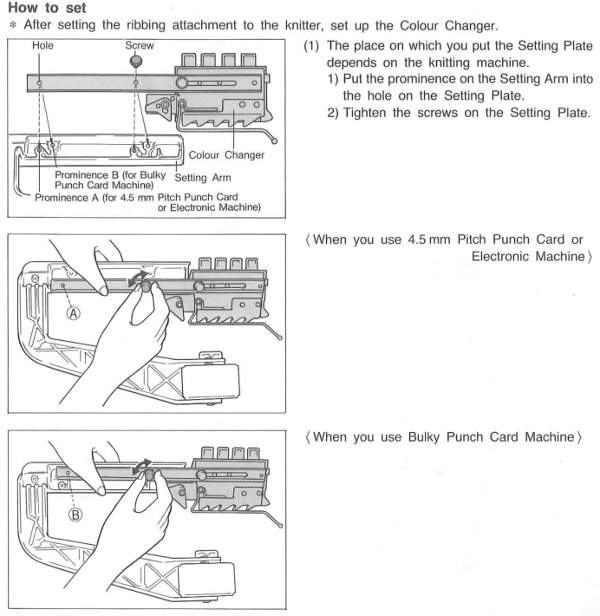
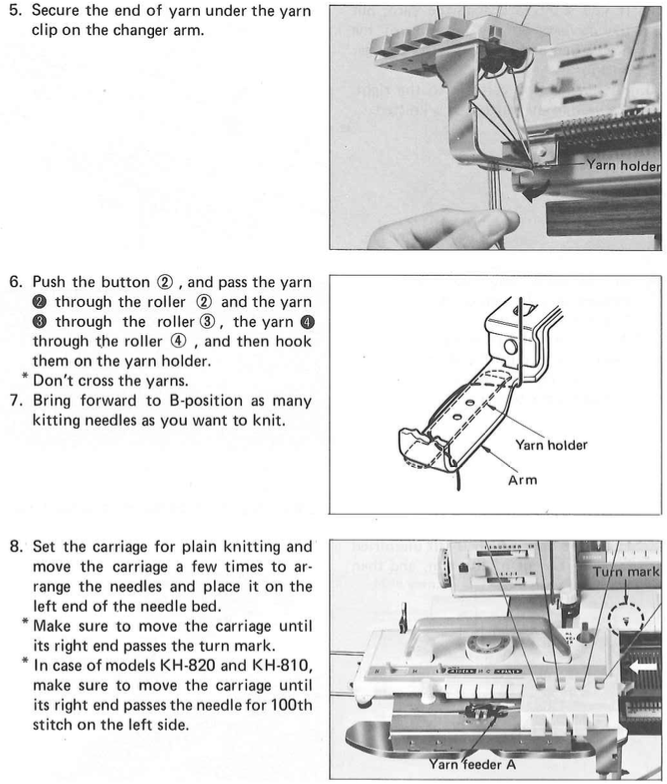
from the KRC 900 manual

High tech version: 1 set up 2 in use Automatic knitting system based on the Brother KH-970, consisting of a knitting machine Brother KH-970, set for the ribbing attachment KR-850, KE-100 motor drive, and automatic color changer KRC-1000E (6 color changer). 

The Brother single bed changers are the only ones I know of where the yarn remains in the changer after the color change, never leaving it.
A later post including some single bed color changer info: https://alessandrina.com/2017/05/01/knitting-in-pattern-with-2-carriages-brother-punchcard-kms-2/.
Excerpts from the 820 manual:  The auxiliary yarn tension stand was eliminated when later models introduced a place in the machine casing for the extra mast, my 930 actually offers 2 spots  

It is possible to cast on while the color changer sinker plate is in use, making certain the yarn is used and retained in its proper placement in its roller. I prefer to cast on with the standard sinker plate, knit some rows, weigh the piece, sort the required tension, place the yarn in its position in the changer with COR, and then continue.
It is always a good idea to test color-changing sequences on some waste yarn rows prior to the permanent cast-on of the finished piece.
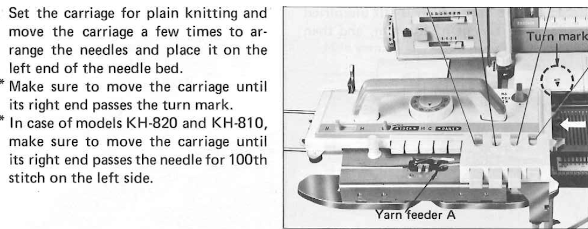
A common cause of color-changer crankiness is simply not moving far enough to the left before changing colors, a step that definitely requires using that “lace” extension rail.
The use of waste knitting is shown in the directions found in the manual as well.

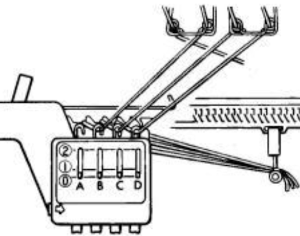
An added difference between brands, the Studio changer uses letters, and the Brother uses numbers for yarn positions in changers  

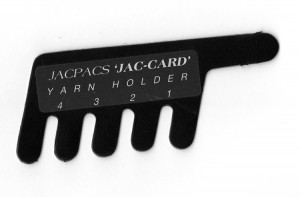
At the opposite end of the spectrum, the image below shows a low-tech “color changer” marketed beginning decades ago, and still available online. It is not practical to use in DBJ knitting because of the issues involved with removing the yarn from the ribber sinker arm in order to switch colors but can be an alternative for working single-bed on multiple gauge machines. It provides a way of holding the yarns that is easier and more successful than some of the other “creative” options for knitters who do not yet own a color changer accessory appropriate for their machine. An improvised “color changer” for knitting multiple color dbj by Chris Burdge, shared in the Ayab FB group.

Lace mesh motif charting_ Mac Numbers_ a touch of Excel

October 2021: I periodically return to old posts and find much has changed since they were written in terms of software or in my thinking on the specific technique.
Rebuilding the working 24 stitch repeat from the colored chart here is now quick and easy. More detailed instructions on using both Numbers and Gimp may be found in my posts in subsequent years.
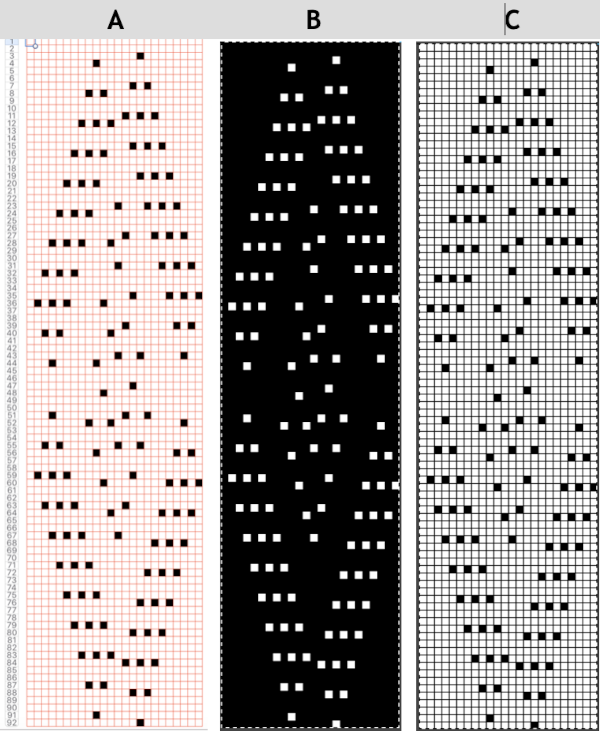
In summary, the expanded colored image of the repeat was cropped to 24 cells wide, 92 cells high. A table with cells measuring 20 by 20 points, 24 units wide, and 92 units high was created with a red grid. The image of the repeat was sized to match the same width and height as those of the table. The table was then arranged in front of the image, and black was filled in cells over the colored cells below. The new table was then screengrabbed with all interior cell borders removed, but with a thin border around all content, opened in Gimp, changed to indexed mode. Because lace has so few black dots I find scaling to punchcard size is more accurate if colors are inverted first, and again after scaling to the 24 by 92 required repeat, shown on the right. the associated png  Previous content:
The symbols here were disregarded in building the repeat here, but they matter when developing designs for use with the lace module in DAK.
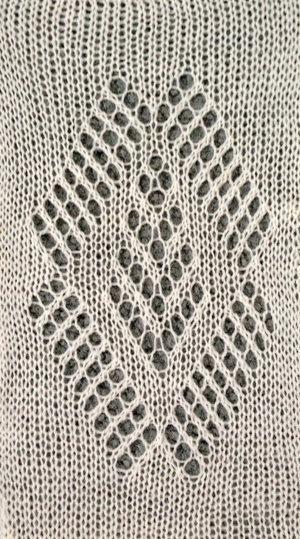
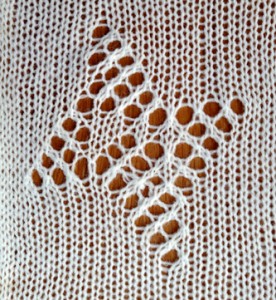
This lace “separation” was based on a mesh technique, created using Mac Numbers, for use on a Brother knitting machine, with the Lace Carriage operating from the left side. The final design requires 4 passes by the lace carriage followed by 2 rows of plain knit throughout. 
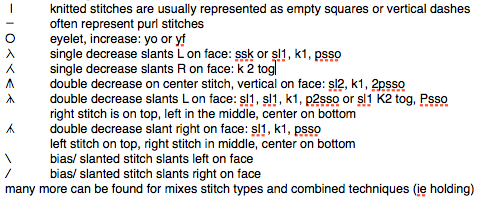
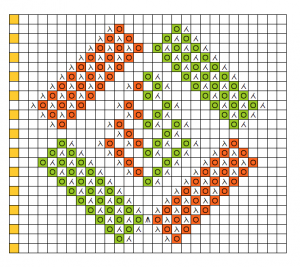
Hand knitting: a brief list of symbols, and a few of their associated directions The hand-knit motif inspiration and symbols remain unchanged in this post, The colors were assigned for coding the direction of transfers to maintain the mesh transfer sequence splitting rows, is an option eliminated by apple in later versions of numbers copy and paste the above in a “blank” part of spreadsheet creating a new table; resize cells by selecting all in the new table, and clicking/ dragging on the bottom line of any of the grey, numbered row cells on left to number/ measurements of cells in the original document. Release the mouse, and all cells will be uniform in size.
In later versions choose the round symbol on the top left of the table to select the whole table or select all cells in it, in the table menu on the far right, cell size may be adjusted to any numbers one desires. If the final file is for scaling in other programs, it is best to have both numbers match. I have grown fond of 20 by 20 as I continued to work between numbers and Gimp. Note: after elongation, on first and all odd-numbered rows colors occur, but no symbols. On even rows, there are both colors and symbols. On odd rows (no symbols) now “erase” the green, on even (symbols) erase the red, results below,  on the right

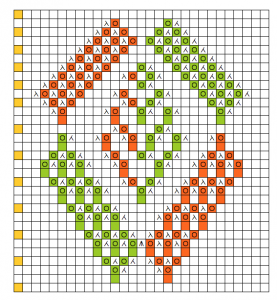
mark the outside of motif on the above right with a third color, beginning on the second row; cut and paste complete motif in a “clean area of your sheet so it is surrounded by blank space, this will save a lot of “erasing” (technically this creates a new table)select and copy blank rows as wide as your motif (blue outline on left)click on 3rd color square beginning at the bottom left, use the insert copied rows command, adding 2 blank rows between pairs of rows that will become markings for lace transfers,  moving up the design, ending with 2 blank rows as well the resulting “separated” mesh repeat is now 92 rows long:  spacing between repeats and number of knit rows at its top may be adjusted to suit preference/ taste. Red and green squares are what is punched, or black squares on mylar sheet, etc. Note: red containing rows have no symbols now, while green ones still do, another visual check with repeats this long, it is worth marking up the final template like that encountered on the card or mylar as described in previous posts: a pdf tree_lace for downloading and marking to suit, depending on mylar sheet or punchcard use. Each colored square represents a punched hole of a black cell. The resulting swatch:

the full repeat could be used singly, to create a border, or to become a  part of a much larger one 

the same motif  created in Excelany change to repasted motif affects the whole document in that area, unlike as in creating a new table in numbers as I recently “discovered” (a very convenient difference)
to elongate the design,  so far my solution has been to mark as above, click on third color cells on the left, beginning at the bottom, then using the insert row command. Doing so yields results that can be seen in the partially expanded chart below the remaining process may be carried out, using slightly different tools to achieve the same results.

A bit of seasonal lace mesh_charted_Intwined

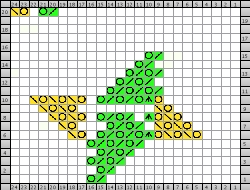
a possible hand knit star motif, color coded transfers

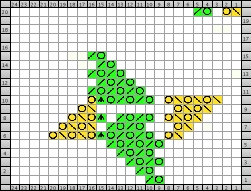
flipped for machine knitting

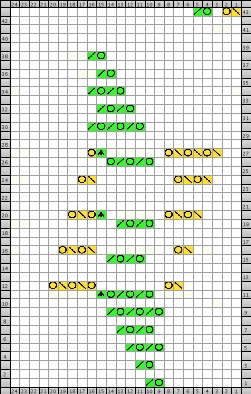
planning the repeat for transfers with LC on left

correction for missing row  required, marked in red

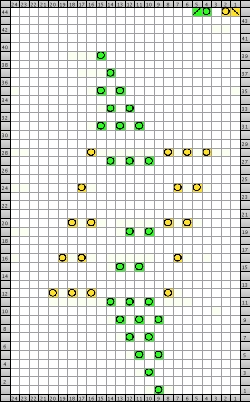
rows to be punched or squares for mylar markings

(motif could be relocated for brick configuration)

2 knit rows follow any with no needle selection by LC

the result

+++

Color separations for knits_ Mac Numbers(3), some Excel

Double jacquard in 2 colors is a good place to start sorting out color separations. There are many methods for this. Japanese electronic machines and Passap tech 179 use a split row 1, col 1 method, which provides the least elongation of motifs upon knitting the piece. For some how-to and problems with these separations and knitting them please see this post. Getting familiar with the tools makes it possible to in turn separate colors for fabrics other than DBJ. The working area needs to be considerably larger than the original design repeat for moving segments of charts around. Some of the changes made to the original design area affect the spreadsheet across all rows (or if applicable, columns) in that area, and copying and pasting in other parts of the table, outside those spreadsheet rows does not do so by default. A 2 col motif will require 4 rows for each row knit (unless one is using double length in machines capable of it), so a 20-row motif would require at least 80 for the fully expanded separation. When I began experimenting I worked on multiple page spreadsheets, with multiple projects within the same document. I would suggest single project documents/ tables, however, so that inserting rows in either excel or numbers does not “accidentally” alter other projects that are saved, within the same row range, but out of working view. Both programs export to PDF and other file formats. Selective screen grab can capture segments for saving, scaling, or printing. Mac users have multiple options built-in for screen grabs. UPDATE July 12, 2014: the table split into rows command is gone from numbers version 3.0+

SPLIT INTO ROWS, ERASE

Begin with a small motif (even # colors per row, in this case, 2) that has been tested for repeats lining up correctly
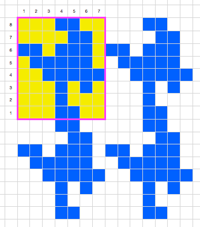
select, copy and paste single repeat: this can be done through menu options or simple use of command C, command V (Mac)

choose color 1, and color 2 for the order of separation. In DBJ in most instances, it is best to begin the knit with the largest # of stitches in any one color, the reverse of the blue/yellow below in my chart below.
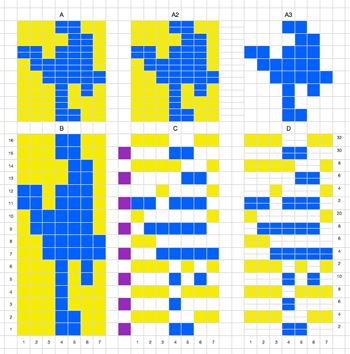
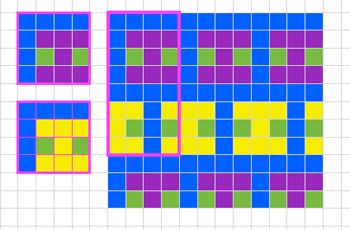
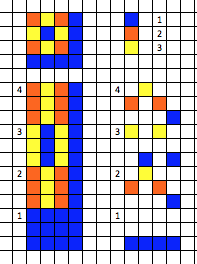
A: motif pasted, selected, Table menu select split into rows. Selecting and pasting the same motif just created on the same rows but different columns will copy its format A2 while going outside those rows in the document, copying the original size motif and pasting in adjoining rows to split ones will bring with it that format, seen in A3

B: copy and paste A (split rows) below its image/row range, motif will take on the formatting of that section of the document, resulting in large working squares once again

C: purple squares act as markers for odd rows, white for even. Chosen color (here = yellow) 1 will be “erased” on row one and odd-numbered rows (purple marker), and color 2 (blue) erased on even-numbered rows (white marker square). One of the ways to achieve this is to select cells to be erased, followed by clicking on fill-in format bar, and choosing no fill or white. Separation may be visually checked: if colored rows were to tumble down on each other, there should be no overlap of different colored squares. Colored squares punched or programmed using this illustrated method require elongation X2

D: C is split once again. This separation may be knit as is on any machine capable of the repeat width, without elongation. I prefer to avoid using double length in my knits if I can, find that makes it easier for me to accurately return to rows when unraveling and returning to any rows after errors in knitting

SPLIT ROWS (Numbers, eliminated in later releases)_INSERT ROWS (Excel)

NUMBERS: any # colors per row: SELECT, INSERT COPIED ROW

select motif, paste again in an area of document outside those rows

select single row of colors beginning at either top or bottom of motif, use Insert_copied rows, in this case, each row needs to be expanded to 3, one for each color

starting at bottom inserts rows below, starting at top inserts rows above

repeat the process for one row at a time, for number of rows required

here 3 cols per row, each row needs to be expanded to 3, so insert row is used X2 for each color

when the expansion is complete proceed with “erasing” as described in 2 col chart above, erasing first col 1, then col2, then col 3 for each row

use separation as is elongate X2, or split again for knitting without elongation

EXCEL_INSERT ROWS
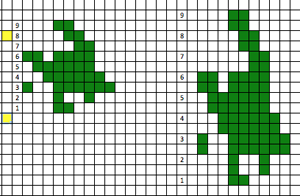
yellow squares indicate starting and ending points for inserting rows; click on any square within a row, a row will be added across the whole document, copying the colored squares in the row above; I began on row 8, working my way down, stopping at row numbered one will have one row missing in elongated repeat on right; yellow squares are markers /reminders for beginning and ending row insertion commands

3 colors, separation requiring elongation for knitting
Both programs have options for changing viewing magnification, so grids may be of one size to start with, and viewed as preferred. This is also helpful in scaling screen grabs. The excel menu bar has a paint bucket that may be be used for coloring cells selected both singly and in groups.

INSERT COLUMNS

Split the column and insert copied column (numbers) will aid when wanting to chart twice as wide; in excel: insert column on the blank square to the left of motif will insert a blank column in that area throughout the document; same command beginning on the right of the first colored square on the left, or of the last colored square on the right, will repeat the colors in the motif, adding blanks to the remaining “squares” for that whole column in the document

NUMBERS
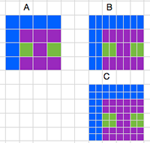
A: original motif, B: split columns for twice the width, selected and pasted elsewhere for C, inserting rows, rendering it also twice as long

the image below shows some of what can happen when any motif is repasted in areas affected by its new formatting ie. rows split at the bottom in E, columns split to the right of A, and if table column and rows are added by dragging on the “handle” on the document’s bottom right, colored squares are copied and extended into stripes. Unwanted areas of color may be selected, using Edit_ clear all will remove the colors, leaving the border lines intact
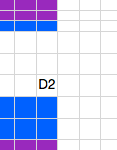
to remove text: select affected cells, use Edit_Delete

EXCEL
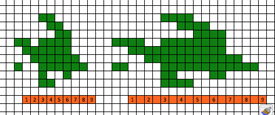


orange squares show sequence used: in order from left to right, beginning with selecting # 1, insert a column, working across the repeat, resulting in twice as wide.

tools are often self-evident, and experimentation helps sort out a way of working so they become familiar, and one may sort out of the many ways that are often available to complete the same task what is the easiest for them

both programs have options for changing viewing magnification, also helpful in scaling screen grabs

to my knowledge there is not a way when there are 2 colors in any one row to swap them for each other, even with formulas and rules, a feature that would be very convenient in other types of color separations.
Charting knits using Mac Numbers program 1

A free manual for the program may be obtained via Apple, with extended documentation. I thought I would share some of my notes in trying to work with it in creating knit charts. They are not intended as complete tutorials, but simply perhaps as a place to start for those owning the program. Having some familiarity with excel makes some things easier, Numbers reads Excel documents already created, will save/export files in its format as well

to create a chart: open a new document, a table will appear with wide, rectangular cells which will need to be readjusted

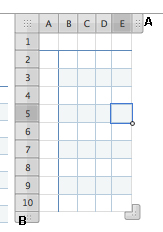
clicking on the square with 9 dots to the left of column A will highlight the whole sheet

the formatting bar

click on inspector (white i in blue dot) located above format bar

adjust column width and height to .4 and .4 or desired values hit return

click on the screen and a resized document will appear

drag on symbol  small rectangle with 6 dots (upper right, bottom left, marked A and B) to  increase # of column or rows, or copy and paste as they are needed

there are many ways to add color described in the manual in multiple contexts. For this purpose, I like to begin by creating a palette within the working table. To do so click on an individual cell, go to fill in the menu bar,

click on it, choose a color from the window that appears, select color, the cell will fill with color, having a palette within the document will save confusion, and save trips back and forth between

repeat until you have a row of chosen trial colors, same can be done with font symbols or numbers for easy access throughout the process, I have created a master document with all symbols in fonts I like to use to the left of the table,  in sizes suited for the working cells, for easy copy and paste as well

copy the individual color (cell) will work with paste  to place color in the design motif area, dragging the handle at the bottom right of the paste will produce single cells, rows, columns, or squares/ rectangular shapes in that color

copy and paste motif created both to change color segments, and to test motif repeat alignment

isolate final repeat for actual knitting, programming, or punching

Borders

here I miss the pencil drawing option in excel; a tutorial on border drawing Numbers, and some illustrations  using the motif in the downloadable document (post1) with variations

using select, copy, paste; border markings  illustrated

altering the repeat to a dropped one

brick stitch_ easy changing to visualize shifts in the pattern

Charting knits using Mac Numbers: color separations 1

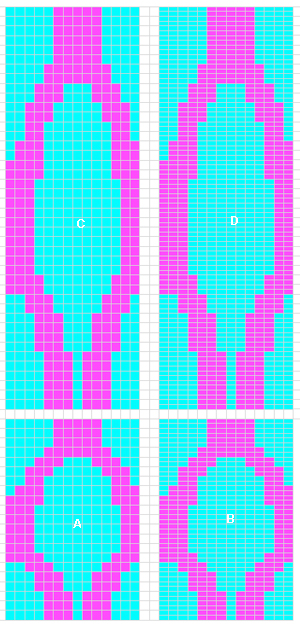
A lot has been written on the use of excel in knit charting, I don’t believe there is anything “out there” on doing the same with Numbers. After my latest OS upgrade, I thought I would revisit playing with the updated program. This is not a tutorial as such, just a sharing of some results and observations on this particular effort. For the design, I used the same motif as in the last post on 2 color drop stitch on Japanese machines. Under the table menu, there is an option to split rows or split columns. This can be achieved in any selected area, without affecting the remainder of the spreadsheet. Copying and pasting the split image over an area of full-size cells will change its format, and in turn, allow for splitting again. In the image below A is the original motif, B the first split after selecting only those colored cells, C repasting B in an area of full-size cells, D selecting and splitting C to achieve elongating the original motif X 4.

to separate the colors for the 2 color drop stitch using white “erase” every other row: these rows will result in no pattern selection, and will be the rows on which stitches are dropped. Select and copy and paste again. Choose either of the 2 colors and white-out that color (I chose to start with cyan) on the first and then every other colored combination row. Note there are 3 blank rows between each “erasure” after the first. Once the process is completed to the top of the design, select, copy, and paste again. On alternate rows that are still in 2 colors, the magenta can now be whited out, and this repeat when complete, visually be checked for any errors. Colored squares remaining in either color now translate to punched holes or black squares on mylar depending on the size of the original motif

This particular method works on even motifs with an even number of colors, as splits double existing rows. Row and stitch numbers, text, etc may all be added. The image below does not refer to color separations. It illustrates the ability to go twice as long, twice as wide through using splitting rows, and in turn, splitting columns. Twice as wide used alone comes in handy for any knitting on every other needle, sometimes used for thicker yarns on the standard machines that do not have the ability to do that via electronic programming.

WordPress will not allow uploading a numbers document; here is a numbers document exported as excel .xls  that should open in Numbers on a Mac for anyone wanting to play with charting a bit. The extra color square on the far right is a “place holder” of sorts, needed to avoid cropping of all empty cells to the right of the motif in the software’s exporting the file  numbers_test_doc

4/30/2018: the feature described below in 2012 disappeared from later versions of numbers, I am presently using version 5.0. Later versions offered these options for working with rows and columns. The highlighted row will be duplicated, a slower process than simply splitting cells. A positive feature is that an individual table may be changed while still within view on other tables on a single sheet, without globally affecting the document. 

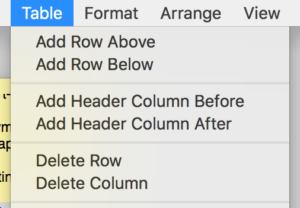
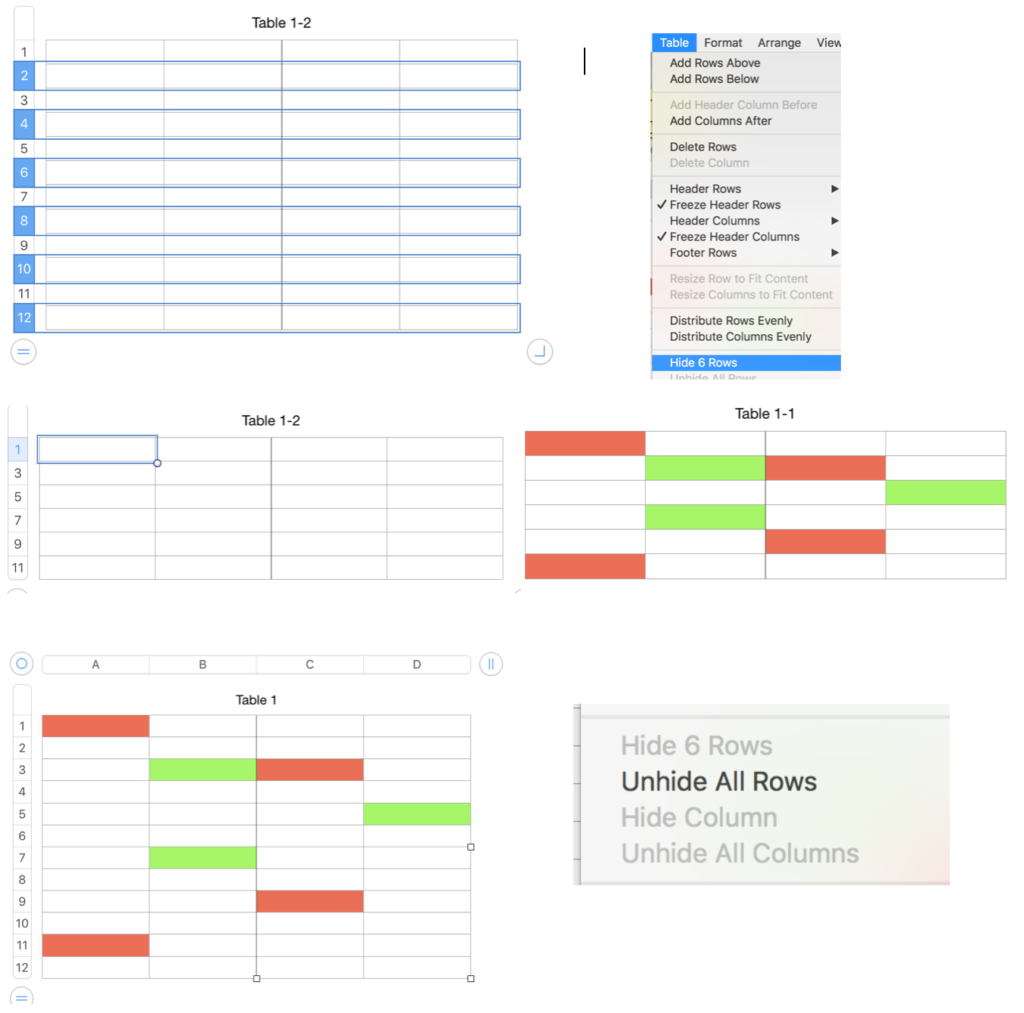
While playing with more table options today I sorted out a way of creating blank rows between design ones, possible charting uses still TBD. Though the results from such charting are not capable of being downloaded directly into knitting software, they are a good way to sort out repeats and begin to understand and create any necessary color separations. By holding the command key, rows on the table can be highlighted and hidden as a group. I chose all the even-numbered rows. The repeat then is drawn. When it is complete, rows originally targeted for hiding are “unhidden”, leaving the design motif with a blank row between each design row, at twice its length. Hiding could take place at irregular intervals as well. 

December 8, 2012: in writing my latest post I found an easier way to deal with split rows and columns. If the motif area is copied and pasted on a “blank” part of the spreadsheet a new table is created, which can be altered without concerns about affecting the remainder of the document. It’s like working with small pieces of graph paper rather than a very large one. The motif area is chosen and pasted, creating a new table

the table, split into row option is used

simply select all, click on the line at bottom of any numbered, grey row cell on the left of the table, and resize to match the remainder of your document, when the desired measurement is achieved, release the mouse and the document cells will be uniform in size.

the same process may be applied to split columns, may well have to try this on some of my huge excel charted spreadsheets

Drop stitch lace, 2 colors per row, japanese machines

This is an attempt to duplicate the results of Passap tech 185 used in knitting multiple colors per row drop stitch “lace” fabrics.
The method may also be used for more colors per row, expanding the repeats accordingly to the number of colors per row X 2 for each motif row. For example, here 2 colors per row are expanded to 4 rows for each color in length, 3 cols per row would need to be expanded to 6 for each design row.
This fabric widens considerably when completed, so at the top and bottom edges, cast ons and bind offs, need special consideration and planning.

In this instance, the design has been separated for the dbj method wherein each color in each design row knits twice. The second row in each pair of rows is then cleared of any pixels which results in no needle selection, providing an opportunity for the loops formed on the main bed to be dropped with the assistance of a stitch ditcher.
The fabric may also be executed using the original separation, but the opportunity to use an accessory to facilitate stitch dropping is lost’
The method for swatching: cast on for every other needle rib, knit 2 circular rows followed by one row of all knit rib, and transfer all main bed stitches to the ribber. For an open stitch cast on directions and photos see later post.
COR Set up needles on both beds for every needle rib with an extra needle in work at each end on the main bed, cancel end needle selection (KC II). With the main bed needles in the B position, set the knit carriage to slip in both directions so as not to pick up loops across the whole row as the first pass toward the color changer is made, needles will be preselected for the first pattern row
COL: the ribber remains set to knit every needle, the main bed to slip in both directions. A piece of tape in front of needle butts of needles in A position aside from the edge needles in work helps keep from accidentally moving extra needles into work when dropping whole rows of stitches
change color, as the carriage moves to the right, selected needles will pick up loops on the main bed that will form the long stitches when dropped, while the next row of pattern is selected, so by the time the carriage has reached the right side of the machine, needles will have flatlined due to the all blank rows in this type of color separation
COR: use any convenient tool to bring all needles involved out to E, and use the same tool to return all stitches back to the B position, dropping the loops on the main bed which will form the long stitches. With this type of color separation, it is also possible to use a modified Studio P slider Directions on altering the studio tool for use on Brother machines to drop stitches from right to left before continuing to knit.
Check that all needles are empty and that loops free and between the beds.
As the carriage moves to the left again toward the color changer, the ribber only will knit all stitches (does so every row), needles will be preselected for the next row of long stitches, selected needles are not knitting.
Colors are changed every 2 rows
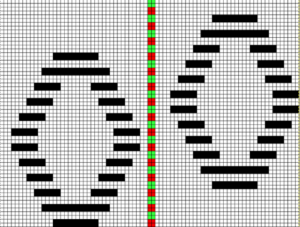
The pattern and the “color separations”, were achieved using GimpImages from left to right
1. motif  lengthened X 4
2. every other row erased (non-selection rows)
3. 2nd pattern row (every other row of design now left) color inverted
4. pattern marked in 5X5 blocks for easier tracking when drawing on the 910 mylar sheet
A downloadable PDF of basic info 185_brother
sideway views: knit side purl side The emerging pattern can be seen, and to be noted is the elongation factor involved as in many color separation DBJ fabrics
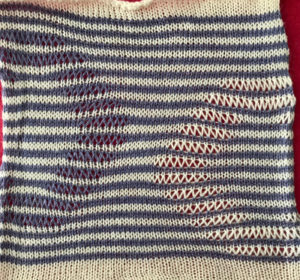
For a later review of cumulative posts on the topic see: revisiting drop stitch lace 
For the design method for staggered shapes in drop stitch see Ayab software-related post.
In other electronics, a single repeat in both height and width is adequate and machine selections will determine whether the design is knit as a single motif or as all-over patterns.
Ayab’s preselection is always from left to right. In unhacked 910s, the first preselection row can be from right to left, so no accommodations need to be made for shifting the last row to the first of the design repeat.
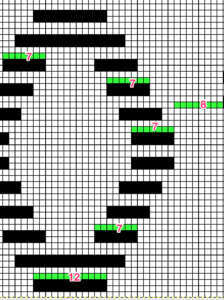
For machines accepting electronic downloads, program the repeat with the first design row containing black squares in it, and adjust the spacing between repeats as preferred. This particular version is 80 stitches wide In an unaltered 910 with the ability to double the width of the programmed repeat, mylar users are not excluded from exploring a similar fabric. The repeat above may be rescaled to half the width,  drawn that way, and then use the twice as wide built-in feature. In Gimp scaling this design to half-width, note the right side of each repeat contains an odd number of squares, the left side an even one. The repeat may be used as-is or redrawn, adding or eliminating black squares if symmetry in each shape matters. The free program Paintbrush produces the same image, mirrored.
The explanation: further analysis of the original design reveals the fact that some of the pixel numbers in the design black square blocks are uneven in width. In this instance, 3.5 is half of 7, and half pixels cannot be rendered, so the software assigns the split to 4 and 3.
A Passap sample

From lace chart to punchcard 6, to electronic

The chart here is simpler than those previously explored, appeared in a Japanese publication, was suggested for use in MK as a hand technique

The lace transfers are in pairs, alternating in direction; this excel chart assigns symbols and colors to them. The repeat is 8 stitches wide, 10 rows tall, which make it suitable for punchcard machines as well as electronic ones

Below is the expanded graph, with alternating transfers for each row, and 2 knit rows completing each sequence. I am now using Studio mylars on the 910, so the additional border markings are to help orient the black squares on the mylar’s markings (6X5 as opposed to Brother’s 5X5). The expanded chart, now 40 rows in height:

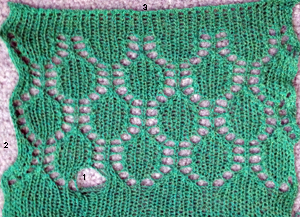
On cards, orange and green may be punched as shown. Below is the resulting swatch, knit on 910 with #2 button up (flipped horizontally). 1: dropped stitch joy, which could actually be easily repaired at this point. 2: a partial repeat creating an interesting edge, more successful than the opposite side, a result that bears testing in swatches. 3: bind off around 2 gate pegs for maximum stretch in any blocking.

From hand knit lace chart to punchcard 2

Following up on the previous post, from-hand-knit-lace-chart-to-punchcard-1, a 24 stitch chart with marked in symbols for conversion to MK repeat: a 24 stitch chart with marked in symbols an isolated repeat segment worked out on a striped template after choosing and marking the transfer direction of the eyelets on the original, green for to the left, yellow for to the right,  marking lace transfers rows for a partial card segment,  the numbers on the left reflect LC passes and their direction is marked by arrows, the numbers on the far right reflect those indicated on a factory-issued blank card, being selected seven rows below eye level by the reader.
DIY offers the opportunity for extending designs, here another lace transfer segment is added, a card would repeat the design twice in width, and twice in height, again showing the shift necessary when marking rows for cards,  The full punchcard for the elongated repeat, with a punching error marked by the red spot, also used to indicate the corresponding spot for the transfer error in that needle spot on the corresponding swatch