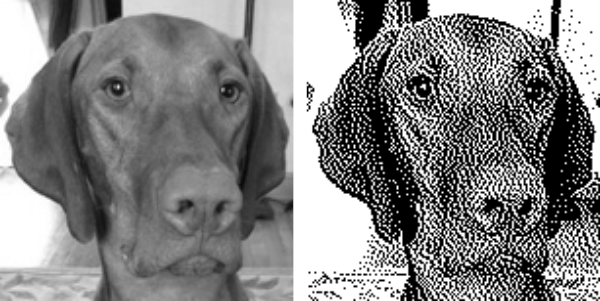
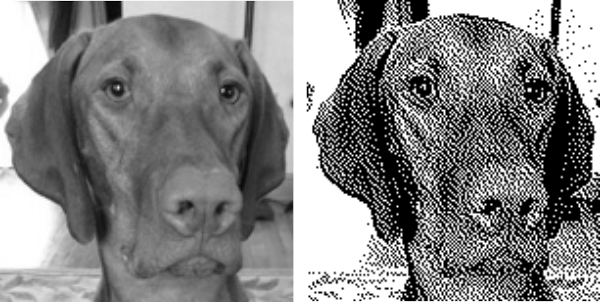
The many faces of Rocco: in my 2013 tests in Gimp, the image is 150 pixels wide by 154 pixels high 
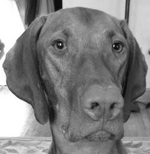 The image is used with the kind permission of Rocco’s owner. I have used this image before, when I posted previously on some ways to reduce colored images to B/W for possible knitting using a Mac computer, please see post on 013/03/14/ color-reduction- conversions-mac-os/. Gimp offers some alternatives to the familiar dithers and is available, free, for both PC and Mac platforms. Tutorial links on Gimp edge detection available online as of May 2019 are listed at bottom of the post.
Image_Mode_Indexed_ one bit black: immediate result, too dark

Threshold adjustments may not be made in indexed images to alter the above image, so it’s back to greyscale. Reductions to greyscale may be achieved through Image_ Mode_ Greyscale or choosing Colors_Desaturate_OK options. Desaturation offers additional choices
Image_Mode_Greyscale Colors_Desaturate_OK
 Rocco desaturated, in “knittable portrait size”
 using edge detection and its algorithms
 Difference of Gaussians


 what happens if in addition color_ invert is used with Roberts
 adjusting B/W with Threshold
 after a bit of “tweaking”
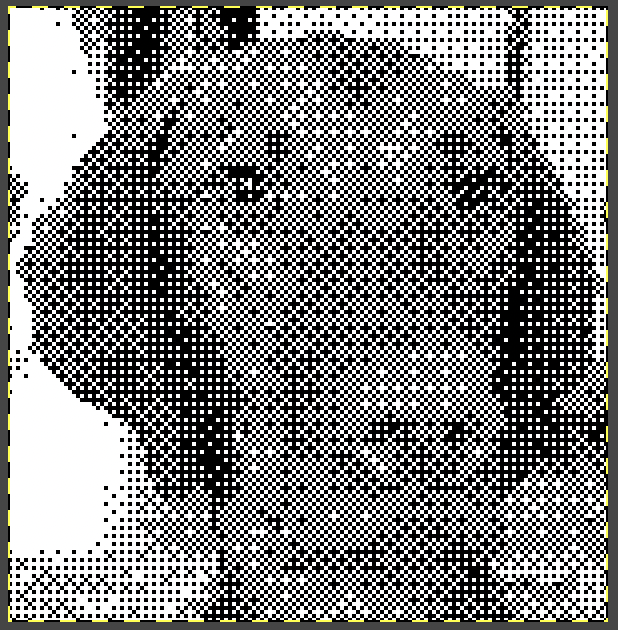
  Image_Mode_Indexed, rendering it “knittable in 2 colors”
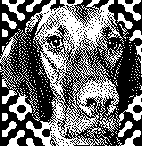
  getting silly with filling the ground with pattern behind the floating head
2021: the latest, December 2020 updated version of Gimp for Mac OS
Gimp dithering controls easily accessible with mode changes to indexed 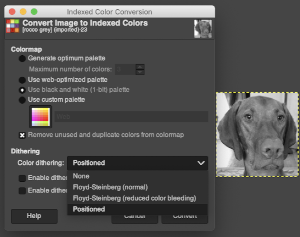 I found I got the best results adjusting the contrast in the original greyscale image prior to changing its mode to indexed and dithering (Floyd_Steinberg, normal)
 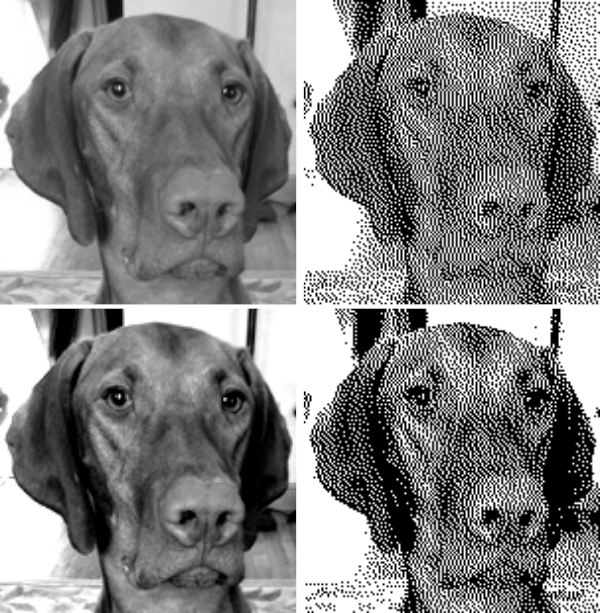 Dithering options in Gimp 2.10 may be found at the bottom of the colors menu
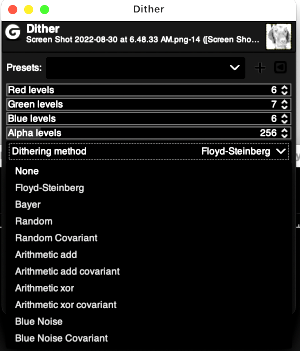 This filter can reduce the number of colors in an image by reducing the levels per channel (colors and alpha). Different dithering methods can be specified to counteract quantization-induced banding.
Presets are common features for many Colors commands.
Red levels, Green levels, Blue levels, and Alpha levels sliders set the number of levels for the respective red, green blue, and alpha channels.
Dithering method: can specify the dithering method to use
None: no dithering will be performed
Floyd Steinberg: the most commonly used method of dithering, and the default for this filter
Bayer: the algorithm is characterized by noticeable cross-hatch patterns in the result
Random, random covariant: use randomization of the pixel values to reduce the number of colors
Arithmetic variants are based on magic numbers and arithmetic
Blue noise variants are sometimes thought to be the least distracting
Random and new seeds are two random dithering methods.
When converting to indexed colors with the image unaltered, and using positioned dithering, the last option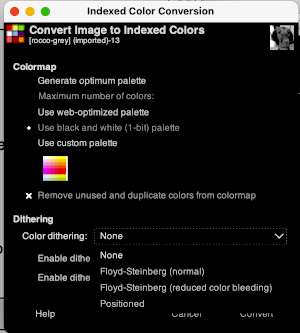
 Hyperdither: options offered
 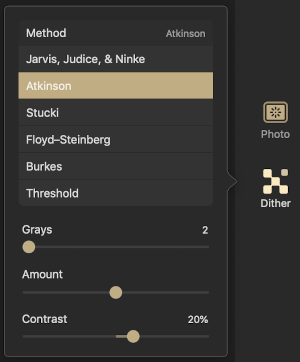 default Jarvis
 default Stucki
 online, options https://ditherit.com
 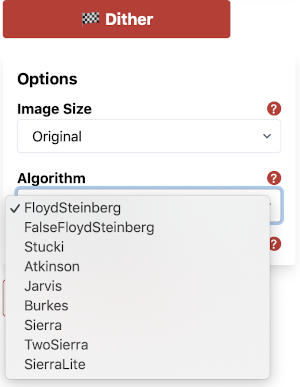 it is possible to choose from multiple palettes
  Sierra dither
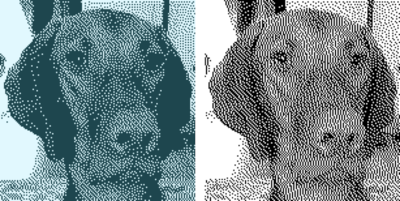
5/4/2019 Other than GIMP: after straightforward load, convert, and save, with no other adjustments, images shown in approximately 150 pixels/sts in width, no significant change results with conversion to color B/W indexed
http://gazs.github.io/canvas-atkinson-dither/
 online, default settings https://29a.ch/2016/08/04/ditherlicious-1-bit-image-dithering
 Check dithered results, downloaded images may be in RGB Mode. Prior to any knitting, they will need to be converted to B/W indexed.
Looking for ways to reduce the noise in dithered images I tried this conversion in XnSketch, using the photocopy effect, beginning with the colored image of Rocco, the results: 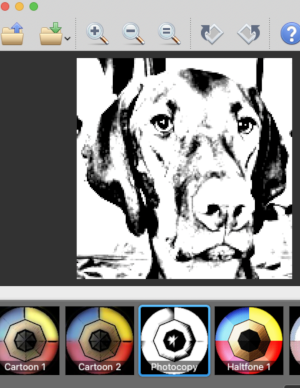 imported the result into Gimp and saved it in indexed 2 color BW and in turn, 3 color indexed mode, no color adjustments, finding the result pleasantly simple
 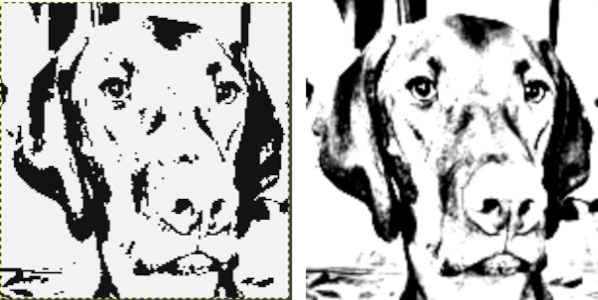 beginning with the greyscale generated image followed by Mode changes in Gimp, indexed 2 color BW, then indexed 3 color, there appear to be very subtle differences with a bit more detail:
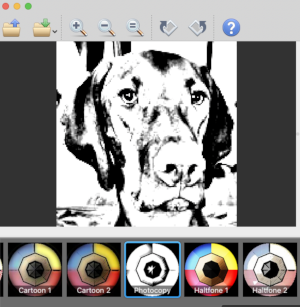
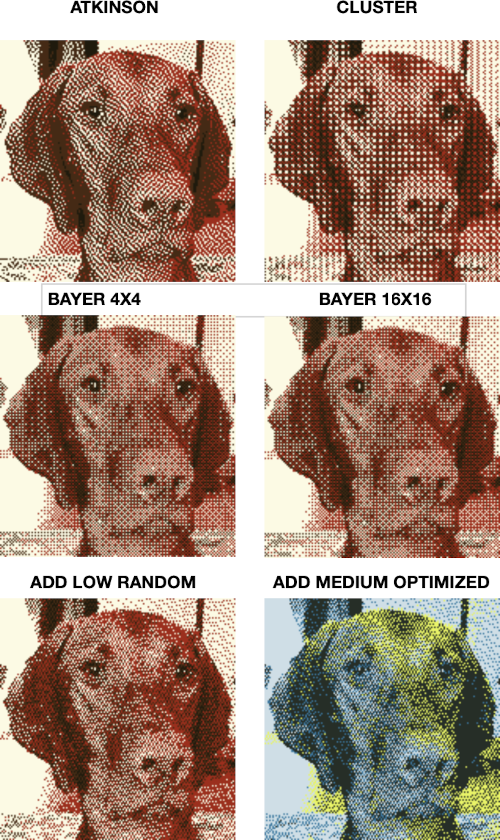
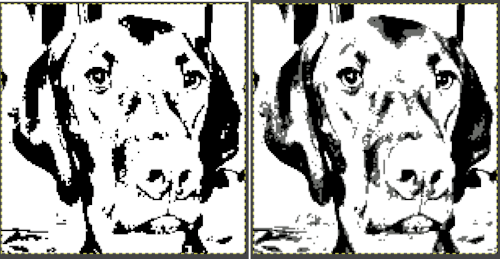 Another online resource with an extensive array of dithering options https://app.dithermark.com. Here are 2 conversions using the app, the images are 2 color B/W. The presence of a third color is an illusion created by the difference in the distribution of BW color pixels, they loaded fine as viewed for knitting in Ayab, and in img2track, once I remembered to change its setting to 2 color knitting from the last used one at 4 colors
 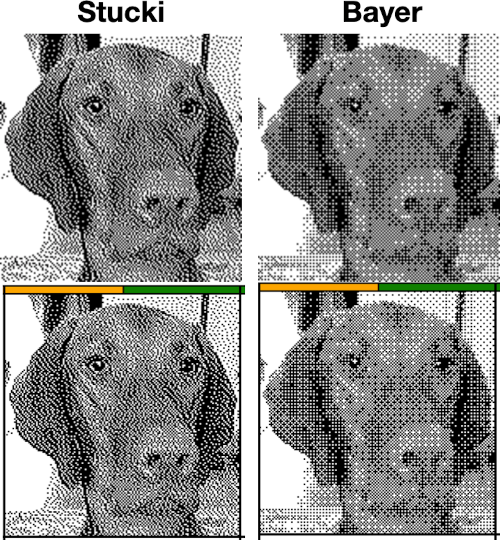 It is possible to reduce images to 4 or 3 colors using the program as well: a slider for color count is used to choose the final number of colors in the reduction. Again, these instances have no added manipulation
 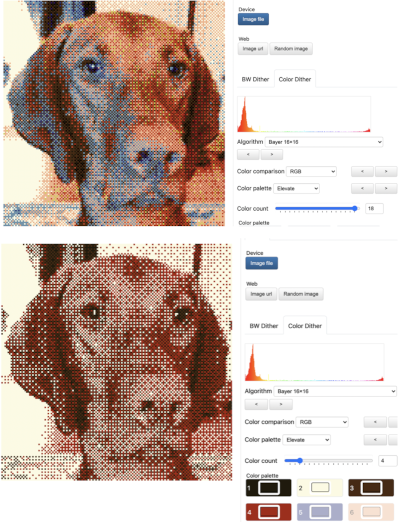 A series of dithers:
 To retain the quality and size of the dithered image, download it, rather than using a screen grab. The software used to separate the chosen dither may alter the result somewhat. I am writing my posts using an iMac M1 with OS 12.0.1. At this point Ayab is not operable, img2track does open images, but in this case, with interesting distortions, and it does not download any files at all.
 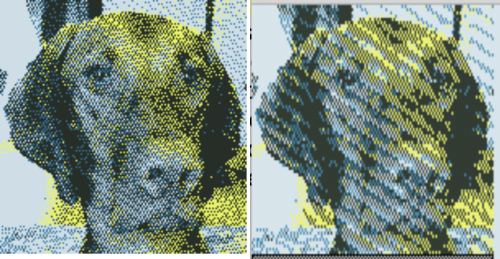 Yet another dithering tool, allows one to draw in dithering mode using a variety of patterns and will dither images. In the latter instance, there is no real opportunity to tweak or alter the result
 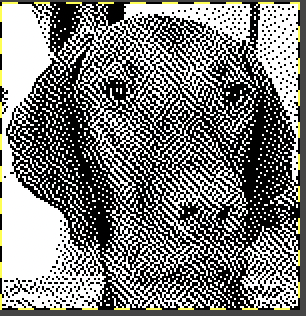 shapes drawn using a few of the large variety of offered patterns:
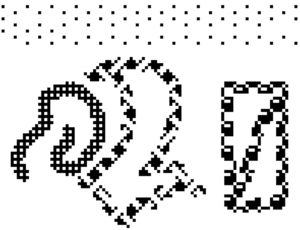
2023 working with pattern fills and removing any background 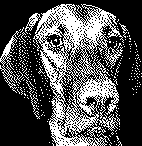
In this instance, a portrait of a dog wearing a sweater image was generated in Midjourney and scaled to 191X195 pixels.
Dithering online apps were used to reduce the colors in instants to 4, 3, and 2.
The greyscale image was also color reduced and dithered in Gimp.
All results were not adjusted further in any way.
Color reductions could be tweaked a bit further prior to actual knitting.
Magnifying the chosen individual result will help visualize the change in resolution quality of the image in the final knit piece. 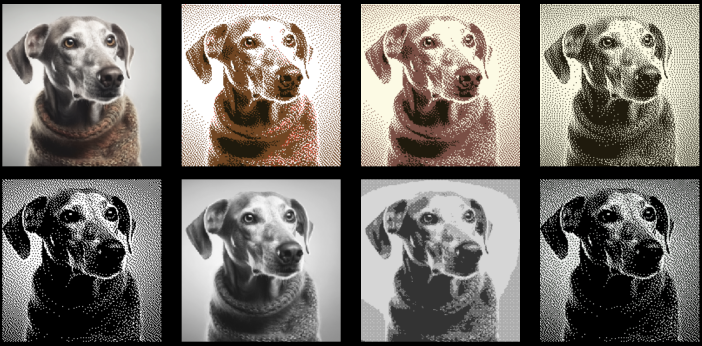


 change the second value


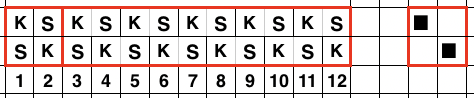
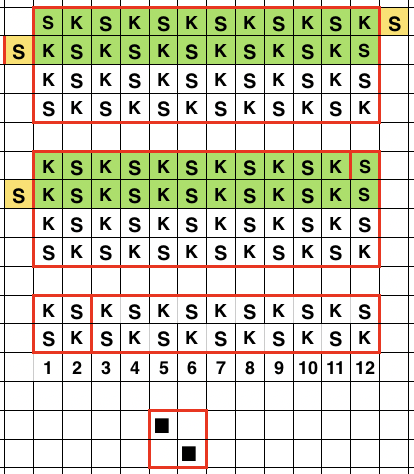
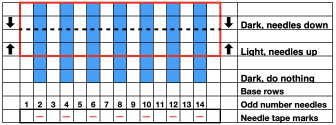
 On odd-numbered rows beginning with row 1, mark all empty squares in the even-numbered light-colored row immediately above it with purl symbols.
  All unmarked stitches throughout the design are knit, whether, on the “wrong/right” sides, all dashes are purled, patterning occurs on the second row of each color. To visualize the full pattern one may use the add row below feature to expand the graph (the chart below is missing the very first row).
  Now add the second row of each color and grounding stripe (s) at bottom of the repeat. Most patterns will start the illusion immediately after casting on with dark color, row 1 above. I was interested in my sample having a border of sorts on its top and bottom.
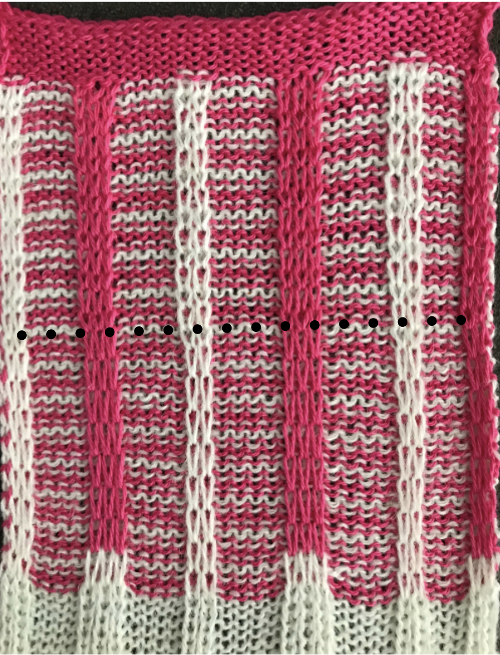
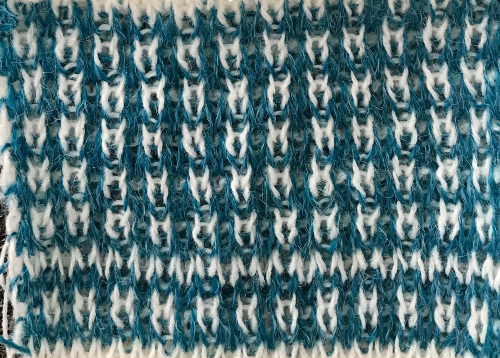
  The resulting knit swatch

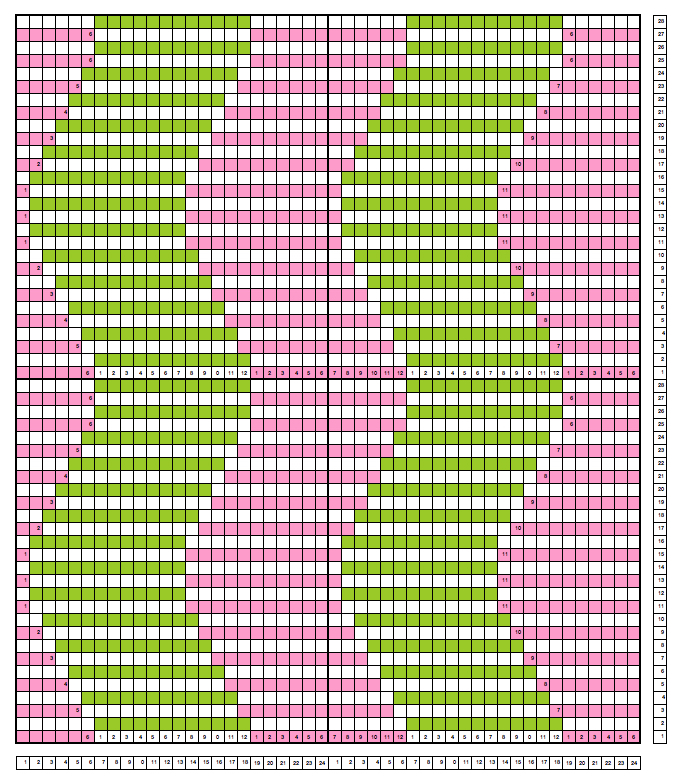
 the actual repeat
  color inversion begins on row 1 and follows every other row (if numbered these would be odd rows)
  testing the repeat through filter/ map/ tile
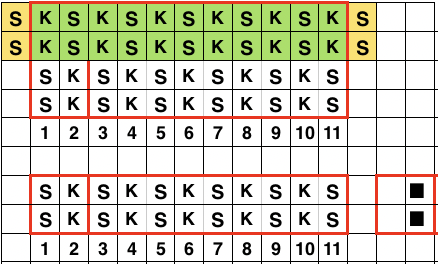
  a working chart that can be printed to suit with dark/light row markings and blank squares for tracking knitting rows in the execution of the pattern
  A larger version with stitch and row counts marked. The chart represents half the rows in the actual knit. The cast on row counts as knit row 1, color 1, and following the chart beginning with row 2 knit the black squares and purl the white squares. *Change color, knit one row (odd#), on the next row follow the chart, knitting the black squares and purling the white (even#).** Repeat from * to **.
 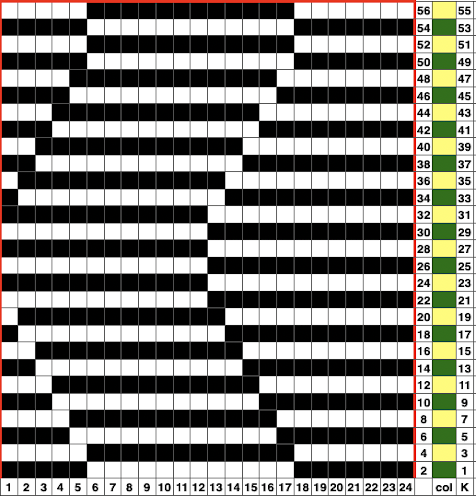 the knit swatch: “shadow side”

 Follow up:
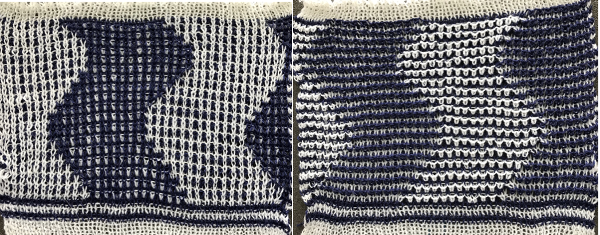


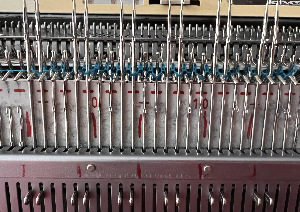
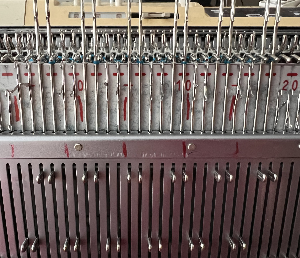
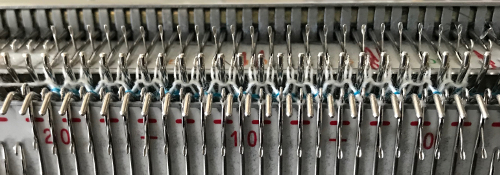
 rear view


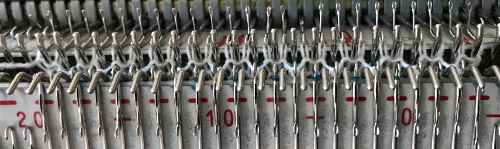
 When all main bed needles are preselected, the ribber is set to slip for 2 rows, only the main bed will knit. When there is no preselection on the main bed, the ribber is set to knit, no stitches will be formed on the main bed, so each surface remains separate. The knit carriage is set to KC1 to ensure the sides of the tube will be sealed. If two knit carriages are used to select needles, then it is possible to easily adjust tension for the alternate color if that is deemed needed.
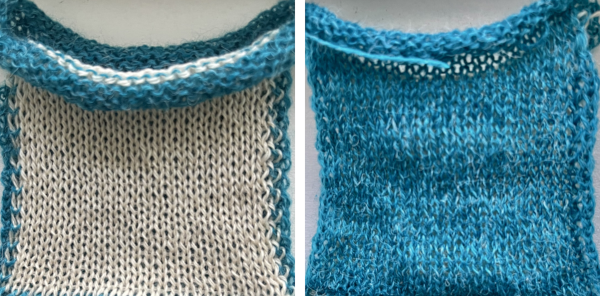
 Not to be forgotten is appliqué, where separate shapes may be knit and joined onto the ground (knit in any desired stitch) technique by a seam as you knit method.
 Automating the function brings us to another color separation of sorts. In single color quilting using simple tubular setting: Knitmaster machines work a bit differently than Brother, so cards/ mylars would have to be designed accordingly, Passap has some built-in techs that can help with this. The settings below are for brother, and the card, for narrow vertical tubes. The width between punched holes could be adjusted to any factor of and up to every 24. Every row or every other row can be marked. Cast on for every needle rib. In this repeat when rows with no needle selection occur at its top, set both carriages to knit 2 rows (or bring all needles manually out to hold) to seal pockets. MB is set to slip in one direction, will knit on even rows, to slip on odd rows as punched. The ribber is set to slip from right to left and knit from left to right. With carriages at KM’s left insert the card, lock on row 1. KC –> knit 1 row in rib from left to right, release card, and continue knitting. In Brother machines, the tucking lever must be in the down, N position as well. When possible, the tension on the main bed should be as loose as it will allow, if stuffing the pockets is planned. Without wadding, the face can have a crumpled look with a smooth back.
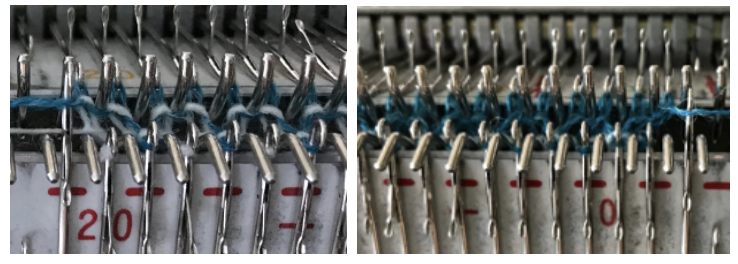
 A small test with a 15 stitch wide pocket
 Going further in automating the repeat: this card portion includes the sealing rows (1 and 2): extend repetitions of rows 3 and 4 until the length of the desired pocket is reached for your DIY repeat. The ribber is set to slip from right to left and knit from left to right, the main carriage to knit from left to right, and to slip from right to left (opposite part buttons). With carriages at right insert the card, lock on row 1. KC <–, knit 1 row in rib from right to left, release card (or mylar), and continue knitting to the desired length. Make certain there is an even number of rows between each pair of sealing rows in your own design. It takes pairs of carriage passes to complete each circular round. To use the repeat below as a continuing pattern, one row in its height would need to be removed or added. A test of the repeat
 …
…


 A sort of tune: