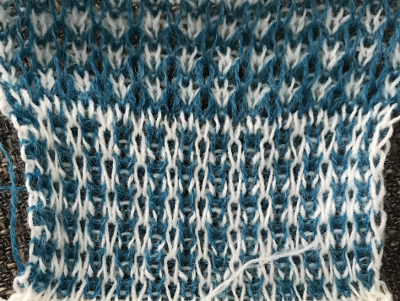
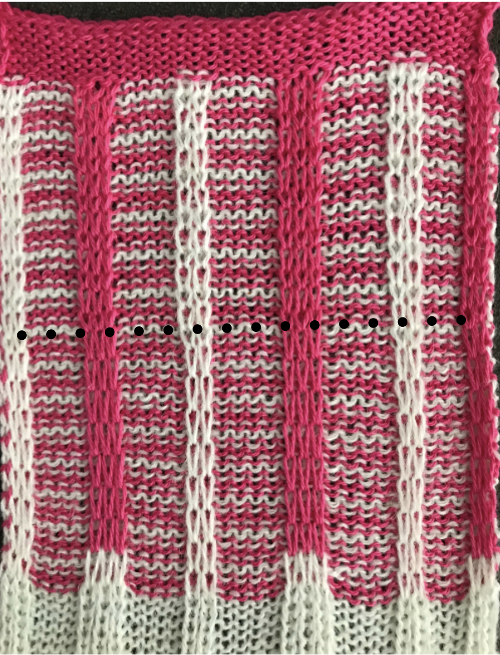
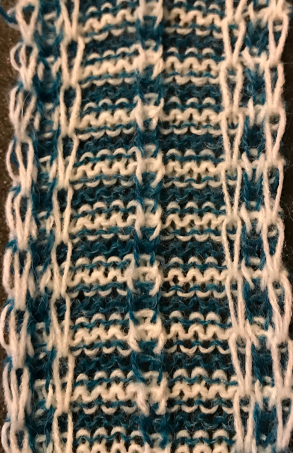
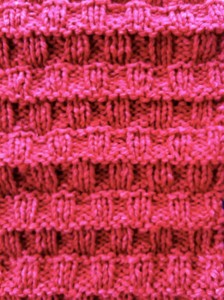
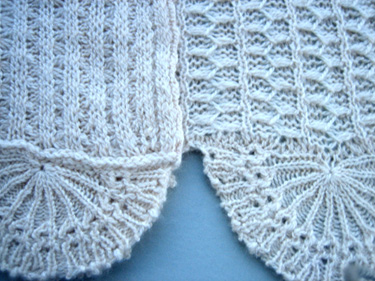
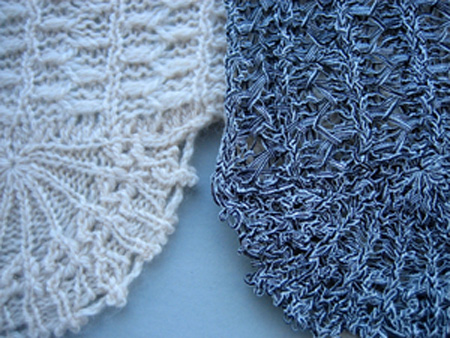
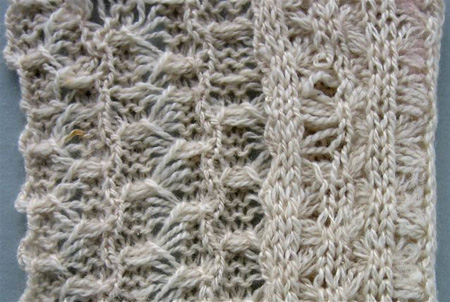
Ribber pitch, a bit on racking 1: chevrons/ horizontal herringbone

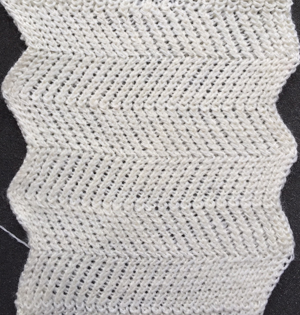
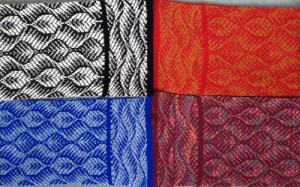
A “how might this be done challenge” of late re this fabric brought to mind racked patterns for chevrons, both vertical and horizontal, and the possibility of producing them on home knitting machines. racked_scarf_mediumTo review some of the principles in racking in both Brother and Passap knitting machines: the pitch is the distance between each needle groove along the needle bed is sometimes also referred to as gauge. The size varies between machine brands and types of machines. For example, the Brother bulky has a 9 mm pitch, the Passap a 5 mm one; the larger the pitch number, the thicker the yarn that may be used.
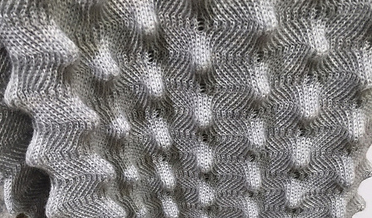
Full pitch lines up needles and gate pegs (or channels) on both beds directly opposite each other. To knit patterns in full pitch, the rule is that for every needle in the working position on the main bed, the corresponding needle on the opposite bed must be out of work, and vice versa. This setting is never used when groups of all needles are in work on both beds. Stitch patterns using this setting are designed to have opposite needles in work on either bed at any one time, but not both at once. The number of maximum needles in use for ribs on both beds will usually total 200 (4.5 mm machines), and the setting accommodates yarns thicker than when every needle is in use.

In half-pitch both bed needles are now offset by half a position, centering them between each other. The full complement of needles for possible use now is potentially 400 (4.5 mm machines); the setting accommodates thinner yarns than one might use on the single bed.

The half pitch lever on Brother may be moved from P to H to change alignments. In Passap the racking handle may be used in an up or down position to do so. The racking or swing lever allows the ribber bed to be swung one full pitch to the right or to the left in a series of stepped moves. The racking handle on Brother machines is located on the left-hand side of the ribber bed. Racking swing indicator positions are numbered 0-10. When the racking indicator has been moved over to the next number, this means the ribber has moved by one full pitch. With the swing indicator at 5, both beds will be centered opposite each other, the usual position. Starting points may vary when racking is used in patterns. Beds cannot be racked with needles in holding, as needles will then crash into each other. It is always a good idea to check ribber alignment before tackling more complex, double bed fabrics. In Passap the racking indicator is situated above the racking handle, and arrows indicate the direction of the last movement. The scale at the top of the front bed shows the possible racking movements from a center point of 0 to 3 to either to right or left of center. I chose to place numbers below the factory ones on the machine from 0 to 7, finding that method easier to follow, since I do not rely on built-in patterns and racking prompts from the console. For the purposes of these swatches, I am reverting to the factory indicators.

In the Passap system, the racking handle has 2 main positions: up, and down. When the racking handle is up needles are directly opposite each other (P pitch in Brother), when it is down the needles are between each other on opposing beds (H on Brother). There are some racking handle positions at different parts of the “clock” that are recommended when using some of the Passap accessories.

Regardless of machine brand needles have 3 basic functions: knit, slip (do not knit), tuck (gather loops). Passap pushers have 3 positions: work, rest, and out of work. When a pusher is in the up position the corresponding needle will knit no matter what the setting on the pattern dial. This is the equivalent of having needle pre-selection on Brother, but forgetting to change cam buttons from the normal knit setting. When a pusher is at rest it will slip or tuck depending on lock setting to AX, DX, or FX (in Brother these would be needles not selected, in B position). If locks are set to C, E, or G, the pushers have no effect on the needles. Pusher positions may be changed manually, automatically by arrow keys (back lock Passap, lili buttons, and lever Brother ribber), automatically by readers whether electronic or punchcard on both brands in the Brother main bed or front bed Passap are in use.  NO pushers are used in N (double or single bed plain knit), CX (tubular), EX (double bed, tuck).

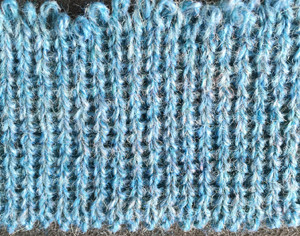
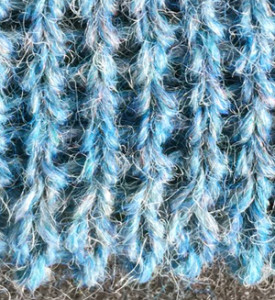
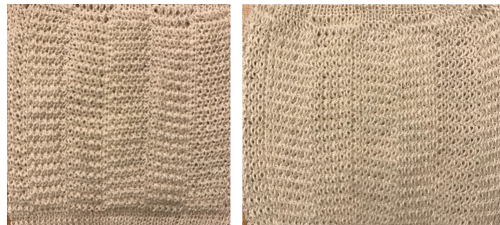
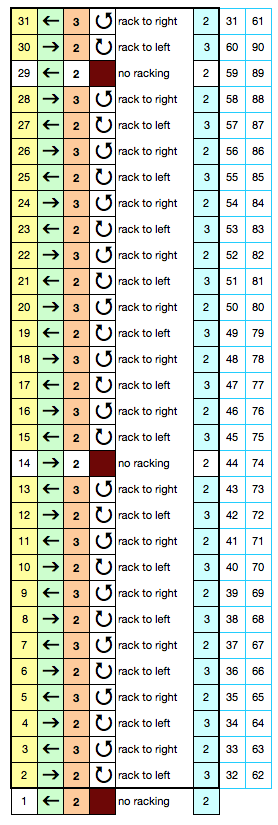
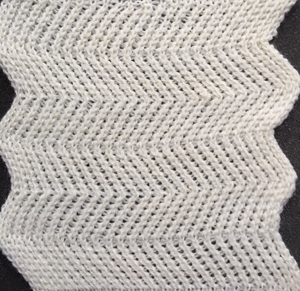
I personally find racking easier in terms of the numbering in Brother brand machines. For these samples, however, I chose to work on my E 6000. Adding tuck to the mix creates more textured surfaces, and a half or full fisherman’s rib where every needle tucks, then knits as the carriage reverses direction on either single or both beds, is a place to start. I have written previously on tracking brother racking sequences using a punchcard numbering system. If no other pattern is used on the main or front beds, needle and pusher selection might be used to track the racking position there as well. These fabrics require concentration. In terms of chevrons, both horizontal and vertical may be produced. Some published sources include a youtube video by Diana Sullivan, knit on a Japanese machine, and a baby blanket in full fisherman rib knit on the Duo 80. The version below is my half fisherman adaptation of the latter. The photos illustrate both sides of the fabric. The racking is done by moving a single of each of only 2 positions to the right or to the left. Single (or multiple, odd-numbered) rows at the end of each sequence place the carriage at its start on the opposite side, rather than altering the numbered sequences as in the Diana video. I began my fabric on Passap racking position 2, to the right of 0, locks set at KX, N, first and last needle in work on the front bed. The back bed tucks every needle right to left, knits them left to right. There is a slight difference in texture between the 2 sides of the fabric.

300_514300_515

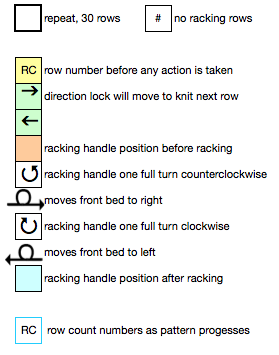
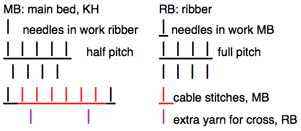
activate row counter after CX rows in the cast on, with locks on left, so knitting the racked pattern begins with locks on Right, RC on 1. Below is my working “cheat sheet”
symbols

cheat sheetsettings

For scales and chevrons on Brother machines please see 2018/07/19/more-scales-and-chevrons-in-ribbed-racked-4-fabrics/
Picot cast on for every needle rib

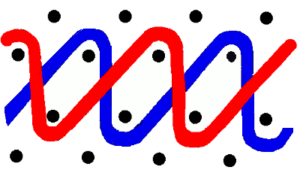
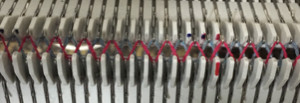
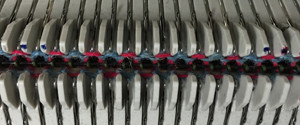
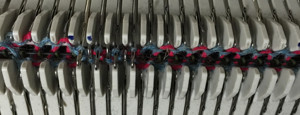
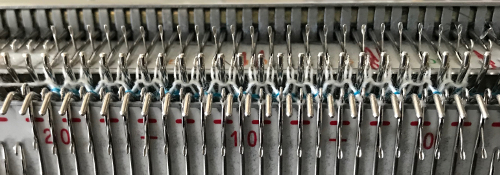
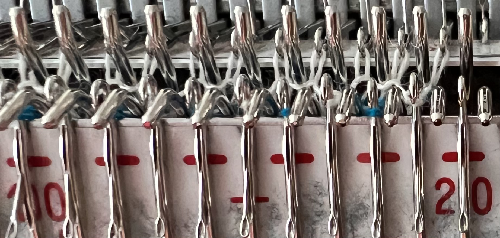
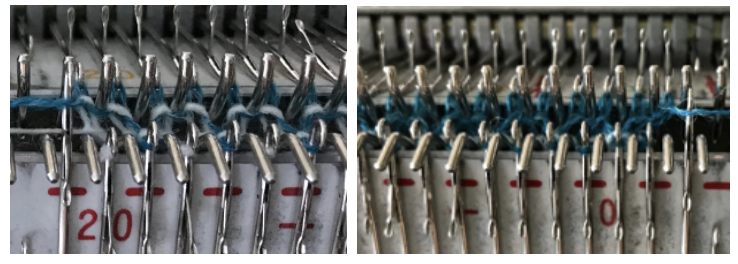
Depending on the sort of rib, the beds need to be aligned in most instances so that the needles on opposing beds line up between each other. For this ribber cast on the beds start at full pitch, as you would for EON knitting. Every other needle is brought in to work. A first “zigzag” row is created at the tightest tension possible. On the second row, the alternative needles need to be worked. On Passap E6000 BX, LX with pushers under new needles only will help do the job. On Japanese machines: bring the new needles out to hold, set both carriages to slip. This will result in only those “new” needles knitting on the next pass. The outcome will be one zigzag crossing over the other (red over blue in the photo). Prior to the third knit row, reset the carriages or locks for circular settings (CX/CX, opposite part buttons). Because all stitches will be knitting on each bed, loosen the tension to about three-quarters of the rib stitch size, knit two rows, change racking handle/lever and needle positions to half pitch at their completion. Adjust tension to desired rib stitch size, knit a closing “zigzag” all knit row at tension used for the remaining knit, and proceed in rib
The method may be used both for every needle and for every other needle rib.
The configurations for each, colors are in reverse order from photos that follow

first zigzag rowzig zag onesecond zigzag row (contrast color for illustration purposes)zig zag 2hang comb, knit 2 circular rows circ_combchange racking position and needles alignment rackchange tension, continue in rib, knitting all sts both beds 300_2423detail close up detail

Unconventional uses for punchcards 1: tracking racking positions in ribbed fabric

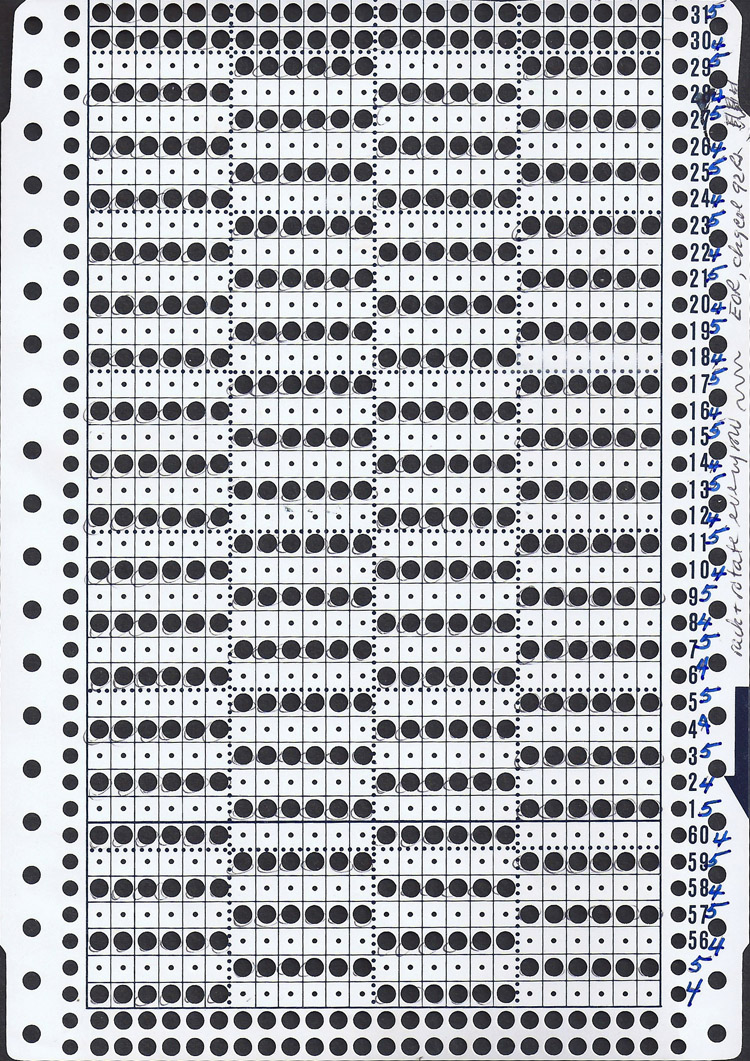
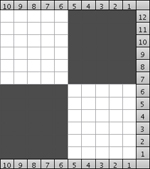
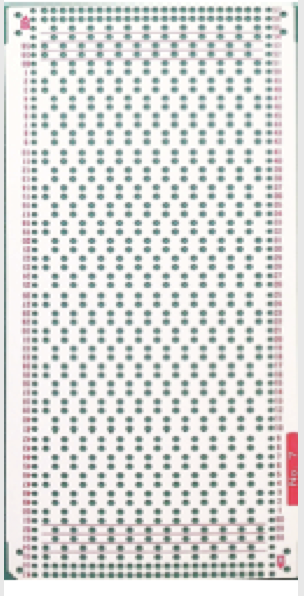
In a long-ago post I shared the punchcard image below. The card is used double length throughout. Cast on in your favorite method.  “Memorize” the first row of pattern, set card to advance EOR, set KC to tuck in both directions, set RC (ribber carriage) for normal knitting throughout. This is a racked pattern. The numbers to the right of the card are for the racking position on each visible row (takes into consideration your eyes can view card 7 rows above card reader teeth). There are only 2 positions in this card as written, 4 and 5, so the results are vertical columns in a textured rib

checkerboardthe corresponding swatch, both sides are shown 

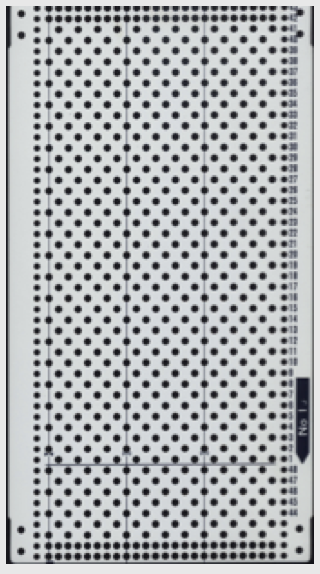
The tracking for the racking sequencing may be created for any punchcard, whether punched holes are required in the card for patterning or not. The image below is taken from the Brother Ribber Techniques Book. If KC is used, no holes are punched, and the carriage is set to plain knit, though the card advances, all needles knit. End needle selection is not a factor. page 17

the racking handle movement repeat isolatedworking repeat

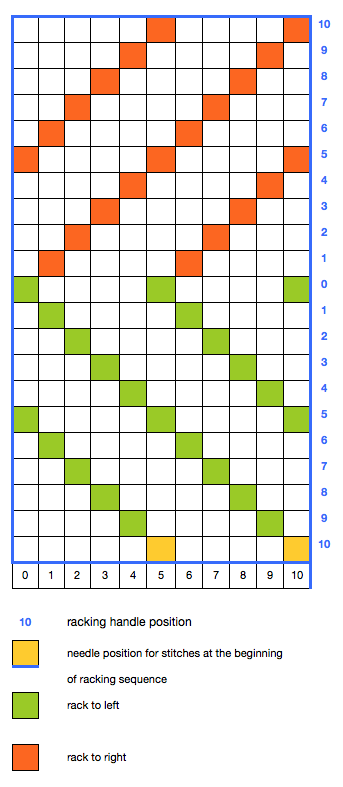
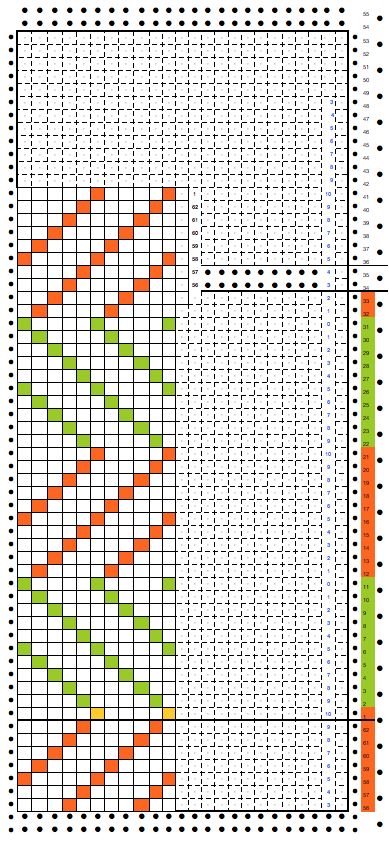
In the card, for use on Brother, the first row of the repeat with the machine on racking position 10 would be placed on row one pre-marked position found on stock brother blank cards. Always check markings for your machine. I have a roll purchased for Brother kms specifically that actually are stamped for Studio, with # 1 two rows below where it should be on right.  No holes need to be punched in this instance. Needles are brought into work and filled as illustrated on the ribber book page. Knit one row across stitches with the card set to advance normally. In this instance marking row numbers in preferred colors will indicate when the racking sequence changes direction. Green rows rack to left, orange to right. The racking handle position repeat is 20 rows high (shown on left), a minimum of 36 rows for the card to roll properly) is met by repeating it twice, and the “motif” is broken up to accommodate the fact that the reader is working on 7 rows below the row number visible on the machine exterior. Rows 34 and 35 would become the 2 every square punched rows always placed at the top of pattern cards. The blue numbers on right reflect the racking handle position for that row before the next row is knit. They can be marked on any blank square if the card is blank, or alongside existing row numbers as seen in the punchcard for the checkered swatch. It is helpful to have consistent habits if one needs to stop for any length of time ie. always knit row, rack to position or stop after knitting, rack upon return.whole card

The machine can be set for double length for racking after every 2 rows knit.

Using the method for cables and crossed stitches  (3 posts)

Lace cards on 260 bulky PDF

Machine knitting cables: single bed, introducing the ribber

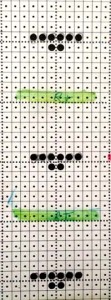
Using two beds is the obvious means of creating a purl ground in combination with your cables, it will be addressed in later posts. If you are trying to cable more than 4 stitches on the main bed, using the ribber to provide extra yarn for the cross over may solve problems in accomplishing the cross. The ribber needs to be set at half-pitch the row before the cables. Needles on the ribber are kept out of work until that row, pushed up to work position, and the row is knit. The loops formed on those needles are then dropped off, the ribber needles are put out of work, and the cables are crossed. The main bed knits until the next row before the cable crossings are once again due. I have recently begun to use water-soluble markers to mark needles positions on metal beds clearly for help in keeping track of locations for specific manipulations.

An illustration of 2 (or more) possible places to pick up extra yarn for a 6 stitch cable crossxtra_yarn

Below is a revision of a punchcard used in a previous post to track crossings for 3X3 cables, with punched holes added, taking into consideration locations for picking up extra yarn on the ribber. After 2 needles are selected on the main bed, one needle on the ribber on either side of them is brought into work. As the carriages knit across, the ribber needles pick up loops, while 6 needles are selected indicating the location of the cable cross on the next row. Ribber loops are dropped, and the needles creating them are returned to out of work position. The cable stitches are then crossed, and knitting resumes, continuing until needle selection once again indicates that an action is required.

IMG_1681

An alternative solution: reverse the beds, with the ribber doing the knitting. A card may then be drawn to select needles for picking up those extra loops, now on the main bed. The knit carriage is set to slip throughout. Punched holes (or programmed pixels in downloads, black squares in mylars) will preselect in Brother KMs, not only keeping the needle selection error-free but also tracking rows knit between cable crosses being made. Brother ribbers tend to knit more tightly than main beds, so tensions will require adjustment as well. With a bit of planning ahead and doing some “air” knitting, all needles not involved in picking up the extra yarn may be noted and placed out of work. Only the needles for selection will remain in work, thus making it easier to drop the loops formed on them during knitting.

This method allows for creating the cables while retaining a somewhat tighter tension. Since the ribber carriage has no wheels or brushes to help hold the knit in place, weight must be used. Too much of it will lead to more frequently dropped stitches. It is always good to bring cable group stitches out to holding (E) in order to visually check that transfers have occurred properly,  and that there are no dropped stitches before continuing to knit.


My recent knits

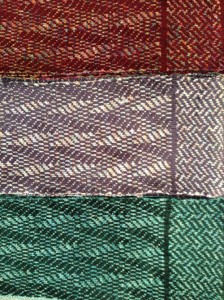
More of the extended twill FI, chenille  and rayon or wool combinations

In addition to all the usual suspects, I have been playing with DBJ once again, keeping my Passap battery charged, crossing my fingers that my ancient Dell laptop will keep working, playing with colors, using super thin yarns and plying them as needed

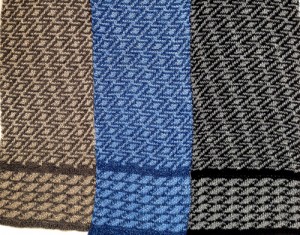
using built in patterns

my own pattern inspired from weaving drafts, borders mirrored to match direction when scarf is worn

More knit bubbles

The topic of “those bubbles” has recently turned up again on Ravelry, where another forum member (Tanya /It makesyousmile) had come across a Russian video by Anna Kovin, with results that closely resembled those in the blue sweater and blankets pictured in my previous post, and poses a great solution for knitting the alternating, the same side knit and purl variants of the stitch. I knit my samples on my Passap, simply because I tend not to keep my ribber on my Brother machine. My production is on a single bed for most pieces in that gauge, and I find it easier to both see and work without the ribber on. That said, the method can work on any machine.

Drop stitch makes for a very loose, wide fabric, so casting on and binding off needs to accommodate that. I often will start with waste yarn, a loose first row, end the piece with a loose row. My bind-off is often around 2 gate pegs or more if needed, and rehanging the bottom and binding off, in the same manner, has top and bottom match. I did not do this in my swatch, and it is easy to see where some of the problems may be.

For swatching I chose to hang the comb with the first knit pass (open cast on trick) on the back bed (would be the main bed on Brother), using a multiple of 5 stitches, knit several rows, and then transferred in a 5/5 rib configuration, sorting out the proper tension for my yarn. I began with 5 stitches on the back bed (main bed in Japanese KM), transferred the next 5 to ribber, and repeated the process across the width of my fabric. The front bed/ ribber was set at half pitch when the pattern was about to start, with an extra needle on left. The portions of the bed that create the long stitches will essentially be knitting an every needle rib, so if point to point is used to make transfers easier, it needs to be changed back to proper pitch for the remainder of the knitting. The swatch does not address the best beginning and end of the fabric for any possible end-use
1. set up 5X5 rib, begin by leaving the first five needles on the main bed (passap back bed)

2. bring all main bed needles into work (ribber needles at this point will be 5 out of work, 5 in across bed)

3. knit 8 rows

4. drop off groups of 5 stitches on the main bed, begin with the second group of 5 from the left, moving across the bed (every needle rib section), pushing groups of needles out of work as they are emptied

5. bring all the ribber needles into work (main bed needles at this point will be 5 out of work, 5 in across bed)

6. knit 8 rows

7. now drop ribber stitches, 5 at a time, begin with first 5 on the left, and continue across the bed, pushing all the needles out of work as they are emptied

repeat the process, beginning with step 2, through 7

the relaxed fabric, the knit blocks alternating knit and purl

the same swatch, illustrating what happens when you press acrylic, and some of the problems to be sorted out in terms of the start and end of any piece in this type of fabric

my previous post

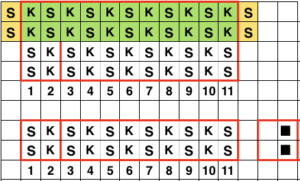
The Brother version, with aid of patterning for needle selection: this particular version of the fabric is actually created by rectangular blocks of every needle rib, with straight side edges. If one wanted recognizable shapes other than this circle illusion, then more hand manipulation would be needed. The chart below illustrates the repeats for my swatch (4 sts X 6 rs or 6 X 6 would be suitable for punchcard KMs). The solid squares represent every needle rib sections, where stitches will be dropped to create the larger ones.

With the machine set to KC and no cam buttons in work, needles are selected, but no patterning occurs. “Air knitting” can help establish where on the needle bed the pattern repeats, and how to set up the needles and stitches to be in sync with selection as the work progresses.

An alternative approach using this method begins with all needles on the main bed in use as opposed to ribber ones as in my Passap test. Once the sequence is understood starting points for creating full needle rib can be varied, as can selecting the first row from either side. For these swatches, I used a thinner yarn, in a bright color, which can help identify any issues in stitch formation, and I began the swatch in rib, to see the effect that might have as well.

my amended repeat

Begin by checking needle selection, set up rib as described at top of the post, beginning the first group of 5 stitches on left with selected needles, next group not selected, etc. If all the steps are repeated beginning on the same side of the KM it does not matter which block of needles are at the opposite end,  allowing for width/gauge adjustment. I like to mark my needle bed with a water-soluble pen so I will be certain to have proper needles in work, not relying on memory or my sometimes “creative note keeping”.

CO ENR (every needle rib) set up with first needle on left in work on ribber, last on right on the main bed, racking at half-pitch: knit 1-row N/N, hang comb and weights, 2 rows circular (using opposite part buttons), follow with one row N/N

rack slightly to the right to make needle transfer easier, set up a multiple of 5 X 5 rib; begin with transferring first 5 on left down to ribber, pushing any empty ribber needles OOW; after the transfer, rack back to the original position so first ribber needle in work will once again be on left

bring all main bed needles into work (ribber needles at this point will be 5 in work, 5 out of work across the bed)

select your first pattern row, KC II (no end needle selection), continue to knit until needle selection changes so the second block from the left on the main bed is selected; nonselected needles on the main bed will now be dropped off, and those same emptied needles will be pushed completely out of work (the first group from left is the starting point here as well)

bring all needles into work on the ribber, knit until needle selection changes with all in main bed needles in B position, at that point I brought all remaining main bed empty needles between them out to hold/ D position in order to drop stitches on ribber between them, using the main bed as a guide, pushing any newly emptied ribber needles completely out of work as stitches were dropped (beginning with the second group of “5” from left)

as one physically looks at the stitches, there will actually be a count of six between MB needles, in my first sample, I dropped in series of 5, always beginning on the same left side.

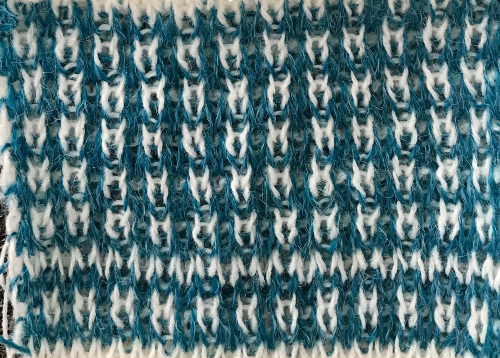
This swatch shows the resulting fabric. Of note is that one side (marked with red) is holding together along dropped stitches far better than on the right (marked in black), a desirable trait, and not as noticeable in the previous swatch knit on Passap, perhaps because of the difference in the weight of the yarn and stitch size

the result was much improved when only the center 4 of the 6 ribber stitches were dropped, producing a bit of a chain stitch on each side and with a better definition of dropped stitch areas; both sides of the fabric are shown below

at this point all main bed needles are in work, needle selection will once more begin on left; knit until needle selection changes, continue the sequence.

Cast on ENR rib edge has obvious width, bind off is around 2 gate pegs after transferring any remaining ribber stitches up to main bed.

The version of the stitch as worked out by Tanya Cunningham with her shared instructions for what she refers to as “bubble pops” may be found on Ravelry.

Vertical striper backing on Brother KM

I reviewed and edited this post in mid March 2019, with plans to add a part 2 post on use of llili buttons when I am able. The content here explores one of the possible lili settings, where slip stitch is used in both directions for every other needle pattern selection on the ribber.

If one chooses to hand manipulate needle selection on either bed, bringing needles to be knit out to hold with the carriage in use set to slip, one can make knit stitches happen wherever one chooses. Automating any part of the process speeds things up, but comes with built in KM limitations. lili buttons enable every other needle selection on the Brother ribber carriage, behave in the same manner as when using the following card single bed.

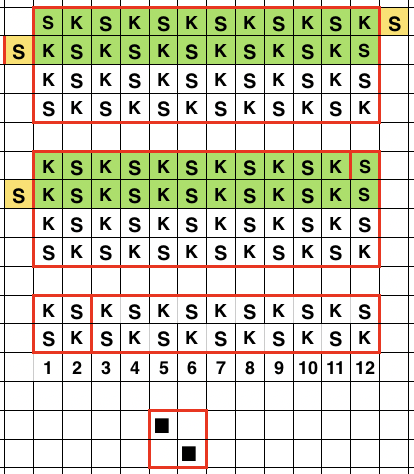
Another way to look at it, showing the isolated smallest repeat bordered in red on the right side, and action on needles in work on the ribber, K for knit, S for slip. Movement of the carriages shown is from left to right and back to left, the color changer side

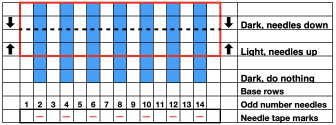
The usual rule when working with lili buttons and slip <– –> setting is to have an even number of needles in work on the ribber bed. The markings on the corresponding needle tape consist of dashes with spaces between them. For an even number of needles, if the first needle is positioned over a dash, then the last must be positioned over a blank space.
The charts below take into consideration duplicate rows, knit first away from, and then back to the color changer resulting in striping every 2 rows. Patterning is fixed, beginning with the second needle from the left when traveling from left to right, and the second needle from the right when traveling from right to left. The second needle in each instance knits. This is true whether one starts on a “blank” or “dash” needle tape position. With an even number of needles in use, needles in work begin and end on opposing symbols in pairs ie dash and blank, or blank and dash

Dashes and spaces on the needle tape are shown in the yellow row in the chart with the first needle on a “dash”. Needles (colored squares in repeat) are numbered reflecting the sequence in which they are knit as the ribber carriage moves in the direction of arrows. 

If an odd number of needles is in use, the same needles will slip/knit respectively. Grey squares represent the needle location for which the ribber carriage thinks it is selecting, including the missing needle location to keep the number of stitches even. Unless settings are changed patterning is fixed on the same stitches.

To create vertical stripes using slipstitch, this would need to be the repeat, not “automatically” possible on the ribber

The card that is being imitated is card one elongated X2, here shown in the studio version  Fooling the machine” into thinking a continued number of odd needles are in work is achieved by bringing an extra needle in work on the ribber carriage side on left, and then right in turn on the carriage side, or one empty needle on each side at the same time. The knitting happens on the needles represented by yellow squares, but the carriage thinks it is knitting the pink repeat

Odd needle setups begin and end on the same symbol ie. Dash or blank on the needle tape, in this case, the “dash”

If knitting begins with an even number of needles in work, extra needles are brought into work with a starting even number of knit stitches, each 2 passes produce a single row of knit with alternating slipped stitches, resulting in a narrow stripe alternating with small checks, or plain stripes in each color on the fabric backing. Again, the movement here is away from and back to the left side The overall design is interrupted by knit stripes, depending on whether one or 2 extra needles are brought into work, here is one sample.  Working with an odd number of needles on the ribber

2023 :
Repeat steps between * and **.
To test the technique choose easily identified contrasting colors.
The main bed will be set to simply knit every needle, resulting in stripes in 2 rows of each color.
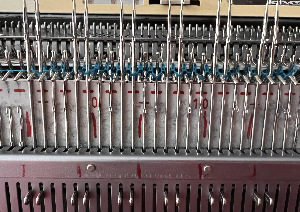
Cast on using the light yarn on an uneven number of needles on the ribber, with the first and last needle in work on the top bed. Set the ribber to slip with the lili buttons set for both directions.
COL, dark color: the second needle will be knit in it. Do nothing, knit 2 rows
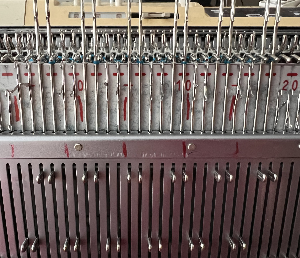
*COL, light color: the goal is to fool the machine into thinking the light color will knit on the second needle. Bring an empty needle into work on the ribber on each side, shown here on the right. Knit to right.  COR: do nothing, knit to left.
COL: there is now a pair of empty needles, they need to be taken out of work so as not to add new stitches. Change to the dark color and knit 2 rows** A sort of tune: light yarn cast on, follow with dark yarn, knit 2 rows
*light yarn: empty needles up, knit 2 rows
dark yarn: empty needles down, knit 2 rows**
For wider stripes, release the lili buttons.
Set the ribber to slip in both directions on an even number of needles.
Pairs of needles will need to be hand selected on every row on the ribber and brought up to E so they will be knit. The remaining needles will be skipped. Beginning from the same side, I chose the left,
*COL: bring up the first needle pair, #1 and 2, for color 1, continue across the row, knit to the right
COR: repeat the same selection, knit to left
COL: change color. Begin selecting pairs with needles #2 and 4 from the same side, and continue across the row. Knit to the right.
COR: repeat the same selection, knit to the left. **
The yarn used is thin, thicker yarns will fill in. Because alternate colors are slipped for 2 rows, the stitches that are skipped are elongated compared to those that are not. These methods may cause distortions on the knit side if used in patterned DBJ, seen slightly in the horizontal stripes. 2013 To knit:
*COL (carriage on left): color 1 knits to set up the base in pattern for 2 rows, ending on the color changer side.
Before knitting with color 2 COL, bring an extra needle into work before moving from left to right. Knit one row.
COR: drop the extra empty needle on the left OOW, and bring an extra needle on right into work. Knit to the left, return to the color changer, drop the extra needle on the right OOW, and change colors*
Repeat the * *process throughout. Check regularly to make certain that the extra needle does not become an unintended increase.
Having an extra needle in work on both sides of those on the ribber on the main bed will insure end stitches knit off and side edges are cleaner, with less noticeable elongated stitches on each side.
If loops are formed on needles brought into work, they need to be released before knitting the next row.  This did not occur in the samples knit using the method described in 2023.
The fabric swatch from the original post illustrates the vertical striping. The thin yarn clearly shows the lengthening of slipped stitches, and why some DBJ fabrics are referred to as “long stitch” ones, with color bleed or grin through from colors traveling behind them.
The plain rib at the bottom is significantly wider than areas where slipstitch is used, an issue if plain rib is to be combined with DBJ created with slipped stitches. On the knit side in this instance, the fabric is knit stripes.
When using the color changer starting with waste yarn and testing yarns, gives one the opportunity to make any adjustments necessary including on occasion doing a bit of metal bending where needed.

A subsequent proof of concept for inclusion in the later post It is also possible to work with the same approach, using tuck settings. A first experimental test lili buttons may be used with needles out of work when using thicker yarns, or for the resulting effect on that side of the fabric. A vertical stripe in that instance produced with hand needle selection on the ribber bed.  Lastly, here is a tiny swatch in an arrangement beginning to explore the odd number of needles in work on the ribber in conjunction with the use of lili buttons, and adding needles to “fool the machine” as described above

On two needles

This is my present HK project, another scarf. Stitch pattern blocks are broken up by rows of solid knit and solid purl alternately, giving the fabric a slightly “pleated” effect, different from the usual square block configurations. The yarn is 60% silk, 40% wool as the last lace HK, all wool would probably have a crisper wave effect. A trial cotton swatch flattened out almost completely.

wavy squares

I am able to get good edges on my HKs, tend to never use the method suggested by some of slipping the first stitch, knitting it only on alternate rows. Such an edging could be added if preferred.

the chart below is the working repeat

My intent is to end the scarf with a partial repeat followed by bind off as seen below

A shawl tale

I have always been interested in mock crochet stitches executed on the knitting machine, have done a bit of experimenting in the past. The ones that are the most interesting to my eye are usually knit on the double bed, often making them reversible, which in turn may require hand manipulations. Browsing through old knitting magazines I came across this baby sweater and became determined to produce a similar fabric, in a manner that might be more manageable for production. In this instance the back locks are changed in sequences of 3, 1, with button changes, the yarn is fine. The first sample I produced was following the pattern stitch instructions.

The fabric as a hand technique, dropped stitches included

The challenge: creating a downloadable stitch pattern that will automatically select appropriate needles and duplicate this texture. Yarn used will be varied and have different weights. Pusher/needle set up both beds critical, then there must be an edging…more to follow.