Miters and spirals: visualizing, charting (and more) 3

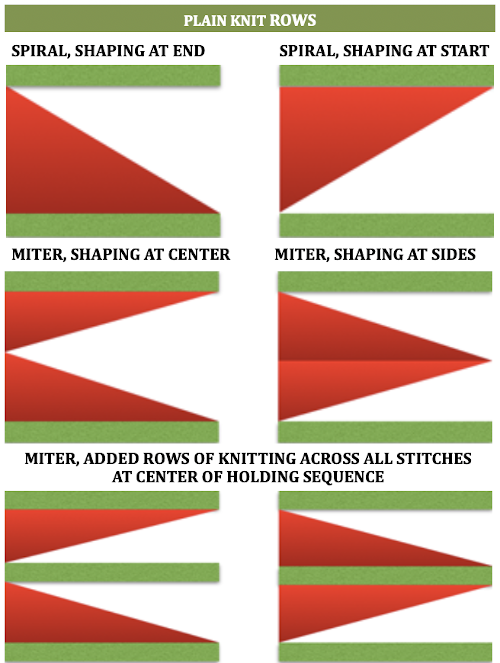
SPLITTING THINGS UP leads to a series of quite different fabrics, sometimes creating interesting secondary solid color shapes when striping is added to any of the forms; repeats will need editing to avoid extra rows to keep the designs balanced, or have them added across their width for extending shapes, such as in creating ruffled effects. I have worked on these charts using Numbers, image capture, and resizing and editing again in photoshop if needed. The images below are not intended as a “sit and knit” tutorial, but rather as a start for creating your own designs, on the desired number of stitches, I randomly picked 22

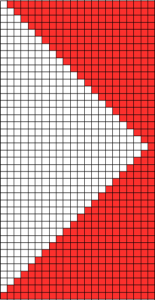
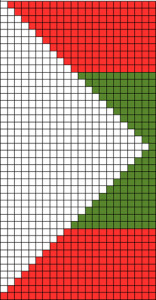
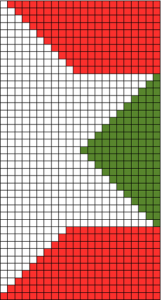
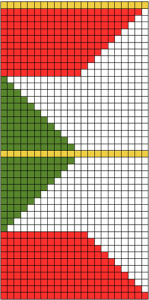
some possibilities on method: SPIRAL original shape

splitting in 2 parts

changing positions and stacking, all knit row edited to bottom of repeat

a mirrored segment

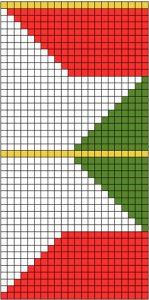
added to first repeat, center line double row edited out for knitting

MITER: original repeat

split repeat

moving parts around

areas for adding plain knit rows in desired numbers across the knit (yellow), keeping in mind how this will affect color changing sequences if striping is used to create secondary patterns; repeat usable for machines with color changer on right

mirroring the whole repeat horizontally for use with color changer on left

Changing colors at regular intervals including every 2 rows will yield secondary, geometric patterns; all knit rows may be added to the right or left of the shapes maintaining color changes, for different effects; if these are planned in extended “white areas”, the holding sequence needs to be maintained every other row; slip stitch setting may be used to automate, with repeats reworked for use on 24 stitch punchcard machines. I find when exploring any of this initially, working repeats as hand techniques helps me understand necessary sequences and editing before committing to punching holes, filling mylar squares, or programming pixels. Swatches and notes, swatches, and notes…

Miters and spirals: visualizing, charting (and more) 2

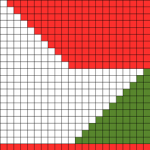
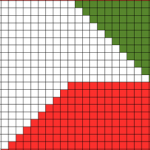
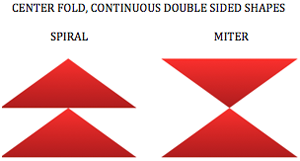
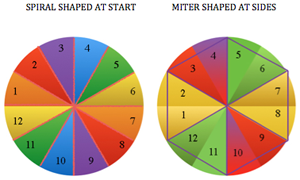
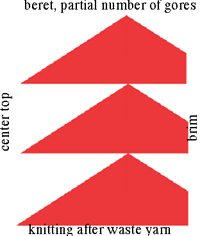
Visualizing the shapes (using charts in Mac Numbers)A spiral gore is the first or second half of a miter gore, conversely, a miter gore has 2 consecutive spiral gores, knit in a mirror image. GOING ROUND: numbers 1-12 represent knitting sequence for wedges, thicker lines at segment edges = rows across knit width at end of each sequence, 2 rows or many more depending on planned design shape

Previous posts on related topics:
2011/06/18/knitting-math-and-pies1/
2011/06/24/taking-it-to-a-garment/
2011/03/29/the-doilies/
2013/12/28/short-rows_-balls-tams-3d-rounds/

Miters and spirals: visualizing, charting (and more) 1

Getting my thoughts together on this topic I searched for any of my previous posts that may be related, here is a list
2013/12/18/holding-stitches-short-rows/
2014/02/24/holdingshort-rows-hand-tech-to-chart-to-automating-with-slip-stitch-1/
2013/12/28/short-rows_-balls-tams-3d-rounds/
2013/01/21/automating-pleating/

Even in my earliest days as a hand knitter, I liked charting out my sweater shapes ie sleeves, necklines, etc on graph paper and tracking my place by marking the appropriate row or every other row on the charted image. Many of the formulas for charting math in garment shaping may be emulated by drawing a line on the chart where each square represents a stitch and a row, connecting points, and filling in squares. Averaging out grid shifts is also the guideline to increasing and decreasing for shaping on pixel charts. Though this may be a bit of egg before the chicken, I got sidetracked playing with software yet again.

GIMP

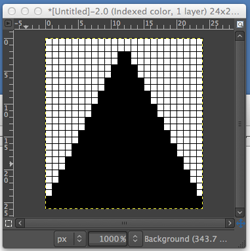
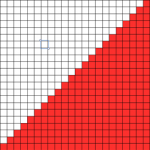
Working premise: using holding to shape a wedge over 36 rows. Stitch multiples  are brought into hold opposite the carriage (floats will be created if they are brought into hold on the carriage side), in the instances below each graph row represents 2 rows knit, my fabric width at the start is 100 sts

Set image size _ pixels equal stitches and rows required

Magnify X 1000 (this is what I prefer for viewing and editing, less magnification may be used)

Activate 1 stitch grid/ show grid/ snap to grid

Make certain the whole image is within your window view

Using line shape: click on the upper left corner, press shift key_a drawing line will appear with a + symbol at its bottom right_click on the first square on the bottom right, a line will appear where black squares represent  # of stitches to be held each row
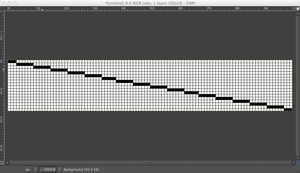
bucket fill in  the appropriate side of the wedge to represent knit stitches

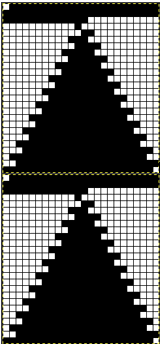
create a new, larger canvas that will accommodate desired multiple stacked repeats and possible knit rows in between shapes in a new window; copy image from the first window, paste  into the new window, move it, and place in the desired location on your  screen

return to the first window, flip the image vertically (image menu/ select transform and direction)

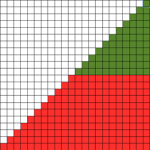
again copy, paste, move into the desired location, and insert knit or (patterned) rows (green) when and if desired. On electronic machines, the final image would have to be doubled in length, so those “knit row” pixels/squares would have to be adjusted accordingly to half the desired number
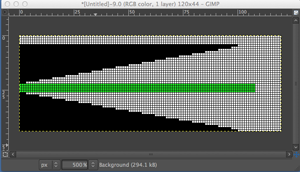
Row by row charting for double-height to represent each row of actual knitting: the process

starting with a repeat 6X6

convert image to bitmapped (repeat at upper right below is a different one, should match the one being resized)
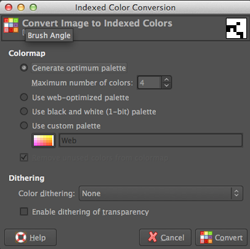
scale image: click on the locked symbol/ chain link, in turn, to alter the aspect ratio, change both pertinent numbers
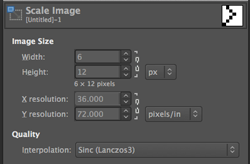
the repeat twice as long, 6 X 12
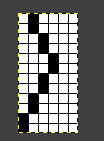
going 3D, possible spiral
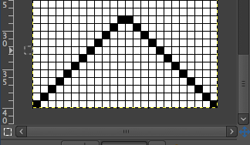
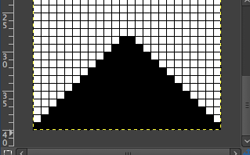
eliminating squares

shifting things around in order to add “automatic wraps”, begin knit with COL
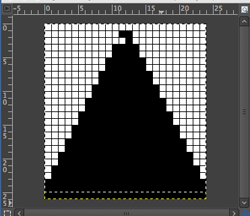
in further progress
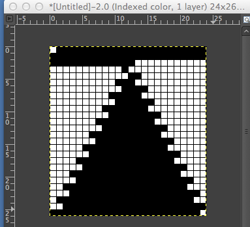
triangle-auto-wrap

stacked repeat

stacked repeat

save in image in format for downloading to machines via cable and knitting using slip stitch setting, or export or screen grab for printing and knitting from chart visually as hand technique. If printing images colored cues may be added for carriage/lock setting or color changes, etc. The question: what about numbers and excel?

NUMBERS

Using the line tool (shapes) will get the line in place, shaping is “eyeballed”
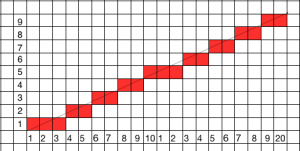
knit squares are filled in
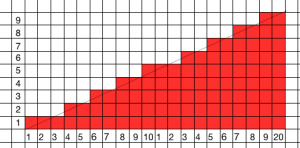
so you want to double the height only? Apple for some reason when they  “upgraded” to the latest version of the program (3.2) has eliminated the split table feature, so the only way I can see is through using the table: add rows above or below in the chart, a new row will be a copy of the selected row
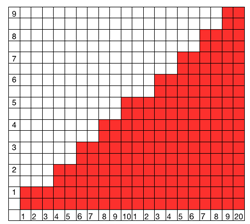
EXCEL

the insert row option will add rows only below selected ones, I have not found a tool equal to the line shape in Numbers
A hand knit stitch tale 2: a bit of cables and lace, charting, hk to mk

For a while, there was agreement on “international symbols” for charting knits. With the proliferation of programs now and methods for self charting and publishing using fonts and personal icons, things can get a bit confusing. Hand knitting in the circular akin to machine knitting results in stitches always worked on one side of the fabric, another consideration. In the last Russian pattern in the previous post, I was unable to get the repeat to work properly regardless of any common meaning I tried to assign to several of the symbols. I have used Intwined for some charting in the past, am finding it problematic again in Mavericks Mac OS, and my go-to for the moment is the latest version of Numbers (3.2), which appears to include changes that make it even more intuitive and easier to use than the previous version. My symbols library includes the Aire river knitting font and an assortment of wingdings and oddball characters found in some of Mac’s built-in libraries.

my hand knit version

Taking it to the machine: chart’s beginning

tweaking it a bit, taking in consideration only the purl side will be facing

flipping it to achieve the same direction transfers as HK

knit on 260 bulky KM

The large hole at the bottom left of the image is not due to a dropped stitch, but rather to yarn breakage. The sample was knit in worsted weight wool, and I found I needed a far looser tension than I would normally use for the same yarn to allow the double transfers to knit off properly. Eliminating the combinations of knit and purl within any one row as seen in the hand-knit version avoided retooling those stitches as well.

 A revisit on topic, April 2015

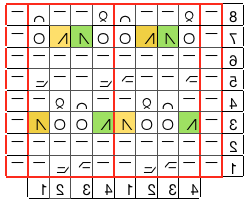
I am back now to once again, using primarily excel to create all my charts. Various Russian, German, and one English pub have offered variations of this particular fabric, some needing interpretation, but consistencies in repeats are easily recognized and isolated.

screenshot_11

screenshot_02

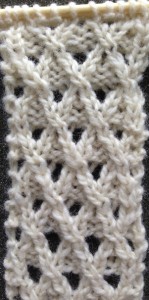
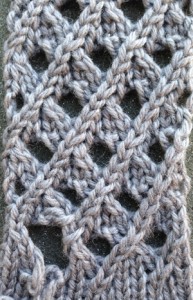
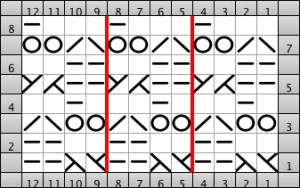
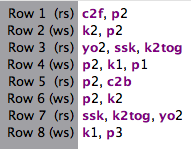
this image is from knittingstitchpatterns.com, they call it grand-eyelet-lattice, and provide written instructions for its execution

2838625ae10e2c26a984d498e99d0510

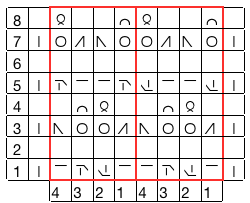
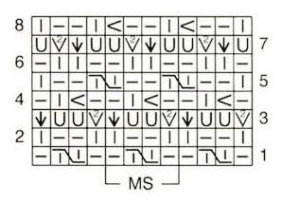
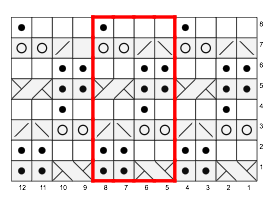
below is another relative, charted in Intwined, with the program’s associated written instructions; repeat is 4 stitches wide by 8 rows tall, border stitches are not represented; cable crosses are reversed after every other eyelet sequence, yet another pattern variable

trellis 3repeats

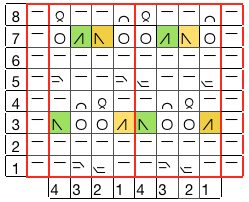
eyelet trellis how toa chart for same using Sconcho and its built-in stitch library. For software details please see symbols post 

sconcho

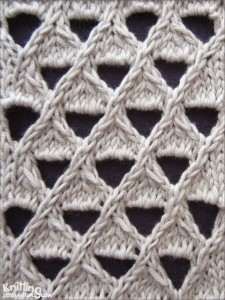
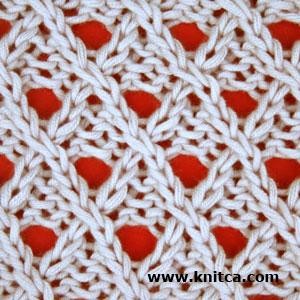
4/26/15 a variation found today on knitca, another resource for hand knitting stitch pattern collections; this is their image

lace_6

 1/2/2016 a Ravelry post on the stitch family